Table of Contents
Advertisement
Available languages
Available languages
INSTALLATION AND CARE GUIDE
Before returning to the store, call Glacier Bay Customer Service
We appreciate the trust and con dence you have placed in Glacier Bay through the purchase of this tub and
shower set. We strive to continually create quality products designed to enhance your home. Visit us online to
see our full line of products available for your home improvement needs. Thank you for choosing Glacier Bay!
THD
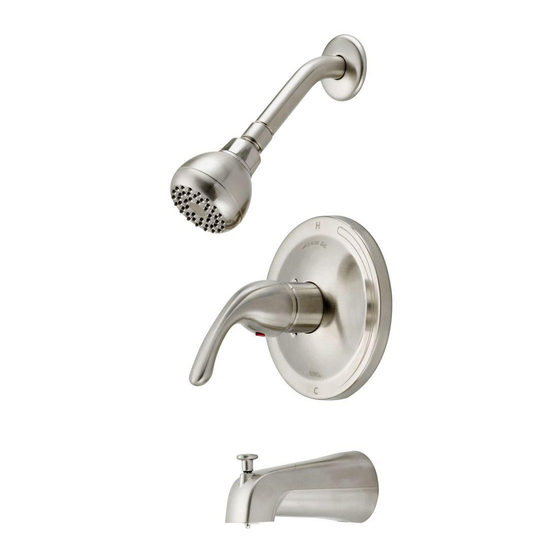
TUB AND SHOWER SET
Questions, problems, missing parts?
8 a.m. - 7 p.m., EST, Monday - Friday
9 a.m. - 6 p.m., EST, Saturday
1-855-HD-GLACIER (1-855-434-5224)
HOMEDEPOT.COM/GLACIERBAY
Model #
F1AA0005OB
1000 029 968
F1AA0005BNV
1000 029 967
1000 029 963
SKU #
04/2015 REV.01
Advertisement
Table of Contents

Related Manuals for Glacier bay F1AA0005OB


Summary of Contents for Glacier bay F1AA0005OB
- Page 1 1-855-HD-GLACIER (1-855-434-5224) HOMEDEPOT.COM/GLACIERBAY We appreciate the trust and con dence you have placed in Glacier Bay through the purchase of this tub and shower set. We strive to continually create quality products designed to enhance your home. Visit us online to see our full line of products available for your home improvement needs.
-
Page 2: Warranty
Glacier Bay products are manufactured with superior quality standards and workmanship and are backed by our limited lifetime warranty. Glacier Bay products are warranted to the original consumer purchaser to be free of defects in materials or workmanship. We will replace FREE OF CHARGE any product or parts that proves defective. -
Page 3: Pre-Installation
Pre-installation Before you begin to install this product, ensure that all parts are present. Compare parts with the package contents list. If any part is missing or damaged, do not attempt to install the product. Contact customer service for replacement parts. All installations can vary depending on how your previous faucet was installed. - Page 4 Pre-installation (continued) Tube Cutter S h a r k B i t e F u l l Ci r c l e F i t ti n g s Cri m p i n g To o l Tubi n g Cutter CP V C S h a r k B i t e...
- Page 5 Pre-installation (continued) Shower head Shower arm Shower arm ange Escutcheon Escutcheon screw Handle Spout Plaster guard Valve body Plug Allen wrench (H 2.5 * 19 mm L * 53 mm L) Allen wrench (H 3.18 *20 mm L * 90 mm L) Sealant tape HOMEDEPOT.COM/GLACIERBAY...
-
Page 6: Installation
Installation Shut off the main water supply before installation. Turn on the faucet nearby to relieve water pressure Note the recommended installation measurements and ensure the water supply has been completely in positioning the valve body for tub and shower. shut off. - Page 7 Installation (continued) Connect water supply pipes to the valve body. Wrap the threads on the shower arm (B) with sealant tape (M). For shower only installation, install the plug (J) onto the bottom unused port. Thread the shower pipe arm (B) through the shower arm ange (C), and screw the shower Apply threaded pipe tape to where threading pipe arm (B) onto the vertical shower pipe elbow.
- Page 8 Installation (continued) Twist and break off the plastic cover (1) from the Turn on the water supply, and then turn on the valve plaster guard (H) and discard. to check all connections for leaks. Remove the valve cap (2) from the valve body (I). Turn the valve counterclockwise to the full position.
- Page 9 Installation (continued) Replace the valve cap (1) onto the valve body (I). Remove the red stop (a) and replace it against the stationary stop (c) to prevent the valve stem from turning further. Turn the lever to the off position once the temperature is set.
-
Page 10: Back To Back Installation
Back to Back Installation Remove the valve cap from the valve stem. Remove the red stop (a) and the blue stop (b) and rotate the valve 180°. 180° Replace the red stop (a) and the blue stop (b). Replace the valve cap on to the valve stem. - Page 11 Clean the Screen Washer Use a clean strap wrench to remove the Use a athead screwdriver (not included) to carefully remove the screen washer (1). showerhead (A) from the shower arm (B). Gently clean the screen washer (1) with a Reinstall the screen washer (1) .
-
Page 12: Care And Cleaning
Care and Cleaning To clean, wipe down with a damp cloth and towel dry. Do not use abrasive cleaners, steel wool, or harsh chemicals when cleaning this faucet, or the warranty will be voided. Troubleshooting Hot and cold are reversed. Lines reversed or cartridge Rotate the cartridge stem 180°... -
Page 13: Service Parts
Service Parts Shower Head S1214306* Sleeve A103322* Shower Arm A020002-S* Bonnet Nut A103310-Z* Shower Arm Flange A019001-S* Pressure Balance Cartridge A507190 Metal Handle A069752* Integral Stop A507040 Handle Cap A66D814 Plug A028452 Screw A608563 Allen Wrench (H 2.5 * 19 mml A031000NI * 53 mml) Screw (for 1000 029 968) - Page 14 Questions, problems, missing parts? Before returning to the store, call Glacier Bay Customer Service 8 a.m.-7 p.m., EST, Monday-Friday 9 a.m.-6 p.m., EST, Saturday 1-855-HD-GLACIER (1-855-434-5224) HOMEDEPOT.COM/GLACIERBAY Retain this manual for future use.
- Page 15 1-855-HD-GLACIER (1-855-434-5224) HOMEDEPOT.COM/GLACIERBAY Apreciamos la con anza que ha depositado en Glacier Bay por la compra de este para bañera y ducha. Nos esforzamos por crear continuamente productos de calidad diseñados para mejorar su hogar. Visítenos en internet para ver nuestra...
- Page 16 Garantía Los productos de Glacier Bay están fabricados con normas y mano de obra de calidad superior y están respal- dados por nuestra garantía de por vida limitada. Los productos de Glacier Bay están garantizados al comprador consumidor original de estar libres de defectos en materiales o mano de obra. Reemplazaremos LIBRE DE CARGOS cualquier producto o pieza que se demuestre está...
- Page 17 Pre-instalación Antes de comenzar a instalar este producto, asegúrese de que todas las partes estén presentes. Compare las partes con la lista de contenido del paquete. Si hace falta alguna parte o se encuentra dañada, no intente instalar el pro- ducto.
- Page 18 Pre-installation (continued) Cortatubos Accesorios de H e rramienta tubería de compresió n SharkBite de círculo completo Cortador de tuibos Pasta selladora Accesorios de para uniones tubería de tubería SharkBite Cemento Cortador de CVPC tuibos...
- Page 19 Pre-instalación (continuación) Cabeza de ducha Brazo de ducha Brida del brazo de ducha Escudo Tornillos del escudo Manija Vertedor Placa para pared Cuerpo de válvula Tapón Llave allen (H 2.5 * 19 mm L * 53 mm L) Llave allen (H 3.18 *20 mm L * 90 mm L) Cinta sellante HOMEDEPOT.COM/GLACIERBAY...
-
Page 20: Instalación
Instalación Cierre el suministro de agua antes de instalar. Abra el grifo cercano para disminuir la presión del Fíjese en las medidas de instalación aconsejadas agua y compruebe que la alimentación de agua esté para colocar el cuerpo de la válvula para bañera y totalmente cerrada. - Page 21 Instalación (continuación) Conecte los tubos de alimentación de agua al cuerpo Aplique cinta sellante (B) a las roscas de brazo de de la válvula. la ducha (M). Si sólo se instala la ducha, ponga el tapón (J) Enrosque el brazo de la ducha (B) a través de la incluido en la conexión de la base no utilizada.
- Page 22 Instalación (continuación) Abra la alimentación de agua y la válvula para Retuerza y rompa la tapa de plástico (1) de la placa veri car si hay fugas en las conexiones. para pared (H) y deséchela. Retire el capuchón de la válvula (2) del cuerpo de la válvula (I).
- Page 23 Instalación (continuación) Retire el tope rojo (a) y reemplazarlo con el tope Reinstale el capuchón de la válvula (1) en el jo (c) para evitar que el vástago de la válvula cuerpo de la válvula (I). giren más. Gire la palanca a la posición de apagado una vez que se jar la temperatura.
- Page 24 Instalación Adosada Retire el tope rojo (a) y el tope azul (b) y gire la Retire el capuchón de la válvula del vástago de válvula de 180º. la válvula. 180° Reinstale el tope rojo (a) y el tope azul (b). Reinstale el capuchón de la válvula del vástago de la válvula.
- Page 25 Limpie con la arandela con ltro Use una llave de correa limpia para retirar el Use un destornillador de cabeza plana (no se incluye) para retirar con cuidado la aran dela con cabezal de ducha (A) del brazo de la du cha (B). ltro (1).
-
Page 26: Cuidado Y Limpieza
Cuidado y Limpieza Limpie con un trapo húmedo y seque con un paño. No use limpiadores abrasivos, lana metálica ni productos químicos fuertes para limpiar el grifo o la garantía podría anularse. Solución de Problemas Caliente y frío están invertidos. Líneas invertidas o cartucho Gire el vástago del cartucho instalado cabeza abajo. -
Page 27: Piezas De Servicio
Piezas de Servicio Cabeza de ducha S1214306* Manga A103322* Brazo de ducha A020002-S* Tuerca tapa A103310-Z* Brida de ducha A019001-S* Cartucho de presión A507190 balanceada Manija metálicas A069752* Tapón integrado A507040 Tapón de manija A66D814 Tapón A028452 Tornillo A608563 Llave allen (H 2.5 * 19 mml * A031000NI Tornillo (para 1000 029 968) A608564... - Page 28 Questions, problèmes, pièces manquantes? Avant de retourner au magasin, appelez le service à la clientèle de Glacier Bay de 8h à 7h, heure normale de l’Est, du lundi au vendredi de 9h à 6h, heure normale de l’Est, samedi 1-855-HD-GLACIER (1-855-434-5224) HOMEDEPOT.COM/GLACIERBAY...
Need help?
Do you have a question about the F1AA0005OB and is the answer not in the manual?
Questions and answers