Table of Contents
Advertisement
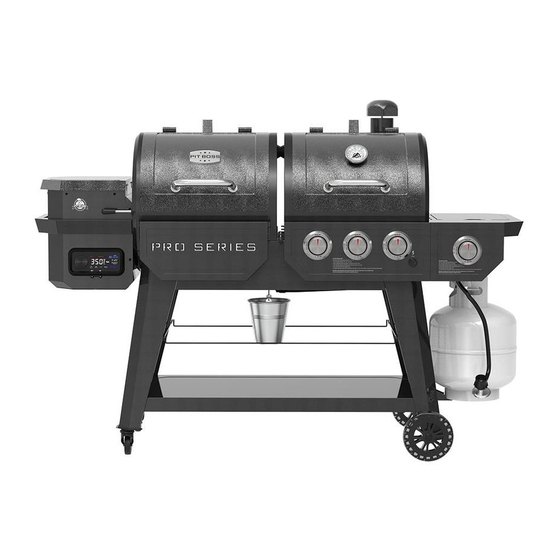
WOOD PELLET & GAS COMBO GRILL
IMPORTANT, READ CAREFULLY, RETAIN FOR FUTURE
REFERENCE. MANUAL MUST BE READ BEFORE OPERATING!
BARBECUE À GRANULÉS
DE BOIS ET À GAZ
IMPORTANT, PRENEZ CONNAISSANCE DE CE
DOCUMENT ET CONSERVEZ-LE POUR RÉFÉRENCE
ULTÉRIEURE VOUS DEVEZ LIRE CE GUIDE AVANT
D'UTILISER LE BARBECUE !
UNIDAD COMBINADA
DE GRÁNULOS DE
MADERA Y GAS
IMPORTANTE, LEA DETENIDAMENTE, CONSERVE
PARA REFERENCIA FUTURA. ¡DEBE LEER EL
MANUAL ANTES DE LA OPERACIÓN!
WARNING: PLEASE READ THE ENTIRE MANUAL BEFORE INSTALLATION AND USE OF THIS ELECTRIC, PELLET FUEL-BURNING APPLIANCE.
FAILURE TO FOLLOW THESE INSTRUCTIONS COULD RESULT IN PROPERTY DAMAGE, BODILY INJURY OR EVEN DEATH. CONTACT LOCAL
BUILDING OR FIRE OFFICIALS ABOUT RESTRICTIONS AND INSTALLATION INSPECTION REQUIREMENTS IN YOUR AREA.
AVERTISSEMENT : VEUILLEZ LIRE L'INTÉGRALITÉ DU MANUEL AVANT L'INSTALLATION ET L'UTILISATION DE CET APPAREIL ÉLECTRONIQUE
À GRANULES. LE NON-RESPECT DE CES INSTRUCTIONS PEUT ENTRAÎNER DES DOMMAGES AUX BIENS, DES BLESSURES OU MÊME LA MORT.
COMMUNIQUEZ AVEC LES AUTORITÉS LOCALES EN MATIÈRE D'INCENDIE ET DE BÂTIMENT CONCERNANT LES RESTRICTIONS ET LES
EXIGENCES D'INSTALLATION DANS VOTRE RÉGION.
ADVERTENCI: LEA EL MANUAL COMPLETO ANTES DE INSTALAR Y UTILIZAR ESTE APARATO ELÉCTRICO PARA QUEMAR PELLETS DE
COMBUSTIBLE. INCUMPLIR ESTAS INSTRUCCIONES PODRÍA CAUSAR DAÑOS MATERIALES, LESIONES CORPORALES, E INCLUSO LA MUERTE.
CONSULTE A SUS FUNCIONARIOS LOCALES DE CONSTRUCCIÓN Y CONTROL DE INCENDIOS PARA INFORMARSE SOBRE LAS RESTRICCIONES Y
LOS REQUISITOS DE INSPECCIÓN DE INSTALACIONES EN SU REGIÓN.
300522
ASSEMBLY AND OPERATION
ASSEMBLAGE ET
FONCTIONNEMENT
MONTAJE Y OPERACIÓN
FOR OUTDOOR AND HOUSEHOLD USE ONLY. NOT FOR COMMERCIAL USE.
RÉSERVÉ À L'USAGE EXTÉRIEUR ET RÉSIDENTIEL UNIQUEMENT. NON DESTINÉ À UN USAGE COMMERCIAL.
SOLO PARA USO EN EXTERIORES Y EN EL HOGAR. NO ES PARA USO COMERCIAL.
ITM. / ART. 2582830
MODEL / MODÈLE / MODELO: PB1100PSC2
PART / PIÈCE / PARTE: 10738
Advertisement
Table of Contents

Related Manuals for Dansons Group PIT BOSS PRO Series


Summary of Contents for Dansons Group PIT BOSS PRO Series
- Page 1 ITM. / ART. 2582830 MODEL / MODÈLE / MODELO: PB1100PSC2 PART / PIÈCE / PARTE: 10738 300522 WOOD PELLET & GAS COMBO GRILL IMPORTANT, READ CAREFULLY, RETAIN FOR FUTURE REFERENCE. MANUAL MUST BE READ BEFORE OPERATING! BARBECUE À GRANULÉS DE BOIS ET À GAZ IMPORTANT, PRENEZ CONNAISSANCE DE CE DOCUMENT ET CONSERVEZ-LE POUR RÉFÉRENCE ULTÉRIEURE VOUS DEVEZ LIRE CE GUIDE AVANT...
-
Page 2: Safety Information
SAFETY INFORMATION MAJOR CAUSES OF APPLIANCE FIRES ARE A RESULT OF POOR MAINTENANCE AND A FAILURE TO MAINTAIN REQUIRED CLEARANCE TO COMBUSTIBLE MATERIALS. IT IS OF UTMOST IMPORTANCE THAT THIS PRODUCT BE USED ONLY IN ACCORDANCE WITH THE FOLLOWING INSTRUCTIONS. Please read and understand this entire manual before attempting to assemble, operate or install the product. - Page 3 3. After a period of storage, or non-use, check the burn grate for obstructions, the hopper for foreign objects, and any air blockage around the fan intake or chimney. Clean before use. Regular care and maintenance is required to prolong the lifespan of your unit.
- Page 4 17. Operate this appliance using liquefied petroleum only, which is also specified on the rating label on the unit. Do not attempt to operate your grill on other gases. Do not attempt to convert this LP unit to natural gas. Failure to follow this warning could lead to fire, bodily harm, and will void your warranty.
- Page 5 CARBON MONOXIDE (“the silent killer”) Carbon monoxide is a colorless, odorless, tasteless gas produced by burning gas, wood, propane, charcoal or other fuel. Carbon monoxide reduces the blood’s ability to carry oxygen. Low blood oxygen levels can result in headaches, dizziness, weakness, nausea, vomiting, sleepiness, confusion, loss of consciousness or death.
- Page 6 COPYRIGHT NOTICE Copyright 2020. All right reserved. No part of this manual may be copied, transmitted, transcribed, stored in a retrieval system, in any form or by any means without expressed written permission of, Dansons 3411 North 5th Avenue, Suite 500, Phoenix, AZ, USA 85013 sales@pitboss-grills.com | service@pitboss-grills.com www.pitboss-grills.com Customer Service...
-
Page 7: Table Of Contents
TABLE OF CONTENTS Safety Information ............2 Wood Pellet Operating Instructions Grill Environment ...............22 Parts & Specs ..............8 Grill Temperature Ranges ............23 Understanding The Control Board .........24 Assembly Preparation ............ 10 Control Board Functions ............26 Assembly Instructions Connecting To The Smoke iT® App .........28 Assembling The Grease Tray Support ........ -
Page 8: Parts & Specs
PARTS & SPECS... - Page 9 PARTS & SPECS Part# Description Part# Porcelain-Coated Steel Upper Cooking Rack (x2) LP Gas Cylinder Wire Retainer (x1) Porcelain-Coated Cast-Iron Cooking Grid (x4) LP Gas Cylinder Support Bracket (x1) Lid Stopper (x2) Cart Bottom Shelf (x1) Chimney Cap (x1) Cart Bar A (x2) Chimney Stack (x1) Cart Bar B (x2) Flame Broiler Slider (x1)
-
Page 10: Assembly Preparation
ASSEMBLY PREPARATION Parts are located throughout the shipping carton, including underneath the grill. Inspect the grill, parts, and hardware blister pack after removing from the protective shipping carton. Discard all packaging materials from inside and outside of the grill before assembly, then review and inspect all parts by referencing the parts list. If any part is missing or damaged, do not attempt to assemble. -
Page 11: Mounting The Legs To Main Barrel
3. MOUNTING THE LEGS TO MAIN BARREL Parts Required: Support Leg /Front (#30) Support Leg /Back (#31) Support Leg for Caster /Front (#32) Support Leg for Caster /Back (#33) 12 x Screw (#A) 12 x Locking Washer (#C) 12 x Washer (#B) Installation: •... -
Page 12: Connecting The Wheels To The Cart
6. CONNECTING THE WHEELS TO THE CART Parts Required: Wheel (#35) Wheel Axle Pin (#G) Wheel Washer (#F) Wheel Cotter Pin (#E) Installation: • Attach the Wheel to the Support Leg by inserting the wheel axle pin through the wheel, support leg hole, wheel washer, then secure using the wheel cotter pin. -
Page 13: Securing The Chimney
9. SECURING THE CHIMNEY Parts Required: Chimney Cap (#4) Chimney Stack (#5) Screw (#A) Locking Washer (#C) Washer (#B) Nut (#I) Installation: • Locate the chimney opening on the backside of the gas barrel. From the inside of the gas barrel, insert the Chimney Stack (with Chimney Gasket) through the opening. -
Page 14: Attaching The Cylinder Wire Retainer
12. ATTACHING THE CYLINDER WIRE RETAINER Parts Required: LP Gas Cylinder Wire Retainer (#37) Installation: • Remove the R-clip from LP Gas Cylinder Wire Retainer. Attach the LP Gas Cylinder Wire Retainer to the right Support Legs. Use R-clip to secure the wire retainer in place. -
Page 15: Assembling The Side Burner Shelf
16. ASSEMBLING THE SIDE BURNER SHELF Parts Required: Side Burner Panel (#16) Side Burner Shelf (#18) Screw (#A) Installation: • Flip the Side Burner Shelf upside-down. Mount the Side Burner Shelf onto the Side Burner Panel with three washers, locking washers, and screws. 17. -
Page 16: Securing The Side Burner
20. SECURING THE SIDE BURNER Parts Required: Side Burner (#17) Installation: • Remove the two pre-installed screws from the underside of the Side Burner Shelf. From above, carefully insert the the Side Burner into the Side Burner Shelf, then secure using the two screws previously removed. •... -
Page 17: 24. Installing The Flame Broiler Components
24. INSTALLING THE FLAME BROILER COMPONENTS Parts Required: Flame Broiler Slider (#6) Flame Broiler Main Plate (#7) Flame Broiler Adjusting Bar Handle (#11) Flame Broiler Adjusting Bar (#12) Installation: • Insert the Flame Broiler Main Plate into the Main Barrel, right side first. -
Page 18: 25. Installing The Cooking Components
25. INSTALLING THE COOKING COMPONENTS Parts Required: Upper Cooking Rack (#1) Cooking Grids (#2) Heat Tent (#8) Smoke Adjusting Bar (#13) Installation: • First, on the gas barrel side, place the three Heat Tents on the top of the burners. Place the Cooking Grids, side-by-side, on the grid ledge inside the Main Grill. -
Page 19: Installing The Igniter Battery
27. INSTALLING THE IGNITER BATTERY Parts Required: AA Battery (#J) Installation: • Unscrew igniter cap from control panel. Insert battery into battery slot with positive end (+) facing outward. Screw cap back onto panel. • The unit is now completely assembled. 28. -
Page 20: Connecting To A Gas Supply
CONNECTING TO A GAS SUPPLY GAS CYLINDER REQUIREMENTS The grill is set and tested with liquid propane gas only. The regulator supplied is set for 27.94 cm (11 inch) water column (WC) and is for use with LP gas only. The factory-supplied regulator and hose must be used with a 9 kg (20 lbs) LP gas tank. Contact your gas supplier for a special regulator for bulk gas that fuels other appliances. -
Page 21: Disconnecting A Gas Cylinder
3. Use a paint brush to apply the solution onto the seal between the regulator and the gas cylinder. Visually inspect for streams of bubbles coming from a defect or break in the seal. NOTE: If a leak appears, repeat gas cylinder installation procedure, but do not over-tighten. Hand-tighten only. -
Page 22: Wood Pellet Operating Instructions
WOOD PELLET OPERATING INSTRUCTIONS With today’s lifestyle of striving to eat healthy and nutritious foods, one factor to consider is the importance of reducing fat intake. One of the best ways to cut down on fat in your diet is to use a low fat method of cooking, such as grilling. As a pellet grill uses natural wood pellets, the savory wood flavor is cooked into the meats, reducing the need for high sugar content sauces. -
Page 23: Grill Temperature Ranges
GRILL TEMPERATURE RANGES Temperature readouts on the control board may not exactly match the thermometer. All temperatures listed below are approximate and are affected by the following factors: outside ambient temperature, the amount and direction of wind, the quality of pellet fuel being used, the lid being opened, and the quantity of food being cooked. HIGH TEMPERATURE (205-260°C / 401-500°F) •... -
Page 24: Understanding The Control Board
UNDERSTANDING THE CONTROL BOARD This P.I.D. (proportional-integral-derivative) digital Control Board is very much the same as the controls on your kitchen oven. The main advantages are the ability to automatically compensate for the different ambient conditions and fuel types. IMPORTANT: The temperature inside of any grill will vary greatly from location to location. Even instruments calibrated together may not agree with each other. - Page 25 The central readout displays both the Actual and Set temperatures. The Actual temperature is constantly displayed unless the Set temperature is being adjusted. The Actual temperature is the temperature from inside the Main Barrel. The Actual temperature readout is taken by the grill probe (sensor) from the inside of the grill barrel.
-
Page 26: Control Board Functions
CONTROL BOARD FUNCTIONS • SETTING THE GRILL TEMPERATURE The Grill Probe measures the internal temperature of the Main Barrel. When the Set temperature is adjusted, the Grill Probe will read the Actual temperature inside the Main Barrel and adjust to the desired Set temperature. IMPORTANT: The temperature of your unit is highly dependent on ambient outdoor weather, quality of pellets used, flavor of pellets, and the quantity of food being cooked. - Page 27 • SETTING UP A RECIPE The Recipe function allows the user to program cooking instructions, known as Recipe Steps, for the Control Board to follow and automatically run. These cooking instructions are a combination between Cooking temperature and Time. Starting from the first Recipe Steps (01), the Control Board will cycle through each Recipe Steps to cook the meal.
-
Page 28: Connecting To The Smoke It® App
CONNECTING TO THE SMOKE IT® APP Follow these instructions on how to connect your grill to the Smoke iT® app with your Android™ or iOS® device. The app will allow you to control and monitor your grill and meat probe temperatures from your mobile device. Enjoy the benefits that Smoke IT® mobile connectivity has to offer! Download the Smoke iT®... -
Page 29: First Use - Grill Burn-Off
FIRST USE – GRILL BURN-OFF Once your hopper has been primed and before cooking on your grill for the first time, it is important to complete a grill burn-off. Start the grill and operate at any temperature over 176°C / 350°F (with the lid down) for 30 to 40 minutes to burn-off the grill and rid it of any foreign matter. -
Page 30: Propane Gas Operating Instructions
PROPANE GAS OPERATING INSTRUCTIONS GRILL ENVIRONMENT 1. WHERE TO SET-UP THE GRILL With all outdoor appliances, outside weather conditions play a big part in the performance of your grill and the cooking time needed to perfect your meals. All Pit Boss® Grills units should keep a minimum clearance of 914 mm (36 inches) from combustible constructions, and this clearance must be maintained while the grill is operational. -
Page 31: Manual Start-Up Procedure
IGNITER FAILURE PROCEDURE If for any reason your igniter fails after three of four attempts, check the following steps, or start your grill using the manual method. Ensure the regulator knob is turned to the OFF position. Allow any accumulated gas to dissipate. 2. -
Page 32: Shutting Off Your Grill
NOTE: Each burner lights independently - repeat same steps for other burners. CAUTION: If burner flame goes out during operation, immediately turn the Burner Knobs to the OFF position, LP gas tank valved CLOSED, and open lid to let the gas clear for 5 minutes before re-lighting, SHUTTING OFF YOUR GRILL Turn LP gas tank valve to CLOSED. -
Page 33: Care & Maintenance
CARE AND MAINTENANCE Any Pit Boss unit will give you many years of flavorful service with minimum cleaning. Follow these cleaning and maintenance tips to service your grill: CHECKING THE GAS LEVEL To check the amount of fuel in the LP gas cylinder, the grill must be in operation. Place your hand at the top of the tank and slowly move down the side until the tank feels cool to the touch. -
Page 34: Using Wood Pellet Fuel
5. OUTSIDE SURFACES • The front shelf includes a removable panel underneath for ease of cleaning. From below, push the backing plate towards the main barrel to remove. Clean, then FROM BELOW replace by sliding back into place. • Wipe your grill down after each use. Use warm soapy water to cut the grease. Do not use oven cleaner, abrasive cleansers or abrasive cleaning pads on the outside grill surfaces. -
Page 35: Cooking Guidelines
COOKING GUIDELINES Smoking and grilling styles of cooking can give you different results based on time and temperature. For best results, keep a record of what you cooked, at what temperature, how long you cooked for, and the results. Adjust to your taste for the next time. Practice makes perfect. - Page 36 BEEF HEAT SIZE Rare - 54°C / 130°F Medium - 60°C / 140°F Well Done - 65°C / 150°F Steak (New York, 1.9 cm / ¾" High Sear 8-10 minutes Porter-house, Rib- 2.5 cm / 1" Sear 10-12 minutes eye, Sirloin, T-bone, 3.8 cm / 1½"...
-
Page 37: Tips & Techniques
TIPS & TECHNIQUES Follow these helpful tips and techniques, passed on from Pit Boss® owners, our staff, and customers just like you, to become more familiar with your grill: 1. FOOD SAFETY • Keep everything in the kitchen and cooking area clean. Use different platters and utensils for the cooked meat than the ones you used to prepare or transport the raw meat out to the grill. -
Page 38: Troubleshooting
TROUBLESHOOTING Proper cleaning, maintenance and the use of clean, dry, quality fuel will prevent common operational problems. When your Pit Boss® grill is operating poorly, or on a less frequent basis, the following troubleshooting tips may be helpful. For FAQ, please visit www.pitboss-grills.com . - Page 39 Grill Produces Excess Grease Build-Up Follow Care and Maintenance instructions. Or Discolored Remove moist wood pellets from hopper. Follow Care and Maintenance instructions to clean out. Wood Pellet Quality Smoke Replace with dry wood pellets. Fire pot Is Blocked Clear fire pot for moist wood pellets. Follow Hopper Priming Procedure. Insufficient Air Intake Check fan.
- Page 40 PROPANE GAS GRILL PROBLEM CAUSE SOLUTION Grill will not light The ignition wire came off Reconnect the ignition wire to the electrical igniter/valve. the electrical igniter/valve. The ignition wire is broken Contact Customer Service for assistance or a replacement part. The battery has died Install a new battery.
-
Page 41: Electrical Wire Diagram
ELECTRICAL WIRE DIAGRAM The Digital Control Board system is an intricate and valuable piece of technology. For protection from power surges and electrical shorts, consult the wire diagram below to ensure your power source is sufficient for the operation of the unit. PB –... -
Page 42: Grill Replacement Parts
GRILL REPLACEMENT PARTS... - Page 43 GRILL REPLACEMENT PARTS Part# Description Part# Description Porcelain-Coated Steel Upper Cooking Rack (x2) Cart Front / Back Panel (x2) Porcelain-Coated Cast-Iron Cooking Grid (x4) LP Gas Cylinder Wire Retainer (x1) Lid Stopper (x2) LP Gas Cylinder Support Bracket (x1) Chimney Cap (x1) Cart Bottom Shelf (x1) Chimney Stack (x1) Cart Bar A (x2)
-
Page 44: Hopper Replacement Parts
HOPPER REPLACEMENT PARTS Part# Description 1-PSH Hopper Lid (x1) 2-PSH Hopper Safety Screen (x1) Hopper Box Housing (x1) 3-PSH Hopper Handle (x1) 4-PSH 5-PSH Drop Chute Plate (x1) Drop Chute Cover (x1) 6-PSH Auger Motor (x1) 7-PSH 8-PSH Nylon Bushing (x1) Auger Flighting Assembly (x1) 9-PSH Auger Box Housing (x1) -
Page 45: Exceptions
Dansons takes every precaution to utilize materials that retard rust. Even with these safeguards, the protective coatings can be compromised by various substances and conditions beyond Dansons’ control. High temperatures, excessive humidity, chlorine, industrial fumes, fertilizers, lawn pesticides and salt are some of the substances that can affect metal coatings. For these reasons, the warranty does not cover rust or oxidization, unless there is loss of structural integrity on the grill component. -
Page 46: Recipes
RECIPES CLASSIC BRISKET SAUSAGE WITH MANGO CHUTNEY Makes 4 - 6 Servings Makes 4 - 6 Servings A whole beef brisket weighs 7.25-3.62 kg / 16-18 pounds and has three Ingredients: separate parts: the cap, the point, and the flat. Use the flat section, Mangoes (finely chopped) as it is lean, compact, and creates nice slices when carved. - Page 47 BBQ RIBS Suggested Wood Pellet Flavor: Hickory / Competition Makes 4 - 6 Servings Instructions: Preheat grill, then leave or reduce slightly (204-260°C / Ingredients: 400-500°F) 1.3-1.8 kg / 3-4 lbs Ribs Meaty pork spareribs / loin back ribs Combine meat, seasoning, eggs and bread crumbs in a mixing 45 ml / 3 tbsp bowl and blend together.
- Page 48 CORNISH HENS WITH MANDARIN RICE Suggested Wood Pellet Flavor: Mesquite / Competition Makes 4 Servings Instructions: Soak wooden skewers in water for 1 hour. Ingredients: Preheat grill, then reduce to 135-163°C / 275-325°F. 4 whole Cornish Game Hens 750 ml/ 3 c. Mandarin Rice Prepare curry butter by melting butter in small pan over 15 ml / 1 tbsp Olive Oil...
- Page 49 WHOLE SMOKED TURKEY brown and crispy; internal temperature should reach 74°C/165°F. Using tongs, carefully remove the upright chicken and can from Feeds a small army - leftovers are great! the grill. Let rest for five minutes, then carefully remove the can Ingredients: from the cavity of the chicken.
- Page 50 IMPORTANT DO NOT RETURN PRODUCT TO STORE FOR ALL QUESTIONS, COMMENTS, OR INQUIRIES, PLEASE CONTACT DANSONS DIRECTLY. OUR CUSTOMER SERVICE DEPARTMENT IS AVAILABLE MONDAY THROUGH SUNDAY, 4AM - 8PM PST (EN/FR/ES). TOLL FREE: 1-877-303-3134 | TOLL FREE FAX: 1-877-303-3135 IMPORTANT NE RETOURNEZ PAS LE PRODUIT AU MAGASIN POUR TOUTE QUESTIONS, COMMENTAIRES OU DEMANDES DE RENSEIGNEMENTS, VEUILLEZ COMMUNIQUER AVEC DANSONS DIRECTEMENT.
Need help?
Do you have a question about the PIT BOSS PRO Series and is the answer not in the manual?
Questions and answers