
Related Manuals for KSB Etaseco Series


Summary of Contents for KSB Etaseco Series
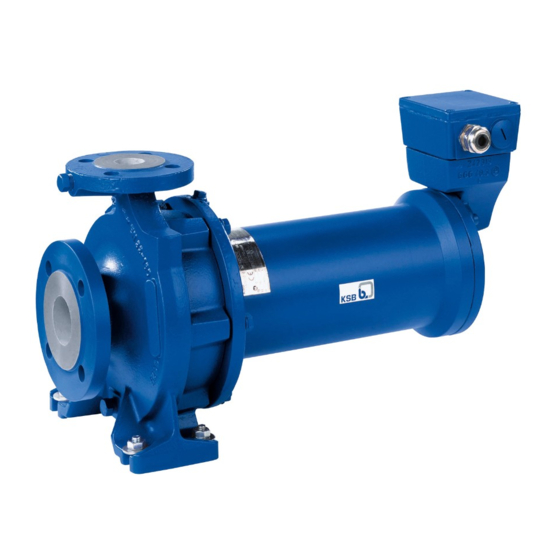
- Page 1 Standardised Water Pump Etaseco/Etaseco I With Canned Motor Seal-less Installation/Operating Manual Order number:...
- Page 2 All rights reserved. Contents provided herein must neither be distributed, copied, reproduced, edited or processed for any other purpose, nor otherwise transmitted, published or made available to a third party without KSB´s express written consent. Subject to technical modification without prior notice.
-
Page 3: Table Of Contents
Contents Contents Glossary ....................5 General ....................6 Principles ......................6 Installation of partly completed machinery ..........6 Target group ....................6 Other applicable documents ................6 Symbols ......................6 Safety ....................8 Key to safety symbols/markings ..............8 General ......................8 Intended use .................... - Page 4 Contents Connection to power supply ................ 24 Commissioning/Start-up/Shutdown ..........28 Commissioning/start-up ................28 Operating limits .................... 31 Shutdown/storage/preservation ..............33 Returning to service after storage ............... 33 Servicing/Maintenance ..............35 Safety regulations ..................35 Servicing/inspection ..................35 Drainage/disposal ..................38 Dismantling the pump set ................
-
Page 5: Glossary
Glossary Glossary (Spare) motor unit Discharge line Stator with motor housing, can and electrical The line which is connected to the discharge connection elements for the stator; without nozzle rotor, main bearing and hydraulic system Pool of pumps Back pull-out design Pumps which are purchased and stored The complete back pull-out unit can be pulled independently of their later use... -
Page 6: General
(set) and serve as identification for all further business processes. In the event of damage, contact your nearest KSB service centre immediately to maintain the right to claim under warranty. Noise characteristics (⇨ Section 4.6 Page 17) 1.2 Installation of partly completed machinery... - Page 7 1 General Symbol Description Step-by-step instructions Note Recommendations and important information on how to handle the product Etaseco/Etaseco I 7 of 60...
-
Page 8: Safety
2 Safety 2 Safety All the information contained in this section refers to hazardous situations. DANGER 2.1 Key to safety symbols/markings Table 3: Definition of safety symbols/markings Symbol Description DANGER DANGER This signal word indicates a high-risk hazard which, if not avoided, will result in death or serious injury. -
Page 9: Personnel Qualification And Training
2 Safety ▪ Only use the pump to handle the fluids specified in the data sheet or product literature of the respective design variant. ▪ Never operate the pump without the fluid to be handled. ▪ Observe the minimum flow rates indicated in the data sheet or product literature (to prevent overheating, bearing damage, etc). -
Page 10: Safety Information For The Operator/User
2 Safety ▪ Safety regulations for handling hazardous substances ▪ Applicable standards and laws 2.7 Safety information for the operator/user ▪ The operator shall fit contact guards for hot, cold or moving parts and check that the guards function properly. ▪... -
Page 11: Transport/Temporary Storage/Disposal
Non-compliance with permissible cable bending radius Damage to the cable! ▷ Observe the permissible minimum bending radius indicated in the manufacturer's data sheet; consult KSB, if necessary. 3.1 Transport DANGER The pump (set) could slip out of the suspension arrangement. -
Page 12: Storage/Preservation
3 Transport/Temporary Storage/Disposal Fig. 3: Transporting the pump set (motor below) 3.2 Storage/Preservation If commissioning is to take place some time after delivery, we recommend that the following measures be taken for pump (set) storage. CAUTION Damage during storage by humidity, dirt, or vermin Corrosion/contamination of the pump (set)! ▷... -
Page 13: Disposal
3 Transport/Temporary Storage/Disposal NOTE If required, a blank certificate of decontamination can be downloaded from the KSB web site at: www.ksb.com/certificate_of_decontamination 3.4 Disposal WARNING Fluids posing a health hazard Hazardous to persons and the environment! ▷ Collect and properly dispose of flushing liquid and any fluid residues. -
Page 14: Description Of The Pump (Set)
Complete motor designation DS 90.2-1,1 DS 90.2-2,2 DS 112.2-4 DS 112.2-5,5 DS 132.2-7,5 DS 132.2-11 DS 132.2-15 4.3 Name plate KSB Aktiengesellschaft 2009 67227 Frankenthal 9970654321 / 00100 / 01 ESO-G-I 32-125.1 / 12 DS90.2-1,1 Motor/Moteur --/400 ∆ / Y... -
Page 15: Design Details
4 Description of the Pump (Set) Rated current, cos φ, enclosure Rated power of the motor at defined fluid temperature Further required information 4.4 Design details D e s i g n ▪ Volute casing pump ▪ Back pull-out design ▪... -
Page 16: Configuration And Function
4 Description of the Pump (Set) 4.5 Configuration and function Fig. 5: Sectional drawing of Etaseco Impeller Bore Plain bearing (impeller-end) Support sleeve Plain bearing (motor-end) Terminal box Bore Shaft Rotor Stator Free cable end Design The hydraulic system and the motor are firmly connected and form a close-coupled unit. -
Page 17: Noise Characteristics
4 Description of the Pump (Set) PTC thermistors for monitoring the winding temperature can optionally be fitted. On pump models with "free cable end" the temperature sensors can optionally be connected via an additional connection cable. Sealing The pump is a seal-less canned motor pump. It is sealed by static O-rings. -
Page 18: Installation At Site
11E (flushing liquid) 5.3 Installing the pump set The pump set can be installed in either horizontal position or vertical position (with the motor on top or below). Other installation types only after consultation with KSB. Etaseco/Etaseco I 18 of 60... - Page 19 5 Installation at Site 5.3.1 Horizontal installation 5.3.1.1 Installation without baseplate Fig. 6: Horizontal installation ✓ The installation surface has the required strength and characteristics. ✓ The installation surface has been prepared in accordance with the dimensions given in the outline drawing/general arrangement drawing. ✓...
- Page 20 5 Installation at Site close proximity to these bolts. For a bolt-to-bolt clearance > 800 mm, fit additional shims (3) halfway between the adjoining holes. All shims must lie perfectly flush. 4. Insert the foundation bolts (4) into the holes provided. 5.
-
Page 21: Piping
5 Installation at Site 5.4 Piping 5.4.1 Protecting flange faces against corrosion Protect uncoated flange faces with a suitable anti-corrosive before connecting the piping. Verify compatibility with the material of any O-ring fitted in the mating flange. 5.4.2 Connecting the piping DANGER Impermissible loads acting on the pump nozzles Danger to life from leakage of hot, toxic, corrosive or flammable fluids! - Page 22 5 Installation at Site Fig. 9: Filter in the piping Differential pressure gauge Filter NOTE Use a filter with laid-in wire mesh (mesh size max. 0.25 mm) made of corrosion-resistant material. Use a filter with a filter area three times the cross-section of the piping. Conical filters have proved suitable.
-
Page 23: Connecting The Potential Equalisation Conductor
5 Installation at Site Size Etaseco G Etaseco S Etaseco C Vmax Hmax tmax Vmax Hmax tmax Vmax Hmax tmax [kN] [kN] [kNm] [kN] [kN] [kNm] [kN] [kN] [kNm] 40-200 3.81 2.67 0.81 4.46 3.04 1.26 40-250 4.21 2.92 0.58 4.70 3.33 0.90... -
Page 24: Connection To Power Supply
5 Installation at Site 5.6 Connection to power supply DANGER Work on the pump set by unqualified personnel Danger of death from electric shock! ▷ Always have the electrical connections installed by a trained electrician. ▷ Observe regulations IEC 30364 (DIN VDE 0100) and, for explosion-proof pump sets, IEC 60079 (DIN VDE 0165). - Page 25 5 Installation at Site ✓ The motor is wired for delta configuration as indicated on the name plate. Example: Δ/Y 400 V/-- ✓ Supply voltage from 380 to 420 V 1. Fit bridges as shown below. 2. Connect conductors as shown below. Fig.
- Page 26 Non-compliance with permissible cable bending radius Damage to the cable! ▷ Observe the permissible minimum bending radius indicated in the manufacturer's data sheet; consult KSB, if necessary. PE*) Fig. 17: Mains connection of pump with free cable end Optional connection of potential equalisation conductor The cable end consists of: ▪...
- Page 27 5 Installation at Site 5.6.3 Checking the direction of rotation 1. Make sure that the power cable for the pump provides a clockwise rotating field. 2. Make sure that the motor is properly connected to the power supply. (⇨ Section 5.6.1 Page 24) ⇨...
-
Page 28: Commissioning/Start-Up/Shutdown
6 Commissioning/Start-up/Shutdown 6 Commissioning/Start-up/Shutdown 6.1 Commissioning/start-up 6.1.1 Prerequisites for commissioning/start-up Before starting up the pump set make sure that the following requirements are met: ▪ The pump set has been properly connected to the electric power supply and is equipped with all protection devices. ▪... - Page 29 6 Commissioning/Start-up/Shutdown V e r t i c a l l y i n s t a l l e d p u m p ( m o t o r o n t o p ) / V i s c o s i t y o f f l u i d h a n d l e d >...
- Page 30 6 Commissioning/Start-up/Shutdown 7. If the pump cannot reach its duty point, find out the cause. (⇨ Section 6.1.4 Page CAUTION Wrong direction of rotation Vibrations during pump operation! Damage to the pump! ▷ If the pump cannot reach its duty point, check the characteristic curve. If required, change the direction of rotation.
-
Page 31: Operating Limits
6 Commissioning/Start-up/Shutdown 3. Close the auxiliary connections (e.g. connections for barrier fluid) immediately after switching off the motor. NOTE If the discharge line is equipped with a non-return or check valve, the shut-off element may remain open as long as there is back pressure. NOTE If shut-off is not possible, the pump will run in reverse direction. - Page 32 6 Commissioning/Start-up/Shutdown 6.2.3 Abrasive fluids Do not exceed the maximum permissible solids content specified in the data sheet. When the pump handles liquids containing abrasive substances, increased wear of all components in contact with the fluid handled is to be expected. In this case, reduce the intervals commonly recommended for servicing and maintenance.
-
Page 33: Shutdown/Storage/Preservation
6 Commissioning/Start-up/Shutdown For frequency inverter operation of the pump set comply with the following conditions: Table 12: Limits for frequency inverter operation Variable Value Motor rating See data sheet of the pump Frequency range Constant u/f ratio Voltage ramp-up time Maximum: du/dt <... - Page 34 6 Commissioning/Start-up/Shutdown NOTE If the pump has been out of service for more than one year, replace all elastomer seals. Etaseco/Etaseco I 34 of 60...
-
Page 35: Servicing/Maintenance
(set) with a minimum of maintenance expenditure and work. NOTE All maintenance, service and installation work can be carried out by KSB Service. Find your contact in the attached "Addresses" booklet or on the Internet at www.ksb.com/ contact". - Page 36 7 Servicing/Maintenance ▪ Monitor the correct functioning of any auxiliary connections. ▪ Monitor the stand-by pump. To make sure that stand-by pumps remain ready for instant start-up, start up stand-by pumps regularly between once a month and once every three months for approximately five minutes 7.2.2 Inspection work 7.2.2.1 Checking the clearance gaps...
- Page 37 7 Servicing/Maintenance 7.2.2.2 Cleaning filters CAUTION Insufficient inlet pressure due to clogged filter in the suction line Damage to the pump! ▷ Monitor contamination of filter with suitable means (e.g. differential pressure gauge). ▷ Clean filter in appropriate intervals. 7.2.2.3 Lubrication of plain bearings The hydrodynamic plain bearings are lubricated by the pumped product itself during pump operation.
-
Page 38: Drainage/Disposal
7 Servicing/Maintenance 1. Connect the conductor strands of the three phases together and measure the connection points of the winding against earth (1000 V DC). 7.3 Drainage/disposal DANGER Insufficient preparation of work at the system Risk of personal injury! ▷ Properly shut down the system and secure it against inadvertent start-up. ▷... -
Page 39: Dismantling The Pump Set
7 Servicing/Maintenance handled inside the pump. For information on quantity refer to the table below. 5. Do not stop flushing until the fluid residue inside the pump has been sufficiently diluted (concentration, colour, smell). This process will usually take 10 minutes. Table 15: Quantity of fluid handled in the rotor space Motor size Fluid handled in the rotor space... - Page 40 7 Servicing/Maintenance 7.4.2 Disconnecting the electrical connections P u m p v e r s i o n w i t h t e r m i n a l b o x ✓ Observe the information in (⇨ Section 7.4.1 Page 39). 1.
- Page 41 7 Servicing/Maintenance 7.4.5 Removing the casing cover/bearing bracket M o t o r D S 9 0 ✓ The notes and steps stated in (⇨ Section 7.4.1 Page 39) to (⇨ Section 7.4.4 Page 40) have been observed/carried out. 1. Pull off bush 540.01, cup springs 950.23 and thrust bearing 314.01. 2.
- Page 42 ✓ The stator space has been opened. (⇨ Section 7.4.9.1 Page 42) 1. Dispose of liquid residues, if any. 2. Clean the stator space (⇨ Section 7.3 Page 38). 3. Dispose of defective motor units or return to KSB for repair. Etaseco/Etaseco I 42 of 60...
-
Page 43: Reassembling The Pump Set
7 Servicing/Maintenance 7.4.9.3 Checking the motor winding at the winding ends ✓ An insulation resistance < 5 MΩ has been measured as described in (⇨ Section 7.2.2.4 Page 37). ✓ The stator space has been opened (⇨ Section 7.4.9.1 Page 42). 1. - Page 44 Measuring procedure (⇨ Section 7.2.2.5 Page 37) ⇨ If insulation resistance is still ≦ 5 MΩ: Check cable connection. ⇨ If the cable connection is in working order, consult KSB. 4. Slip on the cover and gently tighten screws 914.38.
- Page 45 7 Servicing/Maintenance 7.5.3.4 Fastening the pump-end bearing to the rotor ✓ The notes and steps stated in (⇨ Section 7.5.1 Page 43) to (⇨ Section 7.5.3.3 Page 44) have been observed/carried out. CAUTION Dry bearing surfaces during assembly Dry running of the bearings at pump start-up! ▷...
- Page 46 7 Servicing/Maintenance 3. Pull the free shaft end of the rotor towards the pump end by hand until the rotor will not go any further. 4. Slip thrust bearing ring 314.01, cup spring pack 950.23 and ring 540.01 onto the free shaft collar until the thrust bearing ring rests against the bearing bush.
-
Page 47: Tightening Torques
7 Servicing/Maintenance 2. If rotating the impeller proves difficult or rubbing noises can be heard, open the pump and eliminate the causes. C h e c k i n g t h e p u m p f o r a n y l e a k a g e ✓... -
Page 48: Spare Parts Stock
7 Servicing/Maintenance Description Part No. Thread Material Tightening torque M [Nm] New threads -15 % 914.57 A4-70 914.72 A4-70 914.80 M12-LH A4-70 920.01 A2-70 920.95 A4-70 7.7 Spare parts stock 7.7.1 Ordering spare parts Always quote the following data when ordering replacement or spare parts. Refer to the name plate for all data. - Page 49 7 Servicing/Maintenance Part No. Description Number of pump sets (including stand-by pumps) 10 and more 529.06/.21 Bearing sleeve 10 % 10 % Motor unit 10 % Rotor Set of sealing elements 100 % Spare motor 10 % Etaseco/Etaseco I 49 of 60...
-
Page 50: Trouble-Shooting
Rotor is out of balance. Clean impeller. Re-balance the impeller. X Defective bearing(s) Fit new bearing(s). Pump pressure must be released before attempting to remedy faults on parts which are subjected to pressure. Contact KSB. Etaseco/Etaseco I 50 of 60... - Page 51 8 Trouble-shooting A B C D E F G H I Possible cause Remedy Insufficient flow rate Increase minimum flow rate. Motor is not running because of lack of Check electrical installation. voltage. Rotor blocked due to corrosion or oxidation (risk of dry running) Motor winding or power cable are defective.
-
Page 52: Related Documents
9 Related Documents 9 Related Documents 9.1 General assembly drawing with list of components 9.1.1 Motor size DS 90 with SSiC bearings This view applies to the following sizes: DS 90 Motor sizes 12, 22 D00359 Table 19: List of components Part No. - Page 53 9 Related Documents Part No. Description Scope of supply Rotor with key 940.01 with disc 550.81, socket head cap screw 914.85, O-ring 412.81 Sealed terminal gland 920.95 Hexagon nut with disc 550.87 99-9 Set of sealing elements consisting of 400.19/.81, 411.01/.03/.16/.91, 412.02/.11/.21/.22/.41/.71/.81 consisting of gasket 400.81, holder 732.10, terminal box 833, socket head Terminal box cap screw 914.57, plug...
- Page 54 9 Related Documents Part No. Description Scope of supply Volute casing with joint ring 411.01/.03, casing wear ring 502.01, stud 902.01, screwed plug 903.01/.03, hexagon nut 920.01 Casing cover with gasket 400.19, stud 902.15, nut 920.15 Impeller with casing wear ring 502.02 310.10 Plain bearing (pump-end) consisting of thrust bearing 314.01/.02, bearing sleeve 529.21, cup springs 950.23...
-
Page 55: Spare Motor Unit
9 Related Documents 9.2 Spare motor unit Table 20: List of components Part No. Description Scope of supply 80-1 Motor unit with O-ring 412.21/.22, motor housing cover 812, support, stator, motor housing, can (818), stud 902.04, hexagon nut 920.04, socket head cap screw 914.38 80-1 Bearing carrier... -
Page 56: Ec Declaration Of Conformity
The manufacturer herewith declares that the pump/pump set: Etaseco, Etaseco I, Etaseco-M, Etaseco RVP KSB order number: ....................▪ is in conformity with the provisions of the following directives as amended from time to time: – EC Machinery Directive 2006/42/EC The manufacturer also declares that ▪... -
Page 57: Certificate Of Decontamination
11 Certificate of Decontamination 11 Certificate of Decontamination Type ..........................Order number/ ..........................Order item number Delivery date ..........................Field of application: ....................................................Fluid handled Please tick where applicable ⃞ ⃞ ⃞ ⃞ radioactive explosive corrosive toxic ⃞ ⃞ ⃞... -
Page 58: Index
Index Index Abrasive fluids 32 Operating limits 8 Order number 6 Ordering spare parts 48 Other applicable documents 6 Back pull-out unit 46 Partly completed machinery 6 Permissible forces at the pump nozzles 22 Cable bending radius 11, 18, 26 Piping 21 Certificate of decontamination 57 Preservation 12, 33... - Page 60 KSB Aktiengesellschaft P.O. Box 1361 • 91253 Pegnitz • Bahnhofplatz 1, 91257 Pegnitz (Germany) Tel. +49 9241 71-0 • Fax +49 9241 71-1793 www.ksb.com...
Need help?
Do you have a question about the Etaseco Series and is the answer not in the manual?
Questions and answers