Advertisement
Quick Links
Thank you for purchasing a Sealey product. Manufactured to a high standard, this product will, if used according to these
instructions, and properly maintained, give you years of trouble free performance.
IMPORTANT: PLEASE READ THESE INSTRUCTIONS CAREFULLY. NOTE THE SAFE OPERATIONAL REQUIREMENTS, WARNINGS & CAUTIONS. USE
THE PRODUCT CORRECTLY AND WITH CARE FOR THE PURPOSE FOR WHICH IT IS INTENDED. FAILURE TO DO SO MAY CAUSE DAMAGE AND/OR
PERSONAL INJURY AND WILL INVALIDATE THE WARRANTY. KEEP THESE INSTRUCTIONS SAFE FOR FUTURE USE.
Refer to
instructions
1. SafeTy
For maximum security, this lock box must be securely fixed to a wall.
9
ensure that any wall used is sufficiently strong to carry the weight of the lock box and its contents.
9
Do NoT install in areas where damp and condensation are present.
8
WaRNING! The warnings, cautions and instructions referred to in this instruction manual cannot cover all possible conditions and
‰
situations that may occur. It must be understood that common sense and caution are factors which cannot be built into this product, but
must be applied by the operator.
2. INTRoDucTIoN
Steel construction with durable baked powder coating for corrosion resistance. Fitted with high quality three digit tumbler lock giving hundreds of
combinations. Includes mounting screws and wall plugs.
•
Keep any record of the combination separate from the lock box and unidentified.
3. INSTaLLaTIoN
3.1.
Consideration should be given to the placing of the key lock box to ensure that it is placed in a discreet location and will not be easily
found by intruders.
3.2.
Each lock box is supplied with four mounting screws and wall plugs. Fixing to hollow partition walls is not recommended. If fixed to wood
it must be to a solid wooden structure.
3.3.
Open the door of the cabinet (see 4.1 for opening instructions) and position it where required and mark the mounting positions
through the pre-drilled holes in the back of the key lock box.
3.4.
Drill 4x6mm holes to a depth of 29mm and insert the wall plugs.
3.5.
Position the cabinet over the four drilled holes and support it there whilst securing with the four screws
3.6.
Continue to support the key lock box whilst tightening the fixings.
4. opeRaTIoN
4.1.
Initial opening.
4.1.1.
To open the door of the key lock box for the first time enter the combination - '000' (this is the factory set combination).
4.1.2.
Turn knob clockwise to open the key lock box door.
4.2.
entering a new combination.
The combination must consist of 3 numbers and should be safely
recorded before being set.
4.2.1.
Open key lock box by inputting the factory present combination (000) see 4.1.
4.2.2.
On the back of the key lock box door move the reset tab across and up to
'B', see fig.2
4.2.3.
Now enter your personal combination.
Move the tab back to position 'A' to set your personal combination. Ensure the
combination you have set is correct before moving this tab.
© Jack Sealey Limited
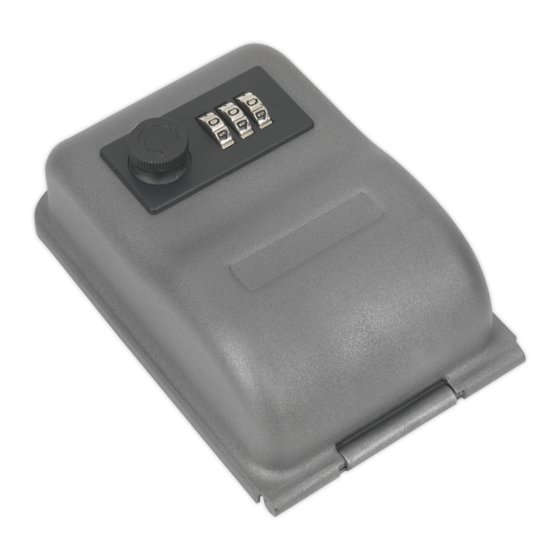
Key LocK Box
Model no:
fig.2
Original Language Version
SKL1
fig.1
SKL1 Issue 2 (HF) 15/05/18
Advertisement

Related Manuals for Sealey SKL1


Summary of Contents for Sealey SKL1
- Page 1 SKL1 Model no: Thank you for purchasing a Sealey product. Manufactured to a high standard, this product will, if used according to these instructions, and properly maintained, give you years of trouble free performance. IMPORTANT: PLEASE READ THESE INSTRUCTIONS CAREFULLY. NOTE THE SAFE OPERATIONAL REQUIREMENTS, WARNINGS & CAUTIONS. USE THE PRODUCT CORRECTLY AND WITH CARE FOR THE PURPOSE FOR WHICH IT IS INTENDED.
- Page 2 Important: No Liability is accepted for incorrect use of this product. Warranty: Guarantee is 12 months from purchase date, proof of which is required for any claim. Sealey Group, Kempson Way, Suffolk Business park, Bury St edmunds, Suffolk. Ip32 7aR 01284 757500 01284 703534 sales@sealey.co.uk...