Toro Recycler 20958 Operator's Manual
55cm lawn mower
Hide thumbs
Also See for Recycler 20958:
- Manual (104 pages) ,
- Operator's manual (96 pages) ,
- Operator's manual (24 pages)
Table of Contents
Advertisement
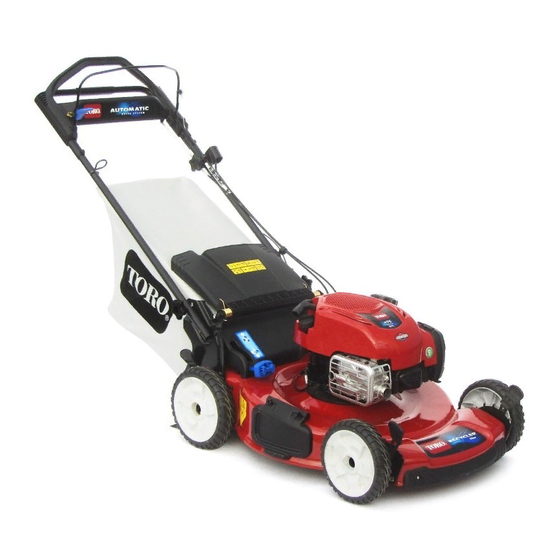
55cm Recycler
Model No. 20958—Serial No. 316000001 and Up
Replacement parts are available from an Authorized Service Dealer or at www.shoptoro.com.
Introduction
This rotary-blade, walk-behind lawn mower is intended to
be used by residential homeowners. It is designed primarily
for cutting grass on well-maintained lawns on residential
properties. It is not designed for cutting brush or for
agricultural uses.
Read this information carefully to learn how to operate and
maintain your product properly and to avoid injury and
product damage. You are responsible for operating the
product properly and safely.
You may contact Toro directly at www.Toro.com for product
and accessory information, help finding a dealer, or to register
your product.
Whenever you need service, genuine Toro parts, or additional
information, contact an Authorized Service Dealer or Toro
Customer Service and have the model and serial numbers of
your product ready.
Figure 1
model and serial numbers on the product.
1. Model and serial number plate
Write the product model and serial numbers in the space
below:
Model No.
Serial No.
© 2016—The Toro® Company
8111 Lyndale Avenue South
Bloomington, MN 55420
identifies the location of the
Figure 1
Register at www.Toro.com.
®
Lawn Mower
This manual identifies potential hazards and has safety
messages identified by the safety-alert symbol
which signals a hazard that may cause serious injury or death
if you do not follow the recommended precautions.
1. Safety-alert symbol
This manual uses 2 words to highlight information.
Important calls attention to special mechanical information
and Note emphasizes general information worthy of special
attention.
Important: If you are using this machine above 1500 m
(5,000 ft) for a continuous period, ensure that the High
Altitude Kit has been installed so that the engine meets
CARB/EPA emission regulations. The High Altitude
Kit increases engine performance while preventing
spark-plug fouling, hard starting, and increased
emissions. Once you have installed the kit, attach
the high-altitude label next to the serial decal on the
machine. Contact any Authorized Toro Service Dealer
to obtain the proper High Altitude Kit and high-altitude
label for your machine. To locate a dealer convenient to
you, access our website at www.Toro.com or contact our
Toro Customer Care Department at the number(s) listed
in your Emission Control Warranty Statement.
Remove the kit from the engine and restore the engine
to its original factory configuration when running the
engine under 1500 m (5,000 ft). Do not operate an engine
g036584
that has been converted for high-altitude use at lower
altitudes; otherwise, you could overheat and damage
the engine.
If you are unsure whether or not your machine has been
converted for high-altitude use, look for the following
label
(Figure
Form No. 3400-880 Rev A
Operator's Manual
Figure 2
3).
Original Instructions (EN)
All Rights Reserved *3400-880* A
Printed in the USA
(Figure
2),
g000502
Advertisement
Table of Contents

Related Manuals for Toro Recycler 20958


Summary of Contents for Toro Recycler 20958
-
Page 1: Introduction
You are responsible for operating the 1. Safety-alert symbol product properly and safely. You may contact Toro directly at www.Toro.com for product This manual uses 2 words to highlight information. and accessory information, help finding a dealer, or to register Important calls attention to special mechanical information your product. -
Page 2: Table Of Contents
Storage ................20 Preparing the Machine for Storage ......20 Remove the Machine from Storage......20 Safety decal127-9363 Figure 3 This machine has been designed in accordance with EN ISO 5395:2013 and ANSI B71.1-2012. General Safety Contents This product is capable of amputating hands and feet and of throwing objects. - Page 3 decaloemmarkt Manufacturer's Mark 1. Indicates that the blade is identified as a part from the original machine manufacturer decal94-8072 94-8072 decal131-0894 131-0894 Traction Adjustment 1. Attention; read the Operator's Manual—1) Loosen the decal108-8117 knob by turning it counter clockwise; 2) Pull the cable(s) 108-8117 away from the engine to decrease the traction, or push the cable(s) toward the engine to increase the traction;...
-
Page 4: Setup
Setup Important: Remove and discard the protective plastic sheet that covers the engine. Installing the Blade-Control g032866 Figure 5 1. Pin 2. Handle end No Parts Required Note: The pins do not show through the holes in the Procedure handle ends when the handle is in the folded position. Install the blade-control bar into the upper handle (Figure 2. -
Page 5: Installing The Recoil-Starter Rope In The Rope Guide
Installing the Recoil-Starter Rope in the Rope Guide No Parts Required g036578 Procedure Figure 7 Important: To start the engine safely and easily 1. Folded position 2. Operating position whenever you use the machine, install the recoil-starter rope in the rope guide. 4. -
Page 6: Assembling The Grass Bag
g027257 g027257 Figure 11 g032609 Figure 10 1. Handle 3. Grass bag 1. Dipstick 2. Frame 2. Slowly pour oil into the oil fill tube until the oil level reaches the Full line on the dipstick (Figure 10). Do not overfill. 3. -
Page 7: Product Overview
Product Overview Operation Before Operation Before Operation Safety General Safety • Become familiar with the safe operation of the equipment, operator controls, and safety signs. • Check that all guards and safety devices, such as deflectors and/or grass catcher, are in place and working properly. •... -
Page 8: Filling The Fuel Tank
Filling the Fuel Tank Checking the Engine-Oil Level • For best results, use only clean, fresh, unleaded gasoline Service Interval: Before each use or daily with an octane rating of 87 or higher ((R+M)/2 rating 1. Move the machine to a level surface. method). -
Page 9: Adjusting The Handle Height
Adjusting the Handle Height You can raise or lower the handle in 1 of 2 positions that is more comfortable for you (Figure 17). g032612 Figure 18 g032867 1. Raise the machine 2. Lower the machine Figure 17 Note: The cutting-height settings are 25 mm (1 inch); 35 1. -
Page 10: Starting The Engine
Check the grass catcher components and the discharge guard frequently and replace them with the manufacturer’s recommended parts when necessary. • Use accessories and attachments approved by the The Toro® Company only. Slope Safety g009549 Figure 20 • Mow across the face of slopes; never up and down. Use extreme caution when changing direction on slopes. -
Page 11: Engaging The Blade
Engaging the Blade Disengaging the Blade Release the blade-control bar (Figure 24). When you start your engine, the blade does not turn. You must engage the blade to mow. 1. Pull the control-bar lock back (Figure 21). g003126 Figure 24 Important: When you release the blade-control bar, g003123 Figure 21... -
Page 12: Recycling The Clippings
Installing the Grass Bag 4. Place the newspaper ball about 13 cm (5 inches) in front of the machine. 1. Raise and hold up the rear deflector (Figure 25). 5. Start the engine. 6. Engage the blade. 7. Release the blade-control bar. 8. -
Page 13: Side-Discharging The Clippings
Bagging position, move the lever to the Recycling position; refer to Operating the Bag-on-Demand • For best performance, install a new blade before the Lever (page 12). cutting season begins. • Replace the blade when necessary with a Toro replacement blade. -
Page 14: After Operation
Cutting Grass After Operation • Cut only about a third of the grass blade at a time. Do not cut below the 54 mm (2-1/8-inch) setting unless the grass After Operating Safety is sparse or it is late fall when grass growth begins to slow down. - Page 15 2. Fold the handle by rotating it forward (Figure 30). g036582 Figure 30 1. Operating position 2. Folded position 3. Insert the carriage bolt (with the bolt head toward the inside) through the handle bracket and the upper hole in the handle end. Ensure that the square edges of each carriage bolt fits into the upper or lower square hole in its related handle bracket (Figure...
-
Page 16: Maintenance
• Empty the fuel tank before repairs as directed and before yearly storage. Yearly or before storage Important: Refer to your engine owner’s manual for additional maintenance procedures. Note: Replacement parts are available from an Authorized Service Dealer (go to www.toro.com to find the nearest dealer) or at www.shoptoro.com. Maintenance Safety •... -
Page 17: Servicing The Air Filter
Servicing the Air Filter Service Interval: Every 25 hours 1. Upclip the top of the air-filter cover (Figure 33). g032609 Figure 34 1. Dipstick 4. Tip the machine onto its side with the air filter up to drain the used oil out through the oil-fill tube (Figure 35). -
Page 18: Replacing The Blade
Cleaning the oil-fill tube and repeat steps through until the oil level is at the Full mark on the dipstick. Blade-Brake-Clutch Shield • If the oil level is above the Full mark on the dipstick, drain the excess oil until the oil level on Service Interval: Every 25 hours the dipstick is at the Full mark. -
Page 19: Adjusting The Self-Propel Drive
Adjusting the Self-Propel Drive Whenever you install a new self-propel cable or if the self-propel drive is out of adjustment, adjust the self-propel drive. 1. Turn the adjustment knob counterclockwise to loosen the cable adjustment (Figure 38). g033492 Figure 39 g027709 1. -
Page 20: Storage
Storage Store the machine in a cool, clean, dry place. Preparing the Machine for Storage 1. On the last refueling of the year, add fuel stabilizer to the fuel as directed by the engine manufacturer. 2. Dispose of any unused fuel properly. Recycle it according to local codes, or use it in your automobile. - Page 21 Notes:...
- Page 22 Notes:...
- Page 23 The Way Toro Uses Information Toro may use your personal information to process warranty claims, to contact you in the event of a product recall and for any other purpose which we tell you about. Toro may share your information with Toro's affiliates, dealers or other business partners in connection with any of these activities. We will not sell your personal information to any other company.
- Page 24 – First time starts after extended period of non-use over three normal use, it will be repaired or replaced, at Toro's option, under warranty at no cost for parts and months or seasonal storage labor. Frame failure due to misuse or abuse and failure or repair required due to rust or corrosion are not covered.