Table of Contents
Advertisement
Quick Links
Advertisement
Table of Contents

Related Manuals for Polyaire airtouch 2 plus

Summary of Contents for Polyaire airtouch 2 plus
- Page 1 User Manual airtouch.net.au...
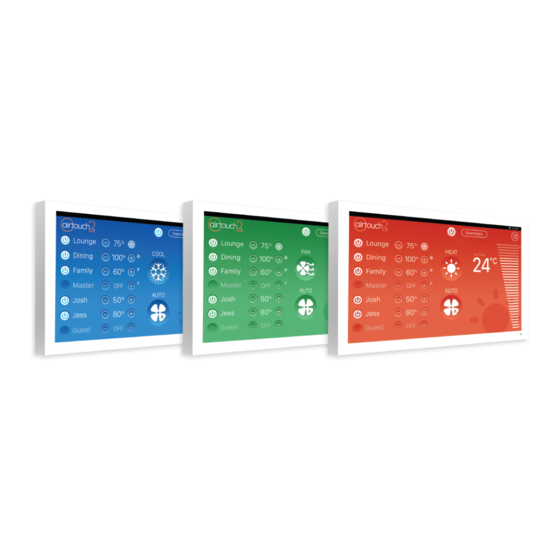
- Page 2 COOL HEAT FRESH /FAN Modes and functions available depend on your Air Conditioning Unit.
-
Page 3: Table Of Contents
Contents Getting Started Quick Start Quick Menu & Controls Adjusting Airflow for a Zone Away Function Setting the AC Timer 10-11 Setting a Program 12-13 Turbo Zone 14-15 Setting up Favorites Sleep Function AirTouch App Advanced System Settings Naming Your Zones Screen Lock Owner’s Name Balancing &... -
Page 4: Quick Start
Quick Start - Console Unit Selection (Select to switch to other units if available) Quick Menu Button AC Unit On/Off Button (Hold down to set Quick Timer, or turn on Away/Sleep Function) Zone Name & Airflow Percentage Set Point Slider Temperature To change the Adjust with... - Page 5 Quick Start - Mobile App Home Screen Some Settings & Zone names setup on the AirTouch Console will be replicated in the App. Zones Screen User Manual | Edition 1, May 2020...
-
Page 6: Quick Menu & Controls
Quick Menu & Controls You can access common AirTouch features using the Quick Menu. Access the Quick Menu by tapping on the menu icon in the top right. www.airtouch.net.au... - Page 7 Inside the Quick Menu Turn On/Off AC To turn On or Off the AC tap the Power button. User Manual | Edition 1, May 2020...
-
Page 8: Adjusting Airflow For A Zone
Adjusting Airflow for a Zone Use the + and – buttons next to the zone names to increase or decrease the air flow in 5% increments. Your zone names are on the left of the home screen. www.airtouch.net.au... -
Page 9: Away Function
Away Function Efficiently make sure home doesn’t get too warm or too cold while no one is home. Press and hold the AC On/Off Button. Press Away. The Away icon will appar in the top status bar. To cancel Away Mode, press the Away button a second time, or adjust the Mode, Fan Speed or Temperature. -
Page 10: Setting The Ac Timer
Setting the AC Timer The AC Timer function is useful for automatically switching the AC on or off at a given time. Quick Timer Setting the Quick Timer from the Home screen to Turn ON or OFF the Air Conditioning at a chosen time (up to 12 hours) Turn ON Timer To Set a Quick Timer to Turn On the Air Conditioning when the unit is currently off, Tap and Hold the Power Button and scroll to select your... - Page 11 Advanced Unit Timer Functions Open the Quick Menu and select Programs. Tap AC Timer to load the Time Wheel, and choose the time for each operation. When a Timer event is scheduled, a Timer Icon will display on the home screen next to your AC Unit’s name.
-
Page 12: Setting A Program
Setting a Program A more advanced version of the Timer function is the Program function, letting you turn the AC ON or OFF and specify a Temperature for your entire house or airflow for individual zones for specific time and day ranges. - Page 13 Programs Touch the On, Set Temp and Touch the Name Off areas to set the time and area to rename Touch the button required temperature the program to add a program (up to eight programs) Assign the program to the desired AC Unit/s here.
-
Page 14: Turbo Zone
Turbo Zone For high volumes of conditioned air in a single zone. AirTouch’s Turbo Zone feature can cool or warm a single zone quickly; or can be useful when there is a lot of activity and you need more conditioned air than normal. Open the Quick Menu and select System Settings. - Page 15 To activate the Turbo function, tap on the button again. Turbo If there is more than one system, multiple Turbo groups can be set. The Turbo function cannot be programmed. It is activated manually from the console when needed. User Manual | Edition 1, May 2020...
-
Page 16: Setting Up Favorites
Setting up Favourites AirTouch’s Favourites feature allows you to save your climate control scenarios. Open the Quick Menu and select Favourites. Create up to four Favourite presets. Select whether you want each zone ON or OFF. www.airtouch.net.au... - Page 17 Give your Favourite(s) option a name and you’re good to go! User Manual | Edition 1, May 2020...
-
Page 18: Sleep Function
Sleep Sleep comfortably while saving energy. Press and hold the AC On/Off Button. Press Sleep. The Sleep icon will appar in the top status bar. To cancel Sleep Mode, press the Sleep button a second time, or adjust the Mode, Fan Speed or Temperature. NOTE: Only available on COOL, HEAT, or DRY Mode. -
Page 19: Airtouch App
AirTouch 2+ App The AirTouch 2+ App can be downloaded free. After downloading the application, follow the prompts to link to your AirTouch console. AirTouch 2+ is compatible with: • iOS 8.0 and above • Android 4.4 and above NOTE: If a mobile device is connected to the same WiFi network as your AirTouch 2+ , the app will automatically direct you to the control interface. - Page 21 System Settings...
-
Page 22: Naming Your Zones
Naming your Zones *Zones are referred to as Groups in System Settings. Customise AirTouch’s Zone Names to suit your home Open the Quick Menu and select System Settings. Select Group Names and edit individual Groups/Zones by tapping on the space provided to enter information. To make it easy a preset name can be selected by selecting Name List. -
Page 23: Screen Lock
Screen Lock The Screen Lock Protects your Air Conditioning and AirTouch from potential damage caused by children playing with the console. Select Screen Lock and choose a four digit password. Now, when the console goes to sleep and turns blank, you can unlock it using the password. -
Page 24: Owner's Name
Owner’s Name Owner’s Name is used by the mobile app to distinguish between AirTouch 2+ systems. The maximum length for a name is 16 letters. Open the Quick Menu and select System settings. Select Preferences and edit Owner’s Name by tapping on the space provided to enter your details. -
Page 25: Balancing & Grouping Tables
Balance & Grouping Tables (Filled in by your installer) Zones Turbo Group Group Name Sensors Balance Included Function User Manual | Edition 1, May 2020... -
Page 26: Wifi & Internet Setup
WiFi & Internet Setup Connect AirTouch 2+ to a home WiFi network to enable the control/operation of the AC unit and zoning via local WiFi and internet. Open the Quick Menu and select WiFi Settings. Select your WiFi network, and enter in the password when prompted. - Page 27 Software Updates Please make sure AirTouch 2+ is connected to the home WiFi network with internet access. If there is a red dot on the top right corner of the Quick Menu, a new software version is available for update. Follow the red dot and prompts to update the system.
- Page 28 Troubleshooting Problem meets solution. Problem Suggested Action LED in the No communication between the console and lower right main module. Check if the AirTouch 2+ App is corner flashes running and the wiring. quickly Disconnect the cable to the touchscreen and connect it back.
- Page 29 Some zones Check if ‘Spill’ status is displayed for the zone. cannot be Opening other zones will rectify the error turned off *Check spill groups. No display on *Check if the cable is plugged in properly. Unplug the the LCD cable and reconnect it.
- Page 30 Specifications Electrical Requirements Power supply: 24V AC ±10% Line frequency: 50 Hz Environmental Requirements Operating Temperature: 0°C to 60°C Altitude: 0 to 2000 meters Operating relative humidity: 10% to 80% Avoid static electricity hazards Avoid electromagnetic radiation sources Avoid dust contamination Avoid highly corrosive environments Zone Output Output voltage:...
- Page 31 Transformer Input Voltage: 240VAC, 50Hz Output Voltage: 24VAC, 50Hz Wattage: Supply Air Sensor NTC type, 10 kΩ at 25°C Fuse Dimension 5x20 mm, Fast-Acting 2A, 250V User Manual | Edition 1, May 2020...
- Page 32 Polyaire Pty Ltd notice. Please read the instructions before installing 11-13 White Road this Zone Control System. Polyaire Pty Ltd does not Gepps Cross South Australia, 5094 accept any responsibility for loss or damage that Tel: (08) 8349 8466 Fax: (08) 8349 8446 may occur as a result of the incorrect installation or operation of this AirTouch Control System.
Need help?
Do you have a question about the airtouch 2 plus and is the answer not in the manual?
Questions and answers