Table of Contents
Advertisement
FCC STATEMENT
This device complies with Part 15 of the FCC Rules. Operation is subject to the
following two conditions:
(1) This device may not cause harmful interference, and
(2) This device must accept any interference received, including interference
that may cause undesired operation.
Note:
This equipment has been tested and found to comply with the limits for Class B
digital devices, pursuant to Part 15 of the FCC rules. These limits are designed
to provide reasonable protection against harmful interference in a residential
installation. This equipment generates uses and can radiate radio frequency
energy and, if not installed and used in accordance with the instructions, may
cause harmful interference to radio communications. However, there is no
guarantee that interference will not occur in a particular installation. If this
equipment does cause harmful interference to radio or television reception,
which can be determined by turning the equipment off and on, the user is
encouraged to try to correct the interference by one or more of the following
measures:
Reorient or relocate the receiving antenna.
Increase the separation between the equipment and receiver.
Connect the equipment into an outlet on a circuit different from that to which
the receiver is connected.
Consult the dealer or an experienced radio/TV technician for help.
Use of shielded cable is required to comply with Class B limits in Subpart B of
Part 15 of the FCC rules.
Do not make any changes or modifications to the equipment unless otherwise
specified in the manual. If such changes or modifications should be made, you
could be required to stop operation of the equipment.
EN-1
Advertisement
Table of Contents

Related Manuals for Traveler Slimline X5


Summary of Contents for Traveler Slimline X5
- Page 1 FCC STATEMENT This device complies with Part 15 of the FCC Rules. Operation is subject to the following two conditions: (1) This device may not cause harmful interference, and (2) This device must accept any interference received, including interference that may cause undesired operation. Note: This equipment has been tested and found to comply with the limits for Class B digital devices, pursuant to Part 15 of the FCC rules.
- Page 2 READ THIS FIRST Trademark Information Microsoft ® and Windows ® are U.S. registered trademarks of Microsoft Corporation. ® Pentium is a registered trademark of Intel Corporation. Macintosh is a trademark of Apple Computer, Inc. is a trademark. Photo Explorer and Photo Express are trademarks. Other names and products may be trademarks or registered trademarks of their respective owners.
- Page 3 SAFETY INSTRUCTIONS Read and understand all Warnings and Cautions before using this product. Warning If foreign objects or water have entered the camera, turn the power OFF and remove the batteries and the AC power adapter. Continued use in this state might cause fire or electric shock. Consult the store of purchase.
- Page 4 Caution Insert the battery paying careful attention to the polarity (+ or –) of the terminals. Inserting the battery with its polarities inverted might cause fire and injury, or damage to the surrounding areas due to the battery rupturing or leaking. Do not fire the flash close to anyone’s eyes.
- Page 5 Notes on Battery Usage When you use the battery, carefully read and strictly observe the Safety Instructions and the notes described below: Different battery types and surrounding temperatures may affect the battery performance. Avoid using batteries in extremely cold environments as low temperatures can shorten the battery life and reduce camera performance.
-
Page 6: Table Of Contents
CONTENTS INTRODUCTION Overview Package Contents GETTING TO KNOW YOUR CAMERA 10 Front View 11 Rear View 12 LCD Monitor Information 14 LED Indicators PREPARING THE CAMERA 15 Installing the Battery 16 Charging the Battery 17 Using an AC Adapter/Charger 17 Attaching the Camera Strap 18 Inserting and Removing an SD Memory Card GETTING STARTED 19 Turning the Power On/Off... - Page 7 MOVIE MODE 42 Recording Video Clips 43 Playing Back Video Clips PLAYBACK MODE - ADVANCED FUNCTIONS 44 Playing Back Images/Video Clips on TV 45 Deleting Images/Video Clips 46 Protecting Images/Video Clips 47 Setting the DPOF 49 Changing the Camera Startup Screen AUDIO MODE 50 Recording Voice Files 50 Playing Back a Voice File...
-
Page 8: Introduction
INTRODUCTION Overview Congratulations on your purchase of the new digital still camera. Capturing high-quality digital images is fast and easy with this state-of-the-art smart camera. Equipped with a 5.2 Mega pixels CCD, this camera is capable of capturing images with a resolution of up to 2560 x 1920 pixels. Other features provided by the camera include the following: SD memory card support 2.5”... -
Page 9: Package Contents
Common Product Components: 1 x Traveler Slimline X5 Digital Still Camera 1 x Traveler 256MB SD Memory Card 1 x Traveler Conversion adapter... -
Page 10: Getting To Know Your Camera
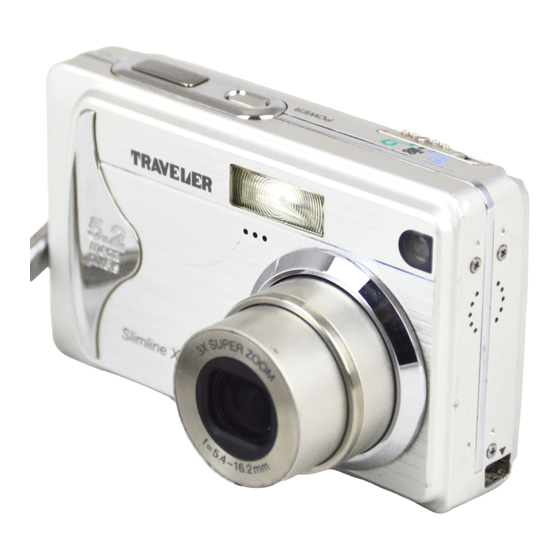
GETTING TO KNOW YOUR CAMERA Front View 1. Shutter button 5. Self-timer LED (AF auxiliary light) 2. POWER Power button 6. Speaker 3. Flash 7. Lens 4. Mode switch 8. Conversion adapter terminal Camera mode 9. Microphone Movie mode Playback mode EN-10... -
Page 11: Rear View
Rear View 1. LCD monitor Menu button Display button/ Delete button Audio mode button 7. Strap eyelet 3. Status LED 8. Control buttons 4. T Zoom in (Telephoto) button 9. Battery/SD memory card cover 10.Tripod socket Zoom out (Wide-angle) button Control Buttons Flash button Up button... -
Page 12: Lcd Monitor Information
LCD Monitor Information Camera Mode 1. Camera mode 2. Image quality ] SUPER FINE [ ] FINE [ ] NORMAL 3. Image size (resolution) ] 2560 x 1920 ] 2048 x 1536 ] 1280 x 960 ] 640 x 480 [ ] TIFF IMAGE 4. - Page 13 Movie Mode 1. Movie mode 2. Available recording time/Elapsed time 3. Video size ] 640 x 480 ] 320 x 240 QVGA 4. SD memory card indicator (if present) 5. Battery power indicator 6. Time 7. Date 8. Exposure compensation (no indication with 0EV) 9.
-
Page 14: Led Indicators
Audio Mode 1. Audio mode 2. SD memory card indicator (if present) 3. Battery power indicator AUD_0001 4. Sound level (speaker volume) AUD_0002 5. Audio file name AUD_0003 SELECT FILE! :RECORD :VOLUME - :PLAY :VOLUME + LED Indicators Indicator Status Description/Activity 1.The digital still camera is powering up. -
Page 15: Preparing The Camera
PREPARING THE CAMERA Installing the Battery We highly recommend you to use the specified rechargeable lithium-ion battery to realize the full capability of your digital still camera. Make sure that the power of the digital still camera is off before inserting or removing the battery. 1. -
Page 16: Charging The Battery
Charging the Battery The state-of-charge of the battery will affect the performance of the digital still camera. To maximize battery performance and lifetime, it is recommended that you fully charge the battery using the AC adapter/charger and then fully discharge it (through normal use) at least one time. Make sure that the power of the digital still camera is off and then insert the battery before starting. -
Page 17: Using An Ac Adapter/Charger
Using an AC Adapter/Charger Using an AC adapter/charger prevents the digital still camera from automatically powering off while transferring files to your computer. Perform the steps in the preceding section "Charging the Battery". Make sure to use only the AC adapter/charger specified for the camera. Damage caused by the use of an incorrect adapter is not covered under the warranty. -
Page 18: Inserting And Removing An Sd Memory Card
Inserting and Removing an SD Memory Card You can also expand the memory capacity by using an optional SD (Secure Digital) memory card so that you can store more files. 1. Always make sure the digital still camera is turned off before inserting or removing a memory card. -
Page 19: Getting Started
GETTING STARTED Turning the Power On/Off Press the POWER button to turn on your digital still camera. To turn off your digital still camera, press the POWER button again. If the camera goes unused for a certain period of time while the camera is powered on, the camera will switch to an idle mode, and eventually turn itself off to conserve power. -
Page 20: Setting The Date And Time
Setting the Date and Time The date/time setting screen will automatically appear: When first turning the camera on. When turning the power on after leaving the camera without battery for an extended period of time. 1. Press the POWER button to turn on the camera. -
Page 21: Choosing The Screen Language
Choosing the Screen Language Follow the steps below to specify in which language menus and messages are to be displayed on the LCD monitor. 1. Press the POWER button to turn on the camera. 2. Slide the mode switch to [ 3. -
Page 22: Formatting An Sd Memory Card Or Internal Memory
For matting an SD Memor y Card or Inter nal Memory Formatting erases all images, videos, audio files and folders that are stored on the SD memory card or internal memory. Formatting is not possible if an SD memory card is locked. 1. -
Page 23: Setting Image Resolution And Quality
Setting Image Resolution and Quality Resolution and quality settings determine the file size and compression ratio for your images. These settings affect the number of images that can be stored in memory, or on a memory card. High resolution and quality settings are recommended for printed output and situations requiring the finest detail. - Page 24 Possible Number of Shots (Still Image) The following table shows the approximate images that you can capture at each setting based on an SD card. SD memory card Resolution Quality 256MB 32MB 64MB 128MB 512MB 2560 x1920 SUPER FINE FINE NORMAL 2048 x1536 SUPER FINE...
-
Page 25: Camera Mode
CAMERA MODE Capturing Images 1. Press the POWER button to turn on the camera. 2. Slide the mode switch to [ 3. Compose your image in the LCD monitor. 4. Press the shutter button down halfway, then press it down fully. Pressing the shutter button down halfway automatically focuses and adjusts the exposure. -
Page 26: Setting The Scene Mode
Setting the Scene Mode This sets the scene mode for capturing images. 1. Press the POWER button to turn on the camera. Make sure the camera is in [ mode. 2. Press the button. The screen of scene mode menu is displayed. - Page 27 The table below will help you choose the appropriate scene mode: Scene mode Description Select this mode when you want to leave the settings up to the camera to capture images with ease. AUTO Select this mode when you want to capture an image that makes the person stand out against a defocused (blurred) background.
-
Page 28: Using The Optical Zoom
Using the Optical Zoom Zoom photography allows you to capture images magnified up to 3 times or wide- angle photography depending on the distance up to the subject. You can further enlarge the center of the screen and capture images using the digital zoom. 1. -
Page 29: Using The Digital Zoom
Using the Digital Zoom Using a combination of 3 times optical zoom and 4 times digital zoom permits zoom photography up to 12 times to suit the subject and the distance. Digital zoom is a compelling feature, however, the more an image is enlarged (zoomed), the more pixilated (grainer) the image will appear. -
Page 30: Using The Flash
Using the Flash The flash is designed to function automatically when lighting conditions warrant the use of flash. You can capture an image using a flash mode suitable to your circumstances. 1. Press the POWER button to turn on the camera. - Page 31 The table below will help you to choose the appropriate flash mode: Flash mode Description Use this mode to reduce the red-eye phenomenon when you want to capture natural-looking images of people and animals in low-light conditions. RED EYE When capturing images, the red-eye phenomenon can be reduced by asking the subject (person) to look at the digital still camera or get as close to the digital still camera as possible.
-
Page 32: Using The Self-Timer
Using the Self-Timer The self-timer can be set in [ ] mode. This feature is useful for situations where you may wish to join into the scene when taking group shots. 1. Secure the camera to a tripod or place it on a stable surface. 2. -
Page 33: Adjusting The Exposure
Adjusting the Exposure Images can be captured with the overall scene intentionally made brighter or darker. These settings are used when a suitable brightness (exposure) cannot otherwise be obtained in circumstances where the difference in brightness between the subject and the background (the contrast) is large, or when the subject that you wish to capture is very small within the scene. -
Page 34: Setting The White Balance
Setting the White Balance The human eye adapts to changes in light so that white objects still appear white even when the light changes. With a digital camera, however, the color of the subject is influenced by the color of the light surrounding it. This color adjustment is called "white balance adjustment". -
Page 35: Advanced Capture
ADVANCED CAPTURE Continuous Capture In continuous capture mode, you can capture a rapid sequence of images with one press of the shutter button. This function is very useful for photographing objects in motion where it is difficult to determine the precise moment of capture. Afterwards, you may review the sequence of images to select the best one. -
Page 36: Auto-Exposure Bracketing (Aeb)
Auto-Exposure Bracketing (AEB) Auto-exposure bracketing is an effective technique when it is difficult to determine the precise exposure of a scene. Using AEB the camera will capture a sequential burst of three images at three different exposure settings. Afterwards, you may review the sequence of images to select the best exposure. -
Page 37: Adjusting White Balance Manually
Adjusting White Balance Manually Manual white balance lets you configure the digital still camera for a particular light source and other conditions. Note that you must perform manual white balance under the same conditions you will be shooting. You must also have a piece of white paper or other similar object on hand in order to perform this function. -
Page 38: Playback Mode - The Basics
PLAYBACK MODE - THE BASICS In the playback mode, you can view, magnify, delete images, play video clips , or run a slide show. This mode also provides a thumbnail image display, allowing you to quickly search for the desired image. Viewing Images 1. -
Page 39: Magnifying Images
Magnifying Images While reviewing your images, you may enlarge a selected portion of an image. This magnification allows you to view the details. Images that are being displayed can be enlarged in 8 times enlargement. 1. Slide the mode switch to [ 2. -
Page 40: Thumbnail Display (Index Playback)
Thumbnail Display (Index Playback) This function allows you to view four or nine thumbnail images on the LCD monitor simultaneously so you may search for a particular image. 1. Slide the mode switch to [ 2. Press the button to enter [PLAY] menu. Select [THUMBNAIL] with the / / / buttons, then press the OK button. -
Page 41: Slideshow Display
Slideshow Display The slideshow function enables you to play back your images automatically in sequential order. This is very useful and entertaining feature for reviewing recorded images and for presentations. 1. Slide the mode switch to [ SLIDE SHOW 2. Press the button to enter [PLAY] menu. -
Page 42: Movie Mode
MOVIE MODE Recording Video Clips 1. Press the POWER button to turn on the camera. 2. Slide the mode switch to [ 3. Compose the image with the zoom button, if desired. Optical zoom should be set while composing the scene. Optical zoom cannot be used during movie capture. -
Page 43: Playing Back Video Clips
Playing Back Video Clips 1. Slide the mode switch to [ 100-0001 2. Use the buttons to go through the images until the video clip you want to play back is displayed. To view the previous image, press button. To view the next image, press the :SHUTTER button. -
Page 44: Playback Mode - Advanced Functions
PLAYBACK MODE - ADVANCED FUNCTIONS Playing Back Images/Video Clips on TV You can also play back your images and videos on a TV screen. Before connecting to any device, make sure to select NTSC/PAL system to match the video output system of the video equipment you are going to connect to the digital still camera. -
Page 45: Deleting Images/Video Clips
Deleting Images/Video Clips Use this function to delete one or all images/video clips stored in the internal memory or memory card. Please note that the deleted images or video clips cannot be recovered. Immediate Erasure (Quick Delete Function) The quick delete function enables you to delete the last image during capture. 1. -
Page 46: Protecting Images/Video Clips
Protecting Images/Video Clips The "PROTECT" function allows you to set the data to read-only to prevent images from being erased by mistake. 1. Slide the mode switch to [ PROTECT 2. Press the button to enter [PLAY] menu. Select [PROTECT] with the ONE IMAGE buttons, then press the OK LOCK... -
Page 47: Setting The Dpof
Setting the DPOF DPOF (Digital Print Order Format) allows you to embed printing information on your memory card. Files saved in the DPOF format can be printed using compatible printers or through a laboratory printing device. 1. Slide the mode switch to [ 2. - Page 48 6. Use the buttons to select [QUANTITY], DPOF [DATE] and [ENABLE], then press the OK button to configure the setting. QUANTITY DATE [QUANTITY]:Allows you to select image ENABLE quantity (0~99). Use the buttons to set the image quantity BACK : SET : and press the OK button.
-
Page 49: Changing The Camera Startup Screen
Changing the Camera Startup Screen This feature lets you specify one of your recorded images as your startup screen, which will be displayed on the monitor whenever you turn on the camera. 1. Slide the mode switch to [ PLAY SETUP 2. -
Page 50: Audio Mode
AUDIO MODE The digital still camera also allows you to record and play back voice files anytime and anywhere. Recording Voice Files 1. Press the POWER button to turn on the camera. 2. Slide the mode switch to [ 3. Press the button to access Audio mode. -
Page 51: Deleting A Voice File
Deleting a Voice File 1. Make sure the camera is in Audio mode. 2. In the Audio mode, use the buttons to select the voice file you want to AUD_0001 delete. AUD_0002 3. Press the button to delete the AUD_0003 selected voice file. - Page 52 TRANSFERRING FILES FROM YOUR D I G I T A L S T I L L C A M E R A COMPUTER After using USB cable to establish a USB connection between the camera and your computer, you can use your computer to share recorded images/video clips/ voice files with your family or friends via e-mail or post them on the Web.
-
Page 53: Step 1: Installing The Usb Driver
Step 1: Installing the USB driver Windows 98/98SE computers The USB driver on the supplied CD-ROM is exclusively for Windows 98 and 98SE computers. Installing the USB driver on computers running Windows 2000/ME/XP is not necessary. 1. Insert the CD-ROM that came with the camera into your CD-ROM drive. -
Page 54: Step 2: Connecting The Digital Still Camera To Your Computer
Step 2: Connecting the digital still camera to your computer 1. Connect one end of the USB cable to the conversion adapter terminal of the camera. If you use the conversion adapter to connect the USB cable, insert the conversion adapter into the conversion adapter terminal of the camera first, and then connect one end of the USB cable to the USB terminal of the... -
Page 55: Step 3: Downloading Images, Videos Or Voice Files
Step 3: Downloading images, videos or voice files When the digital still camera is turned on and connected to your computer, it is considered to be a disk drive, just like a floppy disk or CD. You can download (transfer) images by copying them from the “Removable disk” (“untitled” or “unlabeled”... - Page 56 CO N N E C T I N G TO A PI C T BR I D G E COMPLIANT PRINTER IF a printer that supports PictBridge is available, images can be printed by connecting the digital still camera directly to the PictBridge-compatible printer without using a computer.
- Page 57 3. Use the buttons to select the image you want to print, then press the button to set MORE print reservations. 4. Use the buttons to select the desired SELECT PAGE : PRINT : item, then press the OK button. CANCEL : MORE : Use the...
- Page 58 In [PRINT ORDER] Mode: This function lets you print the specified images that have configured DPOF settings. 1. Use the buttons to select the [PRINT PRINT MODE SELECT ORDER] mode, then press the OK button. PRINT PRINT ORDER SELECT ITEM : ENTRY: 2.
-
Page 59: Using The Digital Still Camera Asa Pc Camera
USING THE DIGITAL STILL CAMERA AS A PC CAMERA Your digital still camera can act as a PC camera, which allows you to videoconference with business associates, or have a real-time conversation with friends or family. To use the digital still camera for videoconferencing, your computer system must include the items as below: Microphone Sound card... -
Page 60: Step 2: Connecting The Digital Still Camera To Your Computer
Step 2: Connecting the digital still camera to your computer 1. Connect one end of the USB cable to the conversion adapter terminal of the camera. If you use the conversion adapter to PRINTER connect the USB cable, insert the PC CAM conversion adapter into the conversion adapter terminal of the camera first,... -
Page 61: Editing Software Installation
EDITING SOFTWARE INSTALLATION Installing Photo Explorer Photo Explorer provides a simple and efficient way to transfer, browse, modify and distribute digital media. Acquire photos, video or sound clips from various digital device types and easily browse or add personal descriptions; make timely modifications;... -
Page 62: Installing Photo Express
Installing Photo Express ® Ulead Photo Express is complete photo project software for digital images. The step-by-step workflow, visual program interface, and in-program help assist users in creating exciting photo projects. Acquire digital photos effortlessly from digital cameras or scanners. Organize them conveniently with the Visual Browse mode. -
Page 63: Menu Options
MENU OPTIONS Camera Menu PICTURE FUNCTION SETUP PICTURE FUNCTION SETUP QUICK VIEW SELECT PAGE: EXIT: SELECT PAGE: EXIT: SELECT ITEM: SELECT ITEM: 1. Slide the mode switch to [ 2. Press the button to access in Camera menu, then use the buttons to select [PICTURE] / [FUNCTION] menu. - Page 64 Camera Menu - PICTURE Settings Item Functional Description SIZE Sets the size of the image that will be captured. 2560 x 1920 2048 x 1536 1280 x 960 640 x 480 TIFF IMAGE QUALITY Sets the quality (compression rate) at which the image is captured.
- Page 65 Camera Menu - FUNCTION Settings Item Functional Description CAPTURE MODE Sets the recording method at the time of capturing images. SINGLE CONTINUOUS LCD BRIGHT Selects a brightness level for the LCD monitor. The adjustment range is from –5 to +5. DIGITAL ZOOM Enables or disables digital zoom.
-
Page 66: Movie Menu
Movie Menu 1. Slide the mode switch to [ MOVIE SETUP 2. Press the button to access in [MOVIE] menu. 3. Use the / / / buttons to select the desired setting, then press the OK button. 4. To exit from the menu, press the SELECT PAGE: EXIT: button. -
Page 67: Play Menu
Play Menu PLAY SETUP PLAY SETUP SLIDE DPOF LOGO SHOW COPY Index EXECUTE CHANGE LOGO SELECT PAGE: EXIT: SELECT PAGE: EXIT: SELECT ITEM: SELECT ITEM: ENTRY: 1. Slide the mode switch to [ 2. Press the button to access in [PLAY] menu. 3. - Page 68 Item Functional Description THUMBNAIL Allows you to view 4 or 9 thumbnail images on the LCD monitor at the same time, which can quickly search for the Index image that you want. * 4/9 RESIZE Changes the size of a recorded image. * 2560 x 1920 * 2048 x 1536 * 1280 x 960...
-
Page 69: Setup Menu (In Camera And Movie Modes)
Setup Menu (In Camera and Movie Modes) PICTURE FUNCTION SETUP MOVIE SETUP FORMAT FORMAT AUTO AUTO AUTO AUTO DATE DATE SELECT PAGE: EXIT: SELECT PAGE: EXIT: SELECT ITEM: SELECT ITEM: 1. Slide the mode switch to [ ] or [ 2. -
Page 70: Setup Menu (In Playback Mode)
Setup Menu (In Playback Mode) 1. Slide the mode switch to [ ]. PLAY SETUP 2. Press the button. Y/M/D 3. Press the buttons to select [SETUP] menu. NTSC 4. Use the / / / buttons to select the desired item, then press the OK button. SELECT PAGE: EXIT: SELECT ITEM:... -
Page 71: Connecting Your Camera To Other Devices
CONNECTING YOUR CAMERA TO OTHER DEVICES EN-71... -
Page 72: Specifications
SPECIFICATIONS Item Description Image sensor 5.2 Mega pixels CCD sensor Image resolution Still image: 2560 x 1920, 2048 x 1536, 1280 x 960, 640 x 480 Video clip: 640 x 480, 320 x 240 Image quality Still image: SUPER FINE, FINE, NORMAL Recording media 9MB internal memory SD memory card (up to 512MB) -
Page 73: Troubleshooting
TROUBLESHOOTING Refer to the symptoms and measures listed below before sending the camera for repairs. If the problem persists, contact your local reseller or service center. Power Supply Symptom Cause Measure The power does not The battery is not loaded. Load the battery correctly. - Page 74 Shooting Symptom Cause Measure Even if I press the The battery is running low. Recharge or use the AC shutter button, the power adapter. c a m e r a d o e s n o t The power is not on. Turn the power on.
- Page 75 Symptom Cause Measure The flash does not The camera is set to Switch the camera mode to fire. someone other than one of mode. T h e f l a s h c a n n o t those. recharge. Set the flash to something The flash is set to no flash.
- Page 76 Other Problems Symptom Cause Measure C a n n o t l o a d t h e T h e c a r d i s f a c i n g t h e Load correctly. memory card. wrong way.
Need help?
Do you have a question about the Slimline X5 and is the answer not in the manual?
Questions and answers