Table of Contents
Advertisement
Advertisement
Table of Contents
Troubleshooting

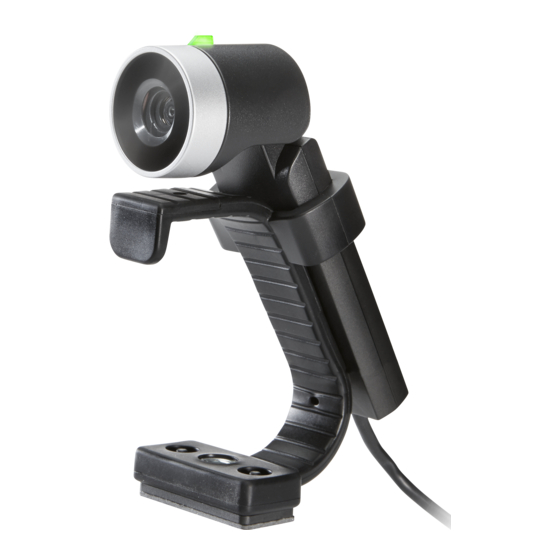
Related Manuals for Polycom EagleEye Mini


Summary of Contents for Polycom EagleEye Mini
- Page 1 USER GUIDE 1.6 | September 2020 | 3725-61839-001I ® Polycom Companion...
- Page 2 2020, Plantronics, Inc. All rights reserved. Poly and the propeller design are trademerks of Plantronics, Inc. All other trademarks are property of their respective owners. Plantronics, Inc. (Poly — formerly Plantronics and Polycom) 345 Encinal Street Santa Cruz, California 95060...
-
Page 3: Table Of Contents
Check Application Version....................4 Send Application Log Files....................5 Managing the EagleEye Mini USB Device............6 View Camera Information....................6 Update the EagleEye Mini USB Device................6 Managing the Studio USB Device..............8 Initialize the Studio USB Device Using the Setup Wizard...........8 View Studio Information...................... 9 Update the Studio USB Device and the Remote Control..........10... - Page 4 Contents Download Log and Crash Files................25 Restart Your Studio USB Device................25 Factory Reset Your Studio USB Device ..............25 Managing the EagleEye Cube USB Device............ 26 Initialize the EagleEye Cube USB Device Using the Setup Wizard........26 View EagleEye Cube Information..................27 Update the EagleEye Cube Firmware................27 Update the EagleEye Cube Firmware from Your Local PC........28 EagleEye Cube User Settings...................28...
-
Page 5: Before You Begin
Topics: ▪ Related Documentation This document is for users who want to manage Polycom EagleEye Mini USB camera, Poly Studio USB video bar, and Poly EagleEye Cube USB camera. Related Documentation You can find all Polycom Companion documentation on the Documents & Software page on Poly Support. -
Page 6: Getting Started With The Polycom Companion
▪ Send Application Log Files The Polycom Companion enables you to update firmware and manage the Polycom EagleEye Mini USB camera, Poly Studio USB video bar, and Poly EagleEye Cube USB camera from a local PC or Mac. Note: These devices are hereinafter referred to as USB devices. -
Page 7: Send Application Log Files
2. (Windows) Click the icon in the top left corner of the application, then go to About. 3. (MAC) Click the Polycom Companion button beside the Apple icon in the top left corner of the application, then go to About. -
Page 8: Managing The Eagleeye Mini Usb Device
You can view the basic camera information through the Polycom Companion application. Procedure 1. Connect the EagleEye Mini USB device to your computer, then select the Polycom EagleEye Mini tile from your Polycom Companion. 2. The application shows the Status: ▪... - Page 9 Managing the EagleEye Mini USB Device Application shows the new version number after the update installs.
-
Page 10: Managing The Studio Usb Device
▪ Studio Admin Settings ▪ Studio Troubleshooting You can use Polycom Companion to show basic information, update the firmware, and configure the user and admin settings for the Studio USB device. Initialize the Studio USB Device Using the Setup Wizard When you start up the Studio USB device for the first time, or after you factory reset the system, the setup wizard leads you through the minimum configuration steps. -
Page 11: View Studio Information
You can view the basic information for your Poly Studio USB device through Polycom Companion. Procedure 1. Connect the Poly Studio USB device to your computer, then select the Poly Studio tile in Polycom Companion. 2. In the Status section, view the basic information for your Poly Studio USB device. -
Page 12: Update The Studio Usb Device And The Remote Control
Update the Studio USB Device and the Remote Control You can use the Polycom Companion application to update the firmware of the Studio USB device and the remote control. After the Studio USB device connects to your computer, the application checks for a new software version from the server automatically. -
Page 13: Studio User Settings
Caution: Don’t unplug the USB cable or power cable of the Poly Studio USB device while changing the its settings on the Polycom Companion. This may cause unexpected errors. Control the Device Camera You can enable speaker tracking and control the camera on the Studio USB device through Polycom Companion. Procedure 1. -
Page 14: Pair The Studio Usb Device To A Bluetooth Device
Managing the Studio USB Device Camera Setting Description Brightness Use the slider to adjust image brightness. Contrast Use the slider to adjust image contrast. Saturation Use the slider to adjust color saturation. Sharpness Use the slider to adjust video sharpness. White Balance Specifies how the camera compensates for variations in room light sources. -
Page 15: Configuring Audio Settings
3. Set the option Bass Boost to On. Configure Acoustic Fence You can enable and configure the Polycom Acoustic Fence feature to help define the audio fence around the system. Polycom Acoustic Fence technology creates a virtual audio fence that blocks sounds from outside the... -
Page 16: Studio Admin Settings
Log In to Studio Admin Settings You must enter the admin password to log in to the Admin Settings menu. Procedure 1. Connect the Studio USB device to your computer, then select the Poly Studio tile in Polycom Companion. 2. Select Admin Settings. -
Page 17: Configure General Settings
Managing the Studio USB Device Procedure 1. Connect the Studio USB device to your computer, then select the Poly Studio tile in Polycom Companion. 2. Go to Admin Settings > Password Settings. 3. Enter your Current Password. 4. Enter a new password in New Password and Confirm Password fields. - Page 18 You can configure the camera tracking speed of the Studio USB device. Procedure 1. Connect the Studio USB device to your computer, then select the Poly Studio tile in Polycom Companion. 2. Go to Admin Settings > Camera Tracking > Tracking Speed and select one of the following options: ▪...
- Page 19 You can adjust the camera movement only when you set the tracking mode to Frame Group or Frame Speaker. Procedure 1. Connect the Studio USB device to your computer, then select the Poly Studio tile in Polycom Companion. 2. Go to Admin Settings > Camera Tracking > Camera Movement and select one of the following options: ▪...
-
Page 20: Join A Wi-Fi Network
Managing the Studio USB Device Join a Wi-Fi Network You can connect the Poly Studio USB device to Wi-Fi through Polycom Companion. Procedure 1. Connect the Poly Studio USB device to your computer, then select the Poly Studio tile from your Polycom Companion. -
Page 21: Delete Known Wi-Fi Networks
6. Select Join to connect to the Wi-Fi network. Delete Known Wi-Fi Networks You can delete the known Wi-Fi networks from Polycom Companion. Procedure 1. Connect the Studio USB device to your computer, then select the Poly Studio tile from your Polycom Companion. -
Page 22: Configure Bluetooth Settings
Managing the Studio USB Device Configure Bluetooth Settings You can turn on the Bluetooth function of the Poly Studio USB device through Polycom Companion. Procedure 1. Connect the Poly Studio USB device to your computer, then select the Poly Studio tile from your Polycom Companion. -
Page 23: Certificate Signing Requests
Before you enable this setting, you must first install the CA certificates needed to validate your provisioning server certificates. Procedure 1. Connect the Studio USB device to your computer, then select the Poly Studio tile in Polycom Companion. 2. Go to Admin Settings > Certificates. - Page 24 Managing the Studio USB Device 3. Select Create. 4. Configure the following settings on the Create Signing Request page: Field Description Country Specifies the country where your organization is located. Note: For EagleEye Cube USB, input a two- character country code following 3166-1 alpha-2 rules.
- Page 25 View Installed Certificate Details You can view the content of an installed certificate. Procedure 1. Connect the Studio USB device to your computer, then select the Poly Studio tile in Polycom Companion. 2. Go to Admin Settings > Certificates. 3. Select the certificate you want to view in the Installed Certificates table.
-
Page 26: Import A Configuration File
When a certificate expires, its Expiration Date turns red in the Installed Certificates table. Procedure 1. Connect the Studio USB device to your computer, then select the Poly Studio tile in Polycom Companion. 2. Go to Admin Settings > Certificates. -
Page 27: Display Camera Information On-Screen
Note: Depending on the application using the Studio USB device, the resolution displayed on the video output doesn’t necessarily reflect the maximum resolution supported by the Studio USB device. Procedure 1. Connect the Studio USB device to your computer, then select the Poly Studio tile in Polycom Companion. 2. Go to Diagnostics > On-Screen Display. -
Page 28: Managing The Eagleeye Cube Usb Device
EagleEye Cube Admin Settings ▪ EagleEye Cube Troubleshooting You can use Polycom Companion to show basic information, update the firmware, and configure the user and admin settings for the EagleEye Cube USB device. Initialize the EagleEye Cube USB Device Using the... -
Page 29: View Eagleeye Cube Information
2. In the Status section, view the basic information for your Poly EagleEye Cube USB device. Update the EagleEye Cube Firmware You can use the Polycom Companion application to update the firmware on your EagleEye Cube USB device. After the EagleEye Cube USB device connects to your computer, the application checks for a new software version from the server automatically. -
Page 30: Update The Eagleeye Cube Firmware From Your Local Pc
2. Select the Firmware Update tab. 3. Select Update from Local File and choose the software build you want to use. The Polycom Companion application updates the EagleEye Cube USB device to the version that you select. EagleEye Cube User Settings You can configure EagleEye Cube settings and control the camera through Polycom Companion. -
Page 31: Save Camera Presets
EagleEye Cube presets. Procedure 1. Connect the EagleEye Cube USB device to your computer, then select the Poly EagleEye Cube tile in Polycom Companion. 2. Go to User Settings > Camera Control. 3. Position the camera using pan, tilt, and zoom. - Page 32 Managing the EagleEye Cube USB Device Room lighting can affect video quality. If the room is too bright or too dark for camera tracking to work properly, you can improve the video quality by adjusting certain settings in Polycom Companion. Procedure 1.
-
Page 33: Eagleeye Cube Admin Settings
You must enter the admin password to log in to the Admin Settings menu. Procedure 1. Connect the EagleEye Cube USB device to your computer, then select the Poly EagleEye Cube tile in Polycom Companion. 2. Select Admin Settings. 3. Enter the admin password in the Password field (the default password is Polycom12#$). -
Page 34: Configuring Camera Tracking
Procedure 1. Connect the EagleEye Cube USB device to your computer, then select the Poly EagleEye Cube tile in Polycom Companion. 2. Go to Admin Settings > Camera Tracking > Tracking Mode and select one of the following options: ▪... -
Page 35: Certificate Signing Requests
3. Select Save. Certificate Signing Requests The Polycom Companion application can generate certificate signing requests (CSRs) that are then sent to a certificate authority (CA) for official issuance. The CA is the trusted entity that issues, or signs, digital certificates for others. - Page 36 You can create a Certificate Signing Request (CSR) and send it to a CA to get a certificate to authenticate your USB device. You may need to authenticate your USB device while connecting to your provisioning server. Note: To create a Provisioning User Certificate, you must use the Polycom Companion application to generate the CSR. Procedure 1.
- Page 37 Note: A factory reset or factory restore deletes all installed certificates. Procedure 1. Connect the EagleEye Cube USB device to your computer, then select the Poly EagleEye Cube tile in Polycom Companion. 2. Go to Admin Settings > Certificates. 3. Select Install and choose one of the following options: ▪...
-
Page 38: Eagleeye Cube Network Settings
3. Select the certificate you want to delete in the Installed Certificates table. 4. At the bottom of the Certificate Details window, select Delete. EagleEye Cube Network Settings You can use the Polycom Companion application to configure an Ethernet connection for the EagleEye Cube USB device. Related Links... - Page 39 You can configure Ethernet 802.1x security settings. Procedure 1. Connect the EagleEye Cube USB device to your computer, then select the Poly EagleEye Cube tile in Polycom Companion. 2. Go to Admin Settings > Network Settings > Network and select Ethernet from the drop-down list.
- Page 40 Configure a Provisioning Server for the EagleEye Cube USB Device You can configure a provisioning server for the EagleEye Cube USB device through Polycom Companion. Make sure that the EagleEye Cube USB device connects to an Ethernet connection before connecting the EagleEye Cube USB device to a provisioning server.
-
Page 41: Export A Configuration File To Your Local System
Managing the EagleEye Cube USB Device Export a Configuration File to Your Local System You can export the EagleEye Cube configuration file from Polycom Companion to your local system. Procedure 1. Connect the EagleEye Cube USB device to your computer, then select the Poly EagleEye Cube tile in Polycom Companion. -
Page 42: Eagleeye Cube Troubleshooting
Procedure 1. Connect the EagleEye Cube USB device to your computer, then select the Poly EagleEye Cube tile from your Polycom Companion. 2. Go to Diagnostics > Audio Test. 3. Select Start Test and speak into the EagleEye Cube USB device. -
Page 43: Download Log Files
4. Select OK to confirm the factory reset. The system restarts automatically. Restart Your EagleEye Cube USB Device You can restart your EagleEye Cube USB device from Polycom Companion. Procedure 1. Connect the EagleEye Cube USB device to your computer, then select the Poly EagleEye Cube tile in Polycom Companion.
Need help?
Do you have a question about the EagleEye Mini and is the answer not in the manual?
Questions and answers