Advertisement
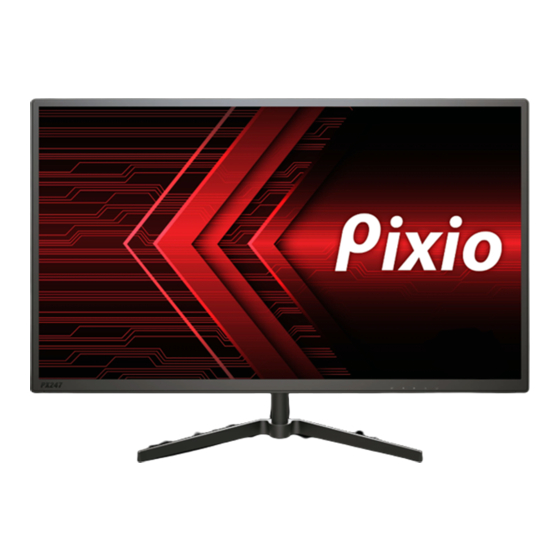
PX247
The color and the appearance may differ depending on the product, and the specifications are subject to change without prior
notice to improve the performance.
The contents of this manual are subject to change without notice to improve quality.
Copyright © 2019 Pixio USA Inc. I Pixio is a registered trademark of Pixio USA Inc. I All Rights Reserved.
Use or reproduction of this manual in parts or entirety without the authorization of Pixio USA Inc is prohibited.
All other trademarks are owned by their respective owners. Rev.1.01Copyright © 2019 Pixio USA Inc. I Pixio is a registered trademark of Pixio USA Inc.
All Rights Reserved.
Advertisement
Table of Contents

Summary of Contents for Pixio PX247
- Page 1 Use or reproduction of this manual in parts or entirety without the authorization of Pixio USA Inc is prohibited. All other trademarks are owned by their respective owners. Rev.1.01Copyright © 2019 Pixio USA Inc. I Pixio is a registered trademark of Pixio USA Inc.
- Page 2 24in 144Hz Gaming Monitor PX247 1912003004EMC-1...
- Page 4 RISK OF ELECTRIC SHOCK DO NOT OPEN THE MONITOR. OPENING MONITOR BACK COVER WILL VOID YOUR WARRANTY. This symbol indicates that high voltage is present inside. It is dangerous to make any kind of contact with any internal part of this product.
-
Page 5: Before Using The Product
Before Using the Product. Installation Space Ensure some space around the product for ventilation. An internal temperature rise may cause fire and damage the product. Make sure to allow some space. Do not install near heater or any other high temperature product or humidifier. Do not place the monitor near heat sources, such as radiators, and do not expose the monitor to direct sunlight for an extended period of time. - Page 6 Please do not try to take off the back panel to repair the monitor yourself. You may run the risk of shock and void the warranty as well. Contract Pixio directly for all RMA issues. Take note of elevation and temperature zone warnings on the adapters.
-
Page 7: Cleaning The Product
Cleaning the Product. Take the following steps when cleaning. 1 Power off the product and computer. 2 Disconnect the power cord from the product. Hold the power cable by the plug and do not touch the cable with wet hands. Otherwise, an electric shock may result. - Page 8 Notice.
- Page 9 Preperation. Product Includes:...
-
Page 10: Product Assembly
Product Assembly: 1. Mount the stand on the base in the pointed direction as 2. Place the assembled base as shown above and secure the shown above, secure with an M5*11mm screw. assembled base to the display with four M4*7mm screws. 3. -
Page 11: Dimension And Weight
Dimension & Weight. 550mm 8.5mm 75mm 296.6mm 130.1mm Net Weight: 3kg (6.6lb) l Gross Weight: 4.1kg (9.0lb) -
Page 12: Monitor Inputs
Monitor Inputs. DisplayPort 1.2, 144Hz, FreeSync HDMI HDMI 1.4, 120Hz, FreeSync AUDIO OUT *WARNING: Always use the appropriate power cord. -
Page 13: Control Panel
Control Panel. Menu Short Cut Open OSD Menu Preset Brightness Select Input HDMI Brightness Preset Brightness Select Input Main OSD Navigation Move to next menu Move up on the OSD Menu/Decrease value of selected item Move down on the OSD Menu/Increase value of selected item Return to previous menu Power ON/OFF... - Page 14 OSD Menu. Display Setup V1.0 Brightness: Adjust the display brightness value from 0 to 100. Brightness Contrast: Adjust the display contrast value from 0 to 100. Contrast Preset: Select Preset from Standard, Internet, Game, and Movie. Preset Standard DCR: Turn Dynamic Contrast Ration feature ON or OFF. Overdrive Overdrive: Select Overdrive from Off, Low, Middle, or High.
- Page 15 Image Setup V1.0 Aspect Ratio: Select Aspect Ratio from Wide and 4:3. Aspect Ratio Wide...
- Page 16 Color Setup V1.0 Color Temp.: Select Color Temp. from Normal, Warm, Cool, and User. Color Temp. Warm Red: Adjust the Red value from 0 to 100. Green Green: Adjust the Green value from 0 to 100. Blue Blue: Adjust the Blue value from 0 to 100. Low Blue Light Low Blue Light: Adjust the Low Blue Light value from 0 to 100.
- Page 17 OSD Setup V1.0 Language: Select language. Language English OSD H.Position: Adjust the OSD H.Position value from 0 to 100. OSD H.Position OSD V.Position: Adjust the OSD V.Position value from 0 to 100. OSD V.Position OSD Timer: Adjust the OSD Timer value from 5 to 120. OSD Timer Transparency: Adjust the Transparency value from 0 to 100.
- Page 18 Reset V1.0 Reset Reset OSD Setting.
- Page 19 MISC V1.0 Input Select: Select Input Select from HDMI and DP. Input Select Mute: Turn Mute On or Off. Mute Volume: Adjust the Volume value from 0 th 100. Volume FreeSync: Turn FreeSync On or Off. FreeSync MPRT MPRT: Turn MPRT On or Off. 1920x1080 FreeSync...
- Page 20 Adaptive-Sync. (AMD FreeSync or Nvidia G-Sync.) FreeSync technology is solution that eliminates screen tearing without all the usual lag and latency. This feature will eliminate screen tearing and lag during game play. Improve your gaming experience. The displayed FreeSync menu items on the monitor may vary, depending on the monitor model and compatibility with the AMD graphics card.
- Page 21 If you have any questions or comments, please contact us below. USA: cs@pixiogaming.com UK & EU: support@pixiogaming.co.uk For your warranty information, please visit: www.pixiogaming.com [USA] www.pixiogaming.co.uk [UK & EU]...


Need help?
Do you have a question about the PX247 and is the answer not in the manual?
Questions and answers