Table of Contents
Advertisement
Advertisement
Table of Contents

Related Manuals for Laser VAGO


Summary of Contents for Laser VAGO
- Page 1 RIGGING MANUAL...
- Page 2 This instruction manual is not a guide to sailing your craft and it should not be considered suitable for the task of learning to sail a boat. Please read the manual before rigging and sailing your Laser Vago. Before you go sailing: o Check you are wearing suitable clothing and safety equipment for the conditions and time of year.
- Page 3 Important information There are three hatches and one transom drain bung on the Vago, these must all be checked to ensure tightness and correct fitment prior to every time you sail: 1. Under the gennaker sock on the port side 2.
-
Page 4: Table Of Contents
Vago Rigging Instructions The Vago rigging instructions are a guide to rigging your boat. Due to production supplies certain parts may be different from those shown in description, colour, and specification. Performance Sailcraft Europe reserves the right to change specifications without prior notification. -
Page 5: Glossary
Glossary Bow: Front of the boat Stern: Back of the boat Fore: Forward Aft: Rearward Clew: Back lower corner of a sail Tack: Forward lower corner of sail Head: Top corner of sail Luff: Forward edge of the sail Foot: Bottom edge of the sail Leech: Rear edge of the sail Burgee: Wind direction indicator (usually a small flag) Batten: A thin stiffening strip in the sail to support the leech... -
Page 6: Useful Boat Terminology
Useful Boat Terminology Head Mast Battens Leech Gennaker Spreaders Foot Clew Boom Gennaker Pole Tack of sail... -
Page 7: Maintenance And Service
Do not leave the rig under tension when not sailing or during storage. Your Vago should only be used in conjunction with the Vago specific Performance Sailcraft gunwale hung launching trolley. The use of any other launching trolley may damage the hull and invalidate your warranty. -
Page 8: Sail Number Positioning
Sail Number Positioning It is advised to apply the sail numbers in a dry, clean and wind free environment. Standard Sail 1. Lay the sail on a flat surface starboard side up. 2. The numbers on the starboard side are always higher than the port side. -
Page 9: Rigging And Raising The Mast
Rigging And Raising The Mast 1. Unwrap the mast. 2. Ensure all the halyards are led to the base of the mast and each halyard rope end has a knot tied in it. 3. Insert blanking plugs, (tight fit to produce seal) a medium size flat blade screwdriver maybe required to fit. - Page 10 Tape all split rings, pins and the outboard end of the spreader extrusion. This will reduce chafe on the mainsail and prevent flailing sails/halyards becoming damaged. Self-amalgamating tape is best, but PVC electrical tape is an adequate alternative. Class Bracket Connection Primary Adjuster Laser Vago...
- Page 11 7. Raise the mast and position the mast heel on the mast step. The mast heel recess/slot should straddle the bolt in the mast step. (Note - This is a two person operation as someone will need to hold the mast upright while shrouds and forestay are connected - Ensure that there are no overhead power cables)
-
Page 12: Boom & Gnav
12. Attach the trapeze rings to hull mounted shock cords by feeding the elastic loop through the ring at the bottom of the pulley. (Note: Trapeze kit is an option on the standard rig but is included in the XD rig) 13. -
Page 13: Sails
4. Attach the gnav strut to the gnav anchor point using the drop nose pin. (Articulating toggle at the bottom with joint orientation as shown) 5. Thread the mainsheet through the centre of the block attached to the bridle rope and tie a half hitch stopper knot. - Page 14 3. Attach the head of the jib to the jib halyard furling swivel and tape up prior to hoisting. 4. Hoist jib by pulling the white halyard out of aft face of the mast then hook the jib halyard purchase system onto jib Halyard wire.
-
Page 15: Lower Shroud Tensioning
Furl the jib by pulling the furling line. The furling line cleat is positioned on the front beam port/left hand side. Lower shroud tensioning After tensioning the jib halyard re-adjust the lower shrouds so that they are just tight. It is essential that the mast is straight before the mainsail is hoisted (Fore and aft and side to side to side). - Page 16 4. Thread the halyard aft and through the gennaker halyard cleat on the starboard /right hand side of the front beam. 5. Pass the halyard to the port side of the boat and thread it through the block at the aft end of the gennaker sock.
- Page 17 c. Secure to the upper downhaul patch using a bowline. 10. Attach the centre of the gennaker sheet to the clew of the gennaker. 11. Pass the free ends of the gennaker sheets aft (One sheet either side of the jib luff) and through the gennaker sheet ratchet blocks attached to the shroud anchor points.
-
Page 18: Mainsail
Mainsail – XD and Standard sail 1. Remove the mainsail from the bag and unroll. 2. Ensure all battens are tight in their pockets and the Velcro locking mechanisms are positively engaged: Prodder a. To release the tension from a batten, slide the batten prodder (supplied) carefully between the two halves of the velcro locking mechanism and pull the... - Page 19 the “V” between the Gnav bar and the mast during hoisting) 6. Locate the head of the mainsail into the mast track. The GNAV bar must be on the starboard side of the sail with sail and halyard to the port side of the GNAV bar. 7.
-
Page 20: Single Line Reefing
1. Rig the single line reefing. (See next page for diagram) . Although single line reefing is only applicable to the standard Vago, you will find a pocket at the forward end of the foot of both Std & XD mainsails (port side) to tidy the loose end of the single line reefing system. - Page 21 Single Line Reefing Instructions Aft/Rear Forward Boom Reefing line Routing Outhaul Lines exit boom ends (Port) from Starbo rd sheaves Place forward reefing line in the Port s Secure aft reefing line boom e Reefing line around the boom using a notch.
-
Page 22: Rudder
If the boat is to be used for institutional usage, it may be advantageous to rig up an additional safety leash line as shown. (Two miscellaneous lengths of short rope are suppl in the storage pocket of your Vago) Your Vago Is Now Ready Fo Launching. -
Page 23: Launching & Basic Safety On The Water
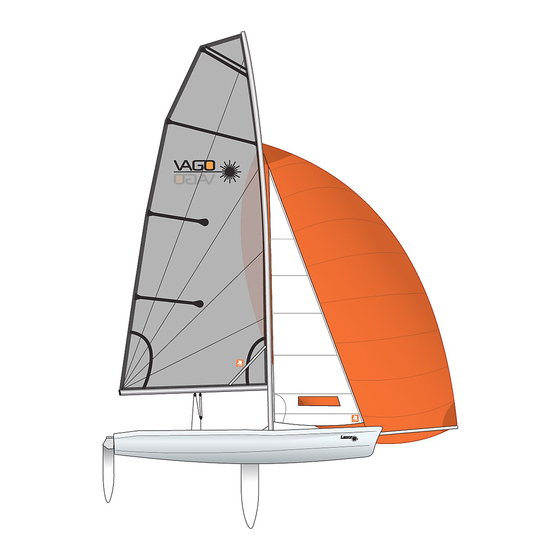
Note: The picture shows the complete boat with the gennaker raised; this would normally be stowed for launching. aunching And Basic Safety On The Water efore You Go Sailing: Check you are wearing suitable clothing and safety equipment for the conditions and time of year. - Page 24 WARNING: When wearing a trapeze harness, take particular care when climbing on to the centreboard and back in to the boat after capsize. (As the trapeze harness hook coul easily damage the various surfaces) Enjoy Your Vago Sailing!
Need help?
Do you have a question about the VAGO and is the answer not in the manual?
Questions and answers