
Related Manuals for LEYBOLD PENNINGVAC PTR 90 N


Summary of Contents for LEYBOLD PENNINGVAC PTR 90 N
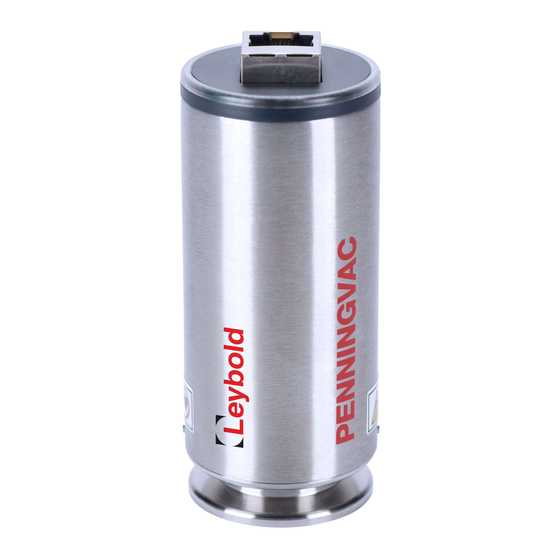
- Page 1 PENNINGVAC Transmitter PTR 90 N Operating Manual 300544657_002_C1 Part Numbers: 230070V02 230085V02 230071V02 230072V02 230088V02 230089V02 300544652_002_C1 - 11/2016 - © Leybold...
-
Page 2: Table Of Contents
Functions LED-ring/LED status indicator Vacuum-zero/full-scale adjustment and setpoint adjustments User switch adjustments Integrated touch display FAQ (Frequently Asked Questions) Troubleshooting Maintenance Cold cathode maintenance Declaration of Contamination Declaration of Conformity Notes Sales and Service 300544652_002_C1 - 11/2016 - © Leybold... -
Page 3: Safety Information
Service and Repair. Do not substitute parts or modify instrument other than described in chapter 9. Do not install substituted parts or perform any unauthorized modification to the instrument. Return the instrument to an Leybold Calibration and Service Center for service and repair to ensure all of the safety features are maintained. - Page 4 Refer to electrical connections description in chapter 4 of this manual. Caution Caution: dirt sensitive area Touching the product or parts thereof with one's bare hands increases the desorption rate. Always wear clean, lint-free gloves and use clean tools when working in this area. 300544652_002_C1 - 11/2016 - © Leybold...
-
Page 5: Liability And Warranty
Liability and Warranty Leybold assumes no liability and the warranty becomes null and void if the end-user or third parties disregard the information in this document use the product in a non-conforming manner make any kind of interventions (modifications, alterations etc.) on the product ... -
Page 6: Unpacking
1 pcs. German short form manual (P/N: 300544671_001) 1 pcs. Product Inspection and Test Report 1 pcs. Pin for adjusting settings via button (only for P/N: 230085V02, 230071V02, 230072V02, 230088V02). If any items are missing, please contact Leybold. 300544652_002_C1 - 11/2016 - © Leybold... -
Page 7: Description
For the benefit of the environment, at the end of life of the transmitter, it should not be disposed in the normal unsorted waste stream. It should be deposited at an appropriate collection point or facility to enable recovery or recycling. 300544652_002_C1 - 11/2016 - © Leybold... -
Page 8: Technical Data
< 5∙10 mbar∙l/s (1) Accuracy and repeatability are typical values measured in Nitrogen atmosphere after zero adjustment at ambient temperature. (2) For the full list of all materials exposed to process gases please contact LEYBOLD. 300544652_002_C1 - 11/2016 - © Leybold... -
Page 9: Dimensions
Dimensions [mm] P/N: 230070V02, 230071V02, 230072V02 P/N: 230088V02 300544652_002_C1 - 11/2016 - © Leybold... - Page 10 P/N: 230085V02 P/N: 230089V02 Flanges KF 25 KF 40 CF 40 300544652_002_C1 - 11/2016 - © Leybold...
-
Page 11: Accessories And Replacement Part Numbers
* Part number EK16291V02 contains: ** Part number 20028711V02 contains: 1) Clip ring (1) 1) Anode module (4) 2) Front cathode plate (2) 2) Three screws 3) Rear cathode pate (3) 4) One screw 300544652_002_C1 - 11/2016 - © Leybold... -
Page 12: Transmitter Installation (Mechanical)
The transmitters have an active and individual sensor temperature compensation circuit that ensures accurate measurement in a wide temperature range. For best measuring performance avoid large temperature gradients and direct cooling like air-condition air stream or direct heating like a pump exhaust stream. 300544652_002_C1 - 11/2016 - © Leybold... -
Page 13: Vacuum Connections
The standard PTR 90 N PENNINGVAC transmitters are internally sealed with elastomer FPM sealing for use down to 1×10 mbar. If used in UHV applications the out gassing rate of FPM can be too high. 300544652_002_C1 - 11/2016 - © Leybold... -
Page 14: Transmitter Installation (Electrical)
The longer the cable, the worse the error will be. Do not connect the setpoint relay terminals to the analog output. Correct connection of analog output to floating input Incorrect connection of analog output to non-floating input 300544652_002_C1 - 11/2016 - © Leybold... -
Page 15: Input/Output Wiring
Relay 2, Common Power return - (GND) Relay 2, Normally Open Analog Output + Relay 3, Normally Closed Analog Output - Relay 3, Common Relay 1, Normally Open Relay 3, Normally Open Relay 1, Common 300544652_002_C1 - 11/2016 - © Leybold... - Page 16 Not Connected Not Connected Not Connected Power + (9-30 VDC) Not Connected Power return - (GND) Not Connected Analog Output + Not Connected Analog Output - Not Connected Not Connected Chassis GND Not Connected 300544652_002_C1 - 11/2016 - © Leybold...
-
Page 17: 4.2 Setpoint Relays
The NC contact will always be closed in case of power failure. Please see the Leybold vacuum transmitter Communication Protocol 300544663 (RS232). Critical When using the setpoint relay to control process equipment always take appropriate precautions to prevent system damage in case of transmitter power failure. -
Page 18: Operations
Sensor defect mode or in case of power failure. Caution When designing pressure data collecting software and controlling loop make sure that the software does not interpret a communication error as a valid pressure value. 300544652_002_C1 - 11/2016 - © Leybold... -
Page 19: Cold Cathode Ignition
Typical ignition time ≈1 Second 1.00E-4 mbar ≈10 Seconds 1.00E-6 mbar ≤5.00E-7 mbar >10 Seconds The combined analog output provides the MEMS Pirani reading until ignition has occurred and valid Cold Cathode measurements are present. 300544652_002_C1 - 11/2016 - © Leybold... -
Page 20: 5.3 Analog Output
6,00E-01 6,667 60,00 7,867 7,00E-07 3,107 7,00E-05 4,307 7,00E-03 5,507 7,00E-01 6,707 70,00 7,907 8,00E-07 3,142 8,00E-05 4,342 8,00E-03 5,542 8,00E-01 6,742 80,00 7,942 9,00E-07 3,173 9,00E-05 4,373 9,00E-03 5,573 9,00E-01 6,773 90,00 7,973 300544652_002_C1 - 11/2016 - © Leybold... - Page 21 Due to curve form and limits, some of the alternative analog outputs will cause loss of measuring range and accuracy. For best performance use the standard Leybold analog output. Change of analog output setup does not interfere on digital reading.
-
Page 22: Sensor Gas Dependence
Calibration factor C Valid range (mbar] 3∙10 to 0.3 mbar 1.57 to 1 mbar 0.84 3∙10 to 0.2 mbar Air, O , CO, N 3∙10 to 0.3 mbar These conversion factors are average values. 300544652_002_C1 - 11/2016 - © Leybold... -
Page 23: Functions
Relates to configuration of Vacuum-zero/Full-scale adjustment see chapter 6.2 The LED status indicator for transmitter versions with EtherCAT digital communication interface (P/N: 230089V02) is compliant with the EtherCAT standard, described in the Communication Protocol 300544664. 300544652_002_C1 - 11/2016 - © Leybold... -
Page 24: Vacuum-Zero/Full-Scale Adjustment And Setpoint Adjustments
600 to 1000 mbar. Note that if the adjustment is performed at a true pressure different from 1000 mbar, it can cause measurement deviations in the upper part of the measuring range. 300544652_002_C1 - 11/2016 - © Leybold... - Page 25 If the pressure measured by the transmitter is higher than approximately 1.3x10 mbar, then the zero adjustment cannot be executed. If the zero adjustment failed, the LED-ring/LED will flash red three times. 300544652_002_C1 - 11/2016 - © Leybold...
-
Page 26: User Switch Adjustments
EtherCAT) for further details. The color of the LED-ring/LED will indicate the status of the transmitter during user switch adjustments: Transmitter status LED-ring/LED color Solid green Normal operation Pulsing between red and green Vacuum-zero/Full-scale adjustment 300544652_002_C1 - 11/2016 - © Leybold... - Page 27 Press button >1 second to perform Zero/FS adjustment Press button <1 second to LED-ring/LED is off go back to Normal Operation Release button LED-ring/LED flashes green 10 LED-ring/LED flashes red 10 times: times: Zero/FS adjustment succeeded Zero/FS adjustment failed 300544652_002_C1 - 11/2016 - © Leybold...
-
Page 28: Integrated Touch Display
For transmitter versions with integrated touch display (P/N: 230085V2) it is possible to see information about setpoints, sensors, model, and measurements unit. It is also possible to set up a pressure threshold alarm. All of this is accessible by the following menu structure: 300544652_002_C1 - 11/2016 - © Leybold... - Page 29 To cancel, press left arrow until a red arrow appears. Press again to proceed. Set Alarm (2/2) When the alarm is set, the operator selects whether the alarm triggers above or below the value. 300544652_002_C1 - 11/2016 - © Leybold...
-
Page 30: Faq (Frequently Asked Questions)
A: Yes – the analog output can be configured to any of the sensor signals (for RS232 versions only). Refer to analog output set up. Digital output Q: How fast can I request pressure measurements via the digital interface? A: 10 times per second is the fastest recommended pressure request frequency. 300544652_002_C1 - 11/2016 - © Leybold... - Page 31 Q: Reverse voltage has been connected to power supply input. Is the transmitter damaged? A: Not likely – the transmitter power supply circuit has reverse voltage and over voltage protection, however, Leybold cannot guarantee that the transmitter will not be damaged. Q: The status LED is constantly illuminating red? A: The red status indicates a defect MEMS Pirani sensor element most likely damaged by corrosion or contamination.
-
Page 32: Troubleshooting
Setpoint direction is different than the user expects. Check electrical connection. Check part number to see if transmitter has setpoint relays. No analog output Power supply turned off. Check electrical connections. Status LED illuminating red Sensor element defect. 300544652_002_C1 - 11/2016 - © Leybold... -
Page 33: Maintenance
Contaminated parts can be cleaned by mechanical polishing or ultrasonic cleaned followed by alcohol degreasing (e.g. Isopropanol). Make sure that all parts are clean and remove any discoloring of the stainless steel and titanium parts. Alternatively the anode module or screens can be replaced with new parts. 300544652_002_C1 - 11/2016 - © Leybold... -
Page 34: Declaration Of Contamination
All dispatch instructions laid down in the manual must be followed e.g.: • Drain all service fluids • Remove filter elements • Seal all openings airtight • Pack / handle appropriately • Attach the declaration of contamination outside of the packaging 300544652_002_C1 - 11/2016 - © Leybold... - Page 35 300544652_002_C1 - 11/2016 - © Leybold...
-
Page 36: Declaration Of Conformity
Declaration of Conformity 300544657_002 - 10/2015 - © Leybold... -
Page 37: Notes
Notes 300544657_002 - 10/2015 - © Leybold... -
Page 38: Sales And Service
Sales and Service 300544657_002 - 10/2015 - © Leybold...
Need help?
Do you have a question about the PENNINGVAC PTR 90 N and is the answer not in the manual?
Questions and answers