
Related Manuals for ADInstruments Human NIBP Nano


Summary of Contents for ADInstruments Human NIBP Nano
- Page 1 Human NIBP Nano Non-invasive hemodynamics Quick Start Get set up and start recording...
- Page 2 6479-D...
- Page 3 Overview This guide will help you to quickly set up the Human NIBP Nano System. For detailed installation and set up instructions and troubleshooting information, please refer to the Owner’s Guide (also available at www.adinstruments.com/support/manuals). The Human NIBP Nano System contains the following: •...
-
Page 4: What's In The Box
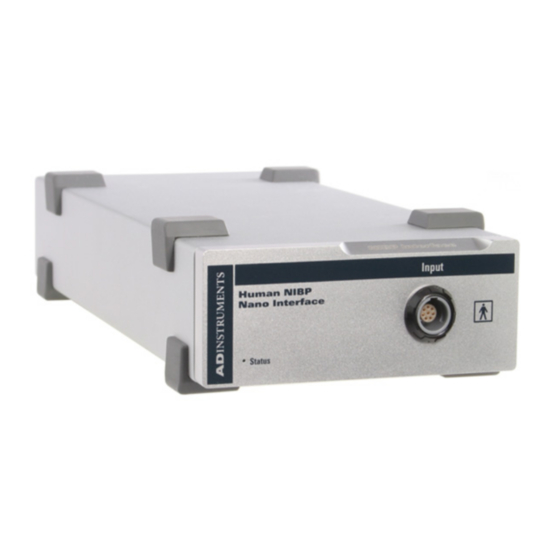
Redel Connector input • The Human NIBP Nano Interface provides power and USB connectivity to the Wrist Unit. It has a Redel input at the front for connection to the wrist unit and an IEC power input and USB type B input at the rear. It is supplied with a USB... -
Page 5: Unpack The Box
Human NIBP Nano Interface. Power cable Power on the hardware Turn on the Human NIBP Nano Interface using the power switch on the rear panel. Power switch Power 100 - 240 VAC, 50/60 Hz, 20 VA Made in Australia by ADInstruments Pty Ltd. -
Page 6: Install Software
2. Install soft ware The Human NIBP Nano System consists of the following soft ware components: LabChart Pro® Place the LabChart Pro CD in the CD drive of GLP Client your computer. Alternatively you can download the latest version of LabChart from here (https:// www.adinstruments.com/support/downloads/... - Page 7 Device Discovery On start-up, LabChart performs a Device Discovery process. It should automatically detect the Human NIBP Nano device which will be indicated by a green tick mark. It is recommended that the Human NIBP Nano Interface is powered on BEFORE connecting the Human NIBP Wrist Unit to the Interface.
- Page 8 Warning! Finger cuff s will be damaged if allowed to inflate without a finger (or another, appropriately sized object) inside them. Proper finger cuff application is critical for success with the Human NIBP Nano. Select the proper finger cuff size. If in doubt, choose the smaller finger size cuff .
- Page 9 Instructions Zero the HCU Perform the height correction procedure before attaching the HCU Unit to the volunteer. Hold the HCU transducer and the reference point at the same level. In LabChart, click Setup > NIBP HCU and test... In the Human NIBP Settings dialog, click Zero. Once the HCU has successfully been zeroed a confirmation message is displayed.
- Page 10 5. Choose Human NIBP settings In LabChart, click Setup > NIBP Settings... to open the Settings dialog. The default options are a good starting point. 1. Auto-calibration (or AutoCal) – is an ongoing calibration, which greatly improves the accuracy measurements. •...
-
Page 11: Start A Measurement
6. Start a measurement To start a blood pressure measurement simply click Start in LabChart. Before you start a measurement... Check that finger cuff (s) are applied and that these are not easy to rotate. Make sure the HCU has been zeroed and is attached to the volunteer. Ensure you have selected your settings for the finger blood pressure measurement in the NIBP Settings dialog. -
Page 12: Stop A Measurement
7. Stop a measurement To stop a measurement, simply click Stop in LabChart. Once you have stopped a measurement, it is recommended to: 1. Disconnect the finger cuff air hoses from the Wrist Unit – this removes residual air pressure from the finger cuff s and protects them from accidental inflation and damage. -
Page 13: Troubleshooting
8. Troubleshooting If the Human NIBP Nano is returning error messages or failing to start a measurement, it is recommended to: • Disconnect the finger cuff air hoses from the Wrist Unit. • Shut down LabChart. • Turn the Human NIBP Nano Interface off and back on. -
Page 14: Further Resources
All products supplied by ADInstruments are intended for use in teaching and research applications and environments only. ADInstruments products are NOT intended to be used as medical devices or in medical environments. That is, no product supplied by ADInstruments is intended to be used to diagnose, treat or monitor a subject. - Page 15 Products supplied by ADInstruments are intended for use in teaching and research applications and environments. Products supplied by ADInstruments are NOT intended to be used as medical devices or in medical environments. That is, no product supplied by ADInstruments is intended to be used to diagnose, treat, or monitor a subject.
- Page 16 defects in material and workmanship for three (3) years from their date of purchase. ADI also warrants that ADI Specialized Data Recorders and Instruments shall be free of defects in material and workmanship for one (1) year from their date of purchase. If there is such a defect, as Purchaser’s sole remedy hereunder, ADI will repair or replace the equipment as appropriate, and the duration of the warranty shall be extended by the length of time needed for repair or replacement.
- Page 17 7. Instruments: Blood FlowMeter, Gas Analyzers, NIBP System (excluding transducers), STH Pump Controller. Third Party Products (Including Transducers) Products not manufactured by ADI are covered by the manufacturer’s warranty. Accessories and Consumables Accessories and Consumables are not covered by any type of warranty. General Limitations ADI products are produced to high standards, and should perform as described in the supplied documentation.
- Page 18 Copyright © ADInstruments NZ Ltd, 2020. All rights reserved. PowerLab, LabChart and ADInstruments are registered trademarks of ADInstruments NZ Ltd. Windows 8, Windows 7, Windows Vista and .NET Framework are trademarks of Microsoft Corporation. Apple, the Apple logo, MacOS, and Macintosh are trademarks of Apple Computer Inc.
- Page 19 6479-D...
- Page 20 adinstruments.com...
Need help?
Do you have a question about the Human NIBP Nano and is the answer not in the manual?
Questions and answers