Table of Contents
Advertisement
Quick Links
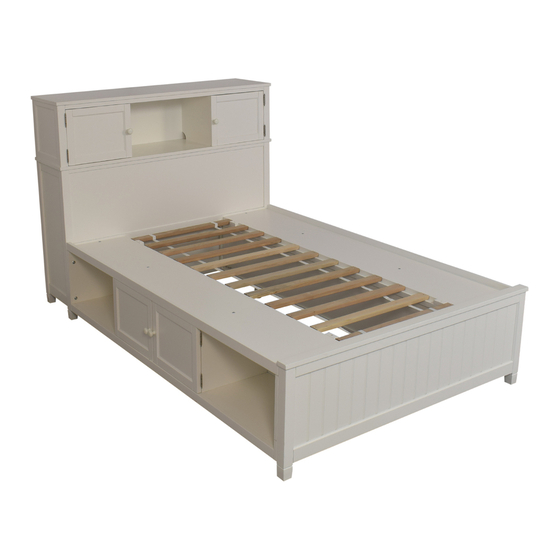
Beadboard Bed
Pre-assembly:
•
Please read all instructions before beginning assembly.
•
Two-adult assembly is recommended.
•
Save all packing materials until assembly is complete to avoid accidentally discarding smaller parts or
hardware.
•
An extra wooden knob is included for your convenience.
Part Included:
A – Headboard – 1pc
D – Center platforms – 4pcs
Hardware Included:
F - Wooden knob bolts (5/32" x 25mm)–6pcs G - Wooden knobs-6pcs H - Hex bolts(5/16" x 1-1/4")-8pcs
B – Siderail storages (L&R) – 2 pcs
E – Adjustable shelves – 4pcs
www.pbteen.com
C – Footboard – 1 pc
Advertisement
Table of Contents

Related Manuals for PB TEEN Beadboard Bed


Summary of Contents for PB TEEN Beadboard Bed
- Page 1 Beadboard Bed Pre-assembly: • Please read all instructions before beginning assembly. • Two-adult assembly is recommended. • Save all packing materials until assembly is complete to avoid accidentally discarding smaller parts or hardware. • An extra wooden knob is included for your convenience.
- Page 2 I – Allen key J – Phillips head screws K – Shelf pegs (4mm x 74 x 29) – 1pc (8 x 30mm) – 24 pcs (5 x 13 x 16 x1.5mm) – 16pcs L – Flat washers(5/16” x 15 x2mm)- 8pcs M –...
- Page 3 4. Continue attaching Wooden Knobs (G) to doors of both Siderail Storages (B), the same as Headboard (A). Move the Siderail Storages (B) to the Headboard (A) and Footboard (C), as shown below. Insert Wooden dowels (N) into the two middle pre-drilled holes on each end of the Siderail Storage (B) and attach the Siderail Storages (B) to the Headboard (A) and Footboard (C) by inserting the exposed part of the Wooden dowels (N) into the corresponding pre-drilled holes in the legs of Headboard (A) and Footboard (C).
- Page 4 7. Lay the 4 Center Platform pieces (D) in place over the lips of both Siderail Storages (B). Insert Phillips Head Screws (J) and fasten by using the Phillips Head Screwdriver, as shown. 8. Hardware should be checked periodically for tightness. Care Instructions: •...
- Page 5 Beadboard Bed Hutch Pre-assembly: • Please read all instructions before starting to assemble. • Two-person is recommended during assembly.. • Save all packing materials until assembly is complete to avoid accidentally discarding smaller parts or hardware. Hardware Included: A – (2) Mending plates B –...
- Page 6 11. Using the Mending Plates (A) and Phillips Head Screws (B), affix the Hutch to the Bed Headboard. Align the Mending plates (A) over the pre-drilled holes in the back of the Headboard and the back of the Hutch. Insert the Phillips Head Screws (B) through the Mending Plate (A) into the Hutch and Headboard’s pre-drilled holes and tighten using a Phillips Head Screwdriver.
Need help?
Do you have a question about the Beadboard Bed and is the answer not in the manual?
Questions and answers