Samsung DV431AEP User Manual
Hide thumbs
Also See for DV431AEP:
- Installation information (4 pages) ,
- User manual (80 pages) ,
- User manual (80 pages)
Table of Contents
Advertisement
This manual is made with 100% recycled paper.
DV431AEP-03021E_EN_v7.indd 1
DV431AEP-03021E_EN_v7.indd 1
Electric Dryer
user manual
imagine
the possibilities
Thank you for purchasing this Samsung product.
To receive more complete service or accessory
please register your product at or
parts,
contact
www.samsung.com/register
DV431AE*
11/25/2011 12:56:58 AM
11/25/2011 12:56:58 AM
Advertisement
Table of Contents

Related Manuals for Samsung DV431AEP


Summary of Contents for Samsung DV431AEP
-
Page 1: Electric Dryer
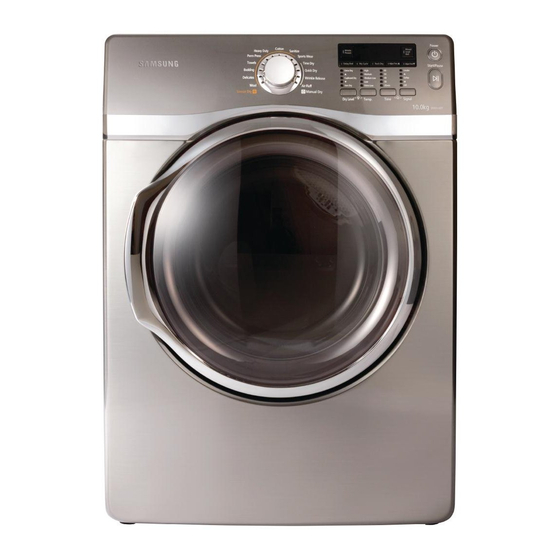
Electric Dryer This manual is made with 100% recycled paper. imagine Thank you for purchasing this Samsung product. To receive more complete service or accessory parts, contact www.samsung.com/register DV431AEP-03021E_EN_v7.indd 1 DV431AEP-03021E_EN_v7.indd 1 user manual the possibilities please register your product at or... -
Page 2: Energy Saving
Simply turn the Jog Dial to select one of the 13 automatic drying cycles, including cotton, heavy duty and towels, or let the Fuzzy Logic Control measure the degree of dampness and automatically set the drying time. Precision drying has never been easier than with Samsung. 4. Energy Saving Energy efficiency has been optimized to minimize unnecessary power consumption. -
Page 3: Safety Instructions
Congratulations on your new Samsung Dryer. This manual contains valuable information on the installation, use, and care of your appliance. Please take the time to read this manual to take full advantage of your dryer’s many benefits and features. - Page 4 safety instructions This appliance is not intended for use by persons (including children) with reduced physical, sensory or mental capabilities, or lack of experience and knowledge, unless they have been given supervision or WARNING instruction concerning use of the appliance by a person responsible for their safety. Children should be supervised to ensure that they do not play with the appliance.
- Page 5 SEVERE WARNING SIGNS FOR INSTALLATION WARNING The installation of this appliance must be performed by a qualified technician or service company. - Failure to do so may result in electric shock, fire, an explosion, problems with the product, or injury. Keep all packaging materials well out of the reach of children, as packaging materials can be dangerous to children.
- Page 6 The use for business purposes qualifies as product misuse. In this case, the product will not be covered by the standard warranty provided by Samsung and no responsibility can be attributed to Samsung for malfunctions or damages resulting from such misuse.
- Page 7 CAUTION SIGNS FOR USING CAUTION Do not stand on top of the appliance or place objects (such as laundry, lighted candles, lighted cigarettes, dishes, chemicals, metal objects, etc.) on the appliance. - This may result in electric shock, fire, problems with the product, or injury. Do not touch the glass door and inside of the drum during or just after drying as it is hot.
-
Page 8: Table Of Contents
contents INSTALLING YOUR DRYER OPERATING INSTRUCTIONS, TIPS CARE AND CLEANING SPECIAL LAUNDRY TIPS TROUBLESHOOTING 8_ contents DV431AEP-03021E_EN_v7.indd Sec3:8 DV431AEP-03021E_EN_v7.indd Sec3:8 Tools needed for installation See dryer exterior Ducting requirements Important to installer Location considerations Alcove or closet installation Mobile home installation Exhausting Electrical requirements Grounding... -
Page 9: Installing Your Dryer
Unpack your Dryer and inspect it for shipping damage. Make sure you have received all of the items shown below. If your Dryer was damaged during shipping, or you do not have all of the items, contact 0330 SAMSUNG (7267864) To prevent personal injury or strain, wear protective gloves whenever lifting or carrying the unit. -
Page 10: Ducting Requirements
installing your dryer DUCTING REQUIREMENTS • Use a 4-inch (10.2 cm) diameter rigid aluminum or rigid galvanized steel duct. • Do not use a smaller duct. • Ducts larger than 4 inches (10.2 cm) in diameter can result in increased lint accumulation. Lint accumulation should be cleaned regularly. -
Page 11: Important To Installer
If the new dryer is installed into an existing exhaust system you must make sure: • The exhaust system meets all local, state, and national codes. • That a flexible plastic duct is not used. • To Inspect and clean all lint buildup from inside the existing duct. •... -
Page 12: Alcove Or Closet Installation
installing your dryer ALCOVE OR CLOSET INSTALLATION MINIMUM CLEARANCES FOR CLOSET AND ALCOVE INSTALLATIONS: Sides – 1 in / 25 mm Rear – 5 in / 127 mm If the washer and dryer are installed together, the closet front must have at least a 72 in² (465 cm²) unobstructed air opening. - Page 13 With optional pedestal base or stacking kit Required Dimensions for Installation With Pedestal 49.6 in (126 cm) to clear open door 48 in.² * (310 cm²) 24 in.² * (155 cm²) Required Dimensions for Installation With Stacking Kit 6 in. * (15.2 cm) 78 in.
-
Page 14: Mobile Home Installation
A minimum of 72 in² (465 cm²) of unobstructed space is required. Call 0330 SAMSUNG (7267864) for information on purchasing the Floor Anchoring Kit as an accessory. All mobile home installations must be exhausted to the outside with the exhaust duct termination securely fastened to the mobile home structure, using materials that will not support combustion. -
Page 15: Replacement Parts And Accessories
REPLACEMENT PARTS AND ACCESSORIES If your dryer requires replacement parts or accessories, contact the dealer from whom you purchased your dryer or the SAMSUNG customer care center at 0330 SAMSUNG (7267864). INSTALLATION Gather the required tools and parts before starting the installation. -
Page 16: Final Installation Checklist
installing your dryer 4. Review the Exhausting section before installing the exhaust system. Install the ductwork from your dryer to the exhaust hood. The crimped end of the duct sections must point away from your dryer. DO NOT use sheet metal screws when assembling ducting. These joints should be taped. Never use plastic flexible exhaust material. -
Page 17: Dryer Exhaust Tips
DRYER EXHAUST TIPS Plastic or non-metal flexible duct presents a potential fire hazard. WARNING 1. Make sure your dryer is installed properly so it exhausts air easily. 2. Use a 4” diameter rigid metal duct. Tape all joints, including at the dryer. Never use lint-trapping screws. -
Page 18: Door Reversal
installing your dryer DOOR REVERSAL 1. Cut off the power supply. 2. Remove two door hinge screws. 3. Lift the door and remove 4. Remove a screw on the Frame Front 5. Remove the two screws on the opposite side of the door hinge. -
Page 19: Operating Instructions, Tips
operating instructions, tips OVERVIEW OF THE CONTROL PANEL To select a cycle, rotate the Cycle Selector dial to the desired cycle. The indicator light by the cycle name will illuminate. The Sports Wear,Sanitize, Cotton, Heavy duty, Perm Press, Towels, Bedding, Delicates and wool cycles are Sensor Dry cycles. - Page 20 operating instructions, tips The display window shows the estimated time remaining in the cycle after the Start/Pause button is pressed. The estimated time remaining may fluctuate as the cycle progresses. ( The Drying light will illuminate and remain lit until the cycle is complete. ( When your dryer is in the cool-down phase, the Cooling light will illuminate.
- Page 21 To select the correct temperature for the load, press the Temp button. An indicator light will illuminate next to the desired temperature. Press the button repeatedly to scroll through the settings. High – For sturdy cottons or those labeled Tumble Dry. Medium –...
-
Page 22: Child Lock
operating instructions, tips CHILD LOCK A function to prevent children from playing with your dryer. Setting/Releasing If you want to set or release the Child Lock, press both the Time and Signal buttons simultaneously for 3 seconds. How to Set: 1. -
Page 23: Rack Dry
RACK DRY Installing the drying rack 1. Open the dryer door. 2. Position drying rack in tumbler, placing the front lip of the drying rack on the top of the lint filter. 3. Place the rear legs in the two recessed areas of the dryer’s back wall then push down the middle of the drying rack to fix. -
Page 24: Clean The Lint Filter
operating instructions, tips CLEAN THE LINT FILTER • After each load. • To shorten drying time. • To operate more energy efficiently. Do not operate your dryer without the lint filter in place. LOAD THE DRYER PROPERLY • Place only one washload in your dryer at a time. •... -
Page 25: Care And Cleaning
care and cleaning CONTROL PANEL Clean with a soft, damp cloth. Do not use abrasive substances. Do not spray cleaners directly on the panel. The control panel finish may be damaged by some laundry pre-treatment soil and stain remover products. Apply such products away from your dryer and wipe up any spills or overspray immediately. -
Page 26: Special Laundry Tips
special laundry tips SPECIAL LAUNDRY TIPS Please follow the care label or manufacturer’s instructions for drying special items. If care label instructions are not available, use the following information as a guide. Bedspreads & Comforters Blankets Curtains & Draperies Cloth Diapers Down–filled Items (jackets, sleeping bags, comforters, etc.) -
Page 27: Troubleshooting
troubleshooting CHECK THESE POINTS IF YOUR DRYER… PROBLEM Doesn’t run. Doesn’t heat. Doesn’t dry. Is noisy. Dries unevenly. Has an odour. Shuts off before load is dry DV431AEP-03021E_EN_v7.indd Sec6:27 DV431AEP-03021E_EN_v7.indd Sec6:27 SOLUTION • Make sure the door is latched shut. •... -
Page 28: Information Codes
Unit detects a button is being pressed for over 30secs or button is stuck Invalid power source Frequency Electronic Control Problem (Communication Error) For any codes not listed above, call 0330 SAMSUNG (7267864). 28_ troubleshooting DV431AEP-03021E_EN_v7.indd Sec6:28 DV431AEP-03021E_EN_v7.indd Sec6:28 SOLUTION •... -
Page 29: Appendix
appendix FABRIC CARE CHART The following symbols provide garment care direction. The Clothing care labels include symbols for washing, bleaching, drying and ironing, or dry cleaning when necessary. The use of symbols ensures consistency among garment manufacturers of domestic and imported items. Follow care label directions to maximize garment life and reduce laundering problems. -
Page 30: Protecting The Environment
appendix PROTECTING THE ENVIRONMENT This appliance is manufactured from recyclable materials. If you decide to dispose of this appliance, please observe local waste disposal regulations. Cut off the power cord so that the appliance cannot be connected to a power source. Remove the door so that animals and small children cannot get trapped inside the appliance. -
Page 31: Cycle Chart
CYCLE CHART Cycle Extra Cotton Heavy Duty Perm Press Bedding Sensor Towels Sanitize Delicates Wool Sports wear Air Fluff Quick Manual Time dry Wrinkle Release ... - Page 32 QUESTIONS OR COMMENTS? Country EIRE DV431AEP-03021E_EN_v7.indd 32 DV431AEP-03021E_EN_v7.indd 32 CALL 0330 SAMSUNG (7267864) 0818 717100 OR VISIT US ONLINE AT www.samsung.com www.samsung.com Code No. DC68-03021E_EN 11/25/2011 12:57:19 AM 11/25/2011 12:57:19 AM...