Samsung BD-C6500 User Manual
Hide thumbs
Also See for BD-C6500:
- User manual (86 pages) ,
- Available apps (16 pages) ,
- Upgrade manual (1 page)

Subscribe to Our Youtube Channel
Related Manuals for Samsung BD-C6500


Summary of Contents for Samsung BD-C6500
- Page 1 BD-C6500 Blu-ray Disc Player user manual imagine the possibilities Thank you for purchasing this Samsung product. To receive a more complete service, please register your product at www.samsung.com/register...
-
Page 2: Key Features
Key features Blu-ray Disc Features Blu-ray Discs support the highest quality HD video available in the industry - Large capacity means no compromise on video quality. Furthermore, a Blu-ray Disc has the same familiar size and look as a DVD. The following Blu-ray Disc features are disc dependant and will vary. -
Page 3: Safety Information
Safety Information TO REDUCE THE RISK OF ELECTRIC SHOCK, DO NOT REMOVE THE COVER (OR BACK). NO USER-SERVICEABLE PARTS ARE INSIDE. REFER SERVICING TO QUALIFIED SERVICE PERSONNEL. This symbol indicates “dangerous voltage” inside the product that presents a risk of electric shock or personal injury. -
Page 4: Precautions
Safety Information Precautions Important Safety Instructions Read these operating instructions carefully before using the unit. Follow all the safety instructions listed below. Keep these operating instructions handy for future reference. Read these instructions. Keep these instructions. Heed all warnings. Follow all instructions. Do not use this apparatus near water. -
Page 5: Handling Cautions
Please note that this is not a defect in the product. • Samsung cannot assure that this product will play every disc bearing the Blu-ray Disc, DVD or CD logo because disc formats evolve, and problems and errors may occur during the creation of Blu-ray Disc, DVD, CD software and/or the manufacture of discs. -
Page 6: Table Of Contents
Contents Contents Key FeATUreS SAFeTy INFOrMATION GeTTING STArTeD CONNeCTIONS English Blu-ray Disc Features Blu-ray Disc Player Features Warning Precautions Important Safety Instructions Disc Storage & Management Disc Handling Before using the User Manual Disc Types and Contents that can be played. Disc types that cannot be played Blu-ray Disc Compatibility Disc Types... - Page 7 (Dolby Digital, DTS Amplifier) - Better Quality Case 4 : Connecting to an Audio System (2 Channel Amplifier) - Good Quality Cable Network Wireless Network TV Aspect BD Wise (Samsung Products only) Resolution HDMI Format Movie Frame (24Fs) Progressive Mode Still Mode...
- Page 8 General Background Energy Saving Front Display Power On/Off Sound Light Effect Support Software Upgrade Contact Samsung Playing a Disc Playback Disc Structure Using the Disc menu/Title menu/Popup menu Using the Disc Menu Using the Title Menu Playing the Title List...
- Page 9 Playing back a Picture Playing a JPEG Disc Using the TOOLS button Playing back a USB Storage Device Using Internet@TV Getting Started with Internet@TV Settings Samsung Apps BD-LIVE™ Software Upgrade Notification Using the AllShare Function Troubleshooting Index Specifications Compliance and Compatibility Notice...
-
Page 10: Getting Started
Getting Started Disc Types and Contents that can be played. Term Logo Icon BD-ROM BD-RE/-R � DVD-VIDEO DVD-RW(V) DVD-R � DVD+RW DVD+R Audio CD � JPEG DivX � NOTE ▪ The product may not play certain CD-RW/-R and DVD-R due to the disc type or recording conditions. ▪... -
Page 11: Blu-Ray Disc Compatibility
Please note that this is not a defect in the product. ▪ Samsung cannot assure that this product will play every disc bearing the Blu-ray Disc, DVD or CD logo because disc formats evolve, and problems and errors may occur during the creation of Blu-ray Disc, DVD, CD software and/or the manufacture of discs. -
Page 12: Supported File Formats
Getting Started DVD+R • This product can play back a DVD+R disc recorded and finalized with a DVD Video recorder. Ability to play back may depend on recording conditions. Audio CD (CD-DA) • This product can play back CD-DA format audio CD-RW/-R discs. -
Page 13: Music File Support
Copyright © 2010 Samsung Electronics Co.,Ltd. All rights reserved; No part or whole of this user’s manual may be reproduced or copied without the prior written permission of Samsung Electronics Co.,Ltd. Area North America, Central America, South America, Korea, Japan, Taiwan, Hong Kong and South East Asia. -
Page 14: Logos Of Discs That Can Be Played
Getting Started Logos of Discs that can be played Blu-ray Disc PAL broadcast System in U.K., France, Dolby TrueHD Check for the supplied accessories below. Audio/Video cable User Manual English DTS-HD Master Audio Germany, etc. Accessories Batteries for Remote Control (AAA Size) Quick Guide DivX BD-LIVE... -
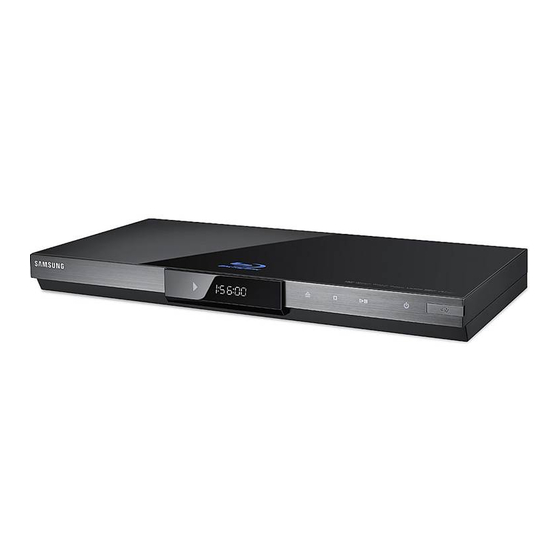
Page 15: Front Panel
DISC TRAY Opens to accept a disc. REMOTE CONTROL SENSOR Detects signals from the remote control. DISPLAY Displays the playing status, time, etc. OPEN/CLOSE BUTTON Opens and closes the disc tray. STOP BUTTON Stops disc playback. PLAY/PAUSE BUTTON Plays a disc or pauses playback. POWER BUTTON Turns the product on and off. -
Page 16: Front Panel Display
Getting Started IN DISC INDICATOR CURRENT TIME AND STATUS INDICATOR WIFI INDICATOR English Front Panel Display Lights when a disc is inserted or played back. Displays the play time and the current status. Lights when the wireless network is connected. -
Page 17: Rear Panel
Can be used for network based services (See pages 52~57), BD-LIVE and software upgrades using a network connection. Using an HDMI cable, connect this HDMI output terminal to the HDMI input terminal HDMI OUT on your TV for the best quality picture or to your Receiver for the best quality sound. DIGITAL AUDIO OUT Connects to a Receiver. -
Page 18: Tour Of The Remote Control
Getting Started Tour of the Remote Control Turn the product on and off. To open and close the disc tray. Press this to use Bonusview function. Press numeric buttons to operate options. Press this to switch the Blu-ray Disc/DVD’s subtitle language. Press to skip backwards or forwards. -
Page 19: Setting The Remote Control
If you replace the remote control’s batteries, you must set the brand code again. Controllable TV Codes Brand Code Brand NOBLEX TV POWER+01, +02, SAMSUNG +03, +04, +05, NOKIA +06, +07, +08, +09 NORDMENDE AIWA TV POWER+82 PANASONIC TV POWER+10, +11,... -
Page 20: Connections
Connections Case 1 : Connecting to a TV with an HDMI Cable - Best Quality (Recommended) Using an HDMI cable, connect the HDMI OUT terminal on the rear of the product to the HDMI IN terminal of your TV. Turn on the product and TV. Press the input selector on your TV remote control until the HDMI signal from the product appears on your TV screen. -
Page 21: Case 2 : Connecting To A Tv With Dvi Cable - Best Quality (Recommended)
Case 2 : Connecting to a TV with DVI Cable - Best Quality (Recommended) Using an HDMI-DVI cable, connect the HDMI OUT terminal on the rear of the product to the DVI IN terminal of your TV. Using the audio cables, connect the AUDIO OUT (red and white) terminals on the rear of the product to the AUDIO IN (red and white) terminals of your TV. -
Page 22: Case 3 : Connecting To A Tv (Component) - Better Quality
Connections Case 3 : Connecting to a TV (Component) - Better Quality Connecting to your TV using Component video cables. You will enjoy high quality images with accurate colour reproduction. Component video separates the picture element into black and white(Y), blue(P (Audio signals are delivered through the audio output.) Using Component video cables, connect the COMPONENT VIDEO OUT terminals on the rear of the product to the COMPONENT IN terminals of your TV. -
Page 23: Case 4 : Connecting To A Tv (Video) - Good Quality
Case 4 : Connecting to a TV (Video) - Good Quality Using video/audio cables, connect the VIDEO OUT (yellow) / AUDIO OUT (red and white) terminals on the rear of the product to the VIDEO IN (yellow) / AUDIO IN (red and white) terminals of your TV. -
Page 24: Connections
Connections • Please turn the volume down when you turn on the Amplifier. Sudden loud sound may cause damage to the speakers and your ears. • Please set the audio in the menu screen according to the Amplifier. (See pages 33~35) •... -
Page 25: Case 2 : Connecting To An Audio System (7.1 Channel Amplifier) - Better Quality
Case 2 : Connecting to an Audio System (7.1 Channel Amplifier) - Better Quality Using the 7.1CH audio cables, connect the 7.1CH ANALOG AUDIO OUT terminals on the rear of the product to the 7.1CH ANALOG AUDIO IN terminals of your Amplifier. Using the video signal cable(s), connect the HDMI, COMPONENT or VIDEO OUT terminals on the rear of the product to the HDMI, COMPONENT or VIDEO IN terminal of your TV. -
Page 26: Case 3 : Connecting To An Audio System
Connections Case 3 : Connecting to an Audio System (Dolby Digital, DTS Amplifier) - Better Quality Using an optical cable, connect the DIGITAL AUDIO OUT (OPTICAL) terminal on the rear of the product to the DIGITAL AUDIO IN (OPTICAL) terminal of your Amplifier. Using the video signal cable(s), connect the HDMI, COMPONENT or VIDEO OUT terminals on the rear of the product to the... -
Page 27: Connecting To The Network
NOTE ▪ Internet access to Samsung’s software update server may not be allowed, depending on the router you use or the ISP’s policy. For more information, contact your ISP (Internet Service Provider). ▪ For DSL users, please use a router to make a network connection. -
Page 28: Wireless Network
Connections Wireless Network You can connect to network with a Wireless IP sharer. A wireless AP/IP router is required to make a wireless network connection. Set the network options. (See pages 37~41) Broadband service Wireless IP sharer Networking with PC for AllShare function (See pages 56~57) NOTE... -
Page 29: Home Menu
5 seconds with no disc inserted. ▪ Use the HDMI cable to connect the product to an Anynet+(HDMI-CEC)-compliant Samsung TV. If the TV uses a language supported by the product, that language will be set to a preferred language automatically. -
Page 30: Setting The Menu
Press the EXIT button to exit the menu. NOTE ▪ When the product is connected to the network, select Internet@TV from the home menu. Download desired content from Samsung Apps. (See page 55) ▪ The access step may differ depending on the selected menu. -
Page 31: Display
In this case, you can’t see full screen by pressing the FULL SCREEN button on the remote control. BD Wise (Samsung Products only) BD Wise is Samsung’s latest inter-connectivity feature. When you connect Samsung products with BD Wise to each other via HDMI, the optimum resolution will be set automatically. -
Page 32: Resolution According To The Output Mode
Setup Resolution according to the output mode Blu-ray Disc playback • Output Setup Auto Optimal Resolution 1080p, Movie Frame(24Fs) off 1080p@60F 1080p/1080i, 1080p@24F Movie Frame(24Fs) on 1080i, Movie Frame(24Fs) off 720p 576p/480p 576i/480i DVD playback • Output Setup Auto Optimal Resolution 1080p 1080p@60F 1080i... -
Page 33: Hdmi Format
HDMI Format You can optimize the colour setting from the HDMI output. Select a connected device Type. TV : Select if connected to a TV via HDMI. • Monitor : Select if connected to a Monitor via • HDMI. Movie Frame (24Fs) Setting the Movie Frame (24Fs) feature to On allows you to adjust the product’s HDMI output to 24 frames per second for improved picture quality. -
Page 34: Digital Output Selection
Setup Digital Output Selection Setup Connection HDMI Receiver Optical Up to 7.1ch Dolby Digital Up to 5.1ch Dolby Digital Up to 7.1ch Audio Stream Plus on Blu-ray Dolby TrueHD Up to 7.1ch Disc Up to 6.1ch DTS-HD HRA Up to 7.1ch DTS-HD MA Up to 7.1ch PCM 2ch... -
Page 35: Dynamic Range Control
HDMI • If your TV is not compatible with compressed multi-channel formats (Dolby Digital, DTS), the product may output PCM 2ch downmixed audio even though you set Bitstream(either Re- encode or Audiophile) on your setup menu. • If your TV is not compatible with PCM sampling rates over 48kHz, the product may output 48kHz downsampled PCM audio even though you set PCM Downsampling to Off. -
Page 36: System
▪ This function is not available if the HDMI cable does not support CEC. ▪ If your Samsung TV has an n logo, then it supports the Anynet+ function. ▪ Depending on your TV, certain HDMI output resolutions may not work. -
Page 37: Clock
Clock Set time-related functions. Settings Display Clock Audio Clock Mode : Auto System Clock Set Network Time Zone : GMT + 0:00 Language : Off Security General Support > Move " Enter ' Return Choose your preferred method of setting clock. Clock Mode : You can set it to Auto or •... -
Page 38: Wired Network
Setup Wired Network In the Network Settings menu, press the ▲▼ buttons to select Network Settings, and then press the ENTER button. The Internet Protocol Setup screen appears. Press the ► button, then select Auto or Manual, and then press the ENTER button. Setting Up a Wired Connection - Auto If you selected Auto, the Network Function acquires and fills in the values for IP Address,... - Page 39 Press the RETURN button on your remote. Run a Network Test to ensure the product has connected to your network (See page 41). Wireless Network You can setup the wireless network three ways: • Using PBC (WPS) • Using the Auto Network Search function. •...
- Page 40 Setup In the list of networks, press the ▲▼ buttons to select a network, and then press the ENTER button. If the PIN/Security pop-up appears, go to Step 7. If the Network Connecting Screen appears, go to Step 11. Press the ▲▼ buttons to select PIN or Security.
-
Page 41: Network Test
Enter the IP Address, Subnet Mask, and Gateway values. Press the ▼ to go to DNS. Press the ▼ button to go to the first DNS entry field. Enter the numbers as above. When done, press the ▲ button to return to Access Point Selection. -
Page 42: Change Password
Setup Settings Display Parental Rating Audio Change Password System Network Language Security General Support Change Password Change the 4-digit password used to access security functions. If you forgot your password Remove the disc. Press and hold the STOP ( front panel for 5 seconds or more. All settings will revert to the factory settings. -
Page 43: Support
If the product is properly connected to the network by cable or wirelessly, the product will automatically connect to Samsung’s website each time it is turned on and download update files if any valid upgrade exists. Settings Display... -
Page 44: Playback Related Buttons
Basic Functions Playing a Disc Playback Press the OPEN/CLOSE ( open the disc tray. Place a disc gently into the tray with the disc’s label facing up. Press the OPEN/CLOSE ( close the disc tray. Press the PLAY ( ) button. Playback related buttons PLAY ( Starts playback. -
Page 45: Using The Popup Menu
Using the Popup Menu During playback, press the POPUP MENU button on the remote control. Press the ▲▼◄► buttons or ENTER button to select the desired menu. NOTE ▪ Depending on the disc, the menu items may differ and this menu may not be available. Using the Search and Skip Functions During play, you can search quickly through a chapter or track, and use the skip function to... -
Page 46: Repeat Playback
Basic Functions repeat Playback Repeat the Title or Chapter h�Z� Repeat the disc title or chapter. Depending on the disc, the Repeat function may not be available. During playback, press the REPEAT button on the remote control. Press the ▲▼ buttons to select Chapter or Title, then press the ENTER button. -
Page 47: Selecting The Audio Language
Selecting the Audio Language h�Z� You can also operate this function by pressing the AUDIO button on the remote control. During playback, press the TOOLS button. Press the ▲▼ buttons to select Audio. Press the ◄► buttons to select the desired audio language. -
Page 48: Setting Bonusview
Basic Functions Dynamic : Choose this setting to increase • Sharpness. Normal : Choose this setting for most • viewing applications. Movie : This is the best setting for watching • movies. User : The user can adjust the sharpness •... -
Page 49: Playing An Audio Cd (Cd-Da)/Mp3
SKIP button : During playback, moves to the previous page in the Music List or moves to the previous track in the Playlist. If you press this button after three seconds of playback in the Playlist, the current track will be replayed from the beginning. -
Page 50: Playing Back A Picture
Basic Functions Press the ▲▼◄► buttons to move desired track, then press the YELLOW(C) button to check desired tracks. Repeat this procedure to select additional tracks. Music TRACK 003 TRACK 001 TRACK 002 00:05:57 00:04:27 TRACK 004 TRACK 003 00:04:07 00:03:41 TRACK 005 TRACK 006... -
Page 51: Playing Back A Usb Storage Device
Zoom : Select this if you want to enlarge the • current picture. (Enlarged up to 4 times) Rotate : Select this if you to rotate the picture. • (This will rotate the picture either clockwise or counter clockwise.) Information : Shows the picture information •... -
Page 52: Network Services
Return : To return to the previous menu. • Settings : You can set the system setup and create accounts, etc. " Enter Samsung Apps : You can download various chargeable or free-of-charge application services. Recommended My Applications by Date 1/3... -
Page 53: Using The Keypad
Press the ENTER button. The map and address appear on the screen. NOTE ▪ Samsung Electronics shall take no legal responsibility for any interruption of the Internet@TV service caused by the service provider for any reasons. ▪ The Internet@TV service is to download and process data via the Internet so that you can enjoy the contents on the TV screen. -
Page 54: System Setup
Network Services Account Login For a more enjoyable application experience, register and log in to your account. To do this, you must create an account first. (For instructions on creating an account, refer to Internet@TV ID on this page) Press the ▲▼◄► buttons to select the desired application and press the RED(A) button. -
Page 55: Service Manager
Help If you questions about Internet@TV, check this section first. If none of the tips apply, please visit the help website. Using the colour buttons with the Samsung Apps RED(A) (Login) : To log in to the internet • service. -
Page 56: Bd-Live
PC using the product. To use AllShare, you must connect the product to your PC via the network (See pages 27~28) and install the SAMSUNG PC Share Manager on the Visit the Samsung website at www.samsung. com. - Page 57 C: Document and settings Admin Folder Device State Name Size Kind Folder 1 XXX.XXX.X.XX SAMSUNG Blu-ray Disc Player Deny Folder 1 File Folder 2 File Folder 3 File Cancel Click the Set Change State icon ( move to the home menu on product.
-
Page 58: Appendix
Appendix Before requesting service, please check the following. PROBLEM No operation can be performed with the remote control. Disc does not play. Disc Menu does not appear. The prohibition message appears on the screen. Play mode differs from the Setup Menu selection. - Page 59 Go to the contents and find the section of the user manual that contains the explanations regarding the current problem, and follow the procedure once again. • If the problem still cannot be solved, please contact your nearest Samsung authorized service centre. • Make sure that the disc is not dirty or scratched.
- Page 60 Appendix PROBLEM BD-LIVE I cannot connect to the BD-LIVE server. When using the BD-LIVE service, an error occurs. NOTE ▪ When the factory default settings are restored, all the user data stored in the BD data will be deleted. English SOLUTION •...
-
Page 61: Index
Resolution Repeat 46, 49 Supported File Format Software Upgrade 43, 56 Search and Skip Slow and Step Subtitle Language Slide Show SAMSUNG PC Share Manager 56~57 TV Aspect Title Menu Tools Menu 46~48 USB Storage Device Wireless Network 28, 39... -
Page 62: Specifications
Appendix Weight Dimensions General Operating Temperature Range Operating Humidity Range BD (Blu-ray Disc) DVD (Digital Versatile Disc) Disc CD : 12 cm (COMPACT DISC) CD : 8 cm (COMPACT DISC) Composite Video Video Output Component Video Video/Audio HDMI 2 Channel 7.1 Channel Digital Audio Output Audio Output... -
Page 63: Compliance And Compatibility Notice
• Samsung cannot assure that this product will play every disc bearing the BD-ROM, BD-RE/-R, DVD-VIDEO, DVD-RW/-R, DVD+RW/+R and CD-RW/-R logos, and this product may not respond to all operating commands or operate all features of every disc. -
Page 64: Network Service Disclaimer
CONTENT OR SERVICE BY YOU OR ANY THIRD PARTY, EVEN IF ADVISED OF THE POSSIBILITY OF SUCH DAMAGES. Third party services may be terminated or interrupted at any time, and Samsung makes no representation or warranty that any content or service will remain available for any period of time. Content and services are transmitted by third parties by means of networks and transmission facilities over which Samsung has no control. -
Page 65: License
License • Manufactured under license from Dolby Laboratories. “Dolby” and the double-D symbol are trademarks of Dolby Laboratories. • Manufactured under license under U.S. Patent #’s : 5,451,942; 5,956,674; 5,974,380; 5,978,762; 6,226,616; 6,487,535; 7,212,872; 7,333,929; 7,392,195; 7,272,567 & other U.S. and worldwide patents issued & pending. DTS and the Symbol are registered trademarks, &... - Page 66 This Samsung product is warranted for the period of twelve (12) months from the original date of purchase, against defective materials and workmanship. In the event that warranty service is required, you should return the product to the retailer from whom it was purchased.
-
Page 67: Contact Samsung World Wide
Contact SAMSUNG WORLD WIDE If you have any questions or comments relating to Samsung products, please contact the SAMSUNG customer care center. Area Contact Center ` North America Canada 1-800-SAMSUNG (726-7864) www.samsung.com Mexico 01-800-SAMSUNG (726-7864) www.samsung.com U.S.A 1-800-SAMSUNG (726-7864) www.samsung.com... -
Page 68: Correct Disposal Of Batteries In This Product
Correct disposal of batteries in this product (Applicable in the European Union and other European countries with separate battery return systems.) This marking on the battery, manual or packaging indicates that the batteries in this product should not be disposed of with other household waste at the end of their working life.
Need help?
Do you have a question about the BD-C6500 and is the answer not in the manual?
Questions and answers
Won’t power up blu ray BD-C6500
How can I eject a disk manually on a blu ray BD-C6500?
To manually eject a disc from a Samsung BD-C6500 Blu-ray player, press and hold the STOP button on the front of the player for more than 5 seconds. This will reset the player and may help eject the disc. If the player is unresponsive, try turning it off and on again or unplugging and reconnecting the power cord.
This answer is automatically generated