Samsung DVD-V6800 User Manual
Hide thumbs
Also See for DVD-V6800:
- Instruction manual (174 pages) ,
- User manual (263 pages) ,
- User manual (52 pages)
Table of Contents
Advertisement
Advertisement
Table of Contents

Related Manuals for Samsung DVD-V6800


Summary of Contents for Samsung DVD-V6800
- Page 1 User’s Manual DVD-V6800 www.samsung.com AK68-01604C...
-
Page 2: Safety Instructions
Safety Instructions The following illustrations represent precautions. The lightning bolt is a warning sign alerting you to dangerous voltage inside the product. DO NOT OPEN THE DVD-VCR. Refer to service personnel. DO NOT expose the DVD-VCR to extreme temperature conditions (below 5°C and above 40°C) or to extreme humidity conditions (less than 10% and more than 75%). -
Page 3: Disc Type And Characteristics
Disc Type and Characteristics This DVD-VCR is capable of playing the following types of discs with the corresponding logos : Disc Types (Logos) Recording Types Disc Size Audio Video AUDIO-CD Audio - DO NOT play CD-ROM, CD-I and DVD-ROM in this player! (CDGs play audio only, not graphics). - It may not play CD-R,CD-RW and DVD-R, -RW, DVD+R, +RW in all cases due to the type of disc or condition of the recording. -
Page 4: Table Of Contents
Contents Getting Started Getting Started Safety Instructions ....... .2 Disc Type and Characteristics ..... . .3 Overviews . -
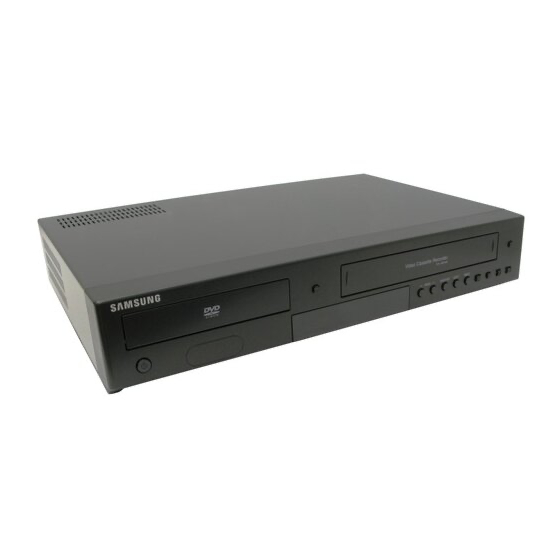
Page 5: Overviews
Overviews Front View of the DVD-VCR (DVD-V6800) 1. DVD DECK. 2. OPEN/CLOSE BUTTON. 3. VIDEO CASSETE COMPARTMENT. 4. EJECT BUTTON. 5. STANDBY/ON BUTTON. 6. AUX VIDEO INPUT JACK. 7. AUX AUDIO L/R INPUT JACK. 8. FRONT PANEL DISPLAY. 10 11 12 13 14 15 9. -
Page 6: Rear View Of The Dvd-Vcr (Dvd-V6800)
Rear View of the DVD-VCR (DVD-V6800) 1. AUDIO L, R OUT JACKS. 2. AERIAL IN CONNECTOR. 3. AV2 (DEC./EXT.) IN/OUT SCART (EURO-21) JACK. 4. AUDIO L, R OUT JACKS (DVD only). 5. VIDEO OUT JACK. Display Indicators 1. The DVD Deck is active. 2. -
Page 7: Accessories
Accessories Make sure that the following basic accessories are supplied with your DVD-VCR. Batteries for Owner’s remote controls Instructions Audio & Video Cable Inserting Batteries in the Remote Control You must insert or replace the batteries in the remote control when you: •... - Page 8 1. DVD,VCR Used to operate DVD, VCR. 2. STANDBY/ON Used to turn the power on or off. 3. NUMBER buttons Use to input the value of operating needed (Example: Find track, chapter, timer, etc.) 4. TIMER Used to activate the timer recording of a programme.
-
Page 9: Connections
onnections onnections Connecting DVD-VCR to the TV using the RF Cable To receive television programmes a signal must be received from one of the following sources: • An outdoor aerial. • An indoor aerial. • A cable television network. • A satellite receiver. Note •... -
Page 10: Connecting Dvd-Vcr To A Satellite Receiver Or Other Equipment
Connecting DVD-VCR to a Satellite Receiver or Other Equipment You can connect your DVD-VCR to a Satellite receiver or other DVD-VCR using the SCART cable if the appropriate outputs are available on the equipment chosen. The following illustra- tions give a few examples of the connection possibilities. -
Page 11: Connecting Dvd-Vcr To The Tv Using The Component Video Cable (Dvd Only)
Connecting DVD-VCR to the TV using the Component Video Cable (DVD only) Your TV must support progressive scan input to allow you to watch component video output. You will enjoy high quality accurate colour repro- duction images. Component video seperates the picture element into black and white (Y), blue (Pb), red (Pr) signals to present most clear and clean images. -
Page 12: Connecting An Audio/Video Input Cable
Connecting an Audio/Video Input Cable You can connect other audio/video equipment to your DVD-VCR using audio/video cables if the appropriate outputs are available on the equip- ment chosen. Examples : • You wish to copy a video cassette with the help of a second VCR. -
Page 13: Settings
The current time and date are displayed automatically. SETUP Time Date 12 : 00 01 / 01 Auto Clock : On PROG FUNC Return Check the Date and Time if it is : • Incorrect, refer to “Setting the Date and Time”. -
Page 14: Setting The Date And Time
Setting the Date and Time Your DVD-VCR contains a 24-hour clock and calendar used to: • Automatically stop programme recording. • Preset your DVD-VCR to record a programme automatically. You must set the date and time when: • You purchase the DVD-VCR. •... -
Page 15: Presetting The Stations Automatically
Presetting the Stations Automatically You do not need to preset the stations if you have already set them automatically (refer to “Plug & Auto Set Up” on page 12). Your DVD-VCR contains a built-in tuner used to receive television broadcasts. You must preset the stations received through the tuner. -
Page 16: Presetting The Stations Manually
Presetting the Stations Manually You do not need to preset the stations manually if you have already set them automatically. Press the MENU button, then press the OK or ‹ button. SETUP Language Clock Install User Set Auto Power Off : Off PROG Screen Messages... -
Page 17: Clearing A Preset Station
Clearing a Preset Station If you have stored a TV station: • That you do not require • At the wrong programme position, you can cancel it. Press the MENU button, then press the OK or ‹ button. SETUP Language Clock Install User Set... -
Page 18: Setting The Vcr Output Channel
Press the œ or ƒ button to select required position, then press the OK button to swap the position. For example to move a TV station in programme 1 to programme 3. ❉ ❉ TV STATION TABLE ❉ ❉ NAME - - - - œ... -
Page 19: Vcr Functions
unctions unctions Selecting the Colour Mode Before recording or playing back a cassette, you can select the required system standard. Otherwise, the system automatically selects the reception standard when you select AUTO. • When playing back a cassette, the standard is automatically selected by the DVD-VCR. -
Page 20: Intelligent Picture Control
Intelligent Picture Control This feature allows you to adjust the sharpness of the image automatically, according to your own preferences. During playback, press the MENU button, then press the OK or ‹ button. Press the œ or ƒ button to select User Set, then press the OK or ‹... -
Page 21: Screen Messages
Screen Messages Your DVD-VCR displays most information both the DVD-VCR and the television. You can choose to display or hide this information on the television screen (If you configure the Screen Message to Off, the Fast Forward and Rewind messages will not be displayed on the screen. -
Page 22: Selecting The Recording Speed
Selecting the Recording Speed You can record a cassette at two different speeds: • SP (Standard Play) • LP (Long Play) In Long Play modes: • Each cassette lasts twice as long • The recording is of a slightly lower quality Press the SPEED button to select SP or LP. -
Page 23: Recording A Programme With Automatic Stop
Recording a Programme with Automatic Stop This function enables you to record up to nine hours (LP) of programmes.Your DVD-VCR stops automatically after the requested length of time. Switch on the television. Insert the cassette on which the programme is to be recorded, with the window visible and the safety tab intact or the opening covered with adhesive tape. -
Page 24: Using The Assemble Edit Function
Using the Assemble Edit Function This function allows you to start a new recording at a specific position on the cassette while main- taining a very smooth scene change. Insert the cassette to be edited in your DVD-VCR. Press the ‹ll button to start playback. When you reach the position from which you wish to start the new recording, press the ‹ll button. -
Page 25: Checking A Preset Recording
• DLY : Daily • W-SU : Weekly Sunday • W-MO Weekly Monday • W-SA Weekly Saturday • MO 01 : Monday 01 Press the ‹ button to select Start (Start time of recording). Start Stop Speed MO 01 13 : 25 Return Menu Press the ‹... -
Page 26: Cancelling A Preset Recording
To change any values, select the required programme by pressing the œ or ƒ button, then change any values as required. For more details refer to page 24. (Step 2 to 9). • Press the MENU button to exit the menu. Cancelling a Preset Recording You can cancel any programmes for any rea- sons, such as:... -
Page 27: Selecting The Audio Output Mode
Selecting the Audio Output Mode You can select the mode in which the sound is reproduced on the loudspeakers and AV outputs. The following options are available. Press the AUDIO button on the remote control until the required option is displayed. ➝... -
Page 28: Searching For A Specific Sequence
Searching for a Specific Sequence Each time you record a cassette on this DVD- VCR, an “index” is automatically marked on the tape when recording starts. The Search function allows you to fast-forward or rewind to a specific index and start playback from that point. Depending on the direction selected, the index- es are numbered as follows: Prev... -
Page 29: Using The Tape Counter
When an Index mark is found the DVD-VCR will playback the tape for 5 seconds, after which it will continue searching for the next Index mark INTRO SCAN : ¦¦ If you want to watch the tape from a particular Index, press the ‹ Index Skip Search This feature will enable you to fast forward/rewind to a specific point on a tape: e.g. -
Page 30: Dvd Functions
unctions unctions Setting Up the Language Features If you set disc menu, audio and subtitle lan- guage in advance, it will come up automatically every time you watch a movie. Using the Disc Menu Language Press the MENU button in the stop mode. Press the œ... -
Page 31: Using The Subtitle Language
Using the Subtitle Language Press the MENU button in the stop mode. Press the œ or ƒ button to select DVD, then press the OK or ‹¤button. SETUP Language Setup Audio Setup Display Setup Parental Setup : PROG DivX(R) Registration FUNC Return Menu... -
Page 32: Setting Up The Audio Options
Setting Up the Audio Options Press the MENU button in the stop mode. Press the œ or ƒ button to select DVD, then press the OK or ‹¤button. SETUP Language Setup Audio Setup Display Setup Parental Setup : PROG DivX(R) Registration FUNC Return Menu... -
Page 33: Video Output
Press the œ or ƒ button to select TV Aspect, press the OK or ‹¤button. SETUP TV Aspect 4:3 Letter Box Black Level 4:3 Pan Scan ✓ 16:9 Wide TV System Video Output PROG FUNC Return Press the œ or ƒ button to select the required item, then press the OK button to select the required option. -
Page 34: Setting Up The Parental Control
Setting Up the Parental Control The Parental Control function works in conjunc- tion with DVDs that have been assigned a rating which helps you control the types of DVDs that your family watches. There are up to 8 rating levels on a disc. Press the MENU button in the stop mode. -
Page 35: Divx(R) Registration
Changing the Password Press the MENU button in the stop mode. Press the œ or ƒ button to select DVD, then press the OK or ‹¤button. Press the œ or ƒ button to select Parental Setup. Press the OK or ‹¤button. Press the œ... -
Page 36: Firmware Upgrade
How to make an update disc Write the downloaded file onto a blank CD-R disc, using the following settings. You have to download a new file through Download Center of Samsung Internet Site (www.samsung.com). Write the file to Disc using CD-RW of your computer. -
Page 37: Special Playback Features
Update procedure Open the disc tray. Place the disc on the tray. Close the tray. The Firmware upgrade screen appears. Press the ¦ or ‹ buttons to select Total, then press the OK button. - In the middle of the writing, the tray will open automatically. -
Page 38: Using The Display Function
Stop/Resume • Press the ■ button once to stop playback. To resume the DVD from the point where the disc stopped, press the ‹ll button. • Press the ■ button twice to completely stop playback. The next time you press the ‹ll button, the disc will start over from the begin- ning. -
Page 39: Adjusting The Aspect Ratio (Ez View)
Adjusting the Aspect Ratio (EZ View) This function may be different depending on the type of disc. To play using aspect ratio (DVD) Press the EZ VIEW button. • The screen size changes when the button is pressed repeatedly. • The screen zoom mode operates differently depending on the screen setting in the initial DVD menu. -
Page 40: Selecting The Subtitle Language
Selecting the Subtitle Language Some DVDs provide subtitles in one or more languages. You can use the SUBTITLE button to quickly view and change settings. During playback, press the SUBTITLE button. SUBTITLE Press SUBTITLE button at remocon repeat- edly to select the desired subtitle language To remove the SUBTITLE icon, press the CLEAR or RETURN button. -
Page 41: Zoom
Zoom During playback or pause mode, press the ZOOM button on the remote control, press the OK button. Press the œ or ƒ / ¦ or ‹ buttons to select the part of the screen you want to zoom in on. - During DVD play, press OK to zoom in 2X/4X/2X/Normal in order. -
Page 42: Repeat Chapter/Title
Repeat Chapter/Title You can repeat a single chapter or a complete title Press the REPEAT button while in playback mode to open the repeat menu. The current repeat mode is displayed Press the ¦ or ‹ button to select Chapter/Title. Press the OK button to repeat the current chapter/Title. -
Page 43: Mp3/Wma/Cd Audio Play
MP3/WMA /CD Audio Play If you insert an MP3/WMA /CD Audio Disc into the DVD-VCR, you can see the folder directory. Press the œ or ƒ button to select the desired music folder, then press the OK button. • Only one kind of file is played back when a disc or a folder contains both MP3 and WMA files. -
Page 44: Picture Cd Playback
Picture CD Playback If you insert a Picture (JPEG) CD Disc into the DVD-VCR, you can see the folder directory. Press the œ or ƒ, ¦ or ‹ button to select the picture you want to view, then press the OK button. -
Page 45: Slide Show
Slide show Press the ¦ or ‹¤button to select Press the OK button. The 3 icons are displayed for time interval. TIMER : Press the ¦ or ‹ button to select one of these. Press the OK button. The pictures change automatically with about an 6 second interval. -
Page 46: Divx/Mpeg4 Playback
DivX/MPEG4 Playback When the disc is inserted, the file structure of the disc will be shown. Depending on the file format, a different icon will appear next to each file. The files will have been highlighted. Use œ/ƒ,¦/‹ button to select the movie file, and then press OK or ‹ll. -
Page 47: Technical Specifications
Technical Specifications Rated voltage Power consumption Weight General Size Operating ambient temperature Installation conditions Video input (Rear) Input Audio input (Rear) Input (Front) RF Out Audio (DVD, VCR) Audio (DVD only) Output Video (DVD, VCR) Video (DVD only) Tape format Colour system Tuning system Video S/N... -
Page 48: Troubleshooting Guide (Vcr)
Troubleshooting Guide (VCR) Before contacting the Samsung after-sales service, perform the following simple checks. If you are unable to solve the problem after reading the below instructions, note: • The model and serial number on the rear of your DVD-VCR. -
Page 49: Troubleshooting Guide (Dvd)
Troubleshooting Guide (DVD) Problem ◆ Ensure that the disc is installed with the label side facing up. ◆ Check the region number of the DVD. Disc does not play. ◆ This DVD-VCR cannot play CD-ROMs, DVD-ROMs, etc. Insert a DVD, or a CD. ◆... - Page 50 Authorised Samsung Dealers or Authorised Service Centres. No re- imbursement will be made for repairs car- ried out by non Samsung Dealers and, any such repair work and damage to the prod- ucts caused by such repair work will not be covered by this warranty.
- Page 51 Contact SAMSUNG WORLD WIDE If you have any questions or comments relating to Samsung products, please contact the SAMSUNG customer center care Region Country CANADA North America MEXICO U.S.A ARGENTINE BRAZIL CHILE NICARAGUA HONDURAS COSTA RICA ECUADOR EL SALVADOR Latin America...
- Page 52 Contact SAMSUNG WORLD WIDE If you have any questions or comments relating to Samsung products, please contact the SAMSUNG customer care centre. 0845 726 7864 / www.samsung.com Correct Disposal of This Product (Waste Electrical & Electronic Equipment) (Applicable in the European Union and other European countries with separate collection systems) This marking shown on the product or its literature, indicates that it should not be disposed with other household wastes at the end of its working life.