Advertisement
Quick Links
Advertisement

Related Manuals for Hasselblad 907X CONTROL GRIP


Summary of Contents for Hasselblad 907X CONTROL GRIP
- Page 1 User Guide 907 X CON TROL GR IP 2020-12-09...
-
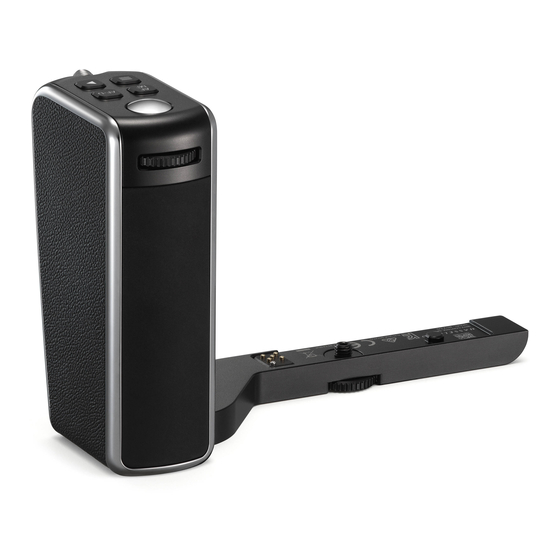
Page 2: Parts And Controls
Rear scroll wheel Front scroll wheel Shutter release button AF/MF button Menu button Joystick 10 Browse button 11 AF Drive button 12 1/4” tripod thread Functions of buttons and controls are described on page 96. 907X CONTROL GRIP USER GUIDE www.hasselblad.com... - Page 3 Align the lock pin ( A ) and lock screw ( B ) as shown below. Make sure you insert the lock screw in the correct hole. Tighten the lock screw securely ( C ) by hand. 907X CONTROL GRIP USER GUIDE www.hasselblad.com...
- Page 4 The four top buttons ( 3 , 4 , 7 and 8 ) can be reprogrammed to a With the camera in a low position it may be easiest to use the different function. thumb for the all buttons. 907X CONTROL GRIP USER GUIDE www.hasselblad.com...
- Page 5 Move the joystick right to enter the settings and click to enter. light Quality. Move the joystick to setting. the right to enter. Move the joystick up/down and click to select a new setting. 907X CONTROL GRIP USER GUIDE www.hasselblad.com...
- Page 6 AF area is centered. Move the joystick two times to the right and two times up to move the AF area in this example. Browse images Sideways movement changes Up or down movement changes overlay. preview image. 907X CONTROL GRIP USER GUIDE www.hasselblad.com...
-
Page 7: Product Im Ages
COPYRIGHT The information in this user guide is intended for informational All text in this user guide copyright © Victor Hasselblad AB. use only. The information and the 3D Product Images and All images in this User Guide, not credited to a specific Photos, are subject to change without notice, and should not photographer, copyright ©...
Need help?
Do you have a question about the 907X CONTROL GRIP and is the answer not in the manual?
Questions and answers