Table of Contents
Advertisement
Quick Links
Advertisement
Table of Contents

Related Manuals for Epson SC-T3100M Series


Summary of Contents for Epson SC-T3100M Series
- Page 1 User's Guide CMP0139-05 EN...
- Page 2 Epson printer. Epson is not responsible for any use of this information as applied to other printers. Neither Seiko Epson Corporation nor its affiliates shall be liable to the purchaser of this product or third parties for damages, losses, costs, or expenses incurred by the purchaser or third parties as a result of accident, misuse, or abuse of this product or unauthorized modifications, repairs, or alterations to this product, or (excluding the U.S.) failure to strictly comply with Seiko Epson Corporation's operating and maintenance instructions.
-
Page 3: Table Of Contents
Front....... . . 8 Loading paper into the auto sheet feeder..35 Scanner (SC-T3100M Series only)... 10 Removing paper from the auto sheet feeder..37 Inside. - Page 4 Printing Files on USB Flash Memory Directly (SC-T3100M Series Only) ....99 Scanning Menu (SC-T3100M Series Only)..168...
- Page 5 Options and Consumable Products... 205 Epson Special Media....205 Ink Cartridges......205 Others.
-
Page 6: Notes On Manuals
SC-T3100M Series/SC-T5100 Series/SC-T3100 Series/SC-T5100N Series/SC-T3100N Series/SC-T2100 Series User's Guide Introduction Manual Organization Introduction The manuals for the product are organized as shown below. Notes on Manuals You can view the PDF manuals using Adobe Acrobat Reader or Preview (Mac). Meaning of Symbols... -
Page 7: Viewing Pdf Manuals
SC-T3100M Series/SC-T5100 Series/SC-T3100 Series/SC-T5100N Series/SC-T3100N Series/SC-T2100 Series User's Guide Introduction You can input and search for keywords, such as Viewing PDF Manuals the names of items you want to confirm. This section uses the Adobe Acrobat Reader DC as an... -
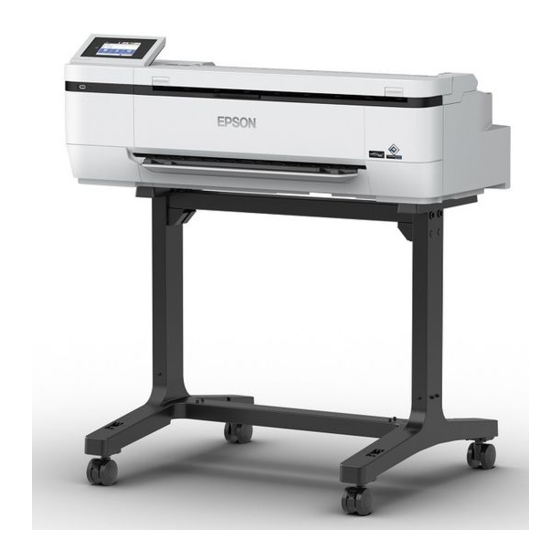
Page 8: Printer Parts
SC-T3100M Series/SC-T5100 Series/SC-T3100 Series/SC-T5100N Series/SC-T3100N Series/SC-T2100 Series User's Guide Introduction Printer Parts Front Control panel “Control panel” on page 14 Cutter cover Open when replacing the cutter. “Replacing the Cutter” on page 183 Paper basket Output from the printer collects in this basket, keeping the media clean and free of creases. - Page 9 SC-T3100M Series/SC-T5100 Series/SC-T3100 Series/SC-T5100N Series/SC-T3100N Series/SC-T2100 Series User's Guide Introduction Paper stacker (for plain paper) Attach to the front of the printer as shown when printing multiple sheets of plain paper continuously from the auto sheet feeder. Printed paper stacks up in this tray after it is ejected. Remove this when printing on roll paper or cut sheets (1 sheet).
-
Page 10: Scanner (Sc-T3100M Series Only)
You can connect a USB flash drive to print directly or save your scanned data. “Printing Files on USB Flash Memory Directly (SC-T3100M Series Only) ” on page 99 “Scanning and Saving an Image to a Memory Device” on page 108 Scanner unit Open this cover when replacing ink cartridges or clearing a paper jam. -
Page 11: Inside
SC-T3100M Series/SC-T5100 Series/SC-T3100 Series/SC-T5100N Series/SC-T3100N Series/SC-T2100 Series User's Guide Introduction Inside Roll paper cover This cover protects the loaded roll paper and prevents dust from entering inside the printer. Except when load- ing or removing roll paper, it should be closed when using the printer. -
Page 12: Back
SC-T3100M Series/SC-T5100 Series/SC-T3100 Series/SC-T5100N Series/SC-T3100N Series/SC-T2100 Series User's Guide Introduction Spindle holder Install the spindle with the roll paper loaded. There is a holder on both the left and right sides. “Loading Roll Paper” on page 29 Back Maintenance box cover Open when replacing the maintenance box. - Page 13 Flashing: Receiving data. OPTION port (except for the SC-T3100M Series) Connect a scanner to perform enlarged copying. “Making Enlarged Copies with an A3 or A4 Scanner (Except for the SC-T3100M Series)” on page 109 USB port Connect the USB cable here.
-
Page 14: Control Panel
SC-T3100M Series/SC-T5100 Series/SC-T3100 Series/SC-T5100N Series/SC-T3100N Series/SC-T2100 Series User's Guide Introduction Control panel Home screen operations Home button Touch this button while a menu is displayed to return to the Home screen. The home button is off Overview of Home screen operations... - Page 15 SC-T3100M Series/SC-T5100 Series/SC-T3100 Series/SC-T5100N Series/SC-T3100N Series/SC-T2100 Series User's Guide Introduction Touch this button when loading, removing, The network connection status is indicated by an setting, or adjusting paper. icon as shown below. ❏ Touching the icon allows you to switch the net- See the following for more details on Roll Paper.
- Page 16 SC-T3100M Series/SC-T5100 Series/SC-T3100 Series/SC-T5100N Series/SC-T3100N Series/SC-T2100 Series User's Guide Introduction Note: Except for the SC-T3100M Series When you connect an Epson A3 or A4 scanner to the printer, Enlarged Copy appears to allow you to easily make enlarged copies. “Making Enlarged Copies with an A3 or A4 Scanner (Except for the SC-T3100M Series)”...
-
Page 17: Features Of Printer
SC-T3100M Series/SC-T5100 Series/SC-T3100 Series/SC-T5100N Series/SC-T3100N Series/SC-T2100 Series User's Guide Introduction “Specifications Table” on page 222 Features of Printer Automatic switching between auto Realizing High Resolution sheet feeder (cut sheets) and roll paper CAD drawings that are clear, legible, You can load roll paper in the printer, and load... -
Page 18: Notes On Usage And Storage
SC-T3100M Series/SC-T5100 Series/SC-T3100 Series/SC-T5100N Series/SC-T3100N Series/SC-T2100 Series User's Guide Introduction Notes on Usage and Storage SC-T3100M 1020 mm 1075 mm 520 mm Series SC-T5100N 1318 mm 915 mm 380 mm Installation space Series SC-T3100N Make sure that you secure the following space, clear of... -
Page 19: Notes When Not Using The Printer
SC-T3100M Series/SC-T5100 Series/SC-T3100 Series/SC-T5100N Series/SC-T3100N Series/SC-T2100 Series User's Guide Introduction ❏ The print head may not be capped (i.e., may not ❏ Store the printer after confirming that the print move to the right-hand side) if an error occurs head has been capped (the print head is and the printer is turned off without first positioned at the far right). -
Page 20: Notes On Handling Paper
SC-T3100M Series/SC-T5100 Series/SC-T3100 Series/SC-T5100N Series/SC-T3100N Series/SC-T2100 Series User's Guide Introduction ❏ To ensure good results, use all the ink in the ❏ Although the ink cartridges may contain recycled cartridges within 6 months of opening the materials, this does not affect printer function or packages. -
Page 21: Saving Power
SC-T3100M Series/SC-T5100 Series/SC-T3100 Series/SC-T5100N Series/SC-T3100N Series/SC-T2100 Series User's Guide Introduction For cut sheets, use new paper. Note: Typically, print outs and photos fade over time (color ❏ Do not wet the paper. distortion) due to the effects of light and various constituents in the air. - Page 22 SC-T3100M Series/SC-T5100 Series/SC-T3100 Series/SC-T5100N Series/SC-T3100N Series/SC-T2100 Series User's Guide Introduction Power Off Timer This function automatically turns the printer off if no errors occur, no print jobs are received, and no control panel or other operations are performed for a set period of time.
-
Page 23: Introducing The Software
For details on the various software, see the online help of each software or the Administrator's Guide (online manual). Note: Convenient software compatible with this printer is introduced on the Epson website. Please check the information from the following link. -
Page 24: Built-In Software In The Printer
SC-T3100M Series/SC-T5100 Series/SC-T3100 Series/SC-T5100N Series/SC-T3100N Series/SC-T2100 Series User's Guide Introducing the Software Built-in Software in the Printer The following software comes preinstalled in the printer. Start and use it from a Web browser via the network. Software Name Function Web Config The network security settings can be configured from Web Config. -
Page 25: How To Use Web Config
SC-T3100M Series/SC-T5100 Series/SC-T3100 Series/SC-T5100N Series/SC-T3100N Series/SC-T2100 Series User's Guide Introducing the Software How to Use Web Config Function Summary This section introduces the main functions of Web This section describes how to start the software and Config. See the Administrator's Guide for more details. -
Page 26: Updating Software Or Installing Additional Software
SC-T3100M Series/SC-T5100 Series/SC-T3100 Series/SC-T5100N Series/SC-T3100N Series/SC-T2100 Series User's Guide Introducing the Software Select the software or manuals to be updated Updating Software or and then update them. Installing Additional Follow the on-screen instructions. Software Important: Do not turn off the computer or printer When you install the software during setup as during the update. -
Page 27: Uninstalling Software
SC-T3100M Series/SC-T5100 Series/SC-T3100 Series/SC-T5100N Series/SC-T3100N Series/SC-T2100 Series User's Guide Introducing the Software Select the printer icon, and then click OK. Uninstalling Software Windows Important: ❏ You must log in as an Administrator. ❏ If the password or confirmation of an administrator is requested, enter the password and then continue with the operation. -
Page 28: Loading And Setting The Paper
SC-T3100M Series/SC-T5100 Series/SC-T3100 Series/SC-T5100N Series/SC-T3100N Series/SC-T2100 Series User's Guide Loading and Setting the Paper Unsupported paper Loading and Setting Do not use paper that is wavy, torn, cut, folded, too thick, too thin, has a sticker affixed, etc. Doing so may the Paper cause paper jams or soiled prints. -
Page 29: Loading And Removing The Roll Paper
SC-T3100M Series/SC-T5100 Series/SC-T3100 Series/SC-T5100N Series/SC-T3100N Series/SC-T2100 Series User's Guide Loading and Setting the Paper Cut Sheet(1 sheet) Loading Roll Paper One sheet of cut paper from A4 to the maximum printable width can be loaded. Caution: Hold the flange while loading the roll paper. If you load the paper while holding another part, your hand or fingers may get trapped causing an injury. - Page 30 SC-T3100M Series/SC-T5100 Series/SC-T3100 Series/SC-T5100N Series/SC-T3100N Series/SC-T2100 Series User's Guide Loading and Setting the Paper Place the roll paper on a flat surface and then Check that the leading edge of the roll paper is insert the spindle. not bent and then insert it into the paper slot until you hear a beep.
-
Page 31: Cutting The Roll Paper
SC-T3100M Series/SC-T5100 Series/SC-T3100 Series/SC-T5100N Series/SC-T3100N Series/SC-T2100 Series User's Guide Loading and Setting the Paper ❏ When printing of one page is finished Important: The roll paper is cut before printing of the next page starts. When paper equivalent to B1 width is... - Page 32 SC-T3100M Series/SC-T5100 Series/SC-T3100 Series/SC-T5100N Series/SC-T3100N Series/SC-T2100 Series User's Guide Loading and Setting the Paper When cutting at desired position Important: Hold down the (Forward) or ❏ If commercially available synthetic or canvas (Backward) button until the position you paper is cut with the built-in cutter, the cutter want to cut reaches the position of the dotted may be damaged or its life may be shortened.
-
Page 33: Removing Roll Paper
SC-T3100M Series/SC-T5100 Series/SC-T3100 Series/SC-T5100N Series/SC-T3100N Series/SC-T2100 Series User's Guide Loading and Setting the Paper Touch Print Cutting Guideline. Unlock the center lock and open the roll paper cover. Cut lines are printed and the paper is ejected automatically to a position where it can be easily cut with scissors. - Page 34 SC-T3100M Series/SC-T5100 Series/SC-T3100 Series/SC-T5100N Series/SC-T3100N Series/SC-T2100 Series User's Guide Loading and Setting the Paper Important: After rewinding the roll paper carefully, store it in the original package. Attach the transparent flange to the spindle and return the spindle in the printer.
-
Page 35: Loading And Removing Paper From The Auto Sheet Feeder
SC-T3100M Series/SC-T5100 Series/SC-T3100 Series/SC-T5100N Series/SC-T3100N Series/SC-T2100 Series User's Guide Loading and Setting the Paper Removing Loading and Removing Pull the paper stacker straight out to remove it. Paper from the Auto Sheet Feeder Installing and removing the paper stacker (for plain paper) - Page 36 SC-T3100M Series/SC-T5100 Series/SC-T3100 Series/SC-T5100N Series/SC-T3100N Series/SC-T2100 Series User's Guide Loading and Setting the Paper Check that Load paper.or Ready is displayed Unfold the auto sheet feeder, and pull it up and on the Home screen, and then open the cut out.
-
Page 37: Removing Paper From The Auto Sheet Feeder
SC-T3100M Series/SC-T5100 Series/SC-T3100 Series/SC-T5100N Series/SC-T3100N Series/SC-T2100 Series User's Guide Loading and Setting the Paper Load paper in the auto sheet feeder with the Removing paper from the auto printable side facing you. sheet feeder Align the paper edges before loading. - Page 38 SC-T3100M Series/SC-T5100 Series/SC-T3100 Series/SC-T5100N Series/SC-T3100N Series/SC-T2100 Series User's Guide Loading and Setting the Paper Push the auto sheet feeder back into its slots, and then fold it forward. Close the cut sheet cover.
-
Page 39: Loading And Removing Cut Sheet(1 Sheet)
SC-T3100M Series/SC-T5100 Series/SC-T3100 Series/SC-T5100N Series/SC-T3100N Series/SC-T2100 Series User's Guide Loading and Setting the Paper Insert the leading edge of the paper straight Loading and Removing into the paper slot until you hear a beep. Cut Sheet(1 sheet) Loading Cut Sheet(1 sheet) When roll paper is loaded, remove it. -
Page 40: Removing Cut Sheet (1 Sheet)
SC-T3100M Series/SC-T5100 Series/SC-T3100 Series/SC-T5100N Series/SC-T3100N Series/SC-T2100 Series User's Guide Loading and Setting the Paper After printing, the paper stops with the trailing edge Important: still held by the printer. If you start printing the next job before removing it manually, it will drop When B1 size paper is loaded in the automatically. -
Page 41: Setting Loaded Paper
SC-T3100M Series/SC-T5100 Series/SC-T3100 Series/SC-T5100N Series/SC-T3100N Series/SC-T2100 Series User's Guide Loading and Setting the Paper How to Set Setting Loaded Paper The currently set paper type is shown on the screen displayed after loading roll paper. For Roll Paper Configure the following settings after loading roll paper. - Page 42 SC-T3100M Series/SC-T5100 Series/SC-T3100 Series/SC-T5100N Series/SC-T3100N Series/SC-T2100 Series User's Guide Loading and Setting the Paper Select the paper type that matches the loaded Touch Paper Remaining. roll paper. Epson Special Media Select the same product name as the one shown on the package of the paper.
-
Page 43: For Auto Sheet Feeder/Cut Sheet(1 Sheet)
SC-T3100M Series/SC-T5100 Series/SC-T3100 Series/SC-T5100N Series/SC-T3100N Series/SC-T2100 Series User's Guide Loading and Setting the Paper For Auto Sheet Feeder/Cut Note: The settings are confirmed if no operations are Sheet(1 sheet) performed for 90 seconds on the above screen. To change the settings later, touch the following in... - Page 44 SC-T3100M Series/SC-T5100 Series/SC-T3100 Series/SC-T5100N Series/SC-T3100N Series/SC-T2100 Series User's Guide Loading and Setting the Paper ❏ Blueprint Paper Select a category and select the target paper size. Note: To select a paper type that is not displayed on Setting non-standard size the screen, touch Others.
-
Page 45: Optimizing Paper Settings (Media Adjust)
SC-T3100M Series/SC-T5100 Series/SC-T3100 Series/SC-T5100N Series/SC-T3100N Series/SC-T2100 Series User's Guide Loading and Setting the Paper Optimizing Paper Adjusting Settings (Media Adjust) Adjustments are performed by using a wizard. Follow the on-screen instructions to print the adjustment pattern twice. Perform Media Adjust in the following cases. You can... - Page 46 SC-T3100M Series/SC-T5100 Series/SC-T3100 Series/SC-T5100N Series/SC-T3100N Series/SC-T2100 Series User's Guide Loading and Setting the Paper Enter the numeric value of the pattern with the Important: least streaks among the printed adjustment patterns of #1 and then touch Alignment #2. When using A2 size or larger cut sheets or...
- Page 47 SC-T3100M Series/SC-T5100 Series/SC-T3100 Series/SC-T5100N Series/SC-T3100N Series/SC-T2100 Series User's Guide Loading and Setting the Paper The adjustment results are saved as settings of the currently selected paper type. Next time, simply select the paper type to realize the optimum print results.
-
Page 48: Printing With The Printer Driver From Your Computer
SC-T3100M Series/SC-T5100 Series/SC-T3100 Series/SC-T5100N Series/SC-T3100N Series/SC-T2100 Series User's Guide Printing with the Printer Driver from Your Computer Select the printer in Printer and then click Printing with the Printer Properties. The printer driver dialog will be displayed. Printer Driver from... - Page 49 SC-T3100M Series/SC-T5100 Series/SC-T3100 Series/SC-T5100N Series/SC-T3100N Series/SC-T2100 Series User's Guide Printing with the Printer Driver from Your Computer If the desired size is not available in the For Roll Paper Width (Paper Size for cut pull-down menu of the Change Paper Size sheets) and Media Type, the settings configured dialog box, click Custom Paper Size...
-
Page 50: Canceling Printing
SC-T3100M Series/SC-T5100 Series/SC-T3100 Series/SC-T5100N Series/SC-T3100N Series/SC-T2100 Series User's Guide Printing with the Printer Driver from Your Computer Check that the Print Preview check box is Note: selected and then click OK. See the printer driver help for more details on setting items. -
Page 51: Customizing The Printer Driver
SC-T3100M Series/SC-T5100 Series/SC-T3100 Series/SC-T5100N Series/SC-T3100N Series/SC-T2100 Series User's Guide Printing with the Printer Driver from Your Computer Select the print data you want to cancel and Open View devices and printers or Devices click Cancel in the Document menu. and Printers. - Page 52 SC-T3100M Series/SC-T5100 Series/SC-T3100 Series/SC-T5100N Series/SC-T3100N Series/SC-T2100 Series User's Guide Printing with the Printer Driver from Your Computer Make the necessary settings. These settings Note: become the default settings of the printer driver. Sharing Select Setting settings with multiple computers Saving various settings as your Select the settings you want to share, click Export..., and then export the settings to a file.
- Page 53 SC-T3100M Series/SC-T5100 Series/SC-T3100 Series/SC-T5100N Series/SC-T3100N Series/SC-T2100 Series User's Guide Printing with the Printer Driver from Your Computer Select Edit Item. Click Save. Change the display order and groups in List. ❏ You can move and order items by dragging and dropping.
-
Page 54: Basic Operating Procedures (Mac)
SC-T3100M Series/SC-T5100 Series/SC-T3100 Series/SC-T5100N Series/SC-T3100N Series/SC-T2100 Series User's Guide Printing with the Printer Driver from Your Computer Basic Operating Note: If page settings are not displayed in the print Procedures (Mac) dialog, click the "page settings" option (e.g., Page Setup) in the File menu. - Page 55 SC-T3100M Series/SC-T5100 Series/SC-T3100 Series/SC-T5100N Series/SC-T3100N Series/SC-T2100 Series User's Guide Printing with the Printer Driver from Your Computer For Roll Paper Width (Paper Size for cut Select Printer Settings from the list and set sheets) and Media Type, the settings configured Output Size.
- Page 56 SC-T3100M Series/SC-T5100 Series/SC-T3100 Series/SC-T5100N Series/SC-T3100N Series/SC-T2100 Series User's Guide Printing with the Printer Driver from Your Computer Select Select Target in Print Quality. Check the print settings in the print preview screen, and if there is no problem, click Print Choose an option according to the type of to start printing.
-
Page 57: Canceling Printing
SC-T3100M Series/SC-T5100 Series/SC-T3100 Series/SC-T5100N Series/SC-T3100N Series/SC-T2100 Series User's Guide Printing with the Printer Driver from Your Computer Click [+] and select Add Printer or Scanner. Customizing the Printer Driver You can assign a name to frequently used setting When the list of devices appears, select the... - Page 58 SC-T3100M Series/SC-T5100 Series/SC-T3100 Series/SC-T5100N Series/SC-T3100N Series/SC-T2100 Series User's Guide Printing with the Printer Driver from Your Computer Deleting from presets Click Show Presets... from Presets in the Print dialog box. Select the setting you want to delete, click Delete, and then click OK.
-
Page 59: Printing Cad Drawings
SC-T3100M Series/SC-T5100 Series/SC-T3100 Series/SC-T5100N Series/SC-T3100N Series/SC-T2100 Series User's Guide Printing with the Printer Driver from Your Computer Open the data to be printed and then click Plot. Printing CAD Drawings There are the following two methods to print CAD drawings. - Page 60 SC-T3100M Series/SC-T5100 Series/SC-T3100 Series/SC-T5100N Series/SC-T3100N Series/SC-T2100 Series User's Guide Printing with the Printer Driver from Your Computer The printer driver's dialog box for this printer Check other settings, and then start printing. appears. Note: Set Output Size and Source in the printer driver.
-
Page 61: Enlargements And Horizontal And Vertical Banners
SC-T3100M Series/SC-T5100 Series/SC-T3100 Series/SC-T5100N Series/SC-T3100N Series/SC-T2100 Series User's Guide Printing with the Printer Driver from Your Computer ❏ Specify Size Enlargements and You can specify the enlargement or reduction ratio. Use this method for a non-standard paper Horizontal and Vertical size. -
Page 62: Fitting Documents To The Width Of The Roll Paper
SC-T3100M Series/SC-T5100 Series/SC-T3100 Series/SC-T5100N Series/SC-T3100N Series/SC-T2100 Series User's Guide Printing with the Printer Driver from Your Computer If the size is different, select the correct size Fitting Documents to the Width from the pull-down menu. of the Roll Paper “Basic Operating Procedures (Mac)” on... -
Page 63: Fitting Documents To The Output Size
SC-T3100M Series/SC-T5100 Series/SC-T3100 Series/SC-T5100N Series/SC-T3100N Series/SC-T2100 Series User's Guide Printing with the Printer Driver from Your Computer Fit Short Side to Roll Paper Width Fitting Documents to the Select this when you want to print with the Output Size print image enlarged to the maximum size for the loaded roll paper. - Page 64 SC-T3100M Series/SC-T5100 Series/SC-T3100 Series/SC-T5100N Series/SC-T3100N Series/SC-T2100 Series User's Guide Printing with the Printer Driver from Your Computer If the size is different, select the correct size Select the desired size from the Output Size from the pull-down menu. pull-down menu.
-
Page 65: Choosing A Print Size
SC-T3100M Series/SC-T5100 Series/SC-T3100 Series/SC-T5100N Series/SC-T3100N Series/SC-T2100 Series User's Guide Printing with the Printer Driver from Your Computer “Basic Operating Procedures (Mac)” on Choosing a Print Size page 54 Check the document size (or paper size) setting Note: on the Printer Settings tab of the printer driver. -
Page 66: Printing At Non-Standard Sizes
SC-T3100M Series/SC-T5100 Series/SC-T3100 Series/SC-T5100N Series/SC-T3100N Series/SC-T2100 Series User's Guide Printing with the Printer Driver from Your Computer Select the size specification method from Printing at Non-Standard Width, Length, and Scale to and then enter the setting value. Sizes The print image is enlarged or reduced so that... - Page 67 SC-T3100M Series/SC-T5100 Series/SC-T3100 Series/SC-T5100N Series/SC-T3100N Series/SC-T2100 Series User's Guide Printing with the Printer Driver from Your Computer Settings in Windows Note: ❏ To change the paper size you saved, select the Display the Printer Settings tab of the printer driver from the application and then click paper size name from the list on the left.
- Page 68 SC-T3100M Series/SC-T5100 Series/SC-T3100 Series/SC-T5100N Series/SC-T3100N Series/SC-T2100 Series User's Guide Printing with the Printer Driver from Your Computer Settings in Mac Enter values in Width and Height of the Paper Size, enter the margins, and then click OK. Open the page setup screen of the application...
- Page 69 SC-T3100M Series/SC-T5100 Series/SC-T3100 Series/SC-T5100N Series/SC-T3100N Series/SC-T2100 Series User's Guide Printing with the Printer Driver from Your Computer When you have finished creating the data, display the Printer Settings tab of the printer driver from the Print dialog box. The registered paper size is displayed in Document Size on the Printer Settings tab.
-
Page 70: Correct Color And Print
SC-T3100M Series/SC-T5100 Series/SC-T3100 Series/SC-T5100N Series/SC-T3100N Series/SC-T2100 Series User's Guide Printing with the Printer Driver from Your Computer If you clear the Simple Settings check box, you can Correct color and print check which of the above color correction methods is used. - Page 71 SC-T3100M Series/SC-T5100 Series/SC-T3100 Series/SC-T5100N Series/SC-T3100N Series/SC-T2100 Series User's Guide Printing with the Printer Driver from Your Computer Display the Printer Settings tab of the printer Color Management driver and then clear the Simple Settings check Settings box in the Print Quality area.
- Page 72 SC-T3100M Series/SC-T5100 Series/SC-T3100 Series/SC-T5100N Series/SC-T3100N Series/SC-T2100 Series User's Guide Printing with the Printer Driver from Your Computer If necessary, click Settings and then adjust Settings example of Adobe Photoshop CC items such as the Gamma, Brightness, Contrast, Saturation, and color balance.
- Page 73 SC-T3100M Series/SC-T5100 Series/SC-T3100 Series/SC-T5100N Series/SC-T3100N Series/SC-T2100 Series User's Guide Printing with the Printer Driver from Your Computer Select Printer Settings from the list and then If necessary, click Settings and then adjust clear the Simple Settings check box in the items such as the Gamma, Brightness, Contrast, Print Quality area.
-
Page 74: Color Management Printing
SC-T3100M Series/SC-T5100 Series/SC-T3100 Series/SC-T5100N Series/SC-T3100N Series/SC-T2100 Series User's Guide Printing with the Printer Driver from Your Computer Color Management Color Management Print Settings Printing You can perform color management printing using this printer's printer driver in the following two ways. -
Page 75: Setting Color Management With The Applications
SC-T3100M Series/SC-T5100 Series/SC-T3100 Series/SC-T5100N Series/SC-T3100N Series/SC-T2100 Series User's Guide Printing with the Printer Driver from Your Computer Setting profiles Setting color management with the applications Settings for the input profile, printer profile, and intent (matching method) vary between three types of... - Page 76 SC-T3100M Series/SC-T5100 Series/SC-T3100 Series/SC-T5100N Series/SC-T3100N Series/SC-T2100 Series User's Guide Printing with the Printer Driver from Your Computer For Mac Set color management to off. For Windows Select Printer Settings from the list and clear the Simple Settings check box in the Print...
-
Page 77: Setting Color Management With The Printer Driver
SC-T3100M Series/SC-T5100 Series/SC-T3100 Series/SC-T5100N Series/SC-T3100N Series/SC-T2100 Series User's Guide Printing with the Printer Driver from Your Computer Settings example of Adobe Photoshop CC Setting color management with Open the Print dialog box. the printer driver Select Color Management, then select Printer... - Page 78 SC-T3100M Series/SC-T5100 Series/SC-T3100 Series/SC-T5100N Series/SC-T3100N Series/SC-T2100 Series User's Guide Printing with the Printer Driver from Your Computer Color Management Printing by Click Settings. ColorSync (Mac) Use image data in which an input profile has been embedded. Also, the application must support ColorSync.
- Page 79 SC-T3100M Series/SC-T5100 Series/SC-T3100 Series/SC-T5100N Series/SC-T3100N Series/SC-T2100 Series User's Guide Printing with the Printer Driver from Your Computer Select Color Management, then select Printer Color Management Printing by Manages Colors in Color Handling, and click Print. Driver ICM (Windows Only) The printer driver uses its own printer profiles to perform color management.
- Page 80 SC-T3100M Series/SC-T5100 Series/SC-T3100 Series/SC-T5100N Series/SC-T3100N Series/SC-T2100 Series User's Guide Printing with the Printer Driver from Your Computer Click Settings. Intent Explanation Relative Converts the data so that a set Colorimetric of color gamut and white point (or color temperature) coordinates in the original data match their corresponding print coordinates.
-
Page 81: Multi-Page Printing (N-Up)
SC-T3100M Series/SC-T5100 Series/SC-T3100 Series/SC-T5100N Series/SC-T3100N Series/SC-T2100 Series User's Guide Printing with the Printer Driver from Your Computer Set Number of pages per sheet and Page Multi-Page Printing Order in the Print Layout dialog box. (N-up) If the Print page frames check box is selected, page frames are printed on each page. -
Page 82: Manual Double Sided Printing (Windows Only)
SC-T3100M Series/SC-T5100 Series/SC-T3100 Series/SC-T5100N Series/SC-T3100N Series/SC-T2100 Series User's Guide Printing with the Printer Driver from Your Computer Manual Double Sided Note: You can print frames around arranged pages Printing (Windows Only) using the Border function. This function is only available when Auto Sheet Check other settings, and then start printing. - Page 83 SC-T3100M Series/SC-T5100 Series/SC-T3100 Series/SC-T5100N Series/SC-T3100N Series/SC-T2100 Series User's Guide Printing with the Printer Driver from Your Computer Display the Basic Settings screen for the printer Note: driver, and then select Auto Sheet Feeder as ❏ Click Binding Settings to set the Binding the Source.
-
Page 84: Folded 2-Sided Printing (Windows Only)
SC-T3100M Series/SC-T5100 Series/SC-T3100 Series/SC-T5100N Series/SC-T3100N Series/SC-T2100 Series User's Guide Printing with the Printer Driver from Your Computer Set Binding Edge and Binding Margin in the Folded 2-Sided Printing Folded Double-Side Setting dialog box. (Windows only) Two consecutive pages can be printed on a single sheet. -
Page 85: Poster Printing (Windows Only)
SC-T3100M Series/SC-T5100 Series/SC-T3100 Series/SC-T5100N Series/SC-T3100N Series/SC-T2100 Series User's Guide Printing with the Printer Driver from Your Computer Set Number of panels in the Poster dialog box. Poster Printing (Windows Only) A single page can be printed across multiple sheets. The sheets can then be joined together to form large posters (up to 16 times the original size). - Page 86 SC-T3100M Series/SC-T5100 Series/SC-T3100 Series/SC-T5100N Series/SC-T3100N Series/SC-T2100 Series User's Guide Printing with the Printer Driver from Your Computer Overlapping Alignment Marks The following section describes how to join four printed pages together. Prints guides for joining the paper with overlapping. The finished size is smaller only for the overlapping portions.
- Page 87 SC-T3100M Series/SC-T5100 Series/SC-T3100 Series/SC-T5100N Series/SC-T3100N Series/SC-T2100 Series User's Guide Printing with the Printer Driver from Your Computer Ready the two top sheets and trim the excess With the two sheets overlapping, trim the from the left sheet by cutting along the line...
- Page 88 SC-T3100M Series/SC-T5100 Series/SC-T3100 Series/SC-T5100N Series/SC-T3100N Series/SC-T2100 Series User's Guide Printing with the Printer Driver from Your Computer Trim the bottom from the upper sheets by With the two sheets overlapping, trim the cutting along the line joining the two guides excess by cutting along the line joining the two (the lines above the X marks).
- Page 89 SC-T3100M Series/SC-T5100 Series/SC-T3100 Series/SC-T5100N Series/SC-T3100N Series/SC-T2100 Series User's Guide Printing with the Printer Driver from Your Computer Join the upper and lower sheets together. After joining all the sheets, trim off the borders by cutting along the cut guides (outside the X Use an adhesive tape to stick the backs of the marks).
-
Page 90: Printing Multiple Documents (Layout Manager) (Windows Only)
SC-T3100M Series/SC-T5100 Series/SC-T3100 Series/SC-T5100N Series/SC-T3100N Series/SC-T2100 Series User's Guide Printing with the Printer Driver from Your Computer Printing Multiple Setting Procedures for Printing Documents (Layout Open the file you want to print in your application. Manager) (Windows Only) Select the Layout Manager check box on the... -
Page 91: Saving And Recalling Settings
SC-T3100M Series/SC-T5100 Series/SC-T3100 Series/SC-T5100N Series/SC-T3100N Series/SC-T2100 Series User's Guide Printing with the Printer Driver from Your Computer The overall size and placement of the objects Saving and Recalling Settings can be changed using the Preferences and Arrangement options in the File menu. -
Page 92: Printing Using The Hp-Gl/2 Or Hp Rtl
SC-T3100M Series/SC-T5100 Series/SC-T3100 Series/SC-T5100N Series/SC-T3100N Series/SC-T2100 Series User's Guide Printing Using the HP-GL/2 or HP RTL Mode from a Computer Check Paper Source and change the setting if Printing Using the necessary. The default setting is Roll Paper. When HP-GL/... -
Page 93: Cad Application Settings
SC-T3100M Series/SC-T5100 Series/SC-T3100 Series/SC-T5100N Series/SC-T3100N Series/SC-T2100 Series User's Guide Printing Using the HP-GL/2 or HP RTL Mode from a Computer ❏ SC-T3100M Series/SC-T3100 Series/ Note: SC-T3100N Series/SC-T2100 Series: When HP-GL/2 or HP RTL printing is not performed HP Designjet 750C C3195A... -
Page 94: Changing The Network Connection Methods
SC-T3100M Series/SC-T5100 Series/SC-T3100 Series/SC-T5100N Series/SC-T3100N Series/SC-T2100 Series User's Guide Changing the Network Connection Methods Connect your router and the printer with a Changing the LAN cable. See the following for the location of the Network Connection printer's LAN port. “Back” on page 12... -
Page 95: Directly Connecting Wirelessly (Wi-Fi Direct)
SC-T3100M Series/SC-T5100 Series/SC-T3100 Series/SC-T5100N Series/SC-T3100N Series/SC-T2100 Series User's Guide Changing the Network Connection Methods Touch Enter Password and enter the password. Touch on the Home screen. Note: Note: The shape and color of the icon differ depending ❏ Differentiate between uppercase and on the connection status. -
Page 96: Using Airprint
SC-T3100M Series/SC-T5100 Series/SC-T3100 Series/SC-T5100N Series/SC-T3100N Series/SC-T2100 Series User's Guide Using AirPrint Using AirPrint AirPrint enables instant wireless printing from iPhone, iPad, iPod touch, and Mac without the need to install drivers or download software. Note: If you disabled paper configuration messages on your product control panel, you cannot use AirPrint. -
Page 97: Printing Without Using The Printer Driver
SC-T3100M Series/SC-T5100 Series/SC-T3100 Series/SC-T5100N Series/SC-T3100N Series/SC-T2100 Series User's Guide Printing without Using the Printer Driver “Loading paper into the auto sheet feeder” Printing without on page 35 “Loading Cut Sheet(1 sheet)” on page 39 Using the Printer Start Web Config. -
Page 98: Printing Files From A Shared Folder (Print From Folder) (Sc-T3100M Series Only)
SC-T3100M Series/SC-T5100 Series/SC-T3100 Series/SC-T5100N Series/SC-T3100N Series/SC-T2100 Series User's Guide Printing without Using the Printer Driver Start printing by dragging and dropping the data. Touch General Settings - Network Settings - Advanced - Shared Folder. The shared folder settings screen appears. -
Page 99: Print From Folder Procedure
SC-T3100M Series/SC-T5100 Series/SC-T3100 Series/SC-T5100N Series/SC-T3100N Series/SC-T2100 Series User's Guide Printing without Using the Printer Driver ❏ User Name: Enter the user name that you use Note: to log into the computer. ❏ If HP-GL/2 files are selected in Page ❏ Password: Enter the password that you use to Margins option - Borderless, either Clip By log into the computer. - Page 100 SC-T3100M Series/SC-T5100 Series/SC-T3100 Series/SC-T5100N Series/SC-T3100N Series/SC-T2100 Series User's Guide Printing without Using the Printer Driver Select 1 file to print. Note: If you touch (Presets), you can assign a name Printing JPEG files to frequently used print settings and then register Touch to select the file image to print, then them to Presets.
-
Page 101: Copying (Sc-T3100M Series Only)
SC-T3100M Series/SC-T5100 Series/SC-T3100 Series/SC-T5100N Series/SC-T3100N Series/SC-T2100 Series User's Guide Copying (SC-T3100M Series only) ❏ Actual printing stock Copying (SC-T3100M ❏ Carrier sheet Series only) Important: If tracing paper is loaded, the printer cannot Placing Documents in the automatically detect the width. On the control panel, set Original Size or Scan Size. -
Page 102: When Loading Documents That Are Thin, That Are Easily Torn, Or That You Do Not Want To Damage
SC-T3100M Series/SC-T5100 Series/SC-T3100 Series/SC-T5100N Series/SC-T3100N Series/SC-T2100 Series User's Guide Copying (SC-T3100M Series only) Documents That Need the Carrier When loading documents that Sheet are thin, that are easily torn, or that you do not want to damage ❏ Valuable documents that you do not want to damage (documents on loan, master copies, old drawings, antique maps, works of art, etc.) -
Page 103: How To Load Documents
SC-T3100M Series/SC-T5100 Series/SC-T3100 Series/SC-T5100N Series/SC-T3100N Series/SC-T2100 Series User's Guide Copying (SC-T3100M Series only) How to Load Documents Important: ❏ If the original tends to curl, load the original after straightening the curl. ❏ Smooth the creases in the original, and then load it. - Page 104 SC-T3100M Series/SC-T5100 Series/SC-T3100 Series/SC-T5100N Series/SC-T3100N Series/SC-T2100 Series User's Guide Copying (SC-T3100M Series only) Touch Copy on the Home screen. In Basic Settings, do the settings for Color, Quality, Density, and Reduce/Enlarge. “Copy Menu (SC-T3100M Series Only) ” on page 164 If you are doing detailed settings, such as Original Type, do the settings from Advanced.
-
Page 105: Scanning (Sc-T3100M Series Only)
SC-T3100M Series/SC-T5100 Series/SC-T3100 Series/SC-T5100N Series/SC-T3100N Series/SC-T2100 Series User's Guide Scanning (SC-T3100M Series Only) ❏ Settings for the recipient email addresses and the Scanning contacts for the shared folder Do the settings from the printer's screen or from (SC-T3100M Series Web Config. This section explains the contacts settings in the shared folder from the printer's screen. -
Page 106: Procedure For Scanning
SC-T3100M Series/SC-T5100 Series/SC-T3100 Series/SC-T5100N Series/SC-T3100N Series/SC-T2100 Series User's Guide Scanning (SC-T3100M Series Only) ❏ Assign to Frequent Use: Register an address for frequent use. When an address is specified, it will appear on the top screen. Note: If you do not have a password set on your computer, you do not have to enter a user name or password. -
Page 107: Scanning And Attaching An Image To An Email
SC-T3100M Series/SC-T5100 Series/SC-T3100 Series/SC-T5100N Series/SC-T3100N Series/SC-T2100 Series User's Guide Scanning (SC-T3100M Series Only) ❏ Keyboard: Touch Keyboard and enter a Press the Save button to start scanning. recipient. Touch OK. While scanning, hold the original with both ❏ Select from your contacts: Touch Contacts, hands so that it does not skew. -
Page 108: Scanning And Saving An Image To A Memory Device
SC-T3100M Series/SC-T5100 Series/SC-T3100 Series/SC-T5100N Series/SC-T3100N Series/SC-T2100 Series User's Guide Scanning (SC-T3100M Series Only) Scanning and Saving an Image to a Memory Device Connect a USB flash memory to the printer. Load the original. “Placing Documents in the Scanner” on page 101 “How to Load Documents”... -
Page 109: A4 Scanner
SC-T3100M Series/SC-T5100 Series/SC-T3100 Series/SC-T5100N Series/SC-T3100N Series/SC-T2100 Series User's Guide Making Enlarged Copies with an A3 or A4 Scanner (Except for the SC-T3100M Series) Supported paper Making Enlarged Roll paper only. Enlarged copying to cut sheet is not possible. Copies with an A3 or... -
Page 110: Placing Documents In The Scanner
SC-T3100M Series/SC-T5100 Series/SC-T3100 Series/SC-T5100N Series/SC-T3100N Series/SC-T2100 Series User's Guide Making Enlarged Copies with an A3 or A4 Scanner (Except for the SC-T3100M Series) Place the document on the scanner glass or in Note: the auto document feeder (ADF). If you touch... - Page 111 SC-T3100M Series/SC-T5100 Series/SC-T3100 Series/SC-T5100N Series/SC-T3100N Series/SC-T2100 Series User's Guide Making Enlarged Copies with an A3 or A4 Scanner (Except for the SC-T3100M Series) ❏ If there are documents both on the glass and in the ADF, the document in the ADF will be scanned.
-
Page 112: Using The Menu
SC-T3100M Series/SC-T5100 Series/SC-T3100 Series/SC-T5100N Series/SC-T3100N Series/SC-T2100 Series User's Guide Using the Menu Using the Menu Menu List The items and options available in the menu are described below. See the reference pages for more details on each item. Paper Setting The Paper Setting menu is displayed if paper is loaded. - Page 113 SC-T3100M Series/SC-T5100 Series/SC-T3100 Series/SC-T5100N Series/SC-T3100N Series/SC-T2100 Series User's Guide Using the Menu Settings item Settings value Change Paper Type Paper Type Plain Paper Display supported paper types Coated Paper(Generic) Premium Glossy Sheet Others Auto Sheet Feeder Media Adjust Start Change Paper Type/Paper Size...
- Page 114 Message List Display list of messages communicating printer status Firmware Version Display firmware version Print Status Sheet Configuration Status Sheet Print Settings Items marked with an asterisk (*) are displayed only for the SC-T3100M Series. Settings item Settings value General Settings...
- Page 115 SC-T3100M Series/SC-T5100 Series/SC-T3100 Series/SC-T5100N Series/SC-T3100N Series/SC-T2100 Series User's Guide Using the Menu Settings item Settings value Basic Settings (Details of each item U “General Settings - Basic Settings” on page 136) LCD Brightness 1 to 9 Sound Mute On, Off...
- Page 116 SC-T3100M Series/SC-T5100 Series/SC-T3100 Series/SC-T5100N Series/SC-T3100N Series/SC-T2100 Series User's Guide Using the Menu Settings item Settings value Printer Settings (Details of each item U “General Settings - Printer Settings” on page 139) Paper Source Settings Error Notice Paper Size Notice On, Off...
- Page 117 SC-T3100M Series/SC-T5100 Series/SC-T3100 Series/SC-T5100N Series/SC-T3100N Series/SC-T2100 Series User's Guide Using the Menu Settings item Settings value Universal Print Settings Paper Source Roll Paper, Auto Sheet Feeder, Cut Sheet(1 sheet) Quality Standard, Speed, Fine, Super Fine Color Mode Color, Black/White Page Margins option...
- Page 118 SC-T3100M Series/SC-T5100 Series/SC-T3100 Series/SC-T5100N Series/SC-T3100N Series/SC-T2100 Series User's Guide Using the Menu Settings item Settings value Memory Device Interface Memory Device Enable, Disable Thick Paper Off, On Bidirectional On, Off PC Connection via USB Enable, Disable USB I/F Timeout Setting...
- Page 119 (Displayed when enabled.) Disable IEEE802.1X Enable, Disable iBeacon Transmission Scan Settings (Details of Each Item U “General Settings - Scan Settings (SC-T3100M Series only)” on page 152) Confirm Recipient On, Off Email Server Server Settings Off, POP before SMTP, SMTP-AUTH...
- Page 120 SC-T3100M Series/SC-T5100 Series/SC-T3100 Series/SC-T5100N Series/SC-T3100N Series/SC-T2100 Series User's Guide Using the Menu Settings item Settings value System Administration (Details of each item U “General Settings - System Administration” on page 155) Contacts Manager Register/Delete Display the Register/Delete screen for Contacts...
- Page 121 Contacts Manager Manager Enlarged Copy (except for the SC-T3100M Series) Displayed when an Epson A3 or A4 scanner is connected to the printer. Set scaling in this menu to enable enlarged printing of the scanned documents. Details of each item U “Enlarged Copy menu (except for the SC-T3100M Series)”...
- Page 122 Displayed when a USB flash memory is connected to the printer. You can print JPEG, TIFF, or PDF files (only data created on an Epson printer) stored on the drive directly from this printer. The following shows the Basic Settings and Advanced menus for JPEG, TIFF, and PDF.
- Page 123 SC-T3100M Series/SC-T5100 Series/SC-T3100 Series/SC-T5100N Series/SC-T3100N Series/SC-T2100 Series User's Guide Using the Menu Settings item Settings value Basic Settings Copies 1 to 99 Color Mode Black/White, Color Quality Speed, Fine, Super Fine Density -4 to 4 Paper Source Roll Paper, Auto Sheet Feeder, Cut Sheet(1 sheet)
- Page 124 SC-T3100M Series/SC-T5100 Series/SC-T3100 Series/SC-T5100N Series/SC-T3100N Series/SC-T2100 Series User's Guide Using the Menu Settings item Settings value Original Size Auto Detect ISO A Display supported sizes for originals US-ANSI US-ARCH JIS B ISO B User-Defined Display the Original Size Input screen Top Offset 0.0 to 100.0 mm...
- Page 125 SC-T3100M Series/SC-T5100 Series/SC-T3100 Series/SC-T5100N Series/SC-T3100N Series/SC-T2100 Series User's Guide Using the Menu Settings item Settings value Destination Display the Location Selection screen Scan Settings Color Mode Black/White, Color File Format File Format JPEG, PDF, PDF/A, TIFF (Multi Page) Compression Ratio...
- Page 126 SC-T3100M Series/SC-T5100 Series/SC-T3100 Series/SC-T5100N Series/SC-T3100N Series/SC-T2100 Series User's Guide Using the Menu Settings item Settings value Image Quality Contrast -4 to 4 Sharpness -4 to 4 Remove Background Auto On, Off -4 to 4 File Name Filename Prefix Enter the filename prefix...
- Page 127 SC-T3100M Series/SC-T5100 Series/SC-T3100 Series/SC-T5100N Series/SC-T3100N Series/SC-T2100 Series User's Guide Using the Menu Settings item Settings value Scan Size Auto Detect ISO A Display supported scan sizes US-ANSI US-ARCH JIS B ISO B User-Defined Display the Scan Size Input screen Top Offset 0.0 to 100.0 mm...
- Page 128 SC-T3100M Series/SC-T5100 Series/SC-T3100 Series/SC-T5100N Series/SC-T3100N Series/SC-T2100 Series User's Guide Using the Menu Settings item Settings value Basic Settings Color Mode Black/White, Color File Format File Format JPEG, PDF, PDF/A, TIFF (Multi Page) Compression Ratio High Compression, Standard Compression, Low Compression...
- Page 129 SC-T3100M Series/SC-T5100 Series/SC-T3100 Series/SC-T5100N Series/SC-T3100N Series/SC-T2100 Series User's Guide Using the Menu Settings item Settings value Advanced Density -4 to 4 Image Quality Contrast -4 to 4 Sharpness -4 to 4 Remove Background Auto On, Off -4 to 4 File Name...
-
Page 130: Paper Setting Menu
SC-T3100M Series/SC-T5100 Series/SC-T3100 Series/SC-T5100N Series/SC-T3100N Series/SC-T2100 Series User's Guide Using the Menu Paper Setting menu Roll Paper menu ❏ The Paper Setting menu is displayed if paper is loaded. ❏ Media Adjust adjustment results, and settings in Advanced Media Setting and Manage Remaining Amount are stored for each paper type in Paper Type. - Page 131 SC-T3100M Series/SC-T5100 Series/SC-T3100 Series/SC-T5100N Series/SC-T3100N Series/SC-T2100 Series User's Guide Using the Menu Settings item Settings value Explanation Platen Gap This is displayed when Custom Paper is selected in Paper Type. When registering Custom Paper, this is set to the Platen Gap...
- Page 132 SC-T3100M Series/SC-T5100 Series/SC-T3100 Series/SC-T5100N Series/SC-T3100N Series/SC-T2100 Series User's Guide Using the Menu Settings item Settings value Explanation Setup Select whether to display/record (On) or not to display/ record (Off) the amount of remaining roll paper. Set to On to enable Remaining Amount and Remaining Alert.
-
Page 133: Auto Sheet Feeder Menu
SC-T3100M Series/SC-T5100 Series/SC-T3100 Series/SC-T5100N Series/SC-T3100N Series/SC-T2100 Series User's Guide Using the Menu Auto Sheet Feeder menu The Paper Setting menu is displayed if paper is loaded. *Default setting Settings item Settings value Explanation Media Adjust Start Run this adjustment when there is a problem with print results, or after registering custom paper settings. -
Page 134: Cut Sheet(1 Sheet) Menu
SC-T3100M Series/SC-T5100 Series/SC-T3100 Series/SC-T5100N Series/SC-T3100N Series/SC-T2100 Series User's Guide Using the Menu Cut Sheet(1 sheet) menu The Paper Setting menu is displayed if paper is loaded. *Default setting Settings item Settings value Explanation Remove Touch to eject the loaded cut sheet (1 sheet) without printing. -
Page 135: Printer Status Menu
SC-T3100M Series/SC-T5100 Series/SC-T3100 Series/SC-T5100N Series/SC-T3100N Series/SC-T2100 Series User's Guide Using the Menu Printer Status menu *Default setting Settings item Settings value Explanation Supply Status Display the approximate remaining amounts of each color in ink cartridge and its product number, and the approximate capacity in and product number of the Maintenance Box. -
Page 136: Settings Menu
SC-T3100M Series/SC-T5100 Series/SC-T3100 Series/SC-T5100N Series/SC-T3100N Series/SC-T2100 Series User's Guide Using the Menu Settings menu General Settings General Settings - Basic Settings *Default setting Settings item Settings value Explanation LCD Brightness Adjust screen brightness. 1 to 9 (9 Sound (SC-T3100M Series only) - Page 137 SC-T3100M Series/SC-T5100 Series/SC-T3100 Series/SC-T5100N Series/SC-T3100N Series/SC-T2100 Series User's Guide Using the Menu Settings item Settings value Explanation Power Off Timer You can select the time after which the printer will turn off automatically if no errors have occurred, no print jobs have been...
- Page 138 SC-T3100M Series/SC-T5100 Series/SC-T3100 Series/SC-T5100N Series/SC-T3100N Series/SC-T2100 Series User's Guide Using the Menu Settings item Settings value Explanation Keyboard Select the key arrangement for the text input screen displayed QWERTY (Except for the when entering the name of Custom Paper or other name.
- Page 139 SC-T3100M Series/SC-T5100 Series/SC-T3100 Series/SC-T5100N Series/SC-T3100N Series/SC-T2100 Series User's Guide Using the Menu General Settings - Printer Settings *Default setting Settings item Settings value Explanation Paper Source Settings Error Notice Paper Size Notice Setting this to On will display an error message when the output size or paper type settings of print jobs sent to the printer differ from those settings in the printer.
- Page 140 SC-T3100M Series/SC-T5100 Series/SC-T3100 Series/SC-T5100N Series/SC-T3100N Series/SC-T2100 Series User's Guide Using the Menu Settings item Settings value Explanation Custom Paper Setting (Touching any of the registry numbers from 01 to 10 will display settings items.) Change Name Register and change the name of the custom paper settings. The name registered here is displayed in the Paper Type list.
- Page 141 SC-T3100M Series/SC-T5100 Series/SC-T3100 Series/SC-T5100N Series/SC-T3100N Series/SC-T2100 Series User's Guide Using the Menu Settings item Settings value Explanation Advanced Media Setting Platen Gap This is the Platen Gap (distance between print head and paper) for the paper selected in Change Reference Paper, so it does not normally need to be changed.
- Page 142 SC-T3100M Series/SC-T5100 Series/SC-T3100 Series/SC-T5100N Series/SC-T3100N Series/SC-T2100 Series User's Guide Using the Menu Settings item Settings value Explanation Normally, leave the setting as Auto. If HP-GL/2 or HP RTL print data Auto is sent from a CAD application or plotter, this is automatically determined, and switched to HP-GL/2 mode.
- Page 143 SC-T3100M Series/SC-T5100 Series/SC-T3100 Series/SC-T5100N Series/SC-T3100N Series/SC-T2100 Series User's Guide Using the Menu Settings item Settings value Explanation Universal Print Settings Paper Source Select the paper source. If the paper is not loaded as in the set Roll Paper paper source, then an error will occur during printing.
- Page 144 SC-T3100M Series/SC-T5100 Series/SC-T3100 Series/SC-T5100N Series/SC-T3100N Series/SC-T2100 Series User's Guide Using the Menu Settings item Settings value Explanation Oversize The position at which the margin is added depends on the base output size setting, as shown below. ❏ When set to Auto...
- Page 145 SC-T3100M Series/SC-T5100 Series/SC-T3100 Series/SC-T5100N Series/SC-T3100N Series/SC-T2100 Series User's Guide Using the Menu Settings item Settings value Explanation Page Margin Select the top, bottom, left, and right margin values. 3 mm For a cut sheet, the top, bottom, left, and right margin values are 3 5 mm mm regardless of the settings.
- Page 146 SC-T3100M Series/SC-T5100 Series/SC-T3100 Series/SC-T5100N Series/SC-T3100N Series/SC-T2100 Series User's Guide Using the Menu Settings item Settings value Explanation Resolution This setting is enabled when the resolution is not specified in the Standard sent print data. Standard prints at the resolution corresponding to...
- Page 147 SC-T3100M Series/SC-T5100 Series/SC-T3100 Series/SC-T5100N Series/SC-T3100N Series/SC-T2100 Series User's Guide Using the Menu Settings item Settings value Explanation Mirror Image Select whether to flip horizontally (mirror) using the center of the output size width as the basis line and then print (On) or print without flipping horizontally (Off).
- Page 148 SC-T3100M Series/SC-T5100 Series/SC-T3100 Series/SC-T5100N Series/SC-T3100N Series/SC-T2100 Series User's Guide Using the Menu Settings item Settings value Explanation Select Palette From the following selections, choose the palette that specifies the Software color and thickness of the logical pen. Default ❏ Software: Print according to the pen configuration set in the application, and ignore the built-in palette of the printer.
- Page 149 SC-T3100M Series/SC-T5100 Series/SC-T3100 Series/SC-T5100N Series/SC-T3100N Series/SC-T2100 Series User's Guide Using the Menu Settings item Settings value Explanation Bidirectional Setting this to On will cause the print head to print while moving both left and right. Setting this to Off reduces ruled line misalignment, but printing takes more time.
- Page 150 SC-T3100M Series/SC-T5100 Series/SC-T3100 Series/SC-T5100N Series/SC-T3100N Series/SC-T2100 Series User's Guide Using the Menu General Settings - Network Settings *Default setting Settings item Settings value Explanation Wi-Fi Setup Router (Connect via Wi-Fi) Disconnected or disabled This is displayed in gray. Touch this, and on the next screen touching Start Setup will display a Wi-Fi Setup Wizard menu, performing a connection operation.
- Page 151 SC-T3100M Series/SC-T5100 Series/SC-T3100 Series/SC-T5100N Series/SC-T3100N Series/SC-T2100 Series User's Guide Using the Menu Settings item Settings value Explanation Wi-Fi Direct Disconnected or disabled This is displayed in gray. Touch this, and then touch Start Setup on the next screen to display Start Setup. Touch Start Setup to enable Wi-Fi Direct and display the printer's SSID and password.
- Page 152 SC-T3100M Series/SC-T5100 Series/SC-T3100 Series/SC-T5100N Series/SC-T3100N Series/SC-T2100 Series User's Guide Using the Menu Settings item Settings value Explanation Advanced Device Name Set the name of the printer to use on the network. TCP/IP Automatically assign the printer IP address using DHCP Auto functionality in the router.
- Page 153 SC-T3100M Series/SC-T5100 Series/SC-T3100 Series/SC-T5100N Series/SC-T3100N Series/SC-T2100 Series User's Guide Using the Menu Settings item Settings value Explanation Confirm Recipient Set to On to be able to check the recipients before scanning the original. Email Server Server Settings Select this when not setting an email server.
- Page 154 SC-T3100M Series/SC-T5100 Series/SC-T3100 Series/SC-T5100N Series/SC-T3100N Series/SC-T2100 Series User's Guide Using the Menu Settings item Settings value Explanation Confirm Before Eject- Set to On to keep the original at the paper eject slot after it is ing Scanned Docu- scanned and display the removal confirmation screen. If you want ment to eject the original right after scanning it, set this to Off.
- Page 155 SC-T3100M Series/SC-T5100 Series/SC-T3100 Series/SC-T5100N Series/SC-T3100N Series/SC-T2100 Series User's Guide Using the Menu General Settings - System Administration *Default setting Settings item Settings value Explanation Contacts Manager (SC-T3100M Series only) Register/Delete Register or delete addresses that are used in Scan to Email and Scan to Network Folder/FTP.
- Page 156 SC-T3100M Series/SC-T5100 Series/SC-T3100 Series/SC-T5100N Series/SC-T3100N Series/SC-T2100 Series User's Guide Using the Menu Settings item Settings value Explanation Restrictions (SC-T3100M Series only) Job log access Administrators can be permitted individually to view and change settings. Access to Register/ Delete Contacts Access to Recent...
- Page 157 SC-T3100M Series/SC-T5100 Series/SC-T3100 Series/SC-T5100N Series/SC-T3100N Series/SC-T2100 Series User's Guide Using the Menu Settings item Settings value Explanation Access Control With Access Control, you can control the functions that users can (SC-T3100M Series use by linking the functions to the accounts registered to the users only) on the printer.
-
Page 158: Maintenance
Using this function requires that the printer be connected to a network that can be connected to the Internet. Touch Start Checking to access the Epson website, and to start a search for new firmware. If there is a display indicating that there is new firmware, then follow the on-screen instructions to update the firmware. -
Page 159: Printer Status/Print
SC-T3100M Series/SC-T5100 Series/SC-T3100 Series/SC-T5100N Series/SC-T3100N Series/SC-T2100 Series User's Guide Using the Menu Settings item Settings value Explanation Ink Cartridge(s) Start Touch Start to move the print head to the position at which the ink Replacement cartridge can be replaced. The replacement procedure is shown on the screen, so replace the ink cartridges while referring to this. -
Page 160: Enlarged Copy Menu (Except For The Sc-T3100M Series)
Using the Menu Enlarged Copy menu (except for the SC-T3100M Series) Displayed when an Epson A3 or A4 scanner is connected to the printer. Set scaling in this menu to enable enlarged printing of the scanned documents. “Making Enlarged Copies with an A3 or A4 Scanner (Except for the SC-T3100M Series)” on page 109... -
Page 161: Memory Device (Sc-T3100M Series Only)
Epson printer) stored on the drive directly from this printer. The following shows the Basic Settings and Advanced menus for JPEG, TIFF, and PDF. “Printing Files on USB Flash Memory Directly (SC-T3100M Series Only) ” on page 99 Settings item... - Page 162 SC-T3100M Series/SC-T5100 Series/SC-T3100 Series/SC-T5100N Series/SC-T3100N Series/SC-T2100 Series User's Guide Using the Menu Settings item Settings value Explanation Oversize Add margins (areas of in the following illustration) outside the output size (areas of in the following illustration) set in the Reduce/Enlarge settings. With the actual output size, the margin...
- Page 163 SC-T3100M Series/SC-T5100 Series/SC-T3100 Series/SC-T5100N Series/SC-T3100N Series/SC-T2100 Series User's Guide Using the Menu Settings item Settings value Explanation Reduce/Enlarge Auto Fit Page Set to On to print so that the short edge of the original fits the width of the paper loaded in the printer.
-
Page 164: Copy Menu (Sc-T3100M Series Only)
SC-T3100M Series/SC-T5100 Series/SC-T3100 Series/SC-T5100N Series/SC-T3100N Series/SC-T2100 Series User's Guide Using the Menu Copy Menu (SC-T3100M Series Only) *Default setting Settings item Settings value Explanation Basic Settings... - Page 165 SC-T3100M Series/SC-T5100 Series/SC-T3100 Series/SC-T5100N Series/SC-T3100N Series/SC-T2100 Series User's Guide Using the Menu Settings item Settings value Explanation Copies 1 to 99 Specify the number of copies. Color Mode Black/White Select whether to copy in color or black and white. Color Quality Select the print quality.
- Page 166 SC-T3100M Series/SC-T5100 Series/SC-T3100 Series/SC-T5100N Series/SC-T3100N Series/SC-T2100 Series User's Guide Using the Menu Settings item Settings value Explanation Original Type Suitable for copying and scanning drawings printed on standard Text/Line Drawing plain paper. This is also suitable for posters and so on that contain images.
- Page 167 SC-T3100M Series/SC-T5100 Series/SC-T3100 Series/SC-T5100N Series/SC-T3100N Series/SC-T2100 Series User's Guide Using the Menu Settings item Settings value Explanation Oversize Add margins (areas of in the following illustration) outside the output size (areas of in the following illustration) set in the Reduce/Enlarge settings. With the actual output size, the margin sections become larger than the set output size (areas of in the following illustration).
-
Page 168: Scanning Menu (Sc-T3100M Series Only)
SC-T3100M Series/SC-T5100 Series/SC-T3100 Series/SC-T5100N Series/SC-T3100N Series/SC-T2100 Series User's Guide Using the Menu Scanning Menu (SC-T3100M Series Only) *Default setting Settings item Settings value Explanation Network Folder/FTP Destination Display the Location Specify the location for the scanned image. Selection screen Specify the location from the recipients registered for frequent use or the recipients registered in your Contacts. - Page 169 SC-T3100M Series/SC-T5100 Series/SC-T3100 Series/SC-T5100N Series/SC-T3100N Series/SC-T2100 Series User's Guide Using the Menu Settings item Settings value Explanation PDF Settings Document Open Password Setting the file format to PDF allows you to set the security for the PDF. Password Set Document Open Password when you create a PDF that requires Setting a password to be opened.
- Page 170 SC-T3100M Series/SC-T5100 Series/SC-T3100 Series/SC-T5100N Series/SC-T3100N Series/SC-T2100 Series User's Guide Using the Menu Settings item Settings value Explanation Original Type Suitable for copying and scanning drawings printed on standard Text/Line Drawing plain paper. This is also suitable for posters and so on that contain images.
- Page 171 SC-T3100M Series/SC-T5100 Series/SC-T3100 Series/SC-T5100N Series/SC-T3100N Series/SC-T2100 Series User's Guide Using the Menu Settings item Settings value Explanation Destination Display the Location Specify the recipient of the scanned image. Selection screen Specify a recipient from the recipients registered for frequent use or the recipients registered in your Contacts.
- Page 172 SC-T3100M Series/SC-T5100 Series/SC-T3100 Series/SC-T5100N Series/SC-T3100N Series/SC-T2100 Series User's Guide Using the Menu Settings item Settings value Explanation PDF Settings Document Open Password Setting the file format to PDF allows you to set the security for the PDF. Password Set Document Open Password when you create a PDF that requires Setting a password to be opened.
- Page 173 SC-T3100M Series/SC-T5100 Series/SC-T3100 Series/SC-T5100N Series/SC-T3100N Series/SC-T2100 Series User's Guide Using the Menu Settings item Settings value Explanation Original Type Suitable for copying and scanning drawings printed on standard Text/Line Drawing plain paper. This is also suitable for posters and so on that contain images.
- Page 174 SC-T3100M Series/SC-T5100 Series/SC-T3100 Series/SC-T5100N Series/SC-T3100N Series/SC-T2100 Series User's Guide Using the Menu Settings item Settings value Explanation Memory Device Basic Settings Color Mode Black/White Select whether to scan in color or black and white. Color File Format File Format JPEG Select the file format in which to save the scanned image.
- Page 175 SC-T3100M Series/SC-T5100 Series/SC-T3100 Series/SC-T5100N Series/SC-T3100N Series/SC-T2100 Series User's Guide Using the Menu Settings item Settings value Explanation Scan Size Auto Detect The default setting of Auto Detect is recommended in most situations. Note that, depending on the original, it may not be...
- Page 176 SC-T3100M Series/SC-T5100 Series/SC-T3100 Series/SC-T5100N Series/SC-T3100N Series/SC-T2100 Series User's Guide Using the Menu Settings item Settings value Explanation File Name Filename Prefix Enter the filename prefix Use single-byte alphanumeric characters or symbols to enter the prefix for the file name of the image.
-
Page 177: Network Folder/Ftp Menu (Sc-T3100M Series Only)
SC-T3100M Series/SC-T5100 Series/SC-T3100 Series/SC-T5100N Series/SC-T3100N Series/SC-T2100 Series User's Guide Using the Menu Network Folder/FTP Menu (SC-T3100M Series only) *Default setting Settings item Settings value Explanation Basic Settings Paper Source Select the paper source. If the paper is not loaded as in the set Roll Paper paper source, then an error will occur during printing. - Page 178 SC-T3100M Series/SC-T5100 Series/SC-T3100 Series/SC-T5100N Series/SC-T3100N Series/SC-T2100 Series User's Guide Using the Menu Settings item Settings value Explanation Oversize Add margins (areas of in the following illustration) outside the output size (areas of in the following illustration) set in the Reduce/Enlarge settings. With the actual output size, the margin...
-
Page 179: Clearing A Clogged Print Head
SC-T3100M Series/SC-T5100 Series/SC-T3100 Series/SC-T5100N Series/SC-T3100N Series/SC-T2100 Series User's Guide Maintenance If none of the pattern is missing, the print head Maintenance nozzles are not clogged. Touch to end the nozzle clogging check. Example of clogged nozzles Clearing a Clogged Print... -
Page 180: Replacing Consumables
SC-T3100M Series/SC-T5100 Series/SC-T3100 Series/SC-T5100N Series/SC-T3100N Series/SC-T2100 Series User's Guide Maintenance Replacing Consumables Important: Epson recommends the use of genuine Epson ink cartridges. Epson cannot guarantee the quality or Handling of Used Consumables reliability of non-genuine ink. The use of non-genuine ink may cause damage that is not... - Page 181 SC-T3100M Series/SC-T5100 Series/SC-T3100 Series/SC-T5100N Series/SC-T3100N Series/SC-T2100 Series User's Guide Maintenance Remove the new ink cartridge from the Remove the ink cartridge to replace. package and then peel off only the yellow tape. Important: Do not touch the parts shown in the illustration.
-
Page 182: Replacing Maintenance Box
SC-T3100M Series/SC-T5100 Series/SC-T3100 Series/SC-T5100N Series/SC-T3100N Series/SC-T2100 Series User's Guide Maintenance Close the cartridge cover and front cover. Replacing Maintenance Box For the SC-T3100M Series, close the cartridge cover and the scanner unit. When the message The Maintenance Box is at the Ink charging starts. -
Page 183: Replacing The Cutter
SC-T3100M Series/SC-T5100 Series/SC-T3100 Series/SC-T5100N Series/SC-T3100N Series/SC-T2100 Series User's Guide Maintenance Place the used Maintenance Box in the clear Replacing the Cutter bag included with the new Maintenance Box, and make sure that the zipper is closed tight. Replace the cutter when it is not cutting paper cleanly. - Page 184 SC-T3100M Series/SC-T5100 Series/SC-T3100 Series/SC-T5100N Series/SC-T3100N Series/SC-T2100 Series User's Guide Maintenance Loosen the screw holding the cutter in place using a cross-head screwdriver and pull the cutter straight out. Important: Screw the cutter firmly, otherwise the cut position may be slightly shifted or skewed.
- Page 185 SC-T3100M Series/SC-T5100 Series/SC-T3100 Series/SC-T5100N Series/SC-T3100N Series/SC-T2100 Series User's Guide Maintenance Touch OK. The cutter moves and the protective sheet stuck to the blade comes off. Remove the protective sheet. Close the cutter cover.
-
Page 186: Problem Solver
Refer to manual for details. ❏ Turn the devices on and off several times. The scanner can be used after the message is no longer displayed. If this message appears on the LCD panel again, contact your dealer or Epson Support. -
Page 187: When A Maintenance Call/Printer Error Occurs
(1) Connect a computer and the printer using a USB cable. (Updates during recovery mode cannot use a network connection.) (2) Download the latest firmware from the Epson website, and start the update. Refer to the firmware download page for update methods. -
Page 188: Troubleshooting
SC-T3100M Series/SC-T5100 Series/SC-T3100 Series/SC-T5100N Series/SC-T3100N Series/SC-T2100 Series User's Guide Problem Solver Troubleshooting Does the printer port setting match the printer connection port? Check the printer port. You cannot print (because the Click the Port tab in the printer Properties dialog... - Page 189 SC-T3100M Series/SC-T5100 Series/SC-T3100 Series/SC-T5100N Series/SC-T3100N Series/SC-T2100 Series User's Guide Problem Solver The printer has an error. When using a USB hub, is it being used correctly? View the message displayed on the control In the USB specification, daisy-chains of up to five panel.
-
Page 190: The Printer Operates, But Nothing Prints
SC-T3100M Series/SC-T5100 Series/SC-T3100 Series/SC-T5100N Series/SC-T3100N Series/SC-T2100 Series User's Guide Problem Solver Your problem is not listed here. Decide whether the trouble is caused by the printer driver or the application. (Windows) Perform a test print from the printer driver so that... -
Page 191: The Prints Are Not What You Expected
SC-T3100M Series/SC-T5100 Series/SC-T3100 Series/SC-T5100N Series/SC-T3100N Series/SC-T2100 Series User's Guide Problem Solver The prints are not what you expected If the following problems with print quality occur, then respond by following the process flow on this page. Double ruled lines or warped... - Page 192 SC-T3100M Series/SC-T5100 Series/SC-T3100 Series/SC-T5100N Series/SC-T3100N Series/SC-T2100 Series User's Guide Problem Solver Ink drips Differences in color/light/dark If there are differences in color/light/dark, then handle these by following the process below. “The prints are not what you expected” on page 191 If these measures do not resolve the issue, check the following items.
- Page 193 SC-T3100M Series/SC-T5100 Series/SC-T3100 Series/SC-T5100N Series/SC-T3100N Series/SC-T2100 Series User's Guide Problem Solver Have you compared the printing result with Is the paper skewed? the image on the display monitor? If Off is selected for Detect Paper Meandering in the Printer Settings menu, printing will continue...
- Page 194 SC-T3100M Series/SC-T5100 Series/SC-T3100 Series/SC-T5100N Series/SC-T3100N Series/SC-T2100 Series User's Guide Problem Solver Roll paper and cut sheets are Is the paper wrinkled or creased? smeared in similar ways Do not use old paper or paper with creases in it. Always use new paper.
- Page 195 SC-T3100M Series/SC-T5100 Series/SC-T3100 Series/SC-T5100N Series/SC-T3100N Series/SC-T2100 Series User's Guide Problem Solver The reverse side of the printed paper Check if the ejected paper is smeared. ❏ If it is smeared: Touch Run Again if the is soiled. paper is smeared.
-
Page 196: Feeding Or Ejecting Problems
SC-T3100M Series/SC-T5100 Series/SC-T3100 Series/SC-T5100N Series/SC-T3100N Series/SC-T2100 Series User's Guide Problem Solver Feeding or ejecting problems Are the edges of the roll paper uneven? Loading roll paper with the right and left edges uneven may cause paper feeding problems or paper Unable to feed or eject paper. - Page 197 SC-T3100M Series/SC-T5100 Series/SC-T3100 Series/SC-T5100N Series/SC-T3100N Series/SC-T2100 Series User's Guide Problem Solver Paper does not collect in the paper Cut the top portion of any torn or wrinkled areas using a commercially available cutter. basket, or is creased or folded Does the print job require a lot of ink, or is...
- Page 198 SC-T3100M Series/SC-T5100 Series/SC-T3100 Series/SC-T5100N Series/SC-T3100N Series/SC-T2100 Series User's Guide Problem Solver Important: After removing the paper, reload the paper and restart Before you reload the roll paper, cut the edge printing. straight horizontally. Cut any wavy or wrinkled sections. “Loading paper into the auto sheet feeder” on...
-
Page 199: Others
SC-T3100M Series/SC-T5100 Series/SC-T3100 Series/SC-T5100N Series/SC-T3100N Series/SC-T2100 Series User's Guide Problem Solver The paper is not cut cleanly. Remove the jammed original. Replace the cutter. If the paper is not cut cleanly, replace the cutter. “Replacing the Cutter” on page 183 A light is visible inside the printer. -
Page 200: Copying Or Scanning Problems (Sc-T3100M Series Only)
SC-T3100M Series/SC-T5100 Series/SC-T3100 Series/SC-T5100N Series/SC-T3100N Series/SC-T2100 Series User's Guide Problem Solver Open the scanner cover. Copying or Scanning Problems (SC-T3100M Series Only) Lines Appear on Scanned or Copied Documents Using a soft cloth, wipe off any dust, dirt, or Follow the steps below to clean the inside of the paper particles (resembles white powder). - Page 201 SC-T3100M Series/SC-T5100 Series/SC-T3100 Series/SC-T5100N Series/SC-T3100N Series/SC-T2100 Series User's Guide Problem Solver Use the cleaning kit, or the clean side of the soft After you have finished cleaning, close the cloth, to thoroughly wipe the area shown in scanner cover. blue in the illustration below.
- Page 202 SC-T3100M Series/SC-T5100 Series/SC-T3100 Series/SC-T5100N Series/SC-T3100N Series/SC-T2100 Series User's Guide Problem Solver Scanned Image Is Misaligned Clean inside of the scanner. If the printer is set to Auto Detect in Original Size Change the direction that the original is or Scan Size, the width of the original may not be loaded.
- Page 203 SC-T3100M Series/SC-T5100 Series/SC-T3100 Series/SC-T5100N Series/SC-T3100N Series/SC-T2100 Series User's Guide Problem Solver Color of Original (Background Color) Touch General Settings - Scan Settings - Scan Options - Document Feed Adjustment. Remains in Scanned Image or The adjustment value settings screen appears.
- Page 204 SC-T3100M Series/SC-T5100 Series/SC-T3100 Series/SC-T5100N Series/SC-T3100N Series/SC-T2100 Series User's Guide Problem Solver Either touch - or + to show the intended adjustment values or touch the adjustment entry area to enter the adjustment values using the keypad screen. Shifting the adjustment value by 1 will correct the misalignment by about 0.1 mm in the...
-
Page 205: Appendix
Epson recommends the use of genuine Epson ink cartridges. Epson cannot guarantee the quality or reliability of non-genuine ink. The use of non-genuine ink may cause damage that is not covered by Epson‘s warranties, and under certain circumstances, may cause erratic printer behavior. -
Page 206: Others
SC-T3100M Series/SC-T5100 Series/SC-T3100 Series/SC-T5100N Series/SC-T3100N Series/SC-T2100 Series User's Guide Appendix Printer model Ink color Product Number 80 ml 50 ml 26 ml SC-T3180M Black T40H1 T40G1 SC-T5180 Cyan T40H2 T40G2 SC-T5180N Magenta T40H3 T40G3 SC-T3180N Yellow T40H4 T40G4 Others Product... - Page 207 SC-T3100M Series/SC-T5100 Series/SC-T3100 Series/SC-T5100N Series/SC-T3100N Series/SC-T2100 Series User's Guide Appendix Product Part number Explanation Document Carrier Sheet (A1+/628 x 935 mm) C12C936101/C12C936121 Used when loading thin originals and originals that you do not want to damage when copying or scanning.
-
Page 208: Supported Media
SC-T3100M Series/SC-T5100 Series/SC-T3100 Series/SC-T5100N Series/SC-T3100N Series/SC-T2100 Series User's Guide Appendix Supported Media We recommend you use the following Epson special media for high-quality printing results. Refer to the following for supported commercially available paper. “Supported Commercially Available Paper” on page 211 Epson Special Media Table Epson paper supported by this printer is described below. - Page 209 SC-T3100M Series/SC-T5100 Series/SC-T3100 Series/SC-T5100N Series/SC-T3100N Series/SC-T2100 Series User's Guide Appendix Paper Name Size Enhanced Adhesive Synthetic Paper 610 mm/24 in. 914 mm/36 in. Enhanced Low Adhesive Synthetic Paper 610 mm/24 in. 914 mm/36 in. * Available only with the SC-T5100 Series.
- Page 210 SC-T3100M Series/SC-T5100 Series/SC-T3100 Series/SC-T5100N Series/SC-T3100N Series/SC-T2100 Series User's Guide Appendix Auto Sheet Feeder Paper Name Loadable Size Availability Number of Sheets Premium Glossy Photo Paper Letter ✓ 11 x 14 in. SuperB US-C Premium Semigloss Photo Paper ✓ Letter SuperB...
-
Page 211: Supported Commercially Available Paper
❏ Do not use paper that is wrinkled, scuffed, torn, or dirty. ❏ Commercially available paper corresponding to the paper types in the table can be loaded in and fed through the printer as long as they meet the following specifications, however Epson cannot guarantee the print quality. - Page 212 SC-T3100M Series/SC-T5100 Series/SC-T3100 Series/SC-T5100N Series/SC-T3100N Series/SC-T2100 Series User's Guide Appendix Length 279.4 mm (Letter) to 1,189 mm Paper thickness 0.12 to 0.27 mm *When blueprint paper is selected, the print data is converted to blue and then printed. You can perform blue printing (printing blue lines on a blue background).
- Page 213 ❏ Select the paper type from the following Epson Special Media settings, and perform Media Adjust. Enhanced Adhesive Syn., Enhanced Low Adh. Syn., Heavyweight Polyester, Glossy Film2 By performing the Media Adjust, paper settings for Epson Special Media will be overwritten by the settings for the paper you use.
-
Page 214: Printable Area
SC-T3100M Series/SC-T5100 Series/SC-T3100 Series/SC-T5100N Series/SC-T3100N Series/SC-T2100 Series User's Guide Appendix Printable area Settings of Top/Bottom Margin Values Margins Standard = 30 mm This section describes the printable areas for the printer. = 3 mm If the print range settings in application software are... - Page 215 SC-T3100M Series/SC-T5100 Series/SC-T3100 Series/SC-T5100N Series/SC-T3100N Series/SC-T2100 Series User's Guide Appendix Important: ❏ Printing is distorted when the trailing edge of the roll paper comes off the core. Make sure the trailing edge does not come inside the printing area. ❏ If the print range settings width...
-
Page 216: Cut Sheets (Auto Sheet Feeder)
SC-T3100M Series/SC-T5100 Series/SC-T3100 Series/SC-T5100N Series/SC-T3100N Series/SC-T2100 Series User's Guide Appendix Cut sheets (Auto sheet feeder) The gray area in the illustration below shows the printable area. The arrow in the illustration indicates the direction that the paper is ejected. Cut Sheet (1 sheet) The gray area in the illustration below shows the printable area. -
Page 217: Moving Or Transporting The Printer
SC-T3100M Series/SC-T5100 Series/SC-T3100 Series/SC-T5100N Series/SC-T3100N Series/SC-T2100 Series User's Guide Appendix Moving or Transporting Moving to a Different Location in the Same Building the Printer Preparations for Moving This section describes methods for moving and transporting the product. This explains preparations for moving the printer a short distance, for example within the same building. -
Page 218: When Transporting
SC-T3100M Series/SC-T5100 Series/SC-T3100 Series/SC-T5100N Series/SC-T3100N Series/SC-T2100 Series User's Guide Appendix “Removing Cut Sheet (1 Sheet)” on page 40 Operations after Moving This explains operations to prepare for use after moving the printer. From the Home screen, touch Settings - Maintenance - Discharging/Charging Ink. - Page 219 SC-T3100M Series/SC-T5100 Series/SC-T3100 Series/SC-T5100N Series/SC-T3100N Series/SC-T2100 Series User's Guide Appendix Close the cartridge cover and front cover. For the SC-T3100M Series, close the cartridge cover and the scanner unit. Closing the front cover automatically turns off the power to the printer.
-
Page 220: System Requirements
SC-T3100M Series/SC-T5100 Series/SC-T3100 Series/SC-T5100N Series/SC-T3100N Series/SC-T2100 Series User's Guide Appendix System Requirements Software for this printer can be used in the following environments. (As of July, 2020) Supported OS and other elements may change. For the latest information, see the Epson Web site. -
Page 221: Web Config
SC-T3100M Series/SC-T5100 Series/SC-T3100 Series/SC-T5100N Series/SC-T3100N Series/SC-T2100 Series User's Guide Appendix USB, Ethernet, or Wi-Fi Connection method with the printer * For details on the connection methods (interface specifications), see the following. “Specifications Table” on page 222 Web Config Windows Browser... -
Page 222: Specifications Table
SC-T3100M Series/SC-T5100 Series/SC-T3100 Series/SC-T5100N Series/SC-T3100N Series/SC-T2100 Series User's Guide Appendix Specifications Table Printer Specifications Humidity The (A) to (E) letters used in the table represent the Printing 20 to 80% (40 to 60% is printer models as shown below. recommended. without... - Page 223 *2 Maximum length of 2569 mm for scanning (600 dpi) and FTPS (Explicit mode) copying (Fine, Super Fine) only *1 USB Flash Drive with security settings cannot be used. *2 SC-T3100M Series only. Only data that was scanned using Interface Specifications this printer is supported. USB port for a com-...
-
Page 224: For European Users
SC-T3100M Series/SC-T5100 Series/SC-T3100 Series/SC-T5100N Series/SC-T3100N Series/SC-T2100 Series User's Guide Appendix *5 IEEE802.11n is only available for the HT20. Important: *6 Not supported for IEEE 802.11b. ❏ The ink freezes if left at below -13 °C for a *7 Complies with WPA2 standards with support for WPA/ long time. -
Page 225: Where To Get Help
SC-T3100M Series/SC-T5100 Series/SC-T3100 Series/SC-T5100N Series/SC-T3100N Series/SC-T2100 Series User's Guide Where To Get Help Contacting Epson Where To Get Help Support Technical Support Web Before Contacting Epson Site If your Epson product is not operating properly and you cannot solve the problem using the... -
Page 226: Help For Users In North America
SC-T3100M Series/SC-T5100 Series/SC-T3100 Series/SC-T5100N Series/SC-T3100N Series/SC-T2100 Series User's Guide Where To Get Help Help for Users in North America Help for Users in Europe Epson provides the technical support services listed Check your Pan-European Warranty Document for below. information on how to contact Epson support. -
Page 227: Help For Users In Australia/New Zealand
SC-T3100M Series/SC-T5100 Series/SC-T3100 Series/SC-T5100N Series/SC-T3100N Series/SC-T2100 Series User's Guide Where To Get Help Your Dealer Telephone Address number number Don't forget that your dealer can often help identify and resolve problems. The dealer should always be the 03-4393119 03-4396589 5F., No.2, Nandong Rd., Pingzhen City, first call for advise on problems;... -
Page 228: Help For Users In Thailand
SC-T3100M Series/SC-T5100 Series/SC-T3100 Series/SC-T5100N Series/SC-T3100N Series/SC-T2100 Series User's Guide Where To Get Help Service Center: 68 Nam Ky Khoi Nghia World Wide Web Street, Nguyen Thai Binh (https://www.epson.com.sg) Ward, District 1, Ho Chi Minh Information on product specifications, drivers for... -
Page 229: Help For Users In Hong Kong
SC-T3100M Series/SC-T5100 Series/SC-T3100 Series/SC-T5100N Series/SC-T3100N Series/SC-T2100 Series User's Guide Where To Get Help Yogyakarta Hotel Natour Garuda Help for Users in Malaysia Jl. Malioboro No. 60 Yogyakarta Contacts for information, support, and services are: Phone: (62) 274-565478 World Wide Web... -
Page 230: Help For Users In The Philippines
SC-T3100M Series/SC-T5100 Series/SC-T3100 Series/SC-T5100N Series/SC-T3100N Series/SC-T2100 Series User's Guide Where To Get Help Help for Users in the Philippines To obtain technical support as well as other after sales services, users are welcome to contact the Epson Philippines Corporation at the telephone and fax...
Need help?
Do you have a question about the SC-T3100M Series and is the answer not in the manual?
Questions and answers