Table of Contents
Advertisement
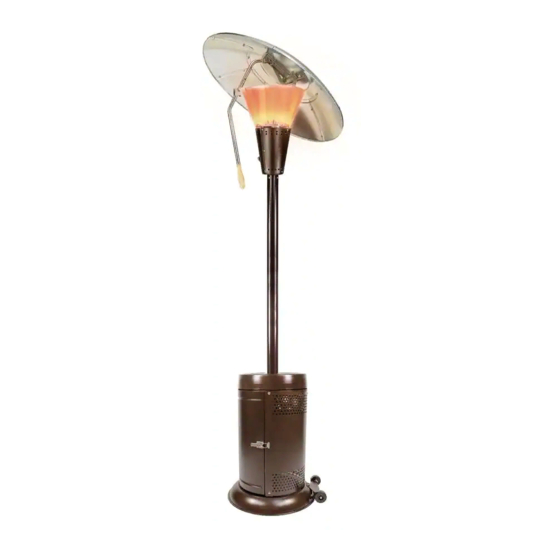
Item #882731
Model #HD10
USE AND CARE GUIDE
38,200 BTU BRONZE HEAT-FOCUSING PROPANE GAS PATIO HEATER
Questions, problems, missing parts? Before returning to the store,
call Hampton Bay Customer Service
8 a.m. - 7 p.m., EST, Monday - Friday, 9 a.m. - 6 p.m., EST, Saturday
1-855-HD-HAMPTON
HAMPTONBAY.COM
THANK YOU
We appreciate the trust and confidence you have placed in Hampton Bay through the purchase of this patio heater. We strive to continually
create quality products designed to enhance your home. Visit us online to see our full line of products available for your home improvement
needs. Thank you for choosing Hampton Bay!
Advertisement
Table of Contents

Related Manuals for HAMPTON BAY HD10


Summary of Contents for HAMPTON BAY HD10
- Page 1 THANK YOU We appreciate the trust and confidence you have placed in Hampton Bay through the purchase of this patio heater. We strive to continually create quality products designed to enhance your home. Visit us online to see our full line of products available for your home improvement...
-
Page 2: Table Of Contents
Table of Contents Table of Contents ........2 Connecting The Cylinder . -
Page 3: Safety Information
Safety Information (continued) WARNING: ONLY use this appliance on a flat LEVEL non WARNING: In the event of an uncontrollable fire, flammable surface or ground. immediately disconnect the gas cylinder moving it away from fire and contact the fire services. DO NOT PUT YOURSELF AT RISK! WARNING: When positioning, ensure the unit is a minimum of 40 in. -
Page 4: Warranty
Warranty 1 YEAR LIMITED WARRANTY WHAT IS COVERED We warrant to the original consumer purchaser that all aspects of this product will be free of defects in material and workmanship for 1 year from the date of purchase. A replacement for any defective part will be supplied free of charge for installation by the consumer. This warranty shall be effective from the date of purchase as shown in the purchaser’s receipt. -
Page 5: Pre-Assembly
PLANNING ASSEMBLY Before You Start, check the contents of the box and make sure you have all the parts and fittings listed. If not, contact Hampton Bay Customer Service at 1-855-HD-HAMPTON. When you are ready to start, make sure that you have the right tools at hand, plenty of space and a clean dry area for assembly. -
Page 6: Package Contents
Pre-Assembly (continued) PACKAGE CONTENTS Part Description Quantity Part Description Quantity Upper Support Pole Base Lantern And Hose Cylinder Chamber Supports (A, B, C) Regulator Lower Support Pole Cylinder Chamber Wall Reflector Handle Cylinder Chamber Door Top Panel Cylinder Chamber Top Side Panels... -
Page 7: Technical Data
Pre-Assembly (continued) TECHNICAL DATA Overall Height 95 in. approx. Overall Weight 82.6 lbs Overall Width 34 in. Heater Heat Input (·Qn) 38,200 Btu/h Heater Gas Consumption 1.77 Lbs per hour Heater Injector Size 0.0744 in. Setting Pressure 11.0 in. per W.C Regulator Outlet Pressure 11.0 in. -
Page 8: Assembly
Assembly Assembling the legs Attaching the lower support pole □ Attach the cylinder chamber supports (B) to the □ Attach the lower support pole (C) to the cylinder chamber corresponding section on the base (A) with six of the supports (B) using six bolts (CC) and nuts (BB). bolts (CC). - Page 9 Assembly (continued) Attaching the cylinder chamber wall Attaching the cylinder chamber door □ Using six of the bolts (AA) and nuts (BB), attach the □ Hang the cylinder chamber door (E) on the hinges. cylinder chamber wall (D) to the cylinder chamber □...
- Page 10 Assembly (continued) Attaching the cylinder chamber top Attaching the upper support pole □ Slide the cylinder chamber top (F) down over the lower □ Attach the upper support pole (G) to the lower support support pole (C) as shown and secure to the cylinder pole (C) using three bolts (CC), three washers (DD) and chamber supports (B), using three bolts (AA) and three three spring washers (GG).
- Page 11 Assembly (continued) Attaching the lantern Attaching the regulator and propane bottle □ Feed the hose down through the support pole (G) and NOTE: THE CYLINDER MUST BE POSITIONED AS SHOWN IN secure the lantern (H) to the support pole (G) using four THE PATIO HEATER CYLINDER CHAMBER TO PROVIDE VAPOR bolts (CC), washers (DD) and spring washers (GG).
- Page 12 Assembly (continued) Fitting the reflector handle Assembling the reflector WARNING: While every precaution has been made in the □ Using the pre-fitted R-clip (1) and pin (2), secure the manufacture of this product, care must be taken during reflector handle (J) to the bracket as shown. assembly in case sharp edges are present.
- Page 13 Assembly (continued) Attaching the reflector to the Fitting the battery lantern □ Unscrew sparker button (1) and insert battery (2), positive side facing outwards. □ Fit the reflector to the lantern (H) using three bolts (FF) and washers (EE). HAMPTONBAY.COM Please contact 1-855-HD-HAMPTON for further assistance.
-
Page 14: Operation
Operation □ The heater, when installed, must be electrically grounded in accordance with local codes or, in the absence of local codes, with the National Electrical Code, ANSI/NFPA 70, or the Canadian Electrical Code, CSA C22.1. □ Certain materials or items, when stored under the heater, will be subjected to radiant heat and could be seriously damaged. □... -
Page 15: Connecting The Cylinder
Operation (continued) □ Important - Make sure the gas bottle is placed level within the base. □ Should you need to change the gas bottle, confirm the gas supply is turned off at the regulator or bottle / cylinder valve, and there are no sources of ignition (cigarettes, open flame, sparks, etc.) near before proceeding. -
Page 16: Leak Testing
Operation (continued) LEAK TESTING Your patio heater has been checked at all factory connections for leakage. To check the connection at the gas hose/regulator/cylinder: □ Ensure you are in a well ventilated area. □ Confirm all control knobs are in the off position. □... -
Page 17: Maintenance
□ It is a necessity to contact an authorized source for replacement of parts and/or servicing. □ This work must be carried out by a qualified gas technician. □ Spare parts may be obtained by contacting Hampton Bay Customer Service at 1-855-HD-HAMPTON. Manufactured by Universal Innovations. Kilcoole Industrial Estate, Kilcoole, Co. Wicklow, Ireland. - Page 18 Page intentionally left blank.
- Page 19 Page intentionally left blank.
- Page 20 Questions, problems, missing parts? Before returning to the store, call Hampton Bay Customer Service 8 a.m.-7 p.m., EST, Monday-Friday, 9 a.m. - 6 p.m., EST, Saturday 1-855-HD-HAMPTON HAMPTONBAY.COM Retain this manual for future use.
Need help?
Do you have a question about the HD10 and is the answer not in the manual?
Questions and answers