Advertisement
Item #1002162762
Model #THD1085
USE AND CARE GUIDE
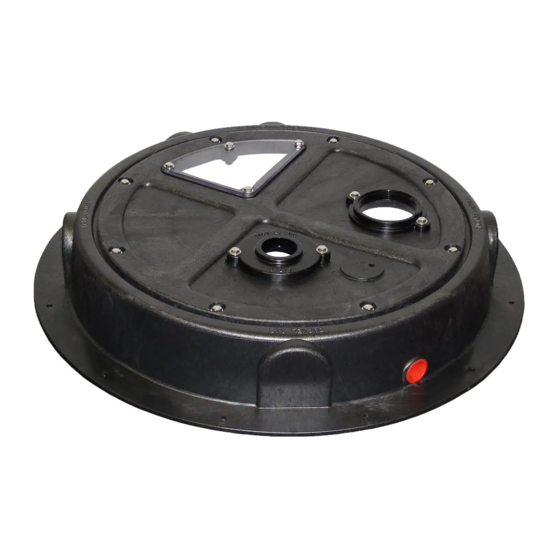
RADON MITIGATION BASIN COVER
Questions, problems, missing parts? Before returning to the store,
call Everbilt Customer Service
8 a.m. - 7 p.m. EST, Monday - Friday and Saturday 9 a.m. - 6 p.m. EST
1-877-297-6069
HOMEDEPOT.COM
THANK YOU
We appreciate the trust and confidence you have placed in Everbilt through the purchase of this radon mitigation basin cover. We strive to continually
create quality products designed to enhance your home. Visit us online to see our full line of products available for your home improvement needs.
Thank you for choosing Everbilt!
Advertisement
Table of Contents

Summary of Contents for Everbilt THD1085
- Page 1 THANK YOU We appreciate the trust and confidence you have placed in Everbilt through the purchase of this radon mitigation basin cover. We strive to continually create quality products designed to enhance your home. Visit us online to see our full line of products available for your home improvement needs.
-
Page 2: Table Of Contents
Table of Contents Table of Contents ............2 Pre-Installation .............. 3 Safety Information ............2 Installation ..............6 Warranty ................. 2 Safety Information PRECAUTIONS This document serves only as an installation guide. Refer to DANGER: Do not handle the pump or pump motor with wet hands or when standing on a wet or damp surface, or in your state and/or local plumbing, radon mitigation, or onsite water. -
Page 3: Pre-Installation
The Everbilt Radon Mitigation Basin Cover serves two pressing needs; the need for a universal gas-tight cover to serve the radon mitigation market and the need for a cover to retrofit failing sump and sewage basin covers. The Everbilt Radon Mitigation Basin Cover is designed to fit over an existing basin, providing a new heavy duty cover to properly contain and vent radon gas and odors. - Page 4 Pre-Installation (continued) TOOLS REQUIRED 5/16 in. 7/16 in. 1/4 x Socket 3/16 in. dia. Socket 1-1/4 in. wrench Masonry Drill wrench Concrete (for drill bit (for cover screws concrete bolts) screws) Hand Silicone Safety hacksaw PVC cement caulk and primer goggles or PVC caulk gun...
- Page 5 Pre-Installation (continued) Part Description Quantity Cover riser 1/4-20 Nylon enclosed nut (Preassembled to cover (A)) Drain plug SF16314 2x3 Lid 1/4-20 Nylon enclosed nut (Preassembled to lid (D)) INSP314-C Clean inspection plate (Preassembled to lid (D)) SEAL314 Inspection plate seal (Preassembled to lid (D)) 3 in.
-
Page 6: Installation
Installation Preparing for installation □ Disconnect the sump’s plumbing and electrical connections, allowing for reconnection after the new cover and lid are installed. □ Ensure the installation floor and surrounding area are clean and smooth. Repair any holes or cracks. Installing the cover to the floor □... - Page 7 Installation (continued) Installing the lid □ Pre-install the lid seal (P) onto the lid bolts (Q and R) to ease installation. Torque the bolts (Q) to 20 in.-lbs. □ Remove the discharge flange assembly (K – M) and install the lid (D) on the cover (A). □...
- Page 8 Installation (continued) Connecting the power and verifying Completing the installation proper operation □ (Optional) You can make additional openings in the □ Make sure that the cord grommet is properly inserted into the cover (A) utilizing the bosses and sealing hubs (Z – lid.
- Page 9 Questions, problems, missing parts? Before returning to the store, call Everbilt Customer Service 8 a.m. - 7 p.m. EST, Monday - Friday and Saturday 9 a.m. - 6 p.m. EST 1-877-297-6069 HOMEDEPOT.COM Retain this manual for future use.
Need help?
Do you have a question about the THD1085 and is the answer not in the manual?
Questions and answers