Table of Contents

Related Manuals for Bray BBU

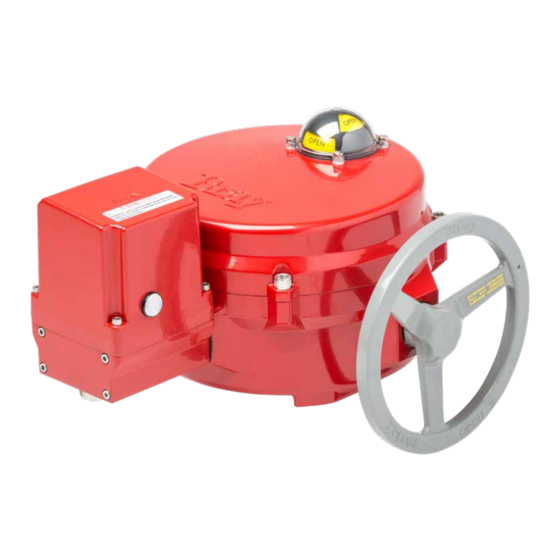
Summary of Contents for Bray BBU
- Page 1 Bray Controls Commercial Division 13788 West Road, Suite 200A Houston, Texas 77041 BCDSales@Bray.com Phone: 1-888-412-2729 www.braycommercialdivision.com Battery Backup Unit (BBU) 10/14/20 Installation & Maintenance Manual...
-
Page 2: Table Of Contents
Actuator/BBU Preparation ....................8 Initial Assembly and Battery Installation ............9,10,11,12 Control Board Wiring ....................13 Setting the Fail Position and Alarm ..............14,15,16 Final Assembly ......................17 Wiring .........................18,19,20 FOR MORE INFORMATION ON THIS PRODUCT AND OTHER BRAY PRODUCTS PLEASE VISIT OUR WEBSITE – www.braycommercialdivision.com... -
Page 3: Safety Instructions
BBU. • Is trained in the proper use and care of personal protective equipment (PPE) in accordance with estab- The control system in which the BBU is installed must lished safety practices. have proper safeguards to prevent injury to person- nel, or damage to equipment, should failure of system •... -
Page 4: Specifications
Battery Conservation Automatically shuts-o batteries after one minute or when actuator stops Current Draw @ 24 VAC BBU only maximum 120mA standby (0.25 VA) Max. 420mA charging (10 VA) Current Draw of 600 lb-in - 1.9A (with load) Actuator with BBU 2,000 lb-in - 2.7A (with load) -
Page 5: Operation
After 12 hours, if the batteries cannot attain full the user. The BBU will allow up to one minute for the charge, the alarm relay is engaged to indicate that the actuator to attain the fail position. -
Page 6: Quick Start Guide
Carefully lift the battery cover and then let the cover hang to the side of the mounting base. The BBU electronics mod- ule is now accessible as shown in Figure 2. With the BBU cover removed, the unit can be commissioned with the appropriate field wiring and fail position settings. -
Page 7: Activating The Bbu
Battery Backup Unit (BBU) — Installation & Maintenance Manual Continued Activating BBU The BBU is shipped from the factory with the bat- tery power disconnected to preserve the battery life. To connect the batteries and activate the BBU do the following: 1. -
Page 8: Installation
Wear safety glasses and all other appropriate safety equipment as directed by Bray HSE policies before performing any of the listed tasks. Retrieve all parts required to construct the S70/BBU assembly as specified on sales order's Traveler BOM. Some hardware depicted below... -
Page 9: Initial Assembly And Battery Installation
Installation & Maintenance Manual Continued Initial Assembly and Battery Installation Remove lid of the actuator minding the lid to body O-Ring. [Figure Figure 2 Remove four (4) BBU actuator mounting bolts and two (2) conduit plugs from side of S70 actuator [Figure Figure 3... - Page 10 Battery Backup Unit (BBU) — Installation & Maintenance Manual Continued Disengage the four (4) BBU lid bolts from BBU [Figure Figure 4 Remove two (2) battery cover panel screws from BBU [Figure Figure 5...
- Page 11 Battery 1 - Postive Blue Battery 1 - Negative Orange Battery 2 - Postive Purple Battery 2 - Negative Gently insert the batteries into the BBU case with the battery terminals positioned nearest to the circuit board [Figure Figure 7...
- Page 12 S70 actuator. Install the Medium Cap Screws on the top two (2) holes of BBU base that attach to S70 actuator. Install two (2) Small Cap Screws with O-rings on top two (2) holes of BBU base [opposite side of Medium Cap Screws] and secure using Hex Screw Nuts.
-
Page 13: Control Board Wiring
Installation & Maintenance Manual Continued Control Board Wiring All wiring from BBU to Actuator shall pass through the conduit ports. Do not allow sharp conduit threads to damage the wire insulation. Use the appropriate Bray S70 wiring diagram for terminal locations and wire color selection. See [Figure 11] for applicable electronic modules. - Page 14 The contacts close when the batteries cannot hold a charge and require replacement. When power is applied to the BBU for the first time or when power is reapplied after a power failure, the BBU commences a battery charge cycle. Depending upon the depth of discharge and the condition of the batteries, a charge cycle can range from under 1 hour up to 8 hours.
- Page 15 [Figure 13] below. Verify LED indicator on the side of the BBU is flashing and the Power LED on the BBU Circuit Board is on. Figure 13 WARNING – ONCE BATTERY POWER IS APPLIED TO THE BBU, THE UNIT IS...
- Page 16 Battery Backup Unit (BBU) — Installation & Maintenance Manual Continued Turn on the Power Supply to the BBU. Verify LED indicator on the side of the BBU is flashing or steady GREEN, see [Figure 14] below. Electrically command the actuator full open and close to verify proper actuator operation.
-
Page 17: Final Assembly
Battery Backup Unit (BBU) — Installation & Maintenance Manual Continued Final Assembly Reconnect the top and bottom BBU case assemblies. Be careful not to pinch or damage wiring and ensure the O-Ring is in place. [Figure 16 & 17] Figure 16... -
Page 18: Wiring
Battery Backup Unit (BBU) — Installation & Maintenance Manual Continued Battery Backup (BBU) - Wiring 24VAC On/Off Controller BBU (BCD-WD-A014-2) FUSE 24V ON/OFF CONTROLLER DRIVE ENABLE OPEN DRIVE DIR COMMON CLOSE COMMON HANDWHEEL BLACK WHITE/RED OPTION CLOSE DC PWR (-) - Page 19 Battery Backup Unit (BBU) — Installation & Maintenance Manual Continued Battery Backup (BBU) - Wiring On/Off NXT BBU (BCD-WD-A034-2)
- Page 20 Battery Backup Unit (BBU) — Installation & Maintenance Manual Continued Battery Backup (BBU) - Wiring 24VAC Modulating NXT BBU (BCD-WD-A035)
Need help?
Do you have a question about the BBU and is the answer not in the manual?
Questions and answers