Table of Contents
Advertisement
Quick Links
The Wireless Connectivity Expert
921 Corporate Way, Fremont, CA 94539, USA
Tel: +1-510-490-8024, Fax: +1-510-623-7268
Web: http://www.actisys.com, E-mail:
irda-info@actisys.com
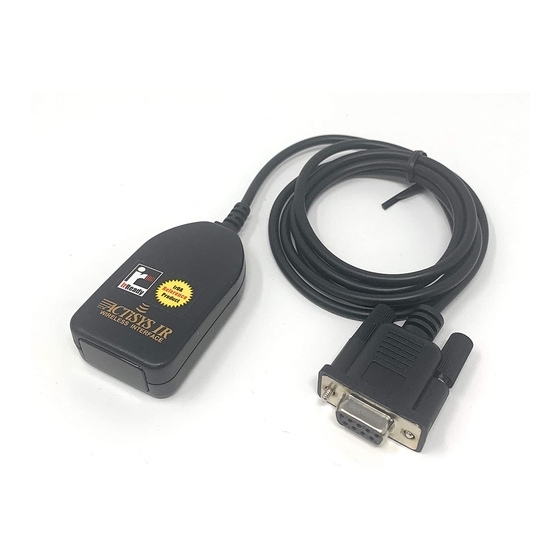
ACT-IR200L/220L/220L+
®
PC RS232 ComPort Adapter
IrDA
User's Manual
January20, 2010
Version 1.5.2.3
© Copyright 2001-2010 ACTiSYS Corporation
All Rights Reserved
<<<<<<< WARNING >>>>>>>
Please do Not read this manual, NOR install IrDA driver from Windows, if the Windows application
software bundled with your equipment, uses ACT-IR220L+ as a "Raw IR", instead of an "IrDA" dongle.
Please just plug in this IR dongle, install no driver, and ACT-IR220L+ will work well with your Windows
software! Otherwise, ACT-IR220L+ will not work with your Windows application software for Raw IR.
Advertisement
Table of Contents

Related Manuals for ACTiSYS ACT-IR220L


Summary of Contents for ACTiSYS ACT-IR220L
- Page 1 ACT-IR220L+ as a “Raw IR”, instead of an “IrDA” dongle. Please just plug in this IR dongle, install no driver, and ACT-IR220L+ will work well with your Windows software! Otherwise, ACT-IR220L+ will not work with your Windows application software for Raw IR.
- Page 2 Date of Purchase Place of Purchase All indicated copyrights and trademarks in the following pages are copyrights and trademarks of their Respective corporations. © Copyright 2001-2010 ACTiSYS Corp. Page 2 of 44 Jan. 20, 2010 ACTiSYS Confidential Information V 1.5.2.3...
-
Page 3: Table Of Contents
14. WINDOWS 7 UNINSTALLATION GUIDE ............39 15. TROUBLE SHOOTING..................41 16. SPECIFICATIONS....................42 17. WARRANTY INFORMATION ................43 18. CONTACT INFORMATION................44 © Copyright 2001-2010 ACTiSYS Corp. Page 3 of 44 Jan. 20, 2010 ACTiSYS Confidential Information V 1.5.2.3... -
Page 4: Revision History
ACTiSYS reserves the right to make changes without prior notice to any products herein to improve reliability, function or design. ACTiSYS does not assume any liability arising out of the application or use of any product or circuit described herein. -
Page 5: Overview
The driver we refer here is ONLY the IrDA driver which is already embedded in Windows O.S. In addition to playing as an IrDA dongle, ACT-IR220L+ can also play as a raw IR. If your application software bundled with your equipment, uses ACT-IR220L+ as a “Raw IR”, instead of an “IrDA”... -
Page 6: Windows 98 Installation Guide
C. Double Click My Computer on DeskTop. D. Double Click Control Panel. E. Double Click Add New Hardware on Control Panel Window. F. Click Next>. © Copyright 2001-2010 ACTiSYS Corp. Page 6 of 44 Jan. 20, 2010 ACTiSYS Confidential Information... - Page 7 H. Select No, I want to select the hardware from a list. Then click Next>. Highlight Infrared Devices from the Hardware types list, then click Next>. © Copyright 2001-2010 ACTiSYS Corp. Page 7 of 44 Jan. 20, 2010 ACTiSYS Confidential Information...
- Page 8 [Infrared COM port or dongle]. From Infrared Devices list, choose (Generic Infrared Serial Port or dongle). Then click OK>. L. Choose ACTiSYS IR-200L if you are an ACT-IR 200L user. Then click Next. © Copyright 2001-2010 ACTiSYS Corp. Page 8 of 44 Jan.
- Page 9 ® ACT-IR2x0L/IR220L+ (IrDA User’s Manual The Wireless Connectivity Expert M. Choose ACTiSYS IR-220L/ 220L+ if you are an ACT-IR-220L/ ACT-IR220L+ User. Then click Next>. N. Select COM port which is physically connected to the Dongle. In most cases, the Dongle is connected to COM2.
-
Page 10: Windows 98 Uninstallation Guide
B. Click Control Panel. C. Double click System Icon. D. Click Device Manager tab. E. Highlight Infrared Communication Device from Infrared devices, and then click Remove. © Copyright 2001-2010 ACTiSYS Corp. Page 10 of 44 Jan. 20, 2010 ACTiSYS Confidential Information V 1.5.2.3... - Page 11 G. Highlight (Generic Infrared Serial Port or dongle), then click Remove. H. Click OK in the Confirm Device Removal. Click Yes to restart your computer. © Copyright 2001-2010 ACTiSYS Corp. Page 11 of 44 Jan. 20, 2010 ACTiSYS Confidential Information V 1.5.2.3...
-
Page 12: Windows 2000 Installation Guide
B. Startup your computer system C. Click on Control Panel. D. Double Click Add/Remove Hardware. E. On Welcome to the Add/Remove Hardware Wizard, click Next>. © Copyright 2001-2010 ACTiSYS Corp. Page 12 of 44 Jan. 20, 2010 ACTiSYS Confidential Information V 1.5.2.3... - Page 13 G. Highlight ADD a new drive then click Next>. H. Choose No, I want to select the hardware form a list then click Next> © Copyright 2001-2010 ACTiSYS Corp. Page 13 of 44 Jan. 20, 2010 ACTiSYS Confidential Information V 1.5.2.3...
- Page 14 The Wireless Connectivity Expert Select the Infrared device from the Hardware types. J. From Manufacturers list, choose ACTiSYS, from Infrared Device list, choose ACTiSYS IR-200L Serial Infrared Device for IR200L; click Next>. K. Choose ACTiSYS IR-220L Serial Infrared Device for IR220L, click Next>.
- Page 15 ® ACT-IR2x0L/IR220L+ (IrDA User’s Manual The Wireless Connectivity Expert L. Choose ACTiSYS IR-220L+ Serial Infrared Device for IR220L+, click Next>. M. Click Next>. N. Choose COM2 in the most cases, then click Next>. O. Click Finish. © Copyright 2001-2010 ACTiSYS Corp.
-
Page 16: Windows 2000 Unistallation Guide
C. Double click System Icon. D. Click on Hardware tab, then click Device Manager button. E. Click on Infrared devices, then highlight ACTiSYS IR-220L+Serial Infrared Device. © Copyright 2001-2010 ACTiSYS Corp. Page 16 of 44 Jan. 20, 2010 ACTiSYS Confidential Information V 1.5.2.3... - Page 17 F. Click Action from the main and then click Uninstall. G. The device has then been uninstalled. You need to close device manager and restart your computer. © Copyright 2001-2010 ACTiSYS Corp. Page 17 of 44 Jan. 20, 2010 ACTiSYS Confidential Information V 1.5.2.3...
-
Page 18: Windows Xp Installation Guide
9. WINDOWS XP INSTALLATION GUIDE A. From Start menu, open Control Panel. B. Double click Add Hardware icon. C. Click Next> from Add Hardware Wizard. © Copyright 2001-2010 ACTiSYS Corp. Page 18 of 44 Jan. 20, 2010 ACTiSYS Confidential Information V 1.5.2.3... - Page 19 D. Choose Yes. I have already connected the hardware. Then click Next>. E. Wait processing F. Choose Add a new hardware device. Then click Next>. © Copyright 2001-2010 ACTiSYS Corp. Page 19 of 44 Jan. 20, 2010 ACTiSYS Confidential Information V 1.5.2.3...
- Page 20 (Advanced). Then click Next>. H. Choose Infrared devices. Then click Next> Choose respective ACT model from Infrared Device. Then click Next> © Copyright 2001-2010 ACTiSYS Corp. Page 20 of 44 Jan. 20, 2010 ACTiSYS Confidential Information V 1.5.2.3...
- Page 21 User’s Manual The Wireless Connectivity Expert J. Click Next> K. Choose the Com port which the device physically connected. Click Next> L. Click Finish © Copyright 2001-2010 ACTiSYS Corp. Page 21 of 44 Jan. 20, 2010 ACTiSYS Confidential Information V 1.5.2.3...
-
Page 22: Windows Xp Un-Installation Guide
10. WINDOWS XP UN-INSTALLATION GUIDE A. Highlight My Computer, then right click for quick menu. B. Select Properties. C. Click Device Manager from Hardware page. © Copyright 2001-2010 ACTiSYS Corp. Page 22 of 44 Jan. 20, 2010 ACTiSYS Confidential Information V 1.5.2.3... - Page 23 E. Click Uninstall from the quick menu. F. Click OK. You have successfully uninstalled the device on your system. © Copyright 2001-2010 ACTiSYS Corp. Page 23 of 44 Jan. 20, 2010 ACTiSYS Confidential Information...
-
Page 24: Windows Vista Installation Guide
The Wireless Connectivity Expert G. Click Yes to reboot your computer. 11. WINDOWS VISTA INSTALLATION GUIDE A. From Control Panel, select “Add Hardware”. © Copyright 2001-2010 ACTiSYS Corp. Page 24 of 44 Jan. 20, 2010 ACTiSYS Confidential Information V 1.5.2.3... - Page 25 C. The installation window will ask “What do you want the wizard to do?” Select “Install the hardware that I manually select from a list (Advanced).” Then click Next. D. Select “Infrared device”. Then click “Next”. © Copyright 2001-2010 ACTiSYS Corp. Page 25 of 44 Jan. 20, 2010 ACTiSYS Confidential Information V 1.5.2.3...
- Page 26 ® ACT-IR2x0L/IR220L+ (IrDA User’s Manual The Wireless Connectivity Expert E. Select “ACTiSYS” from “Manufacturer”. F. Select the right device, e.g., “IR220L+”, from “Infrared Device”. Then click “Next”. © Copyright 2001-2010 ACTiSYS Corp. Page 26 of 44 Jan. 20, 2010 ACTiSYS Confidential Information...
- Page 27 The Wireless Connectivity Expert G. It will pop up a window displaying as below: Click “Next”. H. Then it will display installation process window as below. © Copyright 2001-2010 ACTiSYS Corp. Page 27 of 44 Jan. 20, 2010 ACTiSYS Confidential Information...
- Page 28 The Wireless Connectivity Expert Then it will ask you to select the COM port. Select the port where you plugged your device, e.g., COM2. Then click “Next”. © Copyright 2001-2010 ACTiSYS Corp. Page 28 of 44 Jan. 20, 2010 ACTiSYS Confidential Information...
- Page 29 ® ACT-IR2x0L/IR220L+ (IrDA User’s Manual The Wireless Connectivity Expert J. Now it completes the process. Click “Finish” to end the installation. © Copyright 2001-2010 ACTiSYS Corp. Page 29 of 44 Jan. 20, 2010 ACTiSYS Confidential Information V 1.5.2.3...
-
Page 30: Windows Vista Uninstallation Guide
12. WINDOWS VISTA UNINSTALLATION GUIDE A. From Control Panel, select “System”. B. Select “Device Manager”. C. Select the right “Infrared device” from the list. E.g., “ACTiSYS IR 220L+ Serial Infrared Device” as below. © Copyright 2001-2010 ACTiSYS Corp. Page 30 of 44 Jan. - Page 31 ® ACT-IR2x0L/IR220L+ (IrDA User’s Manual The Wireless Connectivity Expert D. Select “Uninstall” from “Action” pull down menu as below. © Copyright 2001-2010 ACTiSYS Corp. Page 31 of 44 Jan. 20, 2010 ACTiSYS Confidential Information V 1.5.2.3...
- Page 32 E. Click “OK” to “Confirm Device Uninstall”. F. Then it completes the uninstallation. Original Infrared Device will be disappeared from the Device Manager as below. © Copyright 2001-2010 ACTiSYS Corp. Page 32 of 44 Jan. 20, 2010 ACTiSYS Confidential Information...
-
Page 33: Windows 7 Installation Guide
A. Click on Start and type “hdwwiz.exe” in the edit box of “Search programs and files” and press enter, like below screen shot. B. It will prompt a Welcome screen as follows. Click Next. © Copyright 2001-2010 ACTiSYS Corp. Page 33 of 44 Jan. 20, 2010 ACTiSYS Confidential Information V 1.5.2.3... - Page 34 C. The installation window will ask “What do you want the wizard to do?” Select “Install the hardware that I manually select from a list (Advanced).” Then click Next. D. Select “Infrared device”. Then click “Next”. © Copyright 2001-2010 ACTiSYS Corp. Page 34 of 44 Jan. 20, 2010 ACTiSYS Confidential Information V 1.5.2.3...
- Page 35 User’s Manual The Wireless Connectivity Expert E. Click on Have Disk. F. Now browse and give the driver’s inf file from proper location. © Copyright 2001-2010 ACTiSYS Corp. Page 35 of 44 Jan. 20, 2010 ACTiSYS Confidential Information V 1.5.2.3...
- Page 36 ® ACT-IR2x0L/IR220L+ (IrDA User’s Manual The Wireless Connectivity Expert G. Select “ACTiSYS” from “Manufacturer”. H. Select the right device, e.g., “IR200L” or “IR220L+”, from “Infrared Device”. Then click “Next”. © Copyright 2001-2010 ACTiSYS Corp. Page 36 of 44 Jan. 20, 2010 ACTiSYS Confidential Information V 1.5.2.3...
- Page 37 The Wireless Connectivity Expert I. It will pop up a window displaying as below: Click “Next”. J. Then it will display installation process window as below. © Copyright 2001-2010 ACTiSYS Corp. Page 37 of 44 Jan. 20, 2010 ACTiSYS Confidential Information...
- Page 38 K. Then it will ask you to select the COM port. Select the port where you plugged your device, e.g., COM2. Then click “Next”. L. Now it completes the process. Click “Finish” to end the installation. © Copyright 2001-2010 ACTiSYS Corp. Page 38 of 44 Jan. 20, 2010 ACTiSYS Confidential Information V 1.5.2.3...
-
Page 39: Windows 7 Uninstallation Guide
Computer icon and Select “Properties”. B. Select “Device Manager” as arrow pointed below. C. Select the right “Infrared device” from the list. E.g., “ACTiSYS IR 220L+ Serial Infrared Device” as below. © Copyright 2001-2010 ACTiSYS Corp. Page 39 of 44 Jan. - Page 40 E. Click “OK” to “Confirm Device Uninstall”. F. Then it completes the uninstallation. Original Infrared Device will be disappeared from the Device Manager as below. © Copyright 2001-2010 ACTiSYS Corp. Page 40 of 44 Jan. 20, 2010 ACTiSYS Confidential Information...
-
Page 41: Trouble Shooting
PC system user`s manual. Make sure to disconnect modem, etc. from the serial port to make it available for IR transmission. © Copyright 2001-2010 ACTiSYS Corp. Page 41 of 44 Jan. 20, 2010 ACTiSYS Confidential Information V 1.5.2.3... -
Page 42: Specifications
Signal Ground Reference ground (0V) for all signals Request to send Output signal from host computer Clear to send Input signal to host computer © Copyright 2001-2010 ACTiSYS Corp. Page 42 of 44 Jan. 20, 2010 ACTiSYS Confidential Information V 1.5.2.3... -
Page 43: Warranty Information
THE OTHER RIGHTS WHICH VARY FROM STATE TO STATE: ACTiSYS Corporation warrants the first end-user purchaser, for a period of one year from the date of purchase, that this wireless interface (“the Product”) will be free from defective workmanship and materials, and agrees that it will, at its option, either repair the defect or replace the defective Product or part thereof at no charge to the purchaser for parts or for labor. -
Page 44: Contact Information
The Wireless Connectivity Expert 18. CONTACT INFORMATION ACTiSYS Corporation 921 Corporate Way Fremont, CA 94539, USA TEL: +1-510-490-8024, FAX: +1-510-623-7268 E-Mail: irda-info@actisys.com Web: http://www.actisys.com © Copyright 2001-2010 ACTiSYS Corp. Page 44 of 44 Jan. 20, 2010 ACTiSYS Confidential Information V 1.5.2.3...
Need help?
Do you have a question about the ACT-IR220L and is the answer not in the manual?
Questions and answers