Advertisement
Quick Links
INTRODUCTION
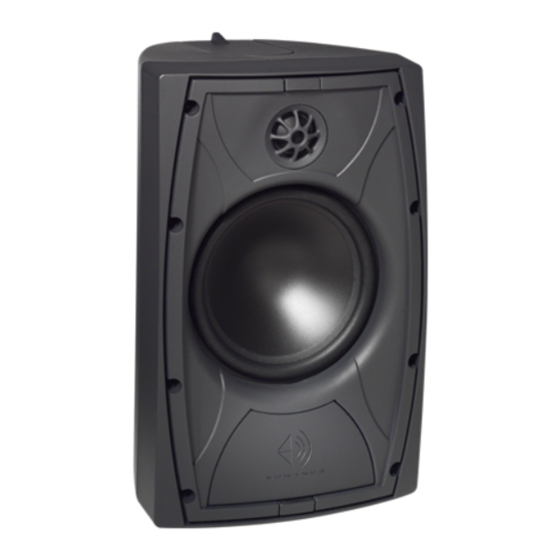
You have purchased the finest weather-resistant speakers available.
Your new Mariner-Series speakers are carefully designed to give you years
of trouble-free listening. Unlike many "outdoor" speakers, Sonance Mariner
Series are designed to sound terrific indoors as well. Please take a few
minutes to read the complete instructions before you begin your wiring.
ASSEMBLY:
The Sonance Mariner 300, 200 and 100 speakers include a patent pending
multi-axis pivot bracket, which includes: two bracket knobs, one mounting
screw, one "banana" shape bracket, one gasket, and one base. Please see
Diagram 1 for assembly.
Diagram 1. Speaker Assembly
PLACEMENT:
The Sonance Mariner 300, 200 and 100 speakers are designed for those
areas around your home where placement of speakers in the wall or ceiling
is not practical, possible, or desirable. They are particularly well suited for
outdoor use, even in locations that are unprotected from the elements (e.g.,
on deck rails, patios, in gardens and pool areas). Other applications might
include indoor areas where a quality bookshelf speaker would be perfect
for music listening or home theater. The Mariner 300 and Mariner 200 are
video-shielded for use in close proximity to TV sets or computer monitors.
INDOOR PLACEMENT:
The Mariner-Series speakers are designed for outstanding performance
indoors or out. Indoor set up can be accomplished by setting the speakers
on a bookshelf or cabinet top, balancing them on a dedicated speaker
stand or by attaching them to a wall using the integrated bracket system.
Shelf mounting
Place the speakers on a shelf at ear level. For a seated listener this will be
about 40" from the floor.If the speakers must be setup higher or lower, con-
sider tilting them to focus the sound into the listening area. The distance
between the speakers will depend upon the layout of your music or home
theater system. As a rule, the distance between the left and right speakers
should be the same or slightly less than the distance from the speakers to
the listening area.
I N S T A L L A T I O N
S O N A N C E M A R I N E R 3 0 0 / 2 0 0 / 1 0 0
I N D O O R / O U T D O O R
33-1455 5.01
Wall mounting
The speakers should be located on the left and right in front of the listen-
er, at approximately ear level. The left-right distance between the speakers
should be the same or slightly less than the distance from the speakers to
the listening area.
If placement above ear level is desired (e.g., on the ceiling or high on the
wall), aim them toward the primary listening area. All Mariner-Series
models feature an integrated pivoting bracket that will allow it to be tilted
along two axis for a wide variety of placement options (Diagram 2 ).
WALL BOX MOUNTING: 2 point
(Always Use Stainless Steel Screws
for Optimum Weather Resistance)
WIRE SLOT
OPTIONAL MOUNTING: 4 point
(Always Use Stainless Steel Screws
for Optimum Weather Resistance)
OUTDOOR PLACEMENT:
All Mariner-Series speakers are highly water resistant. They will perform
exceptionally well for years even under adverse weather conditions.
WIRING:
IMPORTANT: Do not attempt to connect speakers to any source (amplifier,
receiver) that is turned on. Check to be sure that the amplifier
designated to power the speakers is off before attempting connection.
Always use high grade (Sonance MediaLinQ) speaker wire.We recommend
18 GA wire for runs of less than 50 feet, 16 GA for runs of 50-100 feet, 14
GA for runs over 100 feet.
1. Strip 1/4" of insulation from the ends of the speaker wire that will be
connected to the speakers. The 5-way binding posts on the backs of the
speakers will accept up to 14 GA wire. You can connect the stripped wire
directly to the posts by inserting it through the small hole in the center of
the post then tightening the black and red nuts. As an alternative, you can
attach the wire to a banana plug which will plug directly into the 5-way
post.A third alternative is to solder a spade lug onto the end of each speak-
er wire and tighten the black and red nuts tightly to hold it in place. This
would be the most weather resistant option.
2. With your amplifier off, connect the positive (+), or red, terminal of your
amplifier to the positive (+) terminal of one speaker. Connect the negative
(-), or black, terminal of your amplifier to the negative (-) terminal of
the speaker.
3. Repeat step 2 with the other speaker, making sure the left and right
channel of your amplifier are connected to your left and right speaker,
respectively.
1
I N S T R U C T I O N S
Diagram 2. Tilt and Rotation Adjustments
S P E A K E R S
Advertisement

Related Manuals for Sonance Mariner 300


Summary of Contents for Sonance Mariner 300
- Page 1 18 GA wire for runs of less than 50 feet, 16 GA for runs of 50-100 feet, 14 for music listening or home theater. The Mariner 300 and Mariner 200 are GA for runs over 100 feet.
- Page 2 (191 mm x 279 mm x 184 mm) from state to state. Finish: White or Black Grille: Aluminum Sonance • 212 Avenida Fabricante • San Clemente, CA 92672-7531, USA • (800) 582-7777 or (949) 492-7777 • FAX: (949) 361-5151 • Technical Support: (800) 582-0772...
Need help?
Do you have a question about the Mariner 300 and is the answer not in the manual?
Questions and answers