
Related Manuals for Kospel EPMH Series


Summary of Contents for Kospel EPMH Series
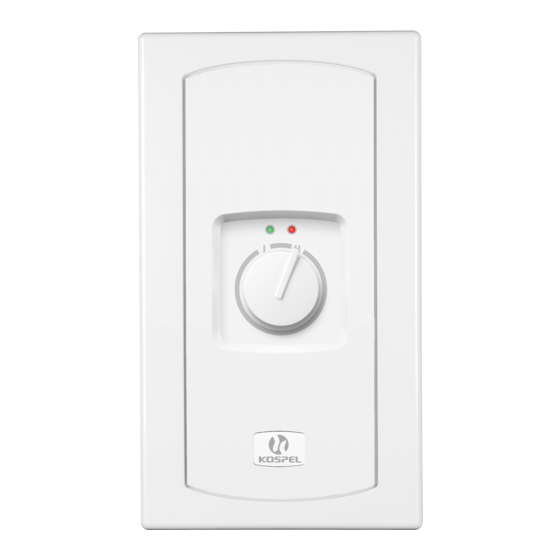
- Page 1 ELEKTRYCZNY PRZEPŁYWOWY PODGRZEWACZ WODY ELEKTRISCHER DURCHLAUFERHITZER ELECTRIC INSTANTANEOUS WATER HEATER EPMH...
- Page 2 Zużyty produkt nie może być traktowany jako odpad komunalny. Zdemontowane, urządzenie należy dostarczyć do punktu zbiórki sprzętu elektrycznego i elektronicznego w celu recyklingu. Odpowiednie zadysponowanie zużytego produktu zapobiega potencjalnym negatywnym wpływom na środowisko jakie mogłyby wystąpić w przypadku niewłaściwego zagospodarowania odpadów. W celu uzyskania bardziej szczegółowych informacji na temat recyklingu tego produktu, należy skontaktować...
- Page 3 Warunki bezpiecznej i niezawodnej pracy Zapoznanie się z treścią niniejszej instrukcji obsługi umożliwi prawidłową instala- cję i eksploatację urzą dze nia, za pew nia jąc jego długotrwałą i niezawodną pracę. Podgrzewacz można użytkować tylko wówczas, gdy został on prawidłowo zain- stalowany i znajduje się...
- Page 4 Montaż Do pro wa dzić do miejsca montażu podgrzewacza instalację elek trycz ną i wodną, zgodnie z obo wią zu jący mi przepisami. Zdjąć obudowę podgrzewacza: odkręcić wkręt i wysunąć ją z zaczepów. W przypadku króćców skierowanych do ściany: do końcówek instalacji wkręcić dwa przyłącza instalacji zgodnie z rysunkiem, przy czym od strony wlotu wody do podgrzewacza dokonać...
- Page 5 Podłączenie podgrzewacza króćcami do ściany Podłączenie podgrzewacza króćcami do dołu PL;DE;GB-060ABC_f.528...
- Page 6 Odpowietrzenie Wyłączyć zasilanie elektryczne podgrzewacza. Włączyć przepływ wody (odkręcić zawór ciepłej wody) w celu odpowietrzenia insta- lacji (ok.15÷30 sekund) aż woda zacznie płynąć jednolitym, równym strumieniem. Zamknąć zawór. Włączyć zasilanie elektryczne. Czynności wykonać każ do ra zo wo po zaniku wody. Eksploatacja Podgrzewacz wyposażony jest w zespół...
-
Page 7: Dane Techniczne
Dane techniczne Podgrzewacz EPMH Moc znamionowa Zasilanie 220V ~ Nominalny pobór prądu 34,1 36,4 38,6 Min. przekrój elektrycznych przewodów przyłączeniowych mm 3 x 6 Moc znamionowa Zasilanie 230V ~ Nominalny pobór prądu 32,7 34,8 37,0 Min. przekrój elektrycznych przewodów przyłączeniowych mm 3 x 6 Moc znamionowa Zasilanie... - Page 8 Bedingungen der sicheren und zuverlässigen Nutzung Die Bedienungsanleitung ermöglicht eine richtige Installation und Nutzung, bzw. sichert die dauerhafte und sichere Arbeit des Geräts. Der Durchlauferhitzer darf nur benutzt werden wenn er fachmännisch installiert wurde und sich in einem einwandfreien technischen Zustand befindet. Der Durchlauferhitzer EPMH ist sowohl für die Installation der Stutzen in Richtung Wand, als auch nach unten bestimmt.
-
Page 9: Montage
Montage Zu der Montagestelle des Durchlauferhitzers die Elektro- und Wasserinstallation nach geltenden Vorschriften verlegen. Das Gehäuse des Durchlauferhitzers abnehmen: die Schraube aufdrehen und von den Haken herausziehen. Im Fall wenn die Stutzen in Wandrichtung gerichtet sind: zu den Endstücken der Installation zwei Anschlüsse einschrauben gemäß Abbildung, wobei an der Seite des Wassereinlaufs dies bis zum Magnetsiebfilter ausführen. - Page 10 Anschluss des Durchlauferhitzers mit den Stutzen an die Wand Anschluss mit den Stutzen nach unten...
-
Page 11: Betrieb
Entlüftung Stromversorgung des Durchlauferhitzers abschalten. Wasserdurchfluss einschalten (Warmwasserhahn öffnen) um die Anlage zu entlüften (ca 15: 30 Sekunden) und warten bis das Wasser blasenfrei austritt. Ventil schließen. Energieversorgung einschalten. Diese Tätigkeiten jedesmal nach Wasserschwund durchführen. Betrieb Der Durchlauferhitzer ist in ein Wasseraggregat ausgestattet, das bei entsprechendem Durchfluss mit eingestellter Armatur den Heizbetrieb aktiviert. -
Page 12: Technische Daten
Technische Daten Durchlauferhitzer EPMH Bemessungsaufnahme Bemessungsspannung 220V ~ Bemessungsstrom 34,1 36,4 38,6 Minimaler Leitungsquerschnitt 3 x 6 Bemessungsaufnahme Bemessungsspannung 230V ~ Bemessungsstrom 32,7 34,8 37,0 Minimaler Leitungsquerschnitt 3 x 6 Bemessungsaufnahme Bemessungsspannung 240V ~ Bemessungsstrom 31,4 33,3 35,5 Minimaler Leitungsquerschnitt 3 x 6 Einschaltpunkt l/min... -
Page 13: Safety Instructions
Safety instructions Read and strictly follow the installation and operating instructions to ensure a long life and reliable unit operation. The unit can only be used when in perfect technical condition and correctly assembled. The unit is designed for installation with the connectors facing toward the wall or the bottom. -
Page 14: Installation & Assembly
Installation – Assembly Bring the water system pipes and electric supply cables (observing binding norms) to the place where the unit will be fitted. Take off the unit’s cover: undo the screws, slide the cover off. For unit installation with the connectors facing toward the wall: screw the fittings to the end of water pipes according to the picture below (make sure you install the filter in the cold water inlet), install the heater to the pre-installed fittings through the back holes and then fix the unit to the wall. - Page 15 Unit installation with the connectors facing toward the wall Unit installation with the connectors at the bottom. PL;DE;GB-060ABC_f.528...
-
Page 16: Maintenance
Venting Shut off electric supplies to the heater. Turn the flow on (turn the hot water tap on) in order to vent the water installation (for about 15-30 seconds), until the flow of water becomes constant and even. Turn the flow off (turn the hot water tap off). Switch on the electric supplies. -
Page 17: Technical Data
Technical data EPMH water heater Rated power Rated voltage 220V ~ Rated current 34,1 36,4 38,6 Min. connecting wires section 3 x 6 Rated power Rated voltage 230V ~ Rated current 32,7 34,8 37,0 Min. connecting wires section 3 x 6 Rated power Rated voltage 240V ~... - Page 20 KOSPEL S.A. ul. Olchowa 1 75-136 Koszalin tel. +48 94 346 38 08 info@kospel.pl www.kospel.pl...
Need help?
Do you have a question about the EPMH Series and is the answer not in the manual?
Questions and answers