Table of Contents
Advertisement
Available languages
Available languages
Advertisement
Chapters
Table of Contents

Summary of Contents for ATI Technologies Straton
- Page 1 Bedienungsanleitung Instruction Manual...
-
Page 2: Table Of Contents
3. Inbetriebnahme der Leuchte ................4 3.1. Elektrischer Anschluss ................... 4 3.2. Montage der Leuchte ..................5 4. Verbindung der Straton mit einem Endgerät ............6 4.1. Verbinden über W-Lan/Funknetzwerk ............6 4.2. Verbinden über Ethernet-Kabel (Alternativ zu W-Lan/Funknetzwerk) ..6 5. - Page 3 5.4.4.1. Master-Slave-Funktion ............19 5.4.4.2. Einbinden aller Leuchten in das Heimnetzwerk ..... 20 5.4.5. Demo-Programm ................21 5.5. Funktion der Registrierkarte "Sprache" ............21 6. Hardware-Reset durchführen ................21...
-
Page 4: Einleitung
Lieferumfang. Sollten Sie Beschädigungen oder Unvollständigkeit beim Lieferumfang feststellen, müssen diese unverzüglich Ihrem Fachhandel gemeldet werden, um eventu- elle Garantieansprüche geltend zu machen. Beschädigte Leuchten oder Komponenten dürfen keinesfalls in Betrieb genommen werden! - LED Straton-Leuchte - Netzteil - Netzgerätezuleitung - Deckenbefestigung Unsere Leuchten sind mit dem CE-Zeichen ausgestattet. -
Page 5: Sicherheitshinweise
Bei Fehlerauftreten, unternehmen Sie bitte keine eigenen Reparaturversuche. Kontaktie- ren Sie Ihren Händler oder rufen Sie unsere Service-Hotline 02381-8710120 an. Die LED Straton Leuchte ist für den Betrieb über offenen Aquarien in Innenräumen kon- zipiert. Es darf kein Betrieb in geschlossenen Abdeckungen oder innerhalb sonstiger Verkleidungen erfolgen. -
Page 6: Montage Der Leuchte
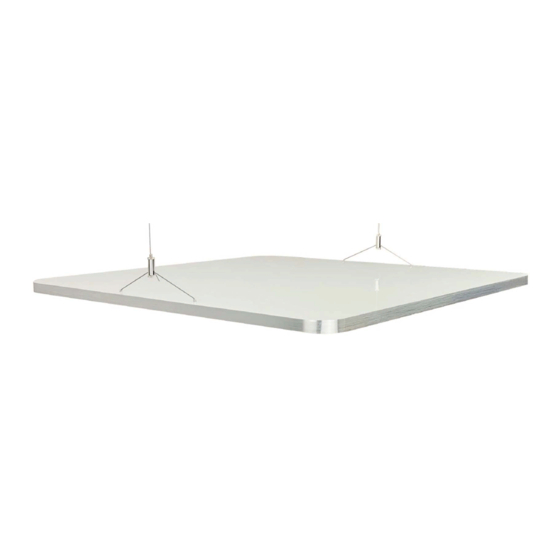
Wichtig! Verbinden Sie die Leuchte erst mit dem externen LED Netzteil, bevor Sie das Netzteil an das Stromnetz anschließen! 3.2. Montage der Leuchte Für die beiden Aufhängungen bohren Sie im Abstand der Seile (440 mm) zwei Löcher in die Zimmerdecke. Montagemittel wie Dübel, Schrauben, etc. -
Page 7: Verbindung Der Straton Mit Einem Endgerät
4. Verbindung der Straton mit einem Endgerät 4.1. Verbinden über WLAN/Funknetzwerk Nachdem die Leuchte mit dem Stromnetz verbunden ist, dauert es 2 Nachdem die Leuchte mit dem Stromnetz verbunden ist, dauert es 2 - 3 Minuten bis der Controller der Leuchte ein WLAN-Netz aufgebaut hat. Sie können anschließend mit j Netz aufgebaut hat. -
Page 8: Programmierung Der Straton-Leuchte
Hierbei wird auch die Systemzeit Ihres PCs bzw. mobilen Endgerätes auf die Leuchte Hierbei wird auch die Systemzeit Ihres PCs bzw. mobilen Endgerätes auf die Leuchte übertragen. 5. Programmierung der Straton-Leuchte Über die graphische Benutzeroberfläche können Sie komfortabel das Programm Ihrer können Sie komfortabel das Programm Ihrer Leuchte individualisieren. -
Page 9: Funktion Der Registrierkarte „Diagramm
5.1 Funktionen der Registrierkarte „Diagramm“ Das Programm startet im Modus „Diagramm“. 5.1.1. „Speichern“ Indem Sie auf „Speichern“ klicken, speichern Sie die aktuellen Einstellu Indem Sie auf „Speichern“ klicken, speichern Sie die aktuellen Einstellun- gen des von Ihnen bearbeiteten Programms in Ihre Leuchte. Leuchte. -
Page 10: Gespeichertes Programm Zur Bearbeitung Laden
Der Speicherort wird durch Ihre Einstellungen im Internetbrowser festgelegt Der Speicherort wird durch Ihre Einstellungen im Internetbrowser festgelegt (z.B. im Ordner „Downloads“). 5.1.2.2. Gespeichertes Programm zur Bearbeitung laden Klicken Sie auf „Durchsuchen“. Wählen Sie in dem neu geöffneten Fenster “. Wählen Sie in dem neu geöffneten Fenster das Verzeichnis aus, in dem sich das gespeicherte Programm befindet. -
Page 11: Voreinstellungen
5.1.4. "Voreinstellungen" Werkseitig wird die Leuchte mit der Voreinstellung "Mixed Corals" ausgelie- fert. Sie können hier sehr komfortabel und schnell bewährte Einstellungen in drei Vari- anten und zwei Intensitäten je nach Tierbe- satz auswählen. 5.1.5. „Übertragen auf Alle“ Die Funktion „Übertragen auf Alle“ ermöglicht es Ihnen Die Funktion „Übertragen auf Alle“... - Page 12 Klicken Sie auf einen Programmierpunkt einer LED-Sektion und anschließend auf eine und anschließend auf eine Farbe, z.B. „LPS“ . Der bearbeitete Punkt wird nun optisch rot dargestellt dargestellt Bitte beachten Sie: Die optische Darstellung der Farben im Diagramm ist willkürlich und kann von Ihnen im Diagramm ist willkürlich und kann von Ihnen geändert werden.
-
Page 13: Vorschau" Starten, Anhalten Oder Stoppen
5.1.7 „Vorschau“ starten, anhalten oder stoppen Mit der Funktion „Vorschau“ haben Sie die Möglichkeit Mit der Funktion „Vorschau“ haben Sie die Möglichkeit die Farbeinstellungen des von Ihnen bearbeiteten Pr die Farbeinstellungen des von Ihnen bearbeiteten Pro- gramms in Zeitraffer in Ihrem Aquarium zu betrachten. Starten Sie den Tagesverlauf mit der Play-Taste . -
Page 14: Funktionen Der Registrierkarte „Farben
Ein Klick auf das Temperatur-Symbol öffnet die graphische Darstellung des Te Symbol öffnet die graphische Darstellung des Tem- peraturverlaufs der Sektionen der letzten 48 Stunden. Die Graphen der einzelnen Sektionen lassen sich durch einen Klick auf die Nummer der Die Graphen der einzelnen Sektionen lassen sich durch einen Klick auf die Nummer der Sektion aus- bzw. -
Page 15: Die Vorschaufunktion
5.2.1. Die Vorschaufunktion Klicken Sie bei deaktivierter Vorschau rechts neben dem Kreis in das weiße Feld. Klicken Sie bei deaktivierter Vorschau rechts neben dem Kreis in das weiße Feld. Der Kreis wandert nach rechts und das linke Feld färbt sich grün. Die Vorscha wandert nach rechts und das linke Feld färbt sich grün. -
Page 16: Erstellen Einer Neuen Farbe
5.2.2. Erstellen einer neuen Farbe Die voreingestellten Farben: „SPS plakativ“, „LPS/SPS“, „ LPS“, „Max Fluorrescent“, “, „ LPS“, „Max Fluorrescent“, „UV/V“ können nicht verändert werden. Es ist jedoch möglich die Farbe der graphischen Darstellung dieser Farben im Diagramm zu ändern. Klicken Sie hierzu auf das graue Quadrat rechts neben dem Namen der Farbe. -
Page 17: Löschen Einer Erstellten Farbe
Klicken Sie auf „Neu“, um die Farbe zu bearbeiten. Klicken Sie in das Textfeld, um den „Neu“, um die Farbe zu bearbeiten. Klicken Sie in das Textfeld, um den Namen zu bearbeiten und auf das benachbarte graue Quadrat, um eine Darstellungsfa Namen zu bearbeiten und auf das benachbarte graue Quadrat, um eine Darstellungsfar- be zuzuweisen (s.o.). -
Page 18: Funktion Der Registrierkarte „Einstellungen
Sie können die Sektionen ein oder mehrerer Straton Leuchten den Gruppen beliebig zuordnen, neue Gruppen hinzufügen oder bestehende Grup- pen löschen. Per Drag and Drop können Sie die Sektionen einfach in das Fenster der gewünschten Gruppe verschie- ben. Ein Klick auf das blaue Minus-Symbol löscht die Gruppe. -
Page 19: Firmware Update Durchführen
Wählen Sie die passende Zeitzone aus der Dropdown-Liste aus. Klicken Sie anschließend Klicken Sie anschließend auf "Übernehmen". 5.4.3. Firmware Update durchführen Bitte beachten Sie: Durch das Update mit einer nicht geeigneten Firmware kann die Leuchte geschädigt werden und die Funktion verlie- ren. -
Page 20: Gleichzeitiger Betrieb Mehrerer Leuchten
Trennen Sie die Verbindung mit der Master-Leuchte und ver- binden Sie sich mit einer weite- ren Straton. Wählen Sie die Registrierkarte "Einstellungen" und clicken Sie auf "WIFI". Ein Click auf den Pfeil in dem neu- en Fenster öffnet eine Drop- down-Liste. -
Page 21: Einbinden Aller Leuchten In Das Heimnetzwerk
Sie sich wie zuvor mit Ihrer Leuchte verbinden. Es werden Ihnen jetzt alle mit können Sie sich wie zuvor mit Ihrer Leuchte verbinden. Es werden Ihnen jetzt alle mit Ihrem Netzwerk verbundenen Straton/Sektionen unten im Diagramm angezeigt. Sie Straton/Sektionen unten im Diagramm angezeigt. Sie können die Sektionen nun nach Ihren Wünschen beliebigen Gruppen zuordnen (Siehe... -
Page 22: Demo-Programm
5.4.5. Demo-Programm Klicken Sie bei deaktiviertem Demo-Modus rechts neben dem Kreis in das weiße Feld. Der Kreis wandert nach rechts und das andert nach rechts und das linke Feld färbt sich grün. Das Demo-Programm ist nun aktiviert. Es ermöglicht einen Hardware-Test der Leuchte. Es werden nacheinander die unte Test der Leuchte. - Page 23 3.1. Electrical connection ................... 25 3.2. Mounting the fixture ................... 26 4. Connection of the Straton to a terminal device ..........27 4.1. Connecting via W-Lan/wireless network ............. 27 4.2. Connecting via Ethernet cable (alternative to W-Lan/wireless network) ... 27 5.
- Page 24 5.4.4.1. Master-Slave Function ............39 5.4.4.2. Integrating all fixtures into the home network ...... 40 5.4.5. Demo program ................41 5.5. Function of the "Language" tab ..............41 6. Perform hardware reset ..................41...
-
Page 25: Introduction
If you notice any damage or incompleteness in the scope of delivery, it must be reported to your dealer immediately in order to assert any warranty claims. Damaged fixtures or components may not be put into operation under any circumstances! - LED Straton fixture - Power supply - Power supply cord - Pendant set Our fixtures are CE marked. -
Page 26: Safety Instruction
If errors occur, please do not attempt to repair the unit yourself. Contact your dealer or call our service hotline 02381-8710120. The LED Straton fixture is designed for the operation of open aquariums indoors. Do not operate in closed covers or within other enclosures. -
Page 27: Mounting The Fixture
Important! First connect the fixture to the external LED power supply before connecting the power supply to the mains. 3.2. Mounting the fixture For the two suspensions, drill two holes in the ceiling at the distance of the ropes (440 mm). -
Page 28: Connection Of The Straton To A Terminal Device
4. Connection of the Straton to a terminal device 4.1. Connecting via W-Lan/wireless network After the fixture has been connected to the mains, it takes 2 - 3 minutes for the contro 3 minutes for the control- ler of the fixture to set up a WLAN network. You can then access the controller with any ler of the fixture to set up a WLAN network. -
Page 29: Programming Of The Straton Lamp
The system time of your PC or platform-independent terminal device is also transferred independent terminal device is also transferred to the fixture. 5. Programming of the Straton lamp The graphical user interface allows you to conveniently customize the program of your allows you to conveniently customize the program of your fixture. -
Page 30: Function Of The "Chart" Tab
5.1 Function of the "Chart" tab The program starts in "Chart" mode. 5.1.1. „Save“ By clicking on "Save", you save the current settings of the program you have By clicking on "Save", you save the current settings of the program you have edited in your fixture. -
Page 31: Raster
After you have clicked on "Upload", a window appears for confirmation, which you can you have clicked on "Upload", a window appears for confirmation, which you can close by clicking on "OK". 5.1.3. „Raster“ You can enable or disable the Snap-to-Grid feature. A setting accurate to the minute is only possible in a mode with deactivated gri A setting accurate to the minute is only possible in a mode with deactivated grid. -
Page 32: Apply To All
5.1.5. „Apply to all“ The "Apply to All" function allows you to conveniently transfer settings The "Apply to All" function allows you to conveniently transfer settings you have made on one group to the other groups or sections. one group to the other groups or sections. Click on "Apply to All"... -
Page 33: Start, Pause Or Stop "Preview
Click on a point that you want to delete or next to which you want to create a new pr Click on a point that you want to delete or next to which you want to create a new pro- gramming point. -
Page 34: Functions Of The "Colors" Tab
See 5.3. Functions of the "Groups" Tab for more information. Tab for more information. A click on the temperature symbol opens the graphic diagram of the temperature mbol opens the graphic diagram of the temperature history of the sections of the last 48 hours. The graphs of the individual sections can be hidden or displayed by clicking on the se The graphs of the individual sections can be hidden or displayed by clicking on the sec- tion number. -
Page 35: The Preview Function
5.2.1. The preview function With the preview disabled, click in the white box to the right of the circle. The With the preview disabled, click in the white box to the right of the circle. The circle moves to the right and the left field turns green. The preview f The preview function is now activated. -
Page 36: Creating A New Color
5.2.2. Creating a new color The preset colors: „SPS plakativ“, „LPS/SPS“, „ LPS“, „Max Fluorrescent“, „UV/V“ cannot be modified. However, it is possible to change the color of the graphic representation of these colors in the diagram. Click on the gray square to the right of the color name. -
Page 37: Deleting A Created Color
LED color are now displayed in the selected color. You can assign the sections of one or more Straton fixtures to the groups as you wish, fixtures to the groups as you wish, add new groups or delete existing groups. -
Page 38: Function Of The "Settings" Tab
You can simply drag and drop the sections into the window of the group you want. dow of the group you want. A click on the blue minus symbol deletes the group. A click on the blue plus symbol opens a new group window. The group can be assigned a name and a color for the graphical representation. -
Page 39: Perform Firmware Update
5.4.3. Perform Firmware Update Please note: Updating with an incorrect firmware may damage the lamp and lose its function. The update resets all chang- es to the program or the network settings to the factory settings. If necessary, contact ATI for an appropriate firmware or installation guide. -
Page 40: Simultaneous Operation Of Several Fixtures
If necessary, the name can be changed. Disconnect the connection with the master light and connect to another Straton. Select the "Set- tings" tab and click "WIFI". A click on the arrow in the new window opens a dropdown list. Select Client. -
Page 41: Integrating All Fixtures Into The Home Network
"Right" in your browser, you can connect to your light as before. All signed names e.g. "Right" in your browser, you can connect to your light as before. All Straton/Sections connected to your network are now displayed in the diagram below. n the diagram below. -
Page 42: Demo Program
5.4.5. Demo program With Demo Mode disabled, click in the white box to the right of the circle. The circle moves to the right and the left field turns green. s green. The demo program is now activated. It enables a hardware test of the fixture. The different colour channels of the LED spots It enables a hardware test of the fixture. - Page 44 ATI Aquaristik Herbert-Rust-Weg 14 - 59071 Hamm Phone +49 (0) 2381 - 871012-0 +49 (0) 2381 - 871012-9 www.atiaquaristik.com...
Need help?
Do you have a question about the Straton and is the answer not in the manual?
Questions and answers
Hi,I have just purchased a Straton 204 unit after I followed the initial instructions to install the unit only three of light panels came on .When I checked the unit I found that only three sections were listed now I am not sure if I have a faulty unit or the fourth panel needs to loaded. Thanks