Table of Contents
Advertisement
tippmann
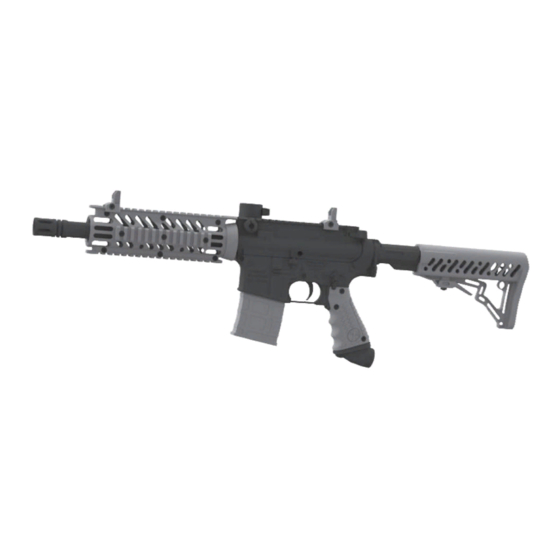
M4 Carbine
®
.68 Caliber
®
Paintball Marker Owner's Manual
Lanceur De Paintball Manuel d'utilisation
Macador Paintball Manual del Usuario
H
F
opper
ed version
M
F
agazine
ed version
TIPPMANN
®
2955 Adams Center Road, Fort Wayne, IN 46803 USA
P) 260-749-6022 • F) 260-749-6619
www.Tippmann.com
TP04405
Ver. 07/16
Advertisement
Table of Contents

Related Manuals for Tippmann M4 Carbine


Summary of Contents for Tippmann M4 Carbine
- Page 1 M4 Carbine ® .68 Caliber ® Paintball Marker Owner’s Manual Lanceur De Paintball Manuel d’utilisation Macador Paintball Manual del Usuario opper ed version agazine ed version TIPPMANN ® 2955 Adams Center Road, Fort Wayne, IN 46803 USA P) 260-749-6022 • F) 260-749-6619 www.Tippmann.com...
- Page 2 WARNING This is not a toy. Misuse may cause serious injury or death. Eye, face, and ear protection designed for paintball must be worn by the user and any person within range. We recommend you be at least 18 years old to purchase.
- Page 3 WARNING Safety is Your Responsibility Read and familiarize yourself and any other user of this marker with the safety instructions in this manual. Follow these instructions when using, working on, transporting, or storing this marker. Always keep the Trigger Safety Selector Switch in Safe mode when not in a shooting situation, see instructions on page 6.
-
Page 4: Table Of Contents
CONGRATULATIONS on your purchase of a Tippmann M4 Carbine paintball marker. We believe this M4 Carbine paintball marker to be the most accurate and durable paintball marker available, and are proudly manufactured by Tippmann. Your M4 Carbine marker will provide many years of dependable service if cared for properly. -
Page 5: Barrel Blocking Device Installation Instructions
WARNING This is not a toy. Misuse may cause serious injury or death. Eye, face, and ear protection designed for paintball must be worn by the user and any person within range. We recommend you be at least 18 years old to purchase. Persons under 18 must have adult supervision when using this product. -
Page 6: Warning/Liability Statement
If you as a user do not accept liability, Tippmann Sports, LLC requests you do not use a Tippmann Sports, LLC marker. By using this paintball marker you release Tippmann Sports, LLC of any and all liability associated with its use. - Page 7 balls or foreign debris lodged in the chamber, barrel, and/or the marker valve. • Do not shoot at fragile objects such as windows. • Never fire your marker at personal property of others. The paintball impact can cause damage and the paint can stain the finish of automobiles, houses, etc. •...
-
Page 8: Getting Started
Getting Started • Eye protection designed for paintball use must be worn by the user and any person within range. • Do not disassemble this marker while it is pressurized. • Do not pressurize a partially assembled marker. • Read each step completely before performing the step. : Carefully hand start all threaded parts when assembling, and do not overtighten, as NOTE this may potentially strip the threaded parts. Refer to the on pages 19-23 for Parts Diagram these instructions (item numbers are in parentheses). Install the Handguard and Barrel 1. Remove the screw identified at right. 2. Insert the Handguard and reinstall the screw. Tighten to hold in place. 3. Slide the Barrel through the Handguard and turn it clockwise to thread it into the Receiver. Length Adjustment of the Stock 1. Squeeze the Adjustment Lever. 2. Slide the Stock together or apart to the desired length. -
Page 9: Air/Co2 Cylinder Installation
This will help prevent an accidental discharge. Lubricate the air/CO2 cylinder valve O-Ring with Tippmann Certified Marker Oil. Insert the air/CO2 cylinder valve into the Air Supply Adapter (ASA) at the back end of the marker grip. -
Page 10: Velocity Adjustment
Velocity Adjustment Each time you play paintball, check the velocity of your paintball marker with a chronograph (an instrument for measuring velocity) prior to playing paintball. Verify that the marker’s velocity is set below 300 feet per second (or less if required by the playing field). To adjust the marker’s velocity, use the included 3/16”... -
Page 11: Air/Co2 Cylinder Safety Tips
: The cylinder valve should unscrew from the paintball marker in about 3 or 4 full turns. NOTE If you finish the 4 full turn and the cylinder valve is not unscrewed from the paintball marker, STOP! Take the entire unit to a “C5” certified airsmith for safe removal and/or repair. Locate a “C5”... -
Page 12: Air/Co2 Cylinder Removal
O-Ring is located on the tip of your air/CO2 cylinder valve. The best cylinder valve O-Rings are made of urethane. Urethane O-Rings are not affected by high air/CO2 pressures. These may be purchased from Tippmann or your local paintball dealer. There is an extra O-Ring in the Accessory Pack that came with your marker. -
Page 13: Cleaning And Maintenance
Cleaning and Maintenance • To reduce the chance of an accidental discharge, follow the Unloading Your (on page 10) and (on page 12). Marker Air/CO2 Cylinder Removal • Eye protection must be worn. • Do not disassemble a marker while it is pressurized with air. •... -
Page 14: Marker Disassembly Instructions
Barrel it, turn it clockwise to thread it into the Receiver. Make sure the (26) is lubricated O-Ring with Tippmann Certified Marker Oil when re-assembling the barrel to the marker. 4. Remove the (92) from the marker. Rear Sight 5. Remove the (66). -
Page 15: Power Tube And Valve
10. Remove the (25) by lifting it Charging Handle from the receiver half. 11. Disconnect the (47) from the Linkage Arm Rear (9) and (23). You may need to lift Bolt Front Bolt the Valve assembly slightly. 12. Slide the Front Bolt off the (22) and Power Tube check the... -
Page 16: Reassembling Receiver Halves
O-Ring Reassembling Receiver Halves indicates lubricate this part with a small amount of Tippmann Certified Marker Oil) 1. Refer to the graphics, and place the following parts into the right Receiver half: Trigger Pins (51), black colored Sear Pin (54), Sear (52), and gold colored Sear Spring (53). -
Page 17: Converting From Hopper Fed To Magazine Fed
7. Align the Magazine Release components in the right receiver half. Put the Safety Selector Switch (in Fire mode) through the left Receiver Half. Align with the openings for Mag Release and Safety Selector Switch in the right Receiver Half. Carefully install the left receiver half (make sure halves fit flush). - Page 18 Mag Cleaning 1. Clean the outside of the magazine with a soft cloth moistened with clean water. Do not use chemicals on the magazine. 2. Make sure the spring mechanism is NOT compressed. 3. The magazine has a removable lower half. To remove the lower half, remove the lower screw;...
-
Page 19: M4 Carbine Parts Diagrams
M4 Carbine Paintball Marker Parts Diagram TP04405 Rev. 07/16... - Page 20 TP04405 Rev. 07/16...
- Page 21 TP04405 Rev. 07/16...
- Page 22 Hopper Fed Parts TP04405 Rev. 07/16...
- Page 23 Magazine Fed Parts TP04405 Rev. 07/16...
-
Page 24: M4 Carbine Parts List
M4 Carbine Parts List Part Number Description Item 9-PA Hex Nut, 10-32 TA06333 Stock Release Latch TA06335 Stock Slide TA06365 Stock Spring TA06364 Stock Latch TA06334 Stock Tube CA-15 Guide Pin CA-14 Spring TA06320 Rear Bolt TA06354 O-Ring, Rear Bolt, small... - Page 25 M4 Carbine Parts List Part Number Description Item TA06325 Gas Line TA40018 Gas Line Adapter TA06301 Receiver Half LH TA45101 Spring TA45102 Ball Bearing TA06312 Safety Lever TA06305 Grip, LH TA06015 Screw, 10-32 x 0.840 98-01A Screw, 10-32 x 0.675...
- Page 26 M4 Carbine Parts List Part Number Description Item Front and Rear Sights TA07065 Screw TA41008 Front Sight TA41007 Rear Sight Feed Tube Assy TA06074 Locking Cap TA06326 Feed Elbow PL-42D 1/4-20 Square Nut 98-45 M6 Flat Washer PL-42C 1/4-20x1" Screw...
- Page 27 M4 Carbine Parts List Part Number Description Item Mag Fed Magazine TA41018 1/8 Screw, self tap TA06350 Ratchet Pin TA06347 Ratchet Wheel TA06345 Ratchet Pawl TA06342 Ball Plunger TA06344 Ball Catch TA06343 Ball Catch Release TA06340 Ball Catch Spring TA06349...
-
Page 28: Specifications
Tippmann warrants to the original purchaser that it will make any repairs or replacements necessary to correct defects in material or workmanship, at no charge to you, for the Marker for a period of one (1) year from the date of original retail sale. Further, Tippmann warrants TP04405 Rev. 07/16... - Page 29 Tippmann Accessories for a period of ninety (90) days from the date of original retail sale. All Tippmann asks is that you properly maintain and care for the Marker and Accessories (collectively, the “Product”) and that you have warranty repairs performed by Tippmann or a Tippmann Certified Tech Center.
- Page 30 NOTE S TP04405 Rev. 07/16...
Need help?
Do you have a question about the M4 Carbine and is the answer not in the manual?
Questions and answers