Advertisement
Quick Links
Advertisement

Subscribe to Our Youtube Channel
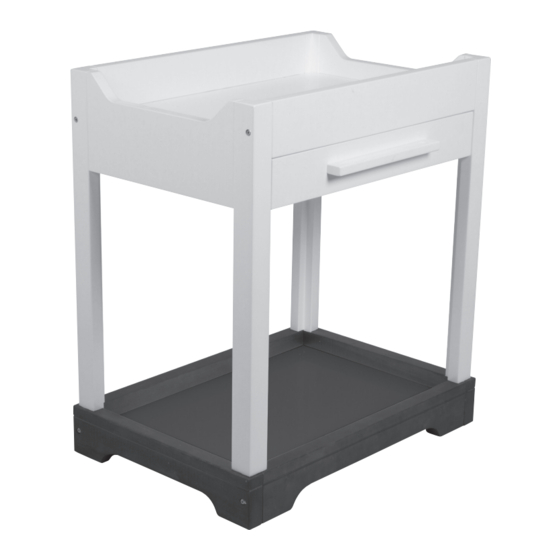
Summary of Contents for CNP Brands bebe care SORRENTO LETTO 092240-388
- Page 1 IMPORTANT: RETAIN FOR FUTURE REFERENCE, READ CAREFULLY...
-
Page 2: Safety Precautions
DISCONTINUE use once child reaches 12 months of age or 11kgs. DO NOT allow older children to climb or play on the change centre. DO NOT use accessories other than those supplied and approved by CNP Brands. Promptly replace worn out or broken parts. - Page 3 Due to variations in the style and design of our products, the photographs and illustrations shown in this instruction manual are generic, therefore product fabrics, colour and design may vary from images shown. CNP Brands reserves the right to alter product specifications without notice as a result of our ongoing policy of product improvement.
-
Page 4: Assembly Contents
You have received 1 box. Please check the contents of the box against the list below. If anything is missing, please contact Customer Service. In Australia, contact CNP Brands on 1300 667 137, in New Zealand contact Wainhouse Distribution on 0800 567 5000. -
Page 5: Assembly Kit
ASSEMBLY CONTENTS Supplied loose in box continued (Drawer Components): Drawer Side Panel Drawer Base Panel Drawer Front Panel Front Panel Drawer Rear Panel Front Panel Handle Assembly Kit: 27mm Screw 22mm Screw (Drawer Assembly) (Drawer Assembly) 40mm Bolt Wooden Dowel x 16 (Drawer Assembly) - Page 6 ASSEMBLY CONTENTS / ASSEMBLY / OPERATING INSTRUCTIONS Assembly Kit continued: 65mm Bolt 50mm Bolt Phillips Screwdriver Allen Key (Not Included) As small parts are involved in assembly, children should be kept clear of the assembly area. Dispose of all packaging material immediately after the change centre is assembled.
- Page 7 ASSEMBLY / OPERATING INSTRUCTIONS To attach Top Front & Rear Panels continued... Insert 2 x Dowels into each end of the Rear Panel. Attach the Top Rear Panel by aligning the dowels with the dowel holes. Push together and secure with one 65mm bolt.
- Page 8 ASSEMBLY / OPERATING INSTRUCTIONS To attach Top Shelf... Carefully lay the Right Side Panel on its back. Insert the thicker Top Shelf into the grooves and slide it down until it sits in the groove in the Right Side Panel. To attach Top Shelf continued...
- Page 9 ASSEMBLY / OPERATING INSTRUCTIONS To attach Left Side Panel... Carefully attach the remaining Left Side Panel onto the upper panels and Lower Plinth Panels by aligning the dowels and guiding the Top and Bottom Shelves into the grooves. Secure with 2 x 50mm bolts through the plinth and 2 x 65mm bolts for the front and rear panels.
- Page 10 ASSEMBLY / OPERATING INSTRUCTIONS To assemble Drawer continued... Connect the Drawer Runner Panels to Rear Panel using 4 x 27mm Screws. Make sure that the grooves line up with the groove on the rear panel. Slide the Drawer Base Panel into the grooves and into the Rear Panel groove.
- Page 11 ASSEMBLY / OPERATING INSTRUCTIONS To assemble Drawer continued... Drawer is ready to assemble into main change centre unit. Insert the Drawer by lining up the drawer runners with the cabinet runners. 10a. Gently push the Drawer closed to engage the mechanism.
-
Page 12: Maintenance
CNP Brands. If you have any difficulties in assembling the change centre, please contact our Service Department. In Australia, contact CNP Brands on 1300 667 137, in New Zealand contact Wainhouse Distribution on 0800 567 5000. - Page 13 ABOUT US About CNP Brands Currently, CNP Brands boasts one of the most diverse brand portfolios with a combination of company owned brands and distribution agreements. These include distribution lines for Brica, Cybex, Evenflo, Good Baby, Lascal, Maclaren, Munchkin, Project Nursery, Summer Infant and Yookidoo.
- Page 14 Distributed in Australia by CNP Brands Distributed in New Zealand by Wainhouse 20 Calarco Drive, Distribution Derrimut, VIC, 3030 2-6 Argyle St, Morningside, Customer Service 1300 667 137 PO Box 41-014, St Lukes, Auckland, New Zealand W: www.cnpbrands.com.au Customer Service: 0800 567 5000 E: info@cnpbrands.com.au...


Need help?
Do you have a question about the bebe care SORRENTO LETTO 092240-388 and is the answer not in the manual?
Questions and answers