Table of Contents
Advertisement
Available languages
Available languages
• READ ALL INSTRUCTIONS BEFORE ASSEMBLY AND USE OF BED RAIL.
KEEP INSTRUCTIONS FOR FUTURE USE.
• LIRE TOUTES LES INSTRUCTIONS AVANT D'ASSEMBLER ET D'UTILISER RAIL DE LIT.
CONSERVER CES INSTRUCTIONS POUR UNE UTILISATION ULTÉRIEURE.
• LEA TODAS LAS INSTRUCCIONES ANTES DE MONTAR Y USAR BARANDAL PLEGABLE.
GUÁRDELAS PARA UTILIZARLAS COMO REFERENCIA.
www.regalo-baby.com
Regalo International, LLC.
3200 Corporate Center Drive, Suite 100 / Burnsville, MN 55306, USA / , É.-U. / , EE. UU.
866.272.5274 (U.S. only / aux États-Unis seulement / solo en EE. UU.) or / ou / o 952.435.1080
Made in China / Fabriqué en Chine / Hecha en China
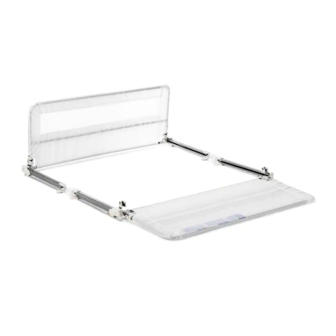
HideAway Double Sided Bed Rail
Barrières de lit escamotables doubles
Barrières de lit escamotables doubles
Model / Modèle / Modelo: 6010 HD
Advertisement
Table of Contents

Related Manuals for Regalo 6010 HD


Summary of Contents for Regalo 6010 HD
- Page 1 HideAway Double Sided Bed Rail Barrières de lit escamotables doubles Barrières de lit escamotables doubles Model / Modèle / Modelo: 6010 HD • READ ALL INSTRUCTIONS BEFORE ASSEMBLY AND USE OF BED RAIL. KEEP INSTRUCTIONS FOR FUTURE USE. • LIRE TOUTES LES INSTRUCTIONS AVANT D’ASSEMBLER ET D’UTILISER RAIL DE LIT.
-
Page 2: Before Assembly
Before Assembly English BEFORE USING PRODUCT Read and follow all instructions carefully to ensure that your product is properly installed. Failure to follow these instructions for the assembly of use of your bed rail could result in serious injury or death. The safety of your child is your responsibility. - Page 3 STEP 3 STEP 4 STEP 5 GUIDE PIN GUIDE TRACK To install the mesh wall (A) on the bed rail, slide it Lay the frame assembly (F,G) flat, and align the Slide the frame assembly along the guide track on over the frame until it reaches the other end, zip it left guide pins with the guide track on the left each side.
- Page 4 STEP 4 STEP 3 Release the strap locks and pull the straps towards you, until the excess Once the straps are in place and tightened, close the locking buckle by slack has been pulled out from under the mattress. This tightens the straps giving one final tug while holding the straps in place.
-
Page 5: Replacement Parts
finish and assembly, Regalo International, LLC, will replace or repair it at Regalo’s option. PROOF OF PURCHASE REQUIRED. -
Page 6: Avant L'assemblage
Avant l'assemblage French AVANT D'UTILISER LE PRODUIT Lire et suivre attentivement les instructions pour assurer une installation conforme du produit. Négliger les instructions de ce guide de montage et d'utilisation de la barrière de lit pourrait entraîner de graves blessures ou la mort. Vous êtes responsable de la sécurité... - Page 7 ÉTAPE 3 ÉTAPE 4 ÉTAPE 5 TIGE GUIDE GLISSIÈRE GUIDE Pour installer la housse en tissu (A) sur la barrière Placez le cadre de la barrière (F, G) à plat et Faites glisser le cadre le long de la glissière guide, de lit, glissez-la jusqu’à...
- Page 8 ÉTAPE 3 ÉTAPE 4 Déclenchez les verrous des courroies et tirez les courroies vers vous Lorsque les courroies sont en place et serrées, fermez la boucle de jusqu’à ce qu’il n’y ait plus de jeu dans les courroies sous le matelas. Cela verrouillage en donnant un petit coup final tout en maintenant les courroies serre les courroies et place la barrière dans la bonne position.
-
Page 9: Pièces De Rechange
à l’acheteur original, s’avère défectueux en ce qui a trait à la qualité des matériaux ou aux travaux de finition et d’assemblage, Regalo International LLC le replacera ou le réparera à son choix. PREUVE D'ACHAT... -
Page 10: Antes Del Montaje
Antes del montaje Spanish ANTES DE USAR EL PRODUCTO Lea y siga todas las instrucciones cuidadosamente para garantizar que el producto quede correctamente instalado. El no seguir estas instrucciones de montaje o uso de la barandilla podría causar lesiones graves o letales. La seguridad de su niño es su responsabilidad. - Page 11 PASO 3 PASO 4 PASO 5 PASADOR CENTRADO GUÍA DESLIZANTE Para instalar la pared de malla (A) en la barandilla, Coloque el ensamble de marco plano (F, G) y Deslice el ensamble de marco por la guía deslizante deslícela sobre el marco hasta que llegue al extremo alinee los pasadores de centrado izquierdos con en ambos lados.
- Page 12 PASO 3 PASO 4 Suelte las hebillas de la correa y tire de la correa hacia usted, hasta quitar Una vez que las correas estén en su lugar y ajustadas, cierre la hebilla de toda holgura debajo del colchón. Esto permite tensar las correas y colocar bloqueo dando un último tirón mientras mantiene las correas en su lugar.
-
Page 13: Piezas De Repuesto
Regalo International, LLC, lo reemplazará o reparará a discreción de Regalo. SE... - Page 14 WARNING ENGLISH • SUFFOCATION AND STRANGULATION HAZARD. • Gaps in and around bed rails have MISE EN GARDE entrapped young children and killed infants. • NEVER use with children younger than 2 years old. USE ONLY with older children who can get in and out of ADVERTENCIA adult bed without help.
Need help?
Do you have a question about the 6010 HD and is the answer not in the manual?
Questions and answers