
Summary of Contents for MONTAGUE M-E1
- Page 1 E-Bike Owner’s Manual Even if you have ridden a bike for years, it is important for you and every rider to read this manual before riding this bicycle. Keep for reference.
- Page 2 If you do not fully understand if not avoided, could cause minor or how to operate the quick release moderate injury. levers, ask a bicycle dealer for assistance, or call Montague’s WARNING Customer Support Team at +1 617-491-7200. In this manual, the WARNING sign...
-
Page 3: Table Of Contents
TABLE OF CONTENTS Warnings Section Two Section One Assembling your Bicycle Introduction Packing List Installing Front Wheel QR Record Your Serial Number Installing Front Wheel Register Your Bicycle Rotating Stem Owner’s Responsibility Installing the Handlebars Bicycle Type and Use Conditions Installing Front Fender E-Bike Classes Attaching Steering Damper Spring... -
Page 4: Warnings
Understanding Registration and and following this information will help proof of purchase you and your Montague bicycle avoid Fig. 1: The serial number is are necessary to injury or damage. located on the seat tube of make a warranty the frame on the drive-side. -
Page 5: Owner's Responsibility
If you have any questions about your All quick releases must be securely Montague after reading this manual, or fastened before riding any Montague encounter any problems when folding bicycle. The quick releases are pictured or unfolding your bike, please visit the on page 11 in Fig. -
Page 6: Bicycle Type And Use Conditions
Condition 2 bicycles typically feature use are not warranted by Montague flat handlebars and 700c or 26” wheels. Corporation. Montague Corporation These bicycles have “semi slick” tires... -
Page 7: E-Bike Classes
Marking for recyclable throttle, and have a maximum materials. Sort packaging and assisted speed of 20 mph. dispose of separately. Dispose Your Montague e-bike falls of cardboard along with waste paper and under Class 1. film in your recycling collection. For reference:... -
Page 8: Introduction To E-Bikes
• E-bikes require more braking force. The Montague ME-1 is a Class-1 This can increase wear on the e-bike which has a power rating of 250 brakes. Watts and provides assistance up to •... - Page 9 Intended Use Other road users such as drivers, pedestrians and other cyclists may need Your Montague e-bike is intended, to adjust to the higher speed of the designed, and tested for riding on paved e-bike and may not be aware of you. It is...
-
Page 10: Kickstand And Cargo Rack
It is your responsibility to know and No child seats or trailers are allowed follow all local laws and regulations regarding use of your e-bike. for use with your Montague electric bicycle. Use of the Kickstand Drive System and Supplementary Manuals... -
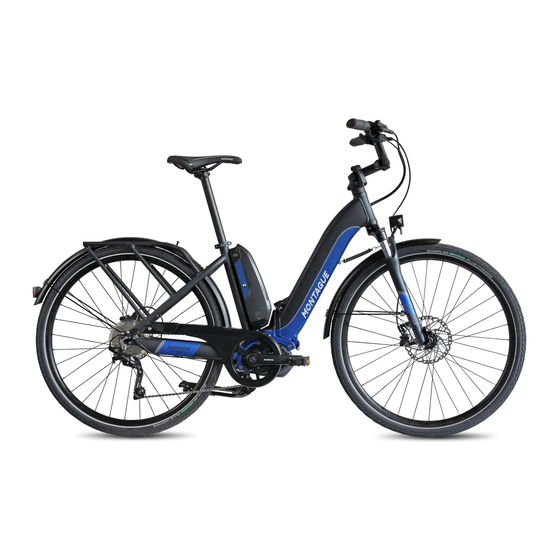
Page 11: Parts Of Your Bicycle
PARTS OF YOUR BICYCLE... -
Page 12: Before Your First Ride
Maximum Gross Weight Limit height and length of frame for the rider. Montague bicycles are designed for The right frame height depends on the a maximum total weight of rider plus rider’s inside leg (inseam) measurement. -
Page 13: Check Your Brakes, Steering, And Quick Releases
Review Riding Safely on page 20 and manuals to understand the power- Riding Instructions on page 23 before assisted drive system and other attempting to ride your Montague e-bike. components. Check the steering as shown in Fig. 5, Before your first ride, you should page 18. -
Page 14: Moving Parts And Pinch Points
BEFORE YOUR FIRST RIDE CONTINUED Hot Spots, Moving Parts, Sharp range of operating conditions, so it is not Areas, and Pinch Points possible to provide a precise schedule for replacement. Any cracks, scratches, Some parts of your e-bike can injure or significant color changes indicate that you if mishandled. -
Page 15: Before Every Ride
BEFORE EVERY RIDE WARNING This is not a comprehensive maintenance program. Montague recommends that you have your e-bike tuned and safety checked by a bicycle technician familiar with e-bikes on a regular basis but no less than annually. If you notice any irregularities in your bike and/or its performance take it to a bicycle dealer before attempting to ride. - Page 16 BEFORE EVERY RIDE CONTINUED An overloaded carbon fiber part will not Carbon Fiber Test bend or deform, so a damaged carbon To examine for surface problems part (with reduced strength due to the damage) may look normal - even after 1.
-
Page 17: Examine The Frame, Fork, & Wheels
BEFORE EVERY RIDE CONTINUED leave your bike lying flat in a black pickup there is any movement or irregularity in truck bed in the desert sun or under the the wheel do not ride your bike. Take it to glass of a hatchback auto. your local dealer for service. -
Page 18: Examine The Brakes And Steering
(Fig. 5).To examine Your Montague e-bike is equipped with Fig. 5: disc brakes The hand lever causes Try to turn the... -
Page 19: Saddle And Seatpost
BEFORE EVERY RIDE CONTINUED the connection of the handlebar, try to Your Montague e-bike comes equipped twist it in the stem. The handlebar should with front and rear lights powered from the main e-bike battery. For additional not move or be loose. Make sure that... -
Page 20: Riding Safely
RIDING SAFELY The first rule in safe e-bike riding is • Give pedestrians the right of way. to use common sense. An e-bike is Do not ride too close to pedestrians vulnerable; it cannot protect you in a and alert them if you intend to pass crash, impact, or loss of control the from behind. -
Page 21: Caution: Wet Weather Riding
RIDING SAFELY CONTINUED Be Seen (Especially at Night) • Never hitch on to other vehicles, do not “stunt” ride or race in traffic. Do not weave in and out of the traffic or Your e-bike comes equipped with front swerve from side to side. and rear lights that are powered from the main e-bike battery. -
Page 22: Think Safety
RIDING SAFELY CONTINUED Think Safety you drowsy. • Ride carefully when off-road, staying Think about safety when you ride. You on trails, and not riding over rocks, can prevent many bicycle accidents if branches, or depressions. you think about safety. For example: •... -
Page 23: Riding Instructions
RIDING INSTRUCTIONS Using Your Brakes the front brake, and the right brake lever operates the rear brake (note: bicycles Always ride with a safe distance manufactured for the United Kingdom between you and other vehicles or and some other countries switch these objects. -
Page 24: Descending
RIDING INSTRUCTIONS CONTINUED like when braking. Keep your feet on For easiest pedaling (while going the pedals and keep the crank arms uphill), position the chain over the horizontal and parallel to the ground smallest chainring in front and the largest (unless you are cornering as you sprocket in back. -
Page 25: Obstacles And Impacts
RIDING INSTRUCTIONS CONTINUED Obstacles and Impacts Always look well down the road to help you anticipate upcoming obstacles. This distance will vary according to your speed, but remember that the closer you get to an obstacle, the less time you have to react to it. -
Page 26: Assembling Your Bicycle
For additional manuals, please visit montaguebikes.com/online-owners- If you have questions or concerns about manual/. any of these steps, please see a bicycle dealer or contact Montague’s Customer Installing Front Wheel Quick Support Team at +1 617-491-7200. Release Carefully follow the Final Assembly Instructions attached to your bike. -
Page 27: Installing Front Wheel
ASSEMBLING YOUR MONTAGUE BICYCLE CONTINUED Closed Quick release Hub axle lever Spring Quick release Open skewer Spring Adjustment Fig. 7: Traditional quick release; diagram of parts. Fig. 8: Positions of a quick release. Installing the Front Wheel WARNING The front wheel of your new bicycle... -
Page 28: Rotating Stem
Disc Brake (Fig. 10): possible. The installation and use of this To attach the front wheel on a disc stem is unique to Montague. For more brake equipped bike, align the wheel details, please see Proper Maintenance rotor with the slot in the disc brake and Adjustment on page 50. - Page 29 ASSEMBLING YOUR MONTAGUE BICYCLE CONTINUED 5. Rotate the stem 180 degrees so that it extends forward from the frame, and is aligned parallel with the front wheel. 6. With the stem aligned parallel with the front wheel, apply a clamping force between the top of the stem assembly and the fork crown.
-
Page 30: Installing The Handlebars
(Fig. 16). Fig. 18: Set at comfortable angle. To complete the assembly of your cables hidden Montague bicycle, continue with the for clarity instructions provided in the next sections, Installing the Front Wheel, Unfolding the Fig. 16: Replace and center handlebars. -
Page 31: Installing Front Fender
ASSEMBLING YOUR MONTAGUE BICYCLE CONTINUED Installing the Front Fender The front fender mounts to three points on the fork. The mounting bolts will already be in place on the fork arch and fork lowers. To install the fender: 1. Remove the nut from the mounting bolt on the fork arch by turning it counter clockwise (Fig 19). -
Page 32: Attaching Steering Damper Spring
ASSEMBLING YOUR MONTAGUE BICYCLE CONTINUED Fig. 22: Mounting bolt on fork lower Fig. 23: Steering damper spring Installing the Seatpost Attaching the Steering Damper Spring A steering damper spring is included Closed to keep the fork and handlebars from turning on their own and falling to one... -
Page 33: Installing Pedals
ASSEMBLING YOUR MONTAGUE BICYCLE CONTINUED 3. When you are when you can sit on the saddle, and satisfied with with your knee only slightly bent the height of (approximately 15º), reach the pedal Minimum insertion the seatpost, at its lowest point with the ball of your line “OPEN”... -
Page 34: Inflating Tires
Pressure threaded hole in the right crank arm and secure it in the crank by hand. Your Montague e-bike is shipped The right hand side of the bicycle is the side of the bicycle with the chain. with the rear tire deflated for packing purposes. -
Page 35: Folding Your Bicycle
FOLDING YOUR MONTAGUE BICYCLE Your Montague e-bike is designed to 3. Open the frame quick release by fold quickly without the use of tools. lifting up on the lever (fig 30). To Fold Your Bike: 1. Lower the kickstand. Lift the rear end of the bike to allow it to fully straighten. - Page 36 FOLDING YOUR MONTAGUE BICYCLE Fig. 34: Lock the folded bike together with hook. Fig. 32: Fold the bike frame in half. 6. Where the two halves of the bike 8. Open the seat post quick release come together, the front wheel quick...
-
Page 37: Folding The Pedals
FOLDING YOUR MONTAGUE BICYCLE Folding the Pedals Your Montague e-bike is equipped with folding pedals to provide a more compact size when folding the bike. To fold the pedals: 1. Grasp the outside edge of the pedal, insert your fingers into the center of the pedal body, and squeeze (Fig. -
Page 38: Rolling The Bike
1. Follow steps 1 through 8 in “Folding bike onto the kickstand as it could Your Montague Bicycle” (pages 34 - cause damage. 36). Do not fold down the handlebars or open the handlebar stem quick release. -
Page 39: Unfolding Your Bicycle
After reading this manual if you do not fully understand how to operate the quick release levers, ask a bicycle dealer for assistance, or call Montague’s Customer Support Team at +1 617-491- 7200. Do not ride your e-bike without all quick releases securely locked. -
Page 40: Adjusting The Frame Quick Release
UNFOLDING YOUR MONTAGUE BICYCLE CONTINUED 3. Once the lever is securely closed, you should no longer be able to pivot the stem along the hinge, and you should not be able to move the stem relative to the front wheel. - Page 41 If you do not fully under- stand how to operate the quick release levers, ask a bicycle dealer for assis- tance, or call Montague’s Customer Support Team at +1 617-491-7200. DO NOT RIDE YOUR E-BIKE WITHOUT ALL QUICK RELEASES...
-
Page 42: Drive Assist System
Montague e-bike. Do not longevity and safe operation. use the included battery with any other bicycle, or any other battery WARNING with your Montague e-bike, even if it fits. Failure to follow the instructions in • Always turn the e-bike’s drive-assist... -
Page 43: Charger And Power Supply
DRIVE-ASSIST SYSTEM CONTINUED • Do not use a battery that shows any Particularly high and particularly low signs of damage, or is leaking any ambient temperatures can permanently fluids. Battery liquid can cause skin speed up battery wear or even irritation, burns and respiratory tract damage the rechargeable battery. - Page 44 Store the charger in an area where it on the battery. will not become wet or damp and do not spray any liquid on the charger. Montague recommends charging the • Do not modify, open or disassemble battery in an area with a working smoke the charger.
-
Page 45: Tips For Getting The Most Range
DRIVE-ASSIST SYSTEM CONTINUED sizing of the attached gear ratios (front/ In general however, the higher the rear chain rings)). Attempts to “hot- power mode, more resistance created rod” or “improve” the speed of the bike by inclines, terrain, wind and weight on are dangerous to the rider. -
Page 46: Cleaning, Storing, And Transporting
DRIVE-ASSIST SYSTEM CONTINUED • • Continually test the functionality of If any part of any component of the e-bike and check for wear, and the drivetrain is wet, allow it to dry refer to all notes on the rechargeable completely before connecting the battery in this user manual and the charger. - Page 47 DRIVE-ASSIST SYSTEM CONTINUED Storage Transportation • Store your e-bike in a dry, well venti- WARNING lated area. Only store the battery at an ambient temperature below +95◦F Always remove the battery before (+35◦C). transporting your e-bike. The battery is • Clean your e-bike prior to storing for considered dangerous and is subject an extended period of time and pro-...
-
Page 48: Keys
DRIVE-ASSIST SYSTEM CONTINUED • Disposal Avoid transporting the rechargeable battery by car in high outdoor tem- peratures. Ensure that you park the Do not dispose of the battery or charger car in the shade when transporting in your household waste. All parts the rechargeable battery by car. -
Page 49: Proper Maintenance And Adjustment
Checklist on page 15. This manual is not identical to the original components on intended to be a repair manual. If you your bike. The Montague frame quick are unsure about adjusting your e-bike or release and the foldable stem assembly have any questions about adjusting your are both safety-critical components. -
Page 50: Stem
The assembly and the fork crown. This mounting and adjustment of this stem will press the stem down onto the is unique to Montague. Please read headset bearings (Fig 49). the instructions below carefully before attempting to adjust the stem. -
Page 51: Seat (Saddle) Adjustments
PROPER MAINTENANCE AND ADJUSTMENT CONTINUED Saddle angles can be adjusted to meet 7. Open the stem quick release and your preferences. It is recommended begin to fold the handlebars down to that you first try to ride with the top of the provide access to the expander bolt. -
Page 52: Pedals
PROPER MAINTENANCE AND ADJUSTMENT CONTINUED Control Cables For saddle height adjustment and seatpost quick release usage, see page Examine all cables for kinks, rust, 32, Installing the Seatpost. broken strands, or frayed ends. Also examine the cable housing for loose WARNING wire strands, bent ends, cuts, and worn areas. -
Page 53: Front Derailleur Adjustment
PROPER MAINTENANCE AND ADJUSTMENT CONTINUED Front Derailleur Adjustment 2. Shift the chain to the outermost/ smallest rear sprocket by turning the right twist shifter all the way away Cable from you, or moving the right shift lever all the way towards you. Cable clamp bolt 3. -
Page 54: Brakes
PROPER MAINTENANCE AND ADJUSTMENT CONTINUED To adjust the middle-gear position 5. On the shift lever, fully turn clockwise with three chainrings the derailleur cable barrel-adjuster. 6. Put the cable in the groove found 1. Move the chain to the largest front near the derailleur-cable-clamp bolt, chainring and the smallest rear cog. -
Page 55: Wheels
PROPER MAINTENANCE AND ADJUSTMENT CONTINUED replace the rim. Make sure there are the front brake lever clockwise to no loose or damaged spokes. If loose move the outside brake pad inward or damaged spokes are found, do not until it touches the rotor. ride the bicycle, take it to your local bike dealer for repair. - Page 56 5. If you can lock the lever with little or no resistance, the clamp-force is not sufficient. Go back to step 2 and Your Montague bicycle could use two tighten the adjustment nut 1/4 turn different types of wheel attachment and return to step 3.
-
Page 57: Fitted Accessories
PROPER MAINTENANCE AND ADJUSTMENT CONTINUED Fitted Accessories (Racks and 3. Move wheel out of the fork or frame. Fenders) To install a wheel with a threaded In addition to the parts already axle and nut: discussed in this chapter, your bicycle might have accessories such as fenders, Some rear wheels are attached with lights, racks, chain guard, or kickstand. -
Page 58: Bearing Adjustments
PROPER MAINTENANCE AND ADJUSTMENT CONTINUED Stem WARNING Each year apply lubricant to the stem. Any modification can make your To apply lubricant to a direct-connect frame, fork, or part unsafe. Do not stem, adjustment of the headset sand, drill, file, remove redundant bearings is necessary. - Page 59 PROPER MAINTENANCE AND ADJUSTMENT CONTINUED 2. Apply a thin layer of grease on the 4. Put the seatpost into the frame. threads. 5. Adjust the saddle to the correct 3. Install the pedals on the correct height and align it. Tighten the side;...
- Page 60 PROPER MAINTENANCE AND ADJUSTMENT CONTINUED Suspension Forks 4. Turn the barrel-adjuster clockwise so that the threads on the barrel- Each month, lubricate your suspension adjuster do not show. • For a fork. Refer to the supplementary manual derailleur cable, put the shift-lever provided by the fork maker, or consult in the position with the least cable your dealer.
-
Page 61: Maintenance Schedule
MAINTENANCE SCHEDULE Every Month Many of the items scheduled on the maintenance list are described within this manual. Several items on • Examine the attachment of the this maintenance list require special handlebar and stem tools and training to complete. We •... -
Page 62: Warranty
MONTAGUE CORPORATION LIMITED WARRANTY Montague Corporation warrants each a warranty registration card or online new Montague electric bicycle frame registration must be completed and against defects in workmanship and received by Montague Corporation materials for 5 years from the date before a warranty claim may be of purchase for the original owner. - Page 63 USA. Montague is a registered Trademark of the Montague Corporation. Component specifications vary by country and are subject to change without notice. All Montague bicycles are cov- ered under one or more patents or patents pending. CLIX is a registered Trademark of CLIX Systems, Inc.
- Page 65 Montague Corporation P.O. Box 398032 Cambridge, MA 02139 Phone # +1 617-491-7200 www.montaguebikes.com © 2020 Montague Corporation, Cambridge, MA, USA...
Need help?
Do you have a question about the M-E1 and is the answer not in the manual?
Questions and answers