Table of Contents
Advertisement
Quick Links
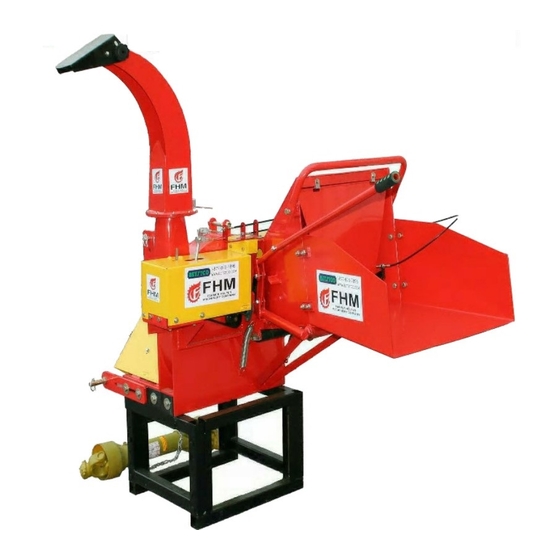
WC8-PRO Power Feed Wood Chipper
Save This Manual for Future Reference
OPERATION & PARTS MANUAL
Please read these instructions carefully before using!
You must fill gear box with oil and grease all grease points before operating!
Check for items in feed chute & for Flywheel free spin before operation.
www.Betstco.com
Toll Free: 877-876-7895, E-mail: sales@betstco.com
83371 Melton Rd, Creswell OR 97426
Labor Saving Equipment Since 1995
Farmer-Helper WC PRO Chipper
1
10-19-2017
*Prices and Specifications subject to change without notice
Advertisement
Table of Contents

Related Manuals for FHM WC8-PRO


Summary of Contents for FHM WC8-PRO
- Page 1 WC8-PRO Power Feed Wood Chipper Save This Manual for Future Reference OPERATION & PARTS MANUAL Please read these instructions carefully before using! You must fill gear box with oil and grease all grease points before operating! Check for items in feed chute & for Flywheel free spin before operation.
- Page 2 The information contained in this operations manual is a general introduction only. The information contained herein may be modified at any time, for any reason. Modification may affect the details or specifications of the product described in this manual. Therefore, users – dealers must include the manufacturing date and serial number when placing an order for spare parts and components.
-
Page 3: Table Of Contents
Table of Contents 1. Introduction ……………………. 2 2. Setup and Assembly Instructions ……………………. 3 3. PTO Driveshaft Safety Tips ……………………. 6 4. Protective Guards and Shields ……………………. 6 5. Safety Instructions ……………………. 7 6. Operator Protective Gear ……………………. 8 7. Operation Checklist ……………………. -
Page 4: Introduction
1. INTRODUCTION Before using your wood chipper, read and understand this operation manual and the accompanying maintenance instructions. It contains important information which will help you observe proper safety precautions, get the most work from your wood chipper and help prolong the life of your chipper. - Page 5 Farmer-Helper WC PRO Chipper Revision 9/22/16...
-
Page 6: Pto Driveshaft Safety Tips
3. PTO DRIVESHAFT SAFETY TIPS Your chipper is shipped with a PTO driveshaft. When using the PTO driveshaft, keep your tractor adjusted as close to the chipper as possible. Always ensure that the PTO shaft is no more than 15 degrees of horizontal when operating. -
Page 7: Safety Instructions
PTO driveshaft should consist of a PTO master shield, integral driveshaft shield, and a chipper input connection shield. 1. Follow all chipper and tractor instruction labels and manuals. The chipper should be used only with the tractor’s PTO master shield in place. -
Page 8: Operator Protective Gear
Keep everyone, especially children, away from the operation area. Anyone who has not read and understood this manual should not be in the area. 6. OPERATOR PROTECTIVE GEAR The following protective clothing and gear is recommended when using your chipper: EYES Wraparound Safety Glasses or Goggles EARS... -
Page 9: Chipper Operation
8. CHIPPER OPERATION Remember that the chippers blades must be sharp to operate properly. Dirt, rocks, nails, or other foreign material will shorten blade life. Always review the manual before operating the chipper. Locate chipper in a safe area with the discharge chute pointed away from doorways, sidewalks, or any areas where your view is obstructed. -
Page 10: Blade Replacement
Replace the upper and lower clean-out covers. Turn the head by hand to be sure it turns freely. If head fails to rotate completely repeat steps above. Once head turns freely again replace the discharge chute. Be sure all shields and deflectors are replaced before operating again. When you have finished working be sure there is nothing in the head or feed roll. -
Page 11: Lubrication Frequencies And Locations
the allen wrench bolt heads. Be sure to note the position of the blade before removing, to ensure new blade is placed in the same location. Caution: Be Sure Not to Drop any Parts Inside. Remove the blade and replace with new blade. Blade installation is opposite of removal, being sure to position in same relation to Bed blade as before. -
Page 12: Preventive Maintenance
REDUCTION GEAR BOX – Check Oil Level every 12 to 16 hours of operation. FEED ROLLER PILLOW BLOCK BEARINGS – 2 zerks on either side of shaft with multipurpose grease every 100 hours of operation. DRIVE SHAFT & FLYWHEEL SHAFT PILLOW BLOCK BEARINGS –... -
Page 13: Parts And Fasteners
Blades Dull Reverse/Replace PROBLEM: Feed Roll Clutch Kicking in and out of gear Possible Causes Solution Blades Dull Reverse/Replace Material jammed in chute Release feed roll clutch and remove material by pulling out of chute, trim forks if necessary PROBLEM: Chip Deflector Plugging; Chips too long or Stringy Possible Causes Solution Blades Dull... -
Page 14: Troubleshooting
Further Plugging Diagnostics There are many variables that can cause the chipper to plug The Input Speed From Tractor The Vegetation Being Feed Maintenance Needed Mechanical Adjustment Needed -If any modification has been made to chipper it may have affected the output process ~ Any Modifications Made? -Verify Tractor PTO Speed Setting at 540 RPM -Verify Tractor Engine Speed between 1800 ~ 2200 RPM... - Page 15 -During Operation be sure the Discharge Flap is adjust outward ~ If it is pointed directly down it will limit the ability for air flow and reduce the chippers efficiency. -Do not force material into the chipper to increase its production rate ~ force feeding the chipper will cause it to plug.
- Page 16 Frame Assembly Farmer-Helper WC PRO Chipper Revision 9/22/16...
- Page 17 Farmer-Helper WC PRO Chipper 10-19-2017...
- Page 18 Rotor Assembly Farmer-Helper WC PRO Chipper 10-19-2017...
- Page 19 Farmer-Helper WC PRO Chipper 10-19-2017...
- Page 20 Drive Piece Assembly Farmer-Helper WC PRO Chipper 10-19-2017...
- Page 21 PART NO. Name & Specifications Quantity Worm reduction gear plate WCN.03.011 Plain washer 8 GB /T97 .1-2002 Spring washer 8 GB/T93-1987 Bolt M8 ×25 GB /T5783-2000 GB /T889 .1-2000 Locking Nut M8 GB /T6170-2000 Nut M10 GB /T5783-2000 Bolt M10 ×45 CH6.326 Divided movement passive belt pulley GB /T80-2000...
- Page 22 NO. PART NO. Name & Specifications Quantity CH6.108 Roller Spring GB /T5783-2000 Bolt M6 ×12 GB/T93-1987 Spring washer 6 WCN.03.104 Baffle WCN.03.105 Roller Shaft CH6.346 Roller GB /T276-94 Bearing 6204 GB/T894.1-1986 Circlip 20 JB /T7940 .1-1995 Oil cup 6 CH6.322 Spring for drive shaft Workbench Assembly Farmer-Helper WC PRO Chipper...
- Page 23 PART NO. Name & Specifications Quantity Bolt M8 ×20 GB /T5783-2000 Spring washer 8 GB/T93-1987 Plain washer 8 GB /T97 .1-2002 Worm reduction gear cover WCN.04.011 GB /T6170-2000 Nut M8 WCN.04.012 Soft shaft support plate WCN.04.101 Workbench rail GB /T6170-2000 Nut M12 GB /T97 .1-2002 Plain washer 12...
- Page 24 Parts Request Form Fax to 541‐895‐2756 or E‐mail cservice@betstproducts.com Name: Model Number: Address: Serial Number: City State Zip: Purchased From: Phone: Purchase Date: E‐mail: Item No. Description Price Amount Comments: Farmer-Helper WC PRO Chipper Revision 9/22/16...
- Page 25 Farmer Helper Machinery Brand LIMITED WARRANTY Unless otherwise stated on purchase invoice, Betstco warrants to original Purchaser that F a r m e r H e l p e r M a c h i n e r y products are free from major defects in material under normal use and service for a period of Two (2) Years from the date the product is purchased or shipped, whichever is later.
- Page 26 WARRANTY VOID IF REGISTRATION IS NOT RECEIVED OR RECORDED ONLINE WITHIN 30 DAYS OF PURCHASE DATE OR SHIP DATE, WHICHEVER IS LATER. REGISTRATION Item________________________________Model # _________________ Purchase Date_____/_____/_______Purchased From: ________________________________Gift � Inv#/Order# ____________________________Owner Name: _______________________________________ Serial # (if Applicable)______________________Owner Address: _______________________________________ City: ________________________ County: ___________ ST: ______ Zip Code: _____________ Phone: _______________________ Email: ________________________ Acceptance of responsibility:...
- Page 27 2 YEAR EXTENDED WARRANTY & REGISTRATION Farmer Helper Machinery Branded Products 2 YEAR EXTENDED WARRANTY 2 Year Extended Warranty amends to original Recorded Warranty Registration the time period of described coverage. Extended Warranty does not apply to Consumable and Expendable Items as described in Product Warranty Registration. This Amendment does not affect any other part of recorded Warranty Registration or Policy.
Need help?
Do you have a question about the WC8-PRO and is the answer not in the manual?
Questions and answers
Wo bekomme ich die Ersatzteile für Holzhäcksler WC-8 ?
Replacement parts for the FHM WC8-PRO wood chipper are available from Betst Power Equipment.
This answer is automatically generated