Table of Contents
Advertisement
Quick Links
Advertisement
Table of Contents

Related Manuals for Paragon Home Artist-120


Summary of Contents for Paragon Home Artist-120
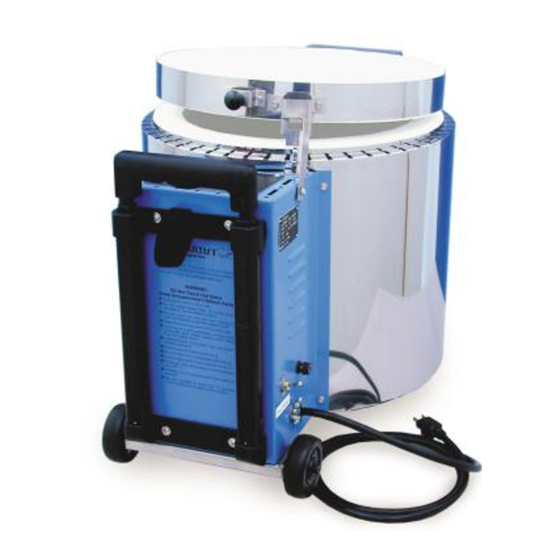
- Page 1 Paragon Home Artist Kiln Instruction & Service Manual...
- Page 2 Introduction Thank you for choosing the Paragon Home Artist kiln! We have designed it to give you many years of reli- able service. The kiln changes clay into ceramics, one of the hardest materials known. Ceramic ware is so durable that it is among the few surviving artifacts from ancient civilizations.
-
Page 3: Table Of Contents
Replacing the Lid ........23 Glossary ......23 Paragon Kiln Limited Warranty..24... - Page 4 Important Safety Rules the kiln while you are away, the closed lid will keep the heat safely inside the firing chamber. An electric kiln is extremely safe to operate provided you follow these basic safety rules and pointers: Never place anything on the kiln’s lid, even when the kiln is idle.
-
Page 5: Setting Up The Kiln
5 Keep the kiln away from curtains and other combus- Setting Up the Kiln tible materials. 6 Keep the space above the kiln clear of hanging plant- Electrical Installation ers and overhead shelves. You must plug your kiln into a 7 Position kiln on a level, fire-proof surface, such as a circuit that no other appliance uses concrete floor. -
Page 6: Kiln Parts
Kiln Parts Lid Latch Thermocouple The latch is a reminder to Digital Controller Ceramic Fiber The thermocouple senses keep the lid closed until the Regulate firing speed and Firing Chamber temperature in the firing kiln has cooled to room temperature with digital Ceramic fiber is a space-age, effi- chamber. -
Page 7: Firing Preparation & Loading
Firing Preparation & Loading Shelves, Posts, Tile Setters & Stilts These accessories can be purchased from Paragon through an authorized dealer. Removing stilt marks with a stilt Cleaning stilt wire with a stilt stone. Kiln Shelves stone. Shelves are flat slabs of fireclay that can withstand high arate the piece from the kiln temperatures. -
Page 8: Kiln Wash And Glass Separator
Tile and Plate Setters with grit cloth (available These are holders used to stack plates and tiles inside the from Paragon). This is kiln. Firing plates and tiles is more efficient with a tile or an abrasive-coated mesh that allows residue to pass through. -
Page 9: Vacuum The Kiln Regularly
Vacuum the 2 To make full use of your kiln’s firing ca- Kiln Regularly pacity, group similar Ke e p th e f ir i n g sizes of ware to- chamber clean. Dust gether inside the falling on molten glaze kiln. -
Page 10: The Basics Of Firing The Kiln
kiln. Allow to cool to The Basics of room temperature. Gently scrape off Firing the Kiln the contaminant with a knife, being careful not to dam- Venting the Lid age the heating ele- ment. Vacuum the kiln. ■ B e s u r e t o v en t g l az e d w ar e b y Removing spattered glaze from the ce- ramic fiber wall with a knife. -
Page 11: Removing The Ware From The Kiln
Black coring When you break the piece, a black line ap- Preventing Overfires pears down the cen- ter of the clay’s Caution: The warranty on your Paragon kiln does cross section. The not cover damage from overfiring, regardless of the carbon burned out circumstances. -
Page 12: Power Failures
Power Failures Firing Clay If a firing that has reached red heat is inter- rupted by a power failure, Pyrometric Cones it is best to resume firing before the kiln cools below red heat. Press the START key to resume firing. Ceramists of the past judged when the firing was com- Your First Firing pleted by the color of the heat and length of firing. -
Page 13: Low-Fire Greenware
Low-Fire Greenware hotter than 05. The number is stamped on the base of the cone. The cone number for each material is usually stated on the label by the clay or glaze manufacturer. Your supplier can Clay is fired in two separate firings: the greenware firing also give you the cone number. -
Page 14: Loading And Firing Low-Fire Greenware
Loading and Firing Low-Fire Greenware Low-fire greenware has a firing range from cone 06 to 02. The greenware must be bone dry before firing. Otherwise, it will crack or even explode during firing. Check for dryness by touching to cheek or the inside of a wrist. Ware will be cold if not dry. -
Page 15: Low-Fire Glaze
Low-Fire Glaze ing.” This is an alterna- tive to stilting. To “dry foot” a piece, remove all Your hands must be clean when touching glazed ware. Oil glaze from the portion of and hand lotion will leave finger prints. If you scrape off or the piece that will rest on damage the color during handling, you can usually repair it the shelf. -
Page 16: Overglaze
Overglaze Overglaze is decoration applied over fired glaze or pol- ished porcelain bisque. Overglazes include china paints, gold, and luster, which fire from 022 to 014. Use stilts to increase the flow of heat under the pieces, and make sure ware is not touching other ware. Hard-bodied porcelain can be stilted. -
Page 17: Glass Fusing & Slumping
2 Hold the straight edge firmly and score the glass with Glass Fusing & the glass cutter. Press just hard enough so that the scoring noise sounds steady and unbroken. Slumping 3 Place the straight edge under the glass so that an edge is lined up with the score line you just made. -
Page 18: Cleaning And Gluing The Glass
Cleaning and Gluing the Glass Grease, dirt, and fingerprints etch permanently into the glass during firing. Clean the glass with glass cleaner (the type without silicones), rubbing alcohol, or even plain water just before assembling the pieces on the kiln shelf. Use white glue, such as Elmer’s diluted 1:1 with water, to hold the glass pieces together after you... -
Page 19: Imperfection
Poor color in colored glazes can be caused by too thin an Imperfection application, placing ware too close to an element or to other glazed ware which may be incompatible, insufficient venting Poor firing results are naturally disappointing, especially during the early stages of firing, or overfiring glazes in the after you have spent hours on a piece. -
Page 20: Glass
Broken lines in gold can be caused by overfiring or too One way to eliminate bubbles is to hold the temperature at 100°F below fusing temperature for 20 minutes. This gives the heavy an application. However, this is can be very attractive shelf time to heat up to match the temperature of the glass. -
Page 21: Replacing The Thermocouple
Temperature is Inaccurate ceramic block. Then securely tighten the 4 screws in the ceramic block. ■ Make sure the thermocouple extends into the firing chamber by the correct amount: 5 Fasten the ceramic block to the heat shield with the two screws removed in step 3. -
Page 22: Replacing A Relay Or Transformer
Replacing a Relay or Transformer Replacing the Temperature Controller 1 UNPLUG kiln. 1 UNPLUG the kiln. R e mo ve t h e screws on the 2 Remove the 4 corner screws holding the controller s id e s of t h e faceplate to the switch box. -
Page 23: Ceramic Fiber Repair
Replacing the firing chamber is a factory repair. Please call 800-876-4328 or 972-288-7557 for instructions, or see the dealer who sold you the kiln. Ceramic Fiber Repair If gla s s , c e r a mi c glaze, or other materials drip onto the firing chamber, repair before the next firing. -
Page 24: Paragon Kiln Limited Warranty
The warranty period begins paid by the owner; or upon receipt of defective parts at the from date of shipment from the Paragon factory unless date factory, and after factory examination of the defect, Paragon...
Need help?
Do you have a question about the Home Artist-120 and is the answer not in the manual?
Questions and answers