Advertisement
Table of Contents
- 1 Included in this Package
- 2 Product Specification
- 3 Getting Started
- 4 Battery Recharging
- 5 Battery Life
- 6 Battery Maintenance
- 7 Battery Notice
- 8 Memory Card Installation
- 9 Connecting to a Computer
- 10 System Requirements for Computer CONNECTION
- 11 Care and Maintenance
- 12 Troubleshooting
- 13 Battery Disposal
- Download this manual
Advertisement
Table of Contents

Summary of Contents for VTech Kidizoom FLIX
- Page 1 Parent's Guide 91-003344-004...
-
Page 3: Included In This Package
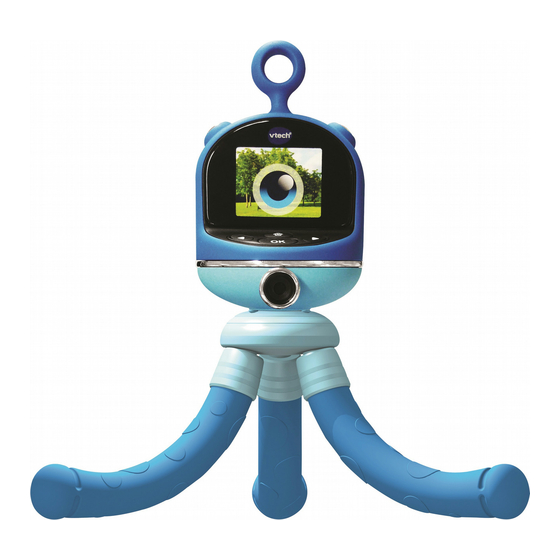
INTRODUCTION Meet FLIX! Your fun alien friend who can detect faces and will sound out funny alien responses when you speak to it. Customise FLIX's look using the camera, make it unique by changing the colour of its eyes and skin. Play 3 fun games to unlock more accessories. Set FLIX to Guard Mode where it will act as a guard and capture photos of any intruders it detects. - Page 4 PRODUCT LAyOUT AND BUTTONS RUBBER RING VIdEo BUTToN CAMERA BUTToN SCREEN CoVER INdICATIoN LIGHTS MICRo-USB PoRT MEMoRY CARd SLoT FLIx BUTToN RIGHT ARRoW MASTER PoWER BUTToN SWITCH oK BUTToN LEFT ARRoW HoME (oN/oFF) BUTToN BUTToN TRIPod SCREW HoLE RoTATABLE CAMERA SCREW LoCKING RING TRIPod SCREW...
- Page 5 Master Power Switch When the switch is set to OFF position , the battery will be disconnected, Kidizoom FLIX will not function and the battery will ® ® not charge. When the switch is set to the ON position , the battery will be connected, Kidizoom FLIX will function and the battery can...
-
Page 6: Product Specification
Left and Right Arrow Buttons Press these buttons to navigate the user interface. Memory Card slot Insert a microSd card here for memory expansion. Micro-USB port Connect to a computer with the included Micro-USB cable to transfer files and to charge Kidizoom FLIX ®... - Page 7 128 MB built-in memory (shared with program Internal Memory data, actual memory available for user storage will be less). Photos: Standard Baseline JPEG File Format Videos: AVI (Motion JPEG) Memory Card microSd / microSdHC card (not included) with Format and capacity from 1 GB to 32 GB are recommended.
-
Page 8: Getting Started
GETTING STARTED When using your Kidizoom FLIX for the first time, you will need to ® ® switch the Master Power Switch to the ON position . You may need a small tool (such as a paperclip) to move the switch to the ON position . -
Page 9: Battery Life
BATTERy LIFE Like with other electronic devices, more frequent usage means the battery will drain more quickly. Some activities will be more demanding on the battery, such as Flix Sees and photo and video taking that make use of the camera sensor. For continuous photo or video taking, the battery will last for approximately 2.5 hours. - Page 10 • do not expose to high temperatures or place near a heat source. do not leave in direct sunlight for any length of time. • do not dispose of in a fire. • do not handle damaged or leaking batteries. •...
- Page 11 ATTACHING THE FLEXIBLE TRIPOD Make sure the Screw Nut is in place. Align the Tripod Screw Hole on Kidizoom FLIX to the screw on the ® ® tripod. Screw on clockwise, ensuring a firm attachment. If you want to fine tune the camera lens to a certain angle, when the Tripod Screw is almost screwed into the last ring of Kidizoom FLIX ®...
-
Page 12: Memory Card Installation
mEmORy CARD INSTALLATION Kidizoom FLIX supports the below memory cards for memory ® ® expansion. • microSd • microSdHC microSd logo and microSdHC Logo are trademarks of Sd-3C, LCC. • Make sure FLIX is turned OFF. Locate the memory card slot on the side of FLIX. •... -
Page 13: Connecting To A Computer
• Two removable drives called VTech 5075 and VT SYSTEM will appear. VTech 5075 is for storage of your data; VT SYSTEM is for storage of system data and cannot be accessed. If there is a memory card in FLIX, the removable drive will show the content on the memory card only. -
Page 14: System Requirements For Computer Connection
• Locate and open the doWNLoAd folder in the removable drive VTech 5075, then copy and paste the photo files into the PHoTo subfolder, or VIdEo subfolder for video files. NOTE: do not transfer photo or video files created by other cameras to... - Page 15 Next, you will need to set the date and time. Press the LEFT, RIGHT Arrow Buttons to change the value of day, month, year, hour and minute. Press the OK Button to go to the next field or press the HOME Button to go back.
- Page 16 FLIX Sees Twist the camera to face you. When FLIX • detects you it will track your face movement and the indication lights will turn green. After a while FLIX will take a photo and add an effect to it for fun! When FLIX Sees colourful objects watch its •...
- Page 17 In this mode you can help FLIX to refill their hunger level. FLIX will ask you to collect genes of a certain colour and shape. Twist the camera to face outwards and search for the colour, FLIX is asking you to find. once you've found the correct colour, press the OK Button to catch the correct genes.
- Page 18 • The guard mode can operate for up to 6 hours per session, or you can press the HOME Button to stop the guard session immediately. • You can customise FLIX's voice response during the guard session. Select the icon and record a new voice to replace the default sound.
- Page 19 • The auto-portrait picture mode will let you take selfie pictures automatically. To get to the auto-portrait mode, press the LEFT, RIGHT ARROW BUTTONS until you see the auto-portrait icon . Just stay in front of the camera and wait for the countdown and take a picture.
- Page 20 • Press the Video Button or the OK Button to start recording. Press either button once again to stop recording. A Play Icon will appear after the recording has stopped, press the OK Button to watch the video you just recorded. Playback Select the Playback Icon on the Home Menu to view the photos...
- Page 21 • To add a voice changing effect to an existing voice file, when a voice file is selected, press the OK Button and select the Star Icon to enter Voice Changing Effects Menu. In this menu, you can preview from the 5 voice changing effects, press the OK Button to apply the selected effect and save as a new voice file.
- Page 22 • Step 1: Remember the colour code. For example: Pink, Blue, Green, press oK to continue. • Step 2: Find the 3 colours in the order they are shown on your screen. Aim the camera to the colour, once detected the frame will flash red and move along to the next colour in the sequence.
- Page 23 Time You can adjust the Time & Time Format here. Language Here you can change the language on the Kidizoom FLIX ® ® Advanced Memory: Here you can see the memory status of the internal memory or external memory card. You can also choose to format the memory and then follow the instructions on screen to complete the process.
-
Page 24: Care And Maintenance
• Make sure to play in a well lit environment, outdoor locations may not perform as well as indoor due to complicated and varying light sources and weather conditions, for example, colours will become dull under a cloudy sky or washed out under direct and intense sunlight. -
Page 25: Troubleshooting
Keep FLIX clean by wiping it with a slightly damp cloth. • Keep FLIX out of direct sunlight and away from any direct heat • source. do not drop FLIX on a hard surface and do not expose it to •... - Page 26 1. Turn the Master Power Switch OFF 30 seconds. Screen display 2. Turn the Master Power Switch ON again is not working and then press the Home Button correctly turn FLIX ON. The Kidizoom FLIX screen ® ® display should now function normally again. 1.
-
Page 27: Battery Disposal
1. Check if the memory card is correctly inserted. 2. Check to see if the memory card is the supported type. FLIX only supports microSd or microSdHC cards. Memory card 3. Check to see if the file system of your cannot be memory card is FAT or FAT32. - Page 28 1. Ensure that the Master Power Switch is set to the OFF position 2. Remove the screen cover. 3. Loosen the 3 screws around the screen, then remove the back cabinet. 4. There are 3 hidden screws connecting the Upper and Bottom Cabinets, slowly rotate the Upper Cabinet and use the screw notch at the back to find and loosen these screws one by one.
- Page 29 6. Remove the 2 screws located at the bottom, then remove the Front Cabinet Cover. 7. Remove the Speaker Bracket located at the back of the Front Cabinet. 8. The battery is a silver coloured pack with two wires (positive red wire and negative black wire) connected to the circuit board.
- Page 30 • do not handle a damaged Li-ion polymer battery. IMPORTANT NOTE: Creating and developing VTech products is accompanied by a ® responsibility that we take very seriously. We make every effort to ensure the accuracy of the information which forms the value of our products.
- Page 31 YEAR...
- Page 32 Visit our website for more information about our products, downloads, resources and more. www.vtech.co.uk TM & © 2017 VTech Holdings Limited. All rights reserved. Printed in China. 91-003344-004...
Need help?
Do you have a question about the Kidizoom FLIX and is the answer not in the manual?
Questions and answers