Advertisement
Quick Links
INSTALLATION MANUAL
SUPPLIED PARTS
SWIVEL MODELS
AE-46 ANE-46 AE-42 ANE-42 UD-42
RECESSED INSTALLATION
#10 x 1 1/2" Wood Screws (2)
#14 x 2 1/2" Philips Screws (2)
SURFACE MOUNT INSTALLATION
#14 x 4" Wood Screws (2)
NON SWIVEL MODELS
E-46 NE-46 E-42 NE-42 IAW-42
RECESSED INSTALLATION
#10 x 1 1/2" Wood Screws (4)
SURFACE MOUNT INSTALLATION
#14 x 4" Wood Screws (2)
IAW-42 ONLY
#14 x 2 1/2" Wood screws (2)
Swivel Models
pg. 2 | Pre-Installation
pg. 3 | Recessed Mount
pg. 4 | Surface Mount
pg. 7 | Electrical
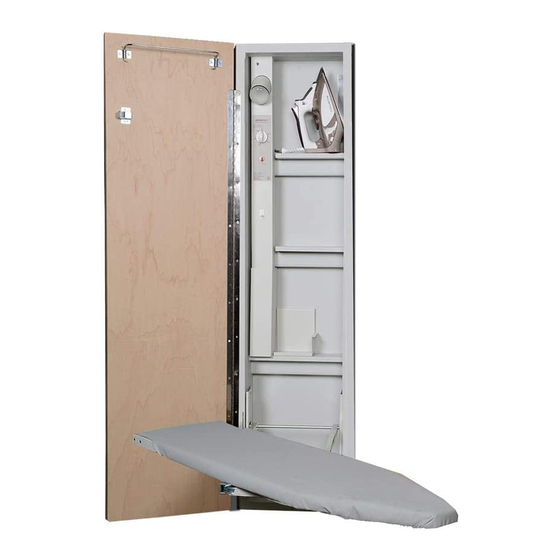
IRONING CENTER
Quick Reference:
Non-Swivel Models
pg. 2 | Pre-Installation
pg. 5 | Recessed Mount
pg. 6 | Surface Mount
pg. 7 | Electrical
Iron-A-Way
1-800-536-9495
support@ironaway.com
220 W. Jackson, Morton, IL 61550
TOOLS NEEDED
Carpenter's Level
Tape Measure
Utility Knife
Drill
1/8" Drill Bit
3/16" Drill Bit
(Surface Mount Installation)
Small Flat Head Screwdriver
Safety Glasses
Optional:
Stud Finder
1/4" Nut Driver
Advertisement

Related Manuals for Iron-A-Way AE-46


Summary of Contents for Iron-A-Way AE-46
- Page 1 IRONING CENTER INSTALLATION MANUAL SUPPLIED PARTS TOOLS NEEDED SWIVEL MODELS Carpenter’s Level Tape Measure AE-46 ANE-46 AE-42 ANE-42 UD-42 Utility Knife RECESSED INSTALLATION Drill #10 x 1 1/2” Wood Screws (2) 1/8” Drill Bit #14 x 2 1/2” Philips Screws (2) 3/16”...
-
Page 2: Pre-Installation
Please follow these Pre-Installation steps to ensure your ironing board will work properly in the installation location you have selected. STEP ONE: Ironing Board Clearance Begin by ensuring your desired installation location has adequate space for your selected model. Choose Recessed Mount or Surface Mount. AE-46 AE-42 E-46 E-42 UD-42... -
Page 3: Installation Complete
ADJUSTABLE SWIVEL RECESSED MOUNT INSTALLATION Models | AE 46, ANE 46, AE 42, ANE 42, UD 42 STEP ONE: Determine Mounting Height Identify your desired ironing board height (typical ironing board is 33”-35” high). Then subtract the number below based on the length of your model’s ironing board to determine mounting height (FIG 1.1). - Page 4 ADJUSTABLE SWIVEL SURFACE MOUNT INSTALLATION Models | AE 46, ANE 46, AE 42, ANE 42, UD 42 STEP ONE: Determine Mounting Height Identify your desired ironing board height (typical ironing board is 33”-35” high). Then subtract the number below based on the length of your model’s ironing board to determine mounting height (FIG 2.1).
- Page 5 NON SWIVEL RECESSED MOUNT INSTALLATION Models | E 46, NE 46, E 42, NE 42 STEP ONE: Determine Mounting Height Identify your desired ironing board height (typical ironing board is 33”-35” high). Then subtract the number below based on the length of your model’s ironing board to determine mounting height (FIG 1.1).
- Page 6 NON SWIVEL SURFACE MOUNT INSTALLATION Models | E 46, NE 46, E 42, NE 42, IAW 42 STEP ONE: Determine Mounting Height Identify your desired ironing board height (typical ironing board is 33”-35” high). Then subtract the number below based on the length of your model’s ironing board to determine mounting height (FIG 2.1).
-
Page 7: Electric Installation
ELECTRIC INSTALLATION Models | AE 46, E 46, AE 42, E 42, UD 42 ATTENTION: TURN OFF POWER AT SERVICE ENTRANCE BEFORE INSTALLING, WIRING, OR SERVICING THIS PRODUCT ITEMS TO NOTE Instructions for electrical models ONLY. DO NOT attempt to install your own outlet or electrical hook-up on a non-electrical model. All electrical work must be done in accordance with all applicable electrical codes. - Page 8 Have installation questions? We’re here to help! 1-800-536-9495 support@ironaway.com Monday-Friday, 8am-4pm CST 9/20 001072...
Need help?
Do you have a question about the AE-46 and is the answer not in the manual?
Questions and answers