Samsung DW80K7050 Series Installation Manual
Hide thumbs
Also See for DW80K7050 Series:
- User manual (114 pages) ,
- Installation manual (48 pages) ,
- User manual (114 pages)
Table of Contents
Advertisement
Available languages
Available languages
Dishwasher
installation guide
These installation instructions are intended
for use by qualifi ed installers.
STOP
If you are having problems installing this dishwasher
Please call : 1-800-SAMSUNG (726-7864)
for assistance : www.samsung.com
imagine
Thank you for purchasing this Samsung product.
the possibilities
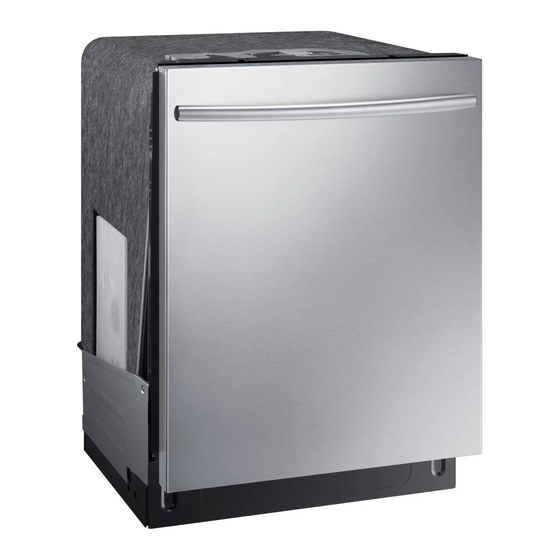
DW80K7050 Series
DW80K5050 Series
Advertisement
Table of Contents

Related Manuals for Samsung DW80K7050 Series


Summary of Contents for Samsung DW80K7050 Series
- Page 1 These installation instructions are intended for use by qualifi ed installers. STOP If you are having problems installing this dishwasher Please call : 1-800-SAMSUNG (726-7864) for assistance : www.samsung.com imagine the possibilities Thank you for purchasing this Samsung product.
- Page 2 It’s your responsibility to use common sense, caution, and care when installing, maintaining, and operating the dishwasher. Samsung is not liable for damages resulting from improper use. IMPORTANT SAFETY INSTRUCTIONS What the icons and signs in this installation guide mean: Hazards or unsafe practices that may result in severe personal injury or death.
- Page 3 GROUNDING INSTRUCTIONS For a permanently connected appliance: This appliance must be connected to grounded metal, a permanent wiring system, or an equipment-grounding conductor must be run with the circuit conductors and connected to the equipment-grounding terminal or lead on the appliance. The dishwasher is very heavy.
-
Page 4: Table Of Contents
contents PREPARING THE DISHWASHER Product dimensions ENCLOSURE Enclosure dimensions INSTALLING THE DISHWASHER STEP 1 Check the parts and tools STEP 2 Select the best location for the dishwasher STEP 3 Check water supply requirements and cautions STEP 4 Check the electrical requirements and cautions STEP 5 Unpacking and inspecting the... -
Page 5: Preparing The Dishwasher Enclosure
PRODUCT DIMENSIONS Side view Rear view 27” (686 mm) DW80K7050 Series ⁄ ” (605 mm) 20 ½ ” (520 mm) 24 ⅔” (627mm) The water supply Side view line, power cable DW80K5050 Series and drain hose... -
Page 6: Installing The Dishwasher
installing the dishwasher Be sure that you or your installer follow these instructions closely so that the new dishwasher works properly and that you’re not at risk of injury when washing dishes. STEP 1 CHECK THE PARTS AND TOOLS Before starting on the installation, prepare all the necessary tools and parts required to install the dishwasher. - Page 7 Tools required Electric drill Safety glasses Gloves Flashlight Adjustable wrench Wire stripper Pliers Nipper Tape measure Pencil Phillips screwdriver Flat screwdriver Tubing cutter Cutting knife Hole saw Level Torx t20 Hex L-wrench installing the dishwasher _7...
-
Page 8: Step 2 Select The Best Location For The Dishwasher
installing the dishwasher New installation If the dishwasher is a new installation, most of the installation work must be done before the dishwasher is moved into place. Replacement If the dishwasher is replacing an old dishwasher, you must check the exising dishwasher connections for compatibility with the new dishwasher. -
Page 9: Step 3 Check Water Supply Requirements And Cautions
STEP 3 CHECK WATER SUPPLY REQUIREMENTS AND CAUTIONS • The hot water supply line pressure must be between 20~120 psi (140~830 kPa). • Adjust the water heater to deliver water between 120 ˚F (49 ˚C) ~ 149 ˚F (65 ˚C). The dishwasher must be connected to a hot water supply between 120 ˚F (49 ˚C) ~ 149 ˚F (65 ˚C). -
Page 10: Step 4 Check The Electrical Requirements And Cautions
installing the dishwasher STEP 4 CHECK THE ELECTRICAL REQUIREMENTS AND CAUTIONS The electrical requirements for the dishwasher are as follows: • In the United States, install in accordance with the National Electric Code/State and Municipal codes and/or local codes. • In Canada, install in accordance with the Canadian Electric Code C22.1-latest edition/Provincial and Municipal codes and/or local codes. -
Page 11: Step 5 Unpacking And Inspecting The Dishwasher
STEP 5 UNPACKING AND INSPECTING THE DISHWASHER Unbox the dishwasher in an open area free of obstruction both around the carton and overhead. We recommend that you retain the carton and all of the packing materials until the dishwasher is fully installed and operational to ensure you have removed all the product’s components from the carton prior to disposal. -
Page 12: Step
installing the dishwasher Plumbing 1. Check the hot water connection on the front left-side of the base of the dishwasher. The mounting plate should be secured to the front of the base, the threads inside the connection should be smooth and shiny, and the area should be clean and free of any debris. - Page 13 2. Ensure that the circuit breaker and water supply valve are turned off before proceeding with the following steps. Before you move or lay down the dishwasher for installation, make sure to adjust the height of the legs so the legs are as short as possible. This prevents the legs from breaking. CAUTION Level the dishwasher by adjusting the height of the legs after you have the dishwasher in place.
-
Page 14: Step 7 Placing The Dishwasher And Connecting The Hot Water Supply Line
installing the dishwasher STEP 7 PLACING THE DISHWASHER AND CONNECTING THE HOT WATER SUPPLY LINE 1. Adjust the three leveling legs at the bottom of the dishwasher after measuring the height of the cabinet opening from under the countertop to the fl oor. (See Step 8, Leveling the Dishwasher.) 2. -
Page 15: Step 8 Leveling The Dishwasher
STEP 8 LEVELING THE DISHWASHER 1. Open the door and place the level against the top of the tub on the inside and check if the the dishwasher is level. If it is not level, rotate the leveling legs at the bottom front of the dishwasher until the dishwasher is level. -
Page 16: Step 9 Securing The Dishwasher
installing the dishwasher STEP 9 SECURING THE DISHWASHER You must fi x the dishwasher to the countertop or cabinet side walls for additional stability and safety. 1. If the countertop is made of wood or the material will not be damaged by drilling, follow the instructions in 2-1 below. -
Page 17: Step 10 Connecting The Drain Hose
<Figure 8> Screw to countertop <Figure 9> Tub spacer cap Screw to side wall STEP 10 CONNECTING THE DRAIN HOSE 1. Check the parts on the sink to which the drain hose will be connected. 2. There are several ways to insert the drain hose into the drain hose connector of the sink, as shown in the following fi... - Page 18 installing the dishwasher Case 2. With disposal With disposal Disposal with an air gap Without an air gap Air gap Drain hose Hose clamp Hose clamp 3. Check the size of the sink’s drain hose connector. If needed, cut the drain hose so its end fi...
- Page 19 <Figure 11> 1 in. (25 mm) (16 mm) If necessary, cut off the dotted line of the drain hose to fi t the size. <Figure 12> Secure the drain hose to the sink wall using cable ties or other fastening materials. Otherwise, the drain hose may bend at the end, causing a drainage problem or excessive supply of water.
-
Page 20: Step 11 Wiring Connections
installing the dishwasher STEP 11 WIRING CONNECTIONS 1. Before connecting the power cable to the dishwasher, make sure the circuit breaker is off . 2. In the junction box located at the front bottom right of the dishwasher, fi nd the three power wires from the dishwasher including the grounding line. -
Page 21: Step 12 Completing The Installation
If an error has occurred, turn off the dishwasher, close the water supply valve, and then refer to the user manual or contact a service center 1-800-SAMSUNG (726-7864). Make sure to check for water leakage on both ends of the water supply line and drain hose connector. -
Page 22: Specifications
20 ~ 120 psi (140 ~ 830 kPa) Dimensions 23 ⅞ x 24 ¾ x 33 ⁄ in. (605 x 627 x 860 mm) (DW80K7050 Series) (Width×Depth×Height) 23 ⅞ x 24 ½ x 33 ⁄ in. (605 x 621.5 x 860 mm) (DW80K5050 Series) Nominal inlet water 120 ˚F (49 ˚C) - Page 23 notes...
- Page 24 DD81-02034A-00...
- Page 25 Serie DW80K5050 Lavavajillas guía de instalación Estas instrucciones de instalación están dirigidas a instaladores califi cados. ATENCIÓN Si tiene problemas al instalar esta lavavajillas Llame al: 1-800-SAMSUNG (726-7864) para recibir asistencia: www.samsung.com imagine las posibilidades Gracias por adquirir este producto Samsung.
- Page 26 Es su responsabilidad actuar con sentido común, precaución y cuidado cuando instale, realice el mantenimiento y ponga en funcionamiento la lavavajillas. Samsung no se responsabiliza por los daños ocasionados por un uso inadecuado. INSTRUCCIONES DE SEGURIDAD IMPORTANTES Signifi...
- Page 27 INSTRUCCIONES DE CONEXIÓN A TIERRA Para un electrodoméstico con conexión permanente: Este electrodoméstico debe estar conectado a un metal con conexión a tierra, un sistema de cableado permanente o a un conductor con conexión a tierra del equipo a los conductores del circuito y a la terminal con conexión a tierra del equipo.
- Page 28 contenido PREPARACIÓN DEL ESPACIO PARA LA Dimensiones del producto LAVAVAJILLAS Dimensiones del espacio INSTALACIÓN DE LA LAVAVAJILLAS PASO 1 Verifi cación de las piezas y las herramientas PASO 2 Elección de la mejor ubicación para la lavavajillas PASO 3 Verifi cación de los requisitos para el suministro de agua y precauciones PASO 4 Verifi...
- Page 29 preparación del espacio para la lavavajillas DIMENSIONES DEL PRODUCTO Vista lateral Vista posterior 27” (686 mm) Serie DW80K7050 ⁄ ” (605 mm) 20 ½ ” (520 mm) 24 ⅔” (627 mm) El conducto, el cable Vista lateral de alimentación y la Serie DW80K5050 manguera de desagüe deberían pasar por...
- Page 30 instalación de la lavavajillas Asegúrese de que usted o su instalador siga estas instrucciones minuciosamente para que su nueva lavavajillas funcione adecuadamente y no existan riesgos de sufrir lesiones al lavar la vajilla. PASO 1 VERIFICACIÓN DE LAS PIEZAS Y LAS HERRAMIENTAS Antes de comenzar la instalación, prepare todas las herramientas y piezas necesarias requeridas para instalar la lavavajillas.
- Page 31 Herramientas requeridas Taladro eléctrico Lentes de seguridad Guantes Linterna Llave ajustable Alicate pelacable Pinza Alicate de corte Cinta métrica Lápiz Destornillador Phillips Destornillador plano Cortatubos Cúter Fresa para escariar Nivel Llave en forma de L para Torx t20 cabezas hexagonales instalación de la lavavajillas _7...
- Page 32 instalación de la lavavajillas Instalación nueva Si la instalación de la lavavajillas es nueva, la mayor parte del trabajo debe realizarse antes de colocar la máquina en su lugar. Reemplazo Si esta lavavajillas reemplaza a otra, debe verifi car que las conexiones existentes sean compatibles con la nueva lavavajillas.
- Page 33 PASO 3 VERIFICACIÓN DE LOS REQUISITOS PARA EL SUMINISTRO DE AGUA Y PRECAUCIONES • La presión del conducto de agua caliente debe estar entre 20 y 120 psi (140 y 830 kPa). • Ajuste el calentador de agua para obtener una temperatura de agua entre 120 ˚F (49 ˚C) y 149 ˚F (65 ˚C). La lavavajillas debe estar conectada al suministro de agua caliente con una temperatura entre 120 ˚F (49 ˚C) y 149 ˚F (65 ˚C).
- Page 34 instalación de la lavavajillas PASO 4 VERIFICACIÓN DE LOS REQUISITOS ELÉCTRICOS Y ADVERTENCIAS Los requisitos eléctricos para la lavavajillas son los siguientes: • En los Estados Unidos, instalar de conformidad con el Código Eléctrico Nacional/códigos estatales y municipales y/o códigos locales. •...
- Page 35 PASO 5 DESEMPAQUE E INSPECCIÓN DE LA LAVAVAJILLAS Desempaque la lavavajillas en una zona libre de obstrucciones ya sea alrededor de la caja como en la parte superior. Recomendamos que conserve la caja y todos los materiales del empaque hasta que la lavavajillas esté completamente instalada y en funcionamiento para asegurarse de que haya retirado todas las piezas del producto de la caja antes de desecharla.
- Page 36 instalación de la lavavajillas Cañerías 1. Verifi que la conexión de agua caliente en el lado izquierdo delantero de la base de la lavavajillas. La placa de montaje debe estar asegurada a la parte delantera de la base, las roscas de la conexión deben ser lisas y brillosas y la zona debe estar limpia y libre de fragmentos.
- Page 37 2. Asegúrese que el disyuntor y la válvula del suministro de agua estén desactivados antes de continuar con los siguientes pasos. Antes de mover o apoyar la lavavajillas para su instalación, debe asegurarse de ajustar la altura de las patas de modo que estas sean lo más cortas posible.
- Page 38 instalación de la lavavajillas PASO 7 COLOCACIÓN DE LA LAVAVAJILLAS Y CONEXIÓN DEL CONDUCTO DEL SUMINISTRO DE AGUA CALIENTE 1. Regule las tres patas niveladoras en la parte inferior de la lavavajillas después de medir la altura de la abertura del gabinete desde abajo de la encimera hasta el piso.
- Page 39 PASO 8 NIVELACIÓN DE LA LAVAVAJILLAS 1. Abra la puerta y coloque el nivel contra la parte superior de la cuba desde adentro y verifi que si la lavavajillas está nivelada. Si no lo está, gire las patas niveladoras en la parte inferior delantera de la lavavajillas hasta que quede nivelada.
- Page 40 instalación de la lavavajillas PASO 9 FIJACIÓN DE LA LAVAVAJILLAS La lavavajillas debe fi jarse a la encimera o a las paredes laterales para mayor estabilidad y seguridad. 1. Si la encimera está hecha de madera de un material que no se daña por la perforación, siga las siguientes instrucciones en 2-1.
- Page 41 <Figura 8> Atornillado a la encimera <Figura 9> Tapa del separador de la cuba Atornillado a la pared lateral PASO 10 CONEXIÓN DE LA MANGUERA DE DESAGÜE 1. Verifi que las piezas del fregadero a las cuales se conectará la manguera de desagüe. 2.
- Page 42 instalación de la lavavajillas Caso 2. Con triturador Sin un espacio de Con triturador Triturador con un espacio de aire aire Espacio de aire Manguera de desagüe Abrazadera de manguera Abrazadera de manguera 3. Verifi que el tamaño del conector de la manguera de desagüe del fregadero. Si es necesario, corte la manguera de desagüe para que encaje en el conector del fregadero (1"...
- Page 43 <Figura 11> 1 pulgada pulgada (25 mm) (16 mm) Si es necesario, corte por la línea punteada de la manguera de desagüe para que se adapte al tamaño. <Figura 12> Asegure la manguera de desagüe a la pared del fregadero con uniones de cables o con otros materiales de fi...
- Page 44 instalación de la lavavajillas PASO 11 CONEXIONES DEL CABLEADO 1. Antes de conectar el cable de alimentación a la lavavajillas, asegúrese de desactivar el disyuntor. 2. En la caja de conexiones que se encuentra ubicada en la parte delantera derecha inferior de la lavavajillas, busque los tres cables de alimentación de la lavavajillas inclusive la conexión a tierra.
- Page 45 Si se produjo un error, apague la lavavajillas, cierre la válvula del suministro de agua y remítase al manual del usuario o contacte a un centro de servicio técnico 1-800-SAMSUNG (726-7864). Verifi que las fi ltraciones de agua en ambos extremos del conducto de agua y en el conector de la manguera de desagüe.
- Page 46 especifi caciones Suministro eléctrico Solamente 120 V, 60 Hz CA Presión de agua 20 - 120 psi (140 - 830 kPa) Dimensiones 23 ⅞ x 24 ¾ x 33 ⁄ pulgadas (605 x 627 x 860 mm) (serie DW80K7050) (Ancho × Profundidad × Altura) 23 ⅞...
- Page 47 notas...
- Page 48 DD81-02034A-00...