Table of Contents
Advertisement
Advertisement
Table of Contents

Summary of Contents for Cafelat Robot
- Page 1 Robot Espresso Maker User Manual 2.0 06/2020...
-
Page 2: Table Of Contents
Robot user manual Contents Page Number 1. Introduction • Warnings and safety • What it does do • What it doesn’t do 2. Inside the box and component part names 3. Quick Start Guide 4. Basic overview of using the machine •... -
Page 3: What It Does Do
What it does do • The Robot is capable of making real espresso coffee, those shots of coffee can then be drank as espresso or used as the base for other drinks such as Americano, Cappuccino, Latte etc. - Page 4 – one exception to that is the capillary tube on the Barista Robot, which is made from an FDA approved material. The other exception is the piston seal, which is made from an FDA approved silicone.
- Page 5 Basket – this holds the ground coffee and the hot water The Professional basket The Pressurised basket Screen – this sits on top of the coffee grounds and slows down and disperses the hot water across the coffee Tamper – this tamps (compresses) the coffee down inside the basket Robot User Manual 2.0 June 2020...
-
Page 6: Quick Start Guide
4. Add water just off the boil and fill up to 5-8mm below the basket rim 5. Insert the portafilter into the machine and push the lever arms down slowly and steadily Paper filters may be used instead of the metal screen Robot User Manual 2.0 June 2020... -
Page 7: Basic Overview Of Using The Machine
TLCM, except the power to drive the piston is not provided by a spring but by the user. The Robot does not have a boiler or a heating element, yet is still able to brew coffee the same as a TLCM thanks to it’s oversized filter basket which becomes a brewing chamber once it is filled with hot water. - Page 8 If you are unfamiliar with a BPF I highly recommend you do some research on these valuable tools. With regards our Robot I would say some benefits are: • When you see the first drops of coffee appear on the underside you would say the coffee puck is fully infused •...
-
Page 9: Inserting And Removing The Portafilter Tips
If you simply turn the handle left and lower the portafilter there is a good chance the basket will be stuck to the piston. So for this reason we advise the tipping the handle method above. Robot User Manual 2.0 June 2020... -
Page 10: The Screen And Paper Filters
The photo on the right shows an incorrectly positioned screen that is not level and therefore has the pin off centre. If one were to press the levers down fully it would almost certainly result in a damaged screen. Robot User Manual 2.0 June 2020... - Page 11 Whilst the metal screen may be seen as fragile, it is the key to making a $300 machine work like a $10,000 machine. For that reason we view the screen as a wear item. It is a good idea to have a spare on hand or use the paper filters instead. Robot User Manual 2.0 June 2020...
-
Page 12: Basics Of Operation
It is important not to overfill the basket with water. You must leave around 5-8mm of space between the top of the water and the rim of the basket. If it is filled higher you will notice water leaking when you put the PF in place. Robot User Manual 2.0 June 2020... - Page 13 5 seconds from when the levers descend and you see coffee appear on the bottom of the basket, and a minimum of 15 seconds of actual coffee flowing from the basket when you are pushing the levers down. Robot User Manual 2.0 June 2020...
- Page 14 Now you can remove the PF. Lift the levers to the top again, and then remove the PF. It will still be hot at this point so either cautiously remove the filter screen or let it cool for a few moments. With the screen removed you may now “knock out’ the puck. Robot User Manual 2.0 June 2020...
-
Page 15: Advanced Brewing With The Professional Basket
The basics in section 4 will provide you with a good foundation on how the machine works, but as with everything, practice makes perfect and so here are some extra tips on using the professional coffee basket. The Robot is exactly the same as any high-end coffee machine, for example the advanced basics would be: •... - Page 16 • Pre-heat the basket and PF in a cup of hot water for 10-20 seconds before adding the coffee • Use the BPF rather than with the spouts on which will help mostly with raising the coffee in the cup temperature Robot User Manual 2.0 June 2020...
-
Page 17: Puckology
With the Robot however spent puck analysis is not possible because the results are very misleading. After you pull the shot and then raise the arms again to remove the water, this draws air from below the basket, up through the coffee. -
Page 18: Advanced Brewing With The Pressurised Basket
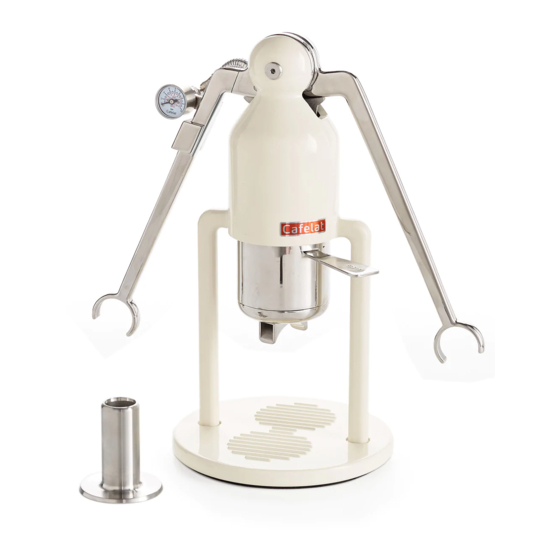
7. Pressure gauge kit - Patented The pressure gauge kit is an optional accessory that is added to the Robot, this enables you to measure the extraction pressure from inside the basket itself and provides real time feedback. -
Page 19: Care And Maintenance
The steel parts would handle this of course but there is no need. The main body of the Robot needs just a clean with a damp and dry cloth from time to time. The aluminium model may be buffed and shined with a metal polish such as Autosol. -
Page 20: Troubleshooting
9 Troubleshooting The Robot is so simple and should give you plenty of trouble free coffee shots, if it is set-up and being used correctly. This guide applies to all Robots, however text in blue is specific to the pressure gauge kit Robots. - Page 21 • Check for leaks in the hydraulic circuit, you would see water drops or hear air hissing from somewhere along the tube • It is unlikely but possible the gauge is broken. Use the Robot with the piston plug installed and contact Cafelat 5.
- Page 22 • Lift the portafilter UP before moving it to the right. • May be time to relube the seal 10. The Aluminium finish or the powder coated finish is scratched • Use the silicone mat under the cups • Relax it is just a tool for making coffee! Robot User Manual 2.0 June 2020...
-
Page 23: Conversion Table For Weight To Bar Pressure
Places your Robot on top of a scale and tare it if possible. The Robot weighs approx. 3kg (6.6lbs) so if you cannot tare your scale you must bear in mind that you need to deduct 3kg (6.6lbs) from readings. -
Page 24: Parts Diagrams
7. Socket Head Cap Screws SS 16. Filter Basket 8. Teflon Wafers PTFE 17. Portafilter SS 9. Lever arm assemblies 18. Spouts o-ring 19. Spout SS = Stainless Steel Alu = Aluminium Si = Silicone PTFE = Teflon Pressure gauge kit parts Robot User Manual 2.0 June 2020... - Page 25 1. Manometer 8. Fitting 1/8 BSPP 2. Bracket 9. Viton o-ring 3. Grub Screws x 2 10. Piston 4. Female 1/8 BSPP fitting 11. Piston Seal 5. Filter Screen 6. Elbow Fitting 1/8BSPP 7. 4mm OD flexible tube Robot User Manual 2.0 June 2020...
- Page 26 6. Female fitting – use a 13mm spanner 7. Base Plate screws – use a 5mm allen key 8. Elbow fitting – use a 13mm spanner For lubricating the piston seal and spout o-ring we recommend silicone grease such as Dow 111. Robot User Manual 2.0 June 2020...
-
Page 27: Warranty
– or from the date of shipping if it is a Kickstarter reward. The warranty does not cover damage from misuse and Cafelat will decide if the damage or malfunction was a manufacturing defect or user error.
Need help?
Do you have a question about the Robot and is the answer not in the manual?
Questions and answers