Table of Contents
Advertisement
Pool, Spa & Pond
Water Sanitizer 4BJ1
USE ONLY HAYWARD GENUINE REPLACEMENT PARTS
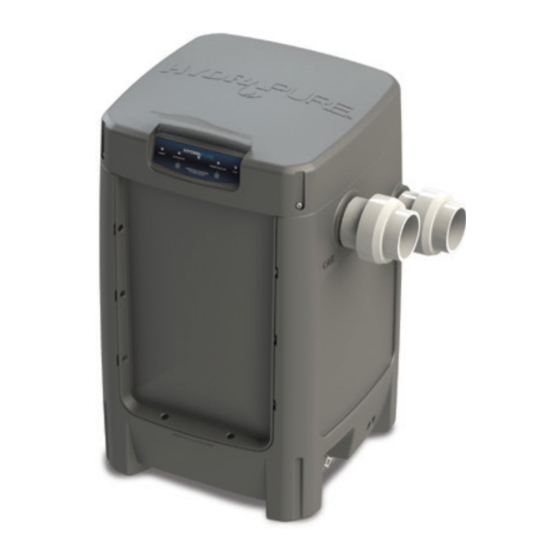
HydraPure
2
inch Residential UV System
½
Owner's Manual
HYDRAPURE
Hayward Industries
400 Connell Drive, Suite 6100
Berkeley Heights, NJ 07922
Phone: (908) 355-7995
www.hayward.com
001-950-1750-00 Rev0
Contents
Overview................................3
Installation............................3
Operation..............................8
EPA Registered
#084221-AZ-001
Advertisement
Table of Contents

Related Manuals for Hayward HydraPure


Summary of Contents for Hayward HydraPure
- Page 1 Residential UV System ½ Owner's Manual Contents Overview........3 Installation......3 Operation......8 HYDRAPURE Pool, Spa & Pond EPA Registered Water Sanitizer 4BJ1 #084221-AZ-001 Hayward Industries 400 Connell Drive, Suite 6100 Berkeley Heights, NJ 07922 Phone: (908) 355-7995 www.hayward.com USE ONLY HAYWARD GENUINE REPLACEMENT PARTS...
- Page 2 You will find DANGER, CAUTION, WARNING and NOTICE symbols which require special attention. Please read them carefully and follow these precautions as indicated! They will explain how to avoid hazards that may endanger you or persons using or maintaining your pool or spa. USE ONLY HAYWARD GENUINE REPLACEMENT PARTS...
- Page 3 Prolonged exposure to the eyes can cause serious injury including blindness. DO NOT VIEW UV LAMP WHILE THE DEVICE IS IN OPERATION. USE ONLY HAYWARD GENUINE REPLACEMENT PARTS USE ONLY HAYWARD GENUINE REPLACEMENT PARTS...
- Page 4 NEC code. Determine a Suitable Location The HydraPure must be mounted at least 5' from the pool (more, if local codes require). The Hydra- Pure should be installed after all equipment (pump, filter, heater) but prior to any chlorinators (salt cell, tablet feeder, liquid injection).
- Page 5 Head Loss Plumbing Overview HYDRAPURE USE ONLY HAYWARD GENUINE REPLACEMENT PARTS USE ONLY HAYWARD GENUINE REPLACEMENT PARTS...
- Page 6 Use PVC solvent cement to glue pipes into the union sleeve. NOTE the inlet and outlet pipe positions. 2" X 2½" reducer bushings may be used if using 2" pipe. USE ONLY HAYWARD GENUINE REPLACEMENT PARTS USE ONLY HAYWARD GENUINE REPLACEMENT PARTS...
- Page 7 Connecting Power to the HydraPure Unit Corded 120V Hydrapure unit: Plug into GFCI outlet. Hardwired 120V or 240V Hydrapure unit: Follow steps 1 & 2 below. Attach wires to connections according to diagram below. Thread L1, L2 (240V) or N (120V)
- Page 8 This would be necessary when the Hydrapure Unit is positioned with the base of the unit greater than 1’ above water level. In that case the inlet check valve must be changed based on the chart below.
- Page 9 Solid red UV BULB LIFE indicates malfunction with Solid red OZONE BULB LIFE indicates malfunction UV bulb and should be replaced immediately, see with ozone bulb and should be replaced immediately, page 12 see page 13 USE ONLY HAYWARD GENUINE REPLACEMENT PARTS...
- Page 10 The quartz tube requires cleaning every 12 months to ensure optimal performance. WARNING: Before cleaning, turn off all power to the HydraPure unit and pool pump. Allow at least 15 minutes for the lamp(s) in the unit to cool. Never remove the electrical enclosure cover without first dis- connecting the power source from the HydraPure unit.
- Page 11 O-ring before reassembly. CAUTION: Do not use tools on the quartz tube. Wear gloves to protect your hands in case the tube breaks. USE ONLY HAYWARD GENUINE REPLACEMENT PARTS...
- Page 12 Reattach electronics cover and the lid. Turn power on to unit and turn pump on. CAUTION: Do not stand over the unit when it is under pressure or when the pump is on. USE ONLY HAYWARD GENUINE REPLACEMENT PARTS...
- Page 13 UV Lamps Replacement WARNING: Turn off all power to the HydraPure unit and pool pump. Before proceeding allow at least 15 minutes for the lamp(s) in the unit to cool. Never remove the electrical enclosure cover without first disconnecting the power source from the HydraPure unit. Never remove the HydraPure unit’s cover without turning off the pump.
- Page 14 Ozone Lamps Replacement WARNING: Turn off all power to the HydraPure unit and pool pump. Before proceeding allow at least 15 minutes for the lamp(s) in the unit to cool. Never remove the electrical enclosure cover without first disconnecting the power source from the HydraPure unit.
- Page 15 After power is restored, press and hold OZONE BULB LIFE Button, for a minimum of 15 seconds, to reset the lamp life indicator. Discard lamp(s) appropriately. Visit www.lamprecycle.org for instructions on disposal. USE ONLY HAYWARD GENUINE REPLACEMENT PARTS...
- Page 16 Winterizing WARNING: Turn off all power to the HydraPure unit and pool pump before proceeding to winterize. Remove Winterizing O-ring plug near the bot- tom of the unit. Note, there will be an initial rush of water from the unit after the plug is removed.
- Page 17 This page intentionally blank USE ONLY HAYWARD GENUINE REPLACEMENT PARTS...
- Page 18 This page intentionally blank USE ONLY HAYWARD GENUINE REPLACEMENT PARTS...
- Page 19 This page intentionally blank USE ONLY HAYWARD GENUINE REPLACEMENT PARTS...
- Page 20 Hayward is a registered trademark of Hayward Industries, Inc. © 2020 Hayward Industries, Inc. All other trademarks not owned by Hayward are the property of their respective owners. Hayward is not in any way affiliated with or endorsed by those third parties.
Need help?
Do you have a question about the HydraPure and is the answer not in the manual?
Questions and answers