Table of Contents
Advertisement
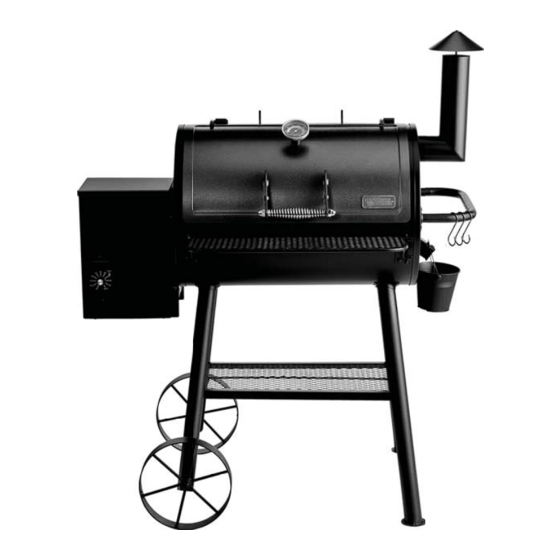
Triton HT Pellet Grill
Assembly Instructions & User's Manual
ITEM# 156589
5009725
CONFORMS TO UL STD
SUBJECT 2728
CERTIFIED TO ULC STD
ORD C2728
Please keep this instruction manual for future reference
Warning:
READ INSTRUCTION MANUAL BEFORE ATTEMPTING TO ASSEMBLE OR
OPERATE THIS PRODUCT.
Adult assembly required.
Keep screws and parts out of reach of children.
Customer Service: (866) 814-0585, 8:00am to 8:00pm,
Monday thru Friday Eastern Standard Time
--------------------------------------OR-------------------------------------
Customer Service: (888) 922-2336 7:00 am to 12:00 am CST (daily)
Live Chat at: www.academy.com
Email: customerservice@academy.com
(Made in China)
Advertisement
Table of Contents
Troubleshooting

Summary of Contents for ACADEMY Outdoor Gourmet Triton
- Page 1 Keep screws and parts out of reach of children. Customer Service: (866) 814-0585, 8:00am to 8:00pm, Monday thru Friday Eastern Standard Time --------------------------------------OR------------------------------------- Customer Service: (888) 922-2336 7:00 am to 12:00 am CST (daily) Live Chat at: www.academy.com Email: customerservice@academy.com (Made in China)
- Page 2 Table of Contents Safety Warnings…………………………………………………………….....2-3 Exploded View & Parts List…………………………………………......4-7 Hardware and Tools…………………………………………........ 8 Assembly Instructions…………………………………………………....9-18 Controller Instructions..................19 Preparation for Use & Lighting Instructions…………........20-21 Shutdown Instructions ..................22 Operating Instructions…………………………………………………....23-2 Grill Cooking Tips…………………………………………........2 Proper Care & Maintenace……………………………........2 - Troubleshooting ....................
- Page 3 Safety Warnings IMPORTANT SAFETY WARNINGS WE WANT YOU TO ASSEMBLE AND USE YOUR GRILL AS SAFELY AS POSSIBLE. THE PURPOSE OF THIS SAFETY ALERT SYMBOL IS TO ATTRACT YOUR ATTENTION TO POSSIBLE HAZARDS AS YOU ASSEMBLE AND USE YOUR GRILL. WHEN YOU SEE THE SAFETY ALERT SYMBOL, PAY CLOSE ATTENTION TO THE INFORMATION WHICH FOLLOWS! BEFORE ASSEMBLING AND OPERATING YOUR GRILL, READ ALL SAFETY WARNINGS AND...
- Page 4 Safety Warnings WARNING Use only a Ground Fault Interrupt (GFI) protected circuit with this grill. Only use a properly-grounded power source. Do not alter or remove the grounding plugs on the power cord or household outlet. Never move the grill while it is operating, or when it contains hot pellets or ashes. Always open the grill lid carefully.
- Page 5 Exploded View - A...
- Page 6 Exploded View - B...
- Page 7 Parts List Chimney Cap Warming Rack Bracket Chamber Lid Power Cord Bracket Warming Rack Hopper Assembly Cooking Grate Flamer Tamer Front Shelf Bracket L Grease Tray Front Left Leg Cooking Chamber Front Shelf Wagon Wheel Bottom Shelf Wheel Axle Back Right Leg Chimney Gasket Front Shelf Bracket R Grease Bucket...
- Page 8 Parts List Part # Description Picture Part # Description Picture Hopper L Auger Motor Fire Pot Hopper Bo Auger Rubber Sealer Hot Rod Digital Controller Power Cord Auger Housing Hopper Bottom Panel Blower Fan Grill Probe...
- Page 9 Hardware Hardware # Description Picture M6 x 12 Bolt M6 Nut M12 Lock Nut M4 Nut M6 x 20 Bolt M4 x 10 Bolt M5 x 12 Bolt Tools Required Phillips Head Screwdriver (Not included) Adjustable Wrench (Not included)
- Page 10 Assembly Instructions Choose a suitable, clear area for assembly. Ask a friend for help as some parts are heavy or difficult for one person to hold and assemble. To help protect the smoker’s finish, cover the area with cardboard. Step 1 Step 1 Remove the lid (#16) from the cooking chamber (#21) by removing bolt and washer and sliding...
- Page 11 Assembly Instructions Step 3 Step 3 Insert the bottom shelf (#23) into the mounted legs. Attach remaining two legs ("Front Left" (#6) & "Front Right" (#28))by inserting the hooks of the bottom shelf (#23) into the holes in the legs before bolting to the cooking chamber (#21) with (8) M6 x 12 bolts (AA) and (8) M6 nuts (BB) as illustrated.
- Page 12 Assembly Instructions Step 5 Step 5 With assistance, turn the cooking chamber assembly horizontally. Attach chamber right bracket (#12) onto cooking chamber right endcap inside with (2) M6 x 12 bolts (AA) and (2) M6 nuts (BB). Fix grease bucket bracket (#11) on the square tube end of chamber right bracket (#12) with (1) M6 x 12 bolt (AA) as illustrated.
- Page 13 Assembly Instructions Step 7 Step 7 Slide hopper gasket over auger housing. Slide the pellet hopper assembly (#4) onto the cooking chamber (#21) by inserting the auger housing through the left side wall. Slide hopper halfway, while holding the hopper assembly (#4) away from the wall, insert grill probe (#42) through the wall.
- Page 14 Assembly Instructions Step 9 Step 9 Attach front shelf bracket L (#5) to the front of cooking chamber (#21) near the left leg with (2) M6 x 12 bolts (AA) and (2) M6 Nuts (BB). Position front shelf (#22) to front shelf bracket R (26) by inserting the shelf hooks through the bracket.
- Page 15 Assembly Instructions Step 11 Step 11 Place grease tray (#20) on the chamber right side bracket and chamber left side bracket as illustrated. Right Side Left Side Tray should fit into chamber left bracket Chamber Left Side Bracket Step 12 Step 12 Place cooking grates (#18) onto cooking chamber grid brackets/rails...
- Page 16 Assembly Instructions Step 13 Step 13 Insert warming rack brackets (#2) into the mounting tabs found on cooking chamber Step 14 Step 14 Place warming rack (#17) on warning rack brackets (#2)
- Page 17 Assembly Instructions Step 15 Step 15 Reinstall the cooking chamber lid (#16) by sliding the hinge pins into the hinges. Secure it with the washer and bolt removed in Step 1. Step 16 Step 16 Carefully screw the temp gauge (#1) fully into the lid. Adjust the orientation and lock the gauge into position using the pre-attached nut.
- Page 18 Assembly Instructions Step 17 Step 17 Hang the grease bucket (#9) from the tube as illustrated. If desired, install the utensil "S" hooks onto the side handle. Step 18 Step 18 Attach the power cord bracket (#3) to the back of the hopper assembly (#4) with (2) M5 x 12 bolts (GG) as illustrated.
- Page 19 Assembly Instructions Step 19 Step 19 When needed, connect the meat probe to the controller by inserting the female plug into the controller socket marked “Meat Probe”. If not in use, leave disconnected and store indoors. NOTE: When connecting meat probe, unplug the rubber cap from the controller socket first.
- Page 20 Controller Instructions NOTE: The maximum temperature that the pellet grill can achieve is influenced by the ambient temperature. In colder weather, the grill may not be able to achieve the highest set temperature and it will continually feed pellets into the fire pot attempting to reach the set temperature. There might be some discrepancy between the digital temperature displayed and the temperature observed on the analog lid gauge.
- Page 21 Preparation for Use & Lighting Instructions PLACE THE GRILL OUTDOORS ON A HARD, LEVEL, NON-COMBUSTIBLE SURFACE AWAY FROM ROOF, OVERHANG OR ANY COMBUSTIBLE MATERIAL. NEVER USE ON WOODEN OR OTHER SURFACES THAT COULD BURN. PLACE THE GRILL AWAY FROM OPEN WINDOWS OR DOORS TO PREVENT SMOKE FROM ENTERING YOUR HOUSE.
- Page 22 Preparation for Use & Lighting Instructions Step 6 Plug the power cord into a properly grounded 120V electrical outlet. DO NOT use if the ground tip has been removed from the power cord. DO NOT use an extension cord or ungrounded outlet. Step 7 Turn the control knob to ‘High' in temperature controller.
- Page 23 Lighting Instructions & Shut Down LIGHTING INSTRUCTIONS MANUAL METHOD 1. With the grill properly setup and located for operation, plug the power cord into a 120V grounded electrical outlet. (Refer to SETUP PROCEDURE for more information.) DO NOT use if the ground tip has be removed from power cord. DO NOT use an extension cord or ungrounded electrical outlet.
- Page 24 Operating Instructions CURING THE GRILL Before initial use, it is recommended to cure the grill to remove manufacturing oils or paint residue and minimize smoke odors or unnatural flavors from being added to food. Follow “Setup Procedure” to ensure the grill is safe for operation. Follow “Lighting Instructions”...
- Page 25 Operating Instructions COOKING INSTRUCTIONS Set Temperature Once the controller has been set to a desired temperature, the target temperature will be displayed along with “COOK”, which indicates the controller is set to standard cooking mode. Grill Actual Temperature The internal temperature of the grill, as measured by a separate Meat Meat / P thermocouple, will be displayed in 5 degree increments.
- Page 26 Operating Instructions COOKING INSTRUCTIONS The following table represents the preset smoking modes showing the relation of smoke produced l l i temperature. Smoke Mode Smoke Cooking Setting Produced Temperature HIGH HIGH WARNING NEVER add wood pellets to fire pot while it is HOT or in USE! Serious injury could result! POST COOKING INSTRUCTIONS It is recommended to allow the grill to operate at a high temperature following each cooking to...
- Page 27 Operating Instructions IMPORTANT: Never move your pellet grill while it is hot or in use. Make sure the flame tamer and grease tray are properly installed. If not properly installed, a grease fire could result. Adjust the chimney cap height for added temperature control. Upward decreases the temperature and downward increases.
- Page 28 Operating Instructions IMPORTANT: Keep the meat probe as clean and dry as possible. Clean with a damp, soapy cloth. If meat probe wires become wet, erroneous readings may occur. Allow the probe wires to dry completely before use. Do not submerge the meat probe when cleaning or place in dishwasher. Do not kink the wiring as this could cause damage.
- Page 29 Grill Cooking Tips WOOD PELLETS ONLY USE wood pellets made for barbecue, not heat grade pellets. Barbecue wood pellets should be 100% all natural wood and come in a variety of types of wood that will add flavor to whatever food you are grilling or smoking. If possible, always use fresh wood pellets for each cooking session to ensure they burn properly giving off the correct amount of heat and smoke flavor.
- Page 30 Care and Maintenance GRILLING TIPS & CLEANLINESS If you pre-cook meat or poultry, do so immediately before grilling. Never defrost meat at room temperature or on a countertop. Refrigerate leftovers within 2 hours of taking off the grill. Always wash hands thoroughly with soap and hot water prior to handling food and after handling raw meat, uncooked poultry or seafood.
- Page 31 (866) 814-0585, Monday through Friday from 8 a.m. to 8 p.m. EST (888) 922-2336, Daily from 7 a.m. to 12 a.m. CST Live Chat: www.academy.com Email: customerservice@academy.com DO NOT RETURN the appliance to the store. Contact Customer Service for assistance first.
- Page 32 Troubleshooting PROBLEM CAUSE SOLUTION Verify there is power at the outlet. If connected The grill Power to a GFCI outlet, check and reset if necessary. won’t ignite If there is power but the grill fails to ignite, contact Customer Service at (866) 814-0585 or (888) 922-2336.
- Page 33 Troubleshooting PROBLEM CAUSE SOLUTION Grill is getting Operating temperature set too high. the Control Knob to a lower temperature. too hot Auger continuously runs. the temperature continues to go higher than the setting, contact Customer Service at (866) 814- 0585 or (888) 922-2336. Excess smoke Grease fire Some smoke is normal, but if excess smoke is...
- Page 34 Troubleshooting PROBLEM CAUSE SOLUTION Ensure unit is plugged in. Grill will not start Power Verify there is power at the GFI outlet. Check and reset the Ground Fault Interrupter if necessary. If igniter not working, check 5 amp fuse found on the back of the control.
- Page 35 Troubleshooting Control Board Back View Board Wire Harness Connection Grill Probe connections Igniter Auger Motor AC Hot Input 5 amp 120 Volt Fuse w/ Housing Fast-Blow Cartridge Fuse The circuit board is equipped with a 5 amp, 120 volt fast-blow fuse to help protect against power surges and electrical shorts.
- Page 36 Warranty Information For 1-year from date of purchase, Academy, Ltd. warrants the Pellet Grill against defects due to workmanship or materials to the original purchaser. The Academy, Ltd. obligations under this warranty are limited to the following guidelines: considered normal wear.
Need help?
Do you have a question about the Outdoor Gourmet Triton and is the answer not in the manual?
Questions and answers