Table of Contents
Advertisement
Available languages
Available languages
Quick Links
Advertisement
Table of Contents

Related Manuals for PeakTech 5201


Summary of Contents for PeakTech 5201
- Page 1 5201 ® PeakTech Mode d'emploi / Operation Manual Humidimètre / Moisture Meter...
- Page 2 1. Précautions de sécurité Ce produit est conforme aux exigences des directives de la Communauté européenne suivantes: 2014/30 / UE (compatibilité électromagnétique) telle que modifiée par 2014/32 / UE (marquage CE). Les précautions de sécurité suivantes doivent être respectées avant utilisation. Les dommages résultant du non-respect de ces consignes de sécurité...
- Page 3 éviter d'éventuels courts-circuits et dommages à l'équipement. Introduction Le PeakTech® 5201 est un humidimètre sans contact avec une méthode de mesure à haute fréquence. Il est utilisé pour le contrôle non destructif de l'humidité dans les matériaux de construction de toutes sortes et pour la détection de la distribution...
- Page 4 3. Spécifications techniques Affichage: LCD avec rétroéclairage automatique 0.0 ~ 100.0 Plage de mesure: Résolution: Profondeur de 20 ~ 40 mm pénétration: Indication de le symbole “ “s'affiche à l'écran batterie faible: Arrêt automatique: après 10 minutes DATA-HOLD Conserve la valeur de mesure à l'écran Alimentation: 3 x 1,5V AAA (UM-4) Environnement de...
- Page 5 4. Description 1.) Capteur d'humidité 2.) UP / Backlight - bouton poussoir 3.) Bouton-poussoir ALARM SET 4.) Bouton-poussoir BAS 5.) Bouton poussoir ON / OFF 6.) Affichage LCD 7.) Bouton-poussoir MEAS 8.) Compartiment à piles (arrière)
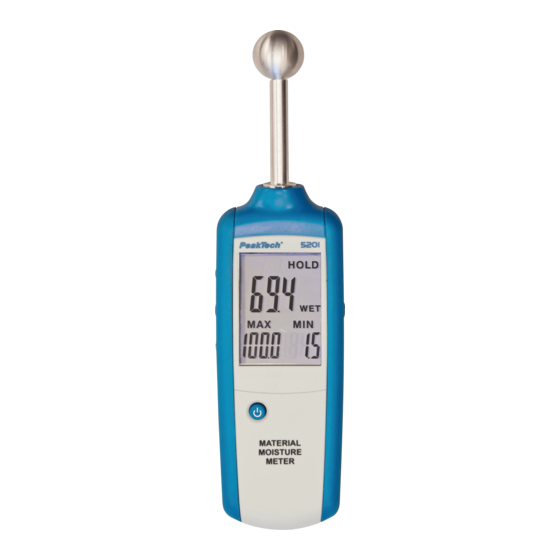
- Page 6 4.2. Indicateur d'affichage 1.) Indication de batterie faible 2.) Symbole Data-HOLD 3.) Valeur d'humidité actuelle 4.) Symbole d'état DRY 5.) Symbole d'état RISK 6.) Symbole d'état WET 7.) Symbole MAX 8.) Valeur d'humidité MAX 9.) Symbole MIN 10.) Valeur d'humidité MIN...
- Page 7 5. Instruction d'utilisation Allumez l'appareil de mesure en appuyant sur le bouton "ON". Appuyez ensuite sur le bouton "MEAS" pour démarrer la mesure. Avant d'appuyer sur le bouton "MEAS", veuillez tenir l'appareil de mesure en l'air afin que le capteur ne soit connecté à aucun objet. Dès que le bouton "MEAS"...
- Page 8 Tableau de comparaison d'humidité Matériau de Affichage Statut construction (unité) d'humidité <30 Gypsum 30-60 RISK >60 <25 Ciment 25-50 RISK >50 <50 Bois 50-80 RISK >80 Note: Maintenez une distance minimale de 8 à 10 cm des coins de la surface mesurée.
- Page 9 6. Mode de réglage de l'alarme Appuyez sur le bouton SET pour entrer dans le mode de réglage de l'alarme lorsque l'appareil de mesure est déjà en mode de maintien des données, l'icône "RISQUE" apparaît sur l'écran LCD. Vous pouvez utiliser les boutons HAUT et BAS pour régler le seuil.
- Page 10 7. Remplacement de la batterie Si le signe «BAT» apparaît sur l'écran LCD, cela indique que la batterie doit être remplacée. Retirez le couvercle arrière et ouvrez le compartiment des piles. Remplacez la batterie épuisée par une batterie neuve. Les piles, qui sont épuisées, doivent être éliminées en conséquence.
- Page 11 7.1. Notification sur le règlement de la batterie La livraison de nombreux appareils comprend des piles, qui servent par exemple à faire fonctionner la télécommande. Il pourrait également y avoir des piles ou des accumulateurs intégrés dans l'appareil lui-même. Dans le cadre de la vente de ces piles ou accumulateurs, nous sommes tenus, en vertu du Règlement sur les piles, d'informer nos clients des éléments suivants:...
- Page 12 Nous confirmons par la présente que l'unité est calibrée par l'usine selon spécifications selon spécifications techniques. ® © PeakTech 02/2020/MP/MI/JTH/EHR PeakTech Prüf- und Messtechnik GmbH – Gerstenstieg 4 – DE-22926 Ahrensburg / Germany +49-(0) 4102-97398-80 +49-(0) 4102-97398-99 info@peaktech.de www.peaktech.de...
- Page 13 1. Safety precautions This product complies with the requirements of the following European Community Directives: 2014/30/EU (Electromagnetic Compatibility) as amended by 2014/32/EU (CE-Marking). The following safety precautions must be observed before operation. Damages resulting from failure to observe these safety precautions are exempt from any legal claims whatever: Comply with the warning labels and other info on the equipment.
- Page 14 Introduction ® The PeakTech 5201 is a non-contact moisture meter with a high- frequency measurement method. It is used for the non-destructive testing of moisture in building materials of all kinds and for the detection of moisture distribution in walls, ceilings and floors. This...
- Page 15 3. Specifications Display LCD with automatic backlight Measurement 0.0 ~ 100.0 Range Resolution: Penetration depth 20 ~ 40 mm Low Battery Symbol “ “ shown in the display Indication Auto Power Off After 10 Minutes DATA-HOLD Holds measurement value in display Power Supply 3 x 1,5V AAA (UM-4) Operating...
- Page 16 4. Panel Description 1.) Moisture Sensor 2.) UP / „Backlight-Symbol“- push button 3.) ALARM SET-push button 4.) DOWN-push button 5.) ON/OFF-push button 6.) LCD Display 7.) MEAS-push button 8.) Battery compartment (rear)
- Page 17 4.2. Display Indicator Low battery Indication Data-HOLD Symbol Current moisture value DRY Status-Symbol RISK Status-Symbol WET Status-Symbol MAX Symbol MAX moisture value MIN Symbol 10.) MIN moisture value...
- Page 18 5. Operating Instruction Turn the Meter ON by pressing the button "ON", then press the MEAS button to start measuring. User press MEAS button for the first time when the meter turned on, please hold the meter up so that the ball sensor is in the air and not covered by your hand, any surface or object for 8 to 10 cm distance.
- Page 19 Moisture Table of Comparison Construction Material Display (Unit) Moisture Status <30 Gypsum 30-60 RISK >60 <25 Cement 25-50 RISK >50 <50 Wood 50-80 RISK >80 Note: If the ball head in corners, it maintain a minimum distance of 8 to 10cm from corner areas.
- Page 20 6. Alarm Set Mode Press SET button will enter the alarm set mode when the meter is already in data hold mode, the "RISK"-Icon appears on the LCD, You can use the UP and DOWN button to adjust the threshold. Press the "SET"...
- Page 21 7. Battery Replacement If the sign “BAT” appears on the LCD display, it indicates that the battery should be replaced. Remove the back cover and open the battery compartment. Replace the exhausted battery with new battery. Batteries, which are used up dispose duly. Used up batteries are hazardous and must be given in the - for this being supposed - collective container.
- Page 22 7.1. Notification about the Battery Regulation The delivery of many devices includes batteries, which for example serve to operate the remote control. There also could be batteries or accumulators built into the device itself. In connection with the sale of these batteries or accumulators, we are obliged under the Battery Regulations to notify our customers of the following: Please dispose of old batteries at a council collection point or...
- Page 23 We recommend to calibrate the unit again, after one year. ® © PeakTech 02/2020/MP/MI/JTH/EHR PeakTech Prüf- und Messtechnik GmbH – Gerstenstieg 4 – DE-22926 Ahrensburg / Germany +49-(0) 4102-97398-80 +49-(0) 4102-97398-99 info@peaktech.de...
Need help?
Do you have a question about the 5201 and is the answer not in the manual?
Questions and answers