
Related Manuals for RYTEC System 4

Summary of Contents for RYTEC System 4
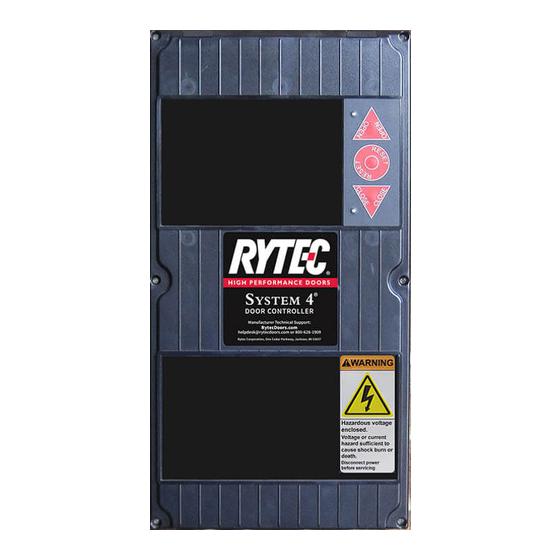
- Page 1 System 4 ® Drive & Control YSTEM YTEC ERFORMANCE IRELESS ECHNOLOGY Installation & Owner’s Manual [Revision: Dec. 19, 2011, 00152000, ©Rytec Corporation, 2011]...
-
Page 3: Table Of Contents
TABLE OF CONTENTS PAGE INTRODUCTION..........1 DOOR SERIAL NUMBER(S). - Page 4 Stop (Input 10 — N.C. Contact) ........14 Programmable (Inputs 11 and 12 —...
- Page 5 SWITCHING CLOCK PROGRAMS........39 FAULT CODES .
- Page 6 PARTS LIST ..........64 PARTS ORDERING INFORMATION .
-
Page 7: Introduction
Drive Motor System 4 The installation and operation of the System 4 Drive & Control ® Panel Control is not difficult, providing you follow the proce- dures outlined in this manual. -
Page 8: How To Use Manual
The control panel was shipped from the factory in a as described. cardboard box along with the contents of your Rytec door. IMPORTANT: IMPORTANT is used to relay information CRITICAL to the... -
Page 9: System Overview
SYSTEM OVERVIEW—CONTROL PANEL SYSTEM OVERVIEW CONTROL PANEL The Rytec System 4 Drive & Control is a solid-state, IMPORTANT: The System 4 control panel microprocessor-based control system designed exclu- allows for configurable supply sively to operate your Rytec high-performance door. voltage. Voltages can range from (See IMPORTANT below.) It combines an AC drive with... - Page 10 SYSTEM OVERVIEW—CONTROL PANEL A5400011 Figure 3 IMPORTANT: All conduit entering the control panel must enter from the bottom of the panel — High voltage from the bottom left and low voltage from the bottom right. Installing conduit through the top or sides of the control panel will void the warranty.
-
Page 11: Installation
System 4 end of the head assembly. Control Panel Install the System 4 control panel and the fused discon- nect as shown in Figure 4. A9500221 The System 4 control panel has three mounting loca- tions on the black plastic enclosure. - Page 12 INSTALLATION—CONTROL PANEL INSTALLATION The System 4 panel door is hinged at the top for easy access to the terminal blocks. To open the door, loosen the six screws along the door face as shown in Figure 6 and lift the door slightly out to release screws. Then lift Door Hinge the door up as shown in Figure 7.
- Page 13 INSTALLATION—CONTROL PANEL INSTALLATION Grounding of the power supply is essen- tial to the safety of personnel as well as the operation of the System 4 Drive & Control. A floating, ungrounded or open delta type power supply can permit dangerously...
- Page 14 INSTALLATION—CONTROL PANEL INSTALLATION IMPORTANT: The System 4 panel conduit con- IMPORTANT: The schematics shown through- nection locations are NOT knock- out this manual are for informa- outs. Do NOT use impact to tion purposes only. Due to remove the conduit connection...
- Page 15 NOTE: Failure to install the ferrite core magnets as illustrated will void the manufacturer’s warranty. Failure to install the ferrite core magnets will void the manufacturer’s warranty and potentially cause irreparable damage to the System 4 control panel. Supply Voltage Magnet Location Green Motor Connection Ground Wire...
-
Page 16: Controller
USB Connector The USB drive logs the function of the door and allows for programming the door using a Rytec encrypted soft- ware program. Removing the USB drive will affect the operation of the door. DO NOT remove the USB drive unless informed by the Rytec Customer Support Department to do so. -
Page 17: Plug-In Modules
4 (part #00122000) is different from the For a door set up to be operated by a radio control or a module for the System 3. The System 4 floor loop, a corresponding plug-in module for each type module is physically smaller. Therefore, of activator is required. -
Page 18: System Inputs
INSTALLATION—SYSTEM INPUTS SYSTEM INPUTS Power Supply Lines Connect the power supply lines from the fused discon- nect to the control panel as shown on the schematic that was shipped with the door. Motor The disconnect must be in the OFF posi- tion and properly locked and tagged before Connect the motor wires to the control panel as shown performing the following procedure. -
Page 19: Breakaway Bottom Bar (Input 1 - N.c. Contact)
INSTALLATION—SYSTEM INPUTS Breakaway Bottom Bar (Input 1 — N.C. Contact) Photo Eye — Front (Input 2 — N.C. Contact) The breakaway bottom bar signal is incorporated with Connect the front set of photo eyes to the control panel the RY-WI wireless reversing edge signal. The break- (terminal 222 located on block X22) as shown on the away electrical connections are connected to terminals schematic that was shipped with the door. -
Page 20: Alternate-Action Activator (Input 4 - N.o. Contact)
INSTALLATION—SYSTEM INPUTS Alternate-Action Activator (Input 4 — N.O. Contact) Open (Input 8 — N.O. Contact) Connect the alternate-action activator to the control Connect the open input to the control panel (terminals panel (terminals 210 and 211) as shown on the sche- 200 and 201) as shown on the schematic that was matic that was shipped with the door. -
Page 21: Dc Power Supply - Photo Eyes
System 4 control board. For exam- Reversing Edge ple, the front set of photo eyes is connected to terminal block X22. The +24 Anytime the door is closing and the reversing edge (bot- VDC is on terminal 220, the –24 VDC is on... -
Page 22: Timers
INSTALLATION—SYSTEM INPUTS Timers The control system includes three programmable auto- close delay timers. Each timer is assigned to a specific input on the control panel and is set to delay closing the door when opened by its associated activator. Two timers (ACL1 and ACL2) can be programmed to automatically close the door from the open position. -
Page 23: System Start-Up
To exit jog mode, repeat the process of pushing and failure. holding the Stop/Reset and down keys at the same time until the display reads “Automatic”. The System 4 Drive & Control is configured for three modes of operation: run, jog, and parameter mode. Parameter Mode Run Mode The control system includes various parameters that are used to operate your door. -
Page 24: System Controls
SYSTEM START-UP—SYSTEM CONTROLS NOTE: If the photo eyes are activated during a • Operator Level — password not required. Access door close cycle, the door will move to the limited to auto-close timers and select defrost con- open position and the display will indicate trol functions (if configured with defrost control). -
Page 25: Initial Start-Up
SYSTEM START-UP—INITIAL START-UP INITIAL START-UP 3. After the reset (●) key has been pressed one time, verify the motor rotation by briefly pushing the up (▲) and down (▼) keys on the control panel. The door should open with the up (▲) key and close with the down (▼) key. -
Page 26: Clock Setting Procedure
6. Set ACL1 and ACL2 timers as required. (See “” on page 28.) Clock Setting Procedure The System 4 control panel has been shipped with the internal clock set with the date and central time. If your time zone is different, the clock can be adjusted. To adjust the clock, see “Navigating Parameters”... -
Page 27: Accessing Parameters
SYSTEM START-UP—ACCESSING PARAMETERS ACCESSING PARAMETERS Three-Digit Parameter NOTE: To access Operator Level and Service Parameter Name or Group Operator Level (O) Number Level parameters, the control board ser- Service Level 2 (S) vice switch must be in the ON position. (See Figure 25.) P : P o s i t i o n 2 1 0... -
Page 28: Accessing Service Level 2
SYSTEM START-UP—ACCESSING PARAMETERS • Pressing the enter (●) key saves the displayed Three-Digit value. Press and hold the enter key until a check- Parameter Parameter Operator Level (O) mark appears to the right of the value you wish to Name or Group Number Service Level 2 (S) enter. -
Page 29: Setting Door Limits (Open, Intermediate, And Close)
Figure 33 shows that auto-close delay timer ACL1 is currently set with an eight (8) second delay. If your door is configured with an optional defrost sys- tem, the System 4 Drive & Control is designed to oper- Three-Digit ate and monitor that system. - Page 30 SYSTEM START-UP—WIRELESS REVERSING EDGE NOTE: Clear plastic cover is shown for sample purposes. Antenna Prongs Point Toward the Drum Roll Mobile Unit A2500246 Tan Cable Figure 34 A7700019 Figure 36 Antenna Prongs Point Toward the Drum Roll Antenna Prongs Drum Roll A2500247 Figure 35 Attached to the electric motor is a small tan-colored...
-
Page 31: Parameters For Wireless System
NOTE: Hexadecimal address should be the tomer Support at 800-628-1909. Access for same value as Parameter P:F07. programming parameters can be found in the Rytec System 4 Drive & Control manual that is shipped with the door in the small parts carton. Table 2... - Page 32 Parameters Encoder Cable Connections P:F09 = Battery low 3.6 volts System 4 Control Panel When battery voltage drops below the pre-set value NOTE: The encoder cable is to be cut to length. an error will be displayed = F 857 Battery low...
- Page 33 SYSTEM START-UP—WIRELESS REVERSING EDGE A5400031 Figure 40...
- Page 34 Jumpers on the System 4 Control Panel The System 4 control panel requires the jumpers located on the control board to be in the following configuration. NOTE: The configuration of the jumpers should have been done at Rytec prior to shipping. This information is provided just to confirm the accurate setting of the jumpers.
- Page 35 Jumpers on the System 4 Control Panel Jumper for the reversing edge should be configured for 8.2K ohms. (See Figure 42.) 1.2K ohm Jumper 8.2K ohm Jumper A5400018 Figure 42 Please contact Rytec Customer Support at 800-628-1909 if there are any questions or concerns.
-
Page 36: System Parameters
SYSTEM PARAMETERS—OPERATOR LEVEL PARAMETERS SYSTEM PARAMETERS The system parameters are grouped into two levels: “OPERATOR LEVEL PARAMETERs” below and “SER- VICE LEVEL 2 PARAMETERS” on page 31. OPERATOR LEVEL PARAMETERS Table 5 below lists the parameters available through the Operator Level. Included in this table is a description of each parameter and its available range and factory default setting. -
Page 37: Service Level 2 Parameters
SERVICE LEVEL 2 PARAMETERS At Service Level 2, the technician will be able to view all the parameters in the System 4 Control panel. However, Table 6 below lists some of the parameters available some parameters (Safety) will require an additional through Service Level 2. - Page 38 SYSTEM PARAMETERS—SERVICE LEVEL 2 PARAMETERS Factory Parameter Range Service Level 2 Parameters Setting P.025 0–20 seconds Pre-warning time before close NOTE: This parameter is used for the yellow flashing warning lights. Increasing the value will increase the number of times the yellow LED's flash previ- ous to closing.
- Page 39 21: Command forwarding 22: Open command (Additional settings are also available under this parameter. Locking, safety, sequence of operation are all available if needed. Contact Rytec Customer Support to discuss specific operational sequence. 800-628-1909 P.670 0–4 Floor loop detector — channel 2 function...
- Page 40 NOTE: All inputs have the ability to be configured in many different ways. If you are interested in config- uring an input please contact Rytec Customer Support at 800-628-1909. Please have details available on what sensor you would like to use and how you would like the sensor to perform.
- Page 41 P.920 Error history (The controller stores the last eight errors in the error history. The System 4 controller will time stamp the errors with the date and time the error occurred.) Error message 1 (most recent error) Error message 2...
- Page 42 SYSTEM PARAMETERS—SERVICE LEVEL 2 PARAMETERS Factory Parameter Range Service Level 2 Parameters Setting P.940 Volt Input voltage (The real time voltage the board is receiving. Electrical meters measure the voltage as an RMS or essentially an average; therefore, an electrical meter reading may vary by 20 volts or more.
- Page 43 SYSTEM PARAMETERS—SERVICE LEVEL 2 PARAMETERS Factory Parameter Range Service Level 2 Parameters Setting P.F01 6–250 Timeout for the wireless milliseconds (This sets the wireless timeout within the controller) NOTE: If the mobile unit doesn’t send a message within the specified time, the wireless edge will be seen as tripped.
-
Page 44: Clock Parameters
Parameter Range Service Level 2 Parameter P:C00 Displays the current time and date of the System 4 clock. Clock is set at Rytec before shipping to current date and central time. P:C01 0–23 hours Adjusts hours for the current time. -
Page 45: Clock Input Selection
The four channels allow the poten- tial of four events to occur each day. If you are interested The System 4 controller has four clock input channels in setting the clock for a particular event, contact Rytec (A, B, C, and D) that can be used to perform special Customer Support at 800-628-1909. - Page 46 SYSTEM PARAMETERS—SWITCHING CLOCK PROGRAMS Parameter Range Service Level 2 Parameter P:C13 0–9 Day of week. Parameter shows which day the clock program will be working. 0: Monday to Sunday 1: Sunday 2: Monday 3: Tuesday 4: Wednesday 5: Thursday 6: Friday 7: Saturday 8: Monday to Friday 9: Saturday to Sunday...
-
Page 47: Fault Codes
NOTE: If you have an error not listed in the chart code, and the suggested corrective action to clear the below, contact Rytec Customer Support at fault. (Door is in the error jog only mode.) 800-628-1909. -
Page 48: Door Safety/Emergency Fault Codes
SYSTEM PARAMETERS—DOOR SAFETY/EMERGENCY FAULT CODES Fault Code Description Corrective Action (Displayed Message) F.060 Bottom bar breakaway input activated, ter- Reassemble bottom bar or repair break- (Door Ajar) minal 271 away switch. The controller believes the door was impacted and the panel is out- side the side columns. -
Page 49: Reversing Edge Circuit Fault Codes
SYSTEM PARAMETERS—REVERSING EDGE CIRCUIT FAULT CODES REVERSING EDGE CIRCUIT FAULT CODES Table 14 below lists the fault codes associated with the reversing edge circuit. Included in this table are the available fault codes, a description of each fault code, and the suggested corrective action to clear the fault. (The door is in the error jog only mode.) Table 14 Fault Code... -
Page 50: Drive System Fault Codes (400-Level Codes)
SYSTEM PARAMETERS—DRIVE SYSTEM FAULT CODES (400-LEVEL CODES) DRIVE SYSTEM FAULT CODES (400-LEVEL CODES) Table 15 below lists the fault codes associated with the drive system. Included in this table are the available fault codes, a description of each fault code, and the suggested corrective action to clear the fault. -
Page 51: Drive System Fault Codes (500-Level Codes)
SYSTEM PARAMETERS—DRIVE SYSTEM FAULT CODES (500-LEVEL CODES) DRIVE SYSTEM FAULT CODES (500-LEVEL CODES) Table 16 below lists the fault codes associated with the drive system. Included in this table are the available fault codes, a description of each fault code, and the suggested corrective action to clear the fault. - Page 52 The encoder shield wire must also be grounded to the P-clip located under the System 4 board to capture the encoder cable. DO NOT ground the encoder shield wire to the ground bus on the System 4 board. (See Figure 45.) P-clip A5400018...
-
Page 53: Wireless System Fault Codes
SYSTEM PARAMETERS—WIRELESS SYSTEM FAULT CODES Fault Code Description Corrective Action (Displayed Message) F.770 Overflow from SSI encoder 1. The current position of the door com- (Protocol 3) pared to the fixed closed position has Protocol 3 encoder exceed the maximal allowed range of 4095 increments 2. -
Page 54: Miscellaneous Messages
Input terminal shown in Open Limit Set Open limit setting. lower right corner of display. Part. Limit Set Partial limit setting. Partial Open Door in partial-open Position position. Rytec Door Type Cycle count. Set Limits Start limit set-up procedure. -
Page 55: Door Jog Messages
I.400 HD Limit Hard door not open. Table 24 (freezer only) In freezer applications, Rytec sends additional switches that turn the Displayed Message Description defrost heaters OFF if an insulated door is used on I.060 Self repair after door ajar site. - Page 56 I.401 Defrost Off Defrost deactivated. I.520 Maximum speed during In freezer applications, (freezer only) automatic limit switch cor- Rytec sends additional rection is not reached. switches that turn the I.555 Auto Calibration Limit switches being cor- defrost heaters OFF if an rected.
-
Page 57: Programmable Text Messages
MISCELLANEOUS MESSAGES—PROGRAMMABLE TEXT MESSAGES PROGRAMMABLE TEXT MESSAGES Table 25 below lists the programmable text messages associated with the control system. Included in this table are the available strings and their description. Table 25 Text Message Description Number 1 (Open) Open door. (Terminals 200 and 201) 2 (Open —... -
Page 58: Troubleshooting
TROUBLESHOOTING—TROUBLESHOOTING WITH STATUS LEDS TROUBLESHOOTING Table 26 TROUBLESHOOTING WITH STATUS LEDS Associated LED If a problem occurs with the control system or the door, LED Group Function the controller is configured with various light-emitting diodes (LEDs) that can be helpful when troubleshooting Emergency Stop NOTE: Reference the problem. - Page 59 TROUBLESHOOTING—TROUBLESHOOTING WITH STATUS LEDS Associated LED LED Group Function 24 V Short LED Normal operation = LED off Red in color 24 V failure = LED on 24 VDC system short =flashing LED Note: If the 24 V power supply is overloaded or has a defective device (such as a shorted photo eye) connected to it, the...
-
Page 60: Specifications
24 V power supply output: Class 2 Marks/Stickers TST FU3-AP: UL/UR sticker and serial number TST FU3P-A: UL sticker, serial number “WARNING High Voltage” provided by Rytec. Clock 24-hour real-time clock with integrated gregorian calendar 4-channel electronic timer Accuracy limit: Max. 5 sec/day over full temperature range... - Page 61 SPECIFICATIONS—INPUTS Emergency Stop/Safety Chain All inputs have to be connected potential free (E-Stop 1, 2, and 3) Contact ratings: 0 to 26 VDC and 10 to 200 mA < 5V: inactive logical 0 > 7V: active logical 1 Indicated by individual LEDs When safety chain is interrupted, no movement of the drive is possible, not even in jog mode.
-
Page 62: Outputs
SPECIFICATIONS—OUTPUTS FEIG Interface Bus II TTL communication interface to interface converter board TST RFUxCom for communication with external mounted I/O expansion board TST RFUxK Max. Distance: 100 ft. (30 m) FEIG Interface Bus III TTL communication interface to interface converter board TST RFUxCom for communication with a second prepared door controller TST FURR Max. -
Page 63: Plug-In Modules (Optional Items)
SPECIFICATIONS—PLUG-IN MODULES (OPTIONAL ITEMS) PLUG-IN MODULES (OPTIONAL ITEMS) Plug-In Modules TST SFSS: 2-channel radio receiver module TST SUVEK: 2-channel induction loop detector module w/terminals on board (alterna- tive TST SUKS—second resistor evaluation or other safety equipment) Expansion Board TST RFUxK TST RFU3P (Freezer) is NOT provided Communication Board TST RFUxCOM... -
Page 64: Abbreviations
SPECIFICATIONS ABBREVIATIONS Table 27 below lists the abbreviation of each unit of measurement referenced throughout the control system program menu and this manual. Table 27 Unit Abbreviation Celsius °C Counter Current (Ampere) Cycles Digits Fahrenheit °F Gigahertz Hertz (Frequency) Horsepower Increments Milliamp Megahertz... -
Page 65: Schematics
SCHEMATICS—GENERAL - INCOMING POWER SCHEMATICS GENERAL - INCOMING POWER NOTE: This schematic is provided for general information purposes only. Due to varying require- ments for individual installations, another schematic is shipped with each door and that sche- matic must be used for that spe- cific installation. -
Page 66: General - Encoder And Photo Eyes
SCHEMATICS—GENERAL - ENCODER AND PHOTO EYES GENERAL - ENCODER AND PHOTO EYES NOTE: Dashed lines indicate NOTE: This schematic is provided for additional feild wiring general information purposes may be required. only. Due to varying require- ments for individual installations, another schematic is shipped with each door and that sche- matic must be used for that spe-... -
Page 67: General - Radio Control And E-Stop
SCHEMATICS—GENERAL - RADIO CONTROL AND E-STOP GENERAL - RADIO CONTROL AND E-STOP NOTE: This schematic is provided for NOTE: Dashed lines indicate general information purposes additional feild wiring only. Due to varying require- may be required. ments for individual installations, another schematic is shipped with each door and that sche- matic must be used for that spe-... -
Page 68: General - Bottom Bar Connections
SCHEMATICS—GENERAL - BOTTOM BAR CONNECTIONS GENERAL - BOTTOM BAR CONNECTIONS NOTE: Dashed lines indicate NOTE: This schematic is provided for additional feild wiring general information purposes may be required. only. Due to varying require- ments for individual installations, another schematic is shipped with each door and that sche- matic must be used for that spe- cific installation. -
Page 69: General - Controller Dimensions
SCHEMATICS—GENERAL - CONTROLLER DIMENSIONS GENERAL - CONTROLLER DIMENSIONS NOTE: This schematic is provided for general information purposes only. Due to varying require- ments for individual installations, another schematic is shipped 8.25 with each door and that sche- matic must be used for that spe- cific installation. -
Page 70: Parts List
Rytec Customer Support Depart- ment at: 800-628-1909 or 262-677-2058 (fax). Rytec will not accept the return of any parts unless they are accompanied by a Return Merchandise Authoriza- 3. To ensure that the correct parts for your controller tion (RMA) form. -
Page 71: Electrician's Quick Guide
7. The remaining cable for the photo eyes and activa- tors must also be cut to length and also contain no The Rytec System 4 controller is a variable frequency loops or coils. AC drive. This controller relies on the proper installation 8. -
Page 72: Control Panel - Standard Panel
PARTS LIST—CONTROL PANEL — STANDARD PANEL CONTROL PANEL — STANDARD PANEL A5400036 Figure 54 ITEM QTY. PART # DESCRIPTION Consult Factory System 4 Control Panel Assembly, 200–500 V Please provide door serial number.
Need help?
Do you have a question about the System 4 and is the answer not in the manual?
Questions and answers