Table of Contents
Advertisement
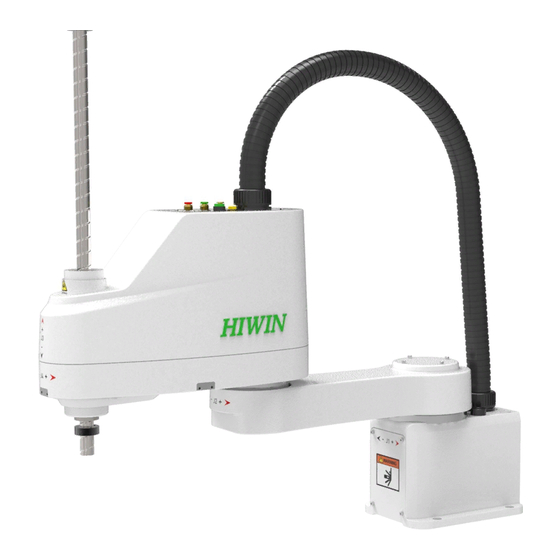
Quick Links
Advertisement
Table of Contents

Related Manuals for Hiwin SCARA Robot RS405-LU


Summary of Contents for Hiwin SCARA Robot RS405-LU
- Page 1 C21UE001-2008...
- Page 2 C21UE001-2008 Warranty Terms and Conditions The period of warranty shall commence at the received date of HIWIN product (hereafter called “product”) and shall cover a period of 12 months. The warranty does not cover any of the damage and failure resulting from: The damage caused by using with the production line or the peripheral equipment not constructed by HIWIN.
- Page 3 The end-effector or the cable for devices should be installed and designed by a professional staff to avoid damaging the robot and robot malfunction. Please contact the technical stuff for special modification coming from production line set up. For the safety reason, any modification for HIWIN product is strictly prohibited.
- Page 4 This chapter explains how to use the robot safely. Be sure to read this chapter carefully before using the robot. 2. The user of the HIWIN industrial robot has responsibility to design and install the safety device meeting the industrial safety regulations in order to ensure personal safety.
- Page 5 C21UE001-2008 Safety Precautions i.General All personnel involved in the use or setup of the industrial robot arm must read the safety related literature for the robot arm and instruction manual in detail and operate it in accordance with the specifications. Safety Symbol Users must strictly abide by the content description, otherwise it will cause serious casualties.
- Page 6 C21UE001-2008 ii.Relevant Personnel Electrical or mechanical work on industrial robot arms is only permitted by professionals. All personnel working on industrial robotic arms must read and understand the manual containing the safety section of the system of the robotic arm. System Integrator Refers to the person who integrates the industrial robot arm into a set of equipment according to safety regulations and puts it into operation.
- Page 7 C21UE001-2008 User Users must be professionally trained, have the knowledge and experience in this area, and be familiar with the prescribed standards, and thus be able to make a correct judgment of the work to be performed and identify potential hazards. Users can be defined into three categories based on operational permissions: 1.
- Page 8 C21UE001-2008 iii.Robotic Arm Working Range Definition Working area The working area of the robot is defined as the area of motion under motion constraints, and the working area must be limited to the minimum required. Protective area Operation must be carried out outside the protected area. A protected area is an area of the working area that is protected by a safe guard device.
- Page 9 C21UE001-2008 Must EMO-Emergency stop (EN 60947-5-1 positive opening) with safety module to meet ISO 13849-1 PL d. Interlock switch...
- Page 10 C21UE001-2008 iv.Description of Safety Functions Industrial robotic arms must have the following safety features: Selection of operating mode of the robot arm Safe guard devices Emergency stop device The safety function of the robot arm system is to prevent loss of personnel or property.
- Page 11 C21UE001-2008 Safe Guard Devices Description The safe guard device must use the components approved by the safety regulations and set and plan according to the relevant regulations. The robotic arm system must be automatically activated to receive the safety signal. In the event of a connection failure during automatic mode operation, an emergency stop must be triggered.
- Page 12 C21UE001-2008 v.Warnings and Precautions General considerations All operating procedures should be assessed by professional and in compliance with related industrial safety regulations. When operating robot, operator needs to wear safety equipment, such as workwear for working environment, safety shoes and helmets. When encountering danger or other emergency or abnormal situation, please press the emergency stop button immediately.
- Page 13 C21UE001-2008 17. Do not touch the heat sink, regenerative resistance, the power supply or the computer inside the controller while it is operating due to its high temperature. 18. Be sure power is disconnected prior to repair and maintenance, and ensure to operate under the condition of no electrical shock risk.
- Page 14 Using non-HIWIN spare parts to repair may cause robot damage or malfunction. Beware of the heat generated by the controller and servo motor. Do not overbend the cable to avoid poor circuit contact or unexpected damage.
- Page 15 Maintenance Precautions Please contact us if the procedure not specified by HIWIN is needed. Please contact us if the replacement of the component not specified by HIWIN is needed. Be sure to carry out regular maintenance, otherwise it will affect the service life of the robot or other unexpected danger.
- Page 16 C21UE001-2008 temperature and active rotary shaft. Special attention should be paid to the operating safety. The end effector should be mounted firmly on the robot to avoid workpiece fall during operation which may cause personal injury or hazard. The end effector may be equipped with its own control unit. During installation, pay attention to installed location.
- Page 17 The emergency stop switch is for emergency stop only. HIWIN's industrial robot arm (SCARA-LU series) has an emergency stop switch, it is automatically connected to the controller via a dedicated cable.
-
Page 18: Table Of Contents
C21UE001-2008 目錄 Safety Precautions ....................19 0.1. Emergency Stop ....................19 0.1.1. Free Running Distance In Emergency ............19 0.2. Robot Arm Operation Method In An Emergency Stop State ........ 20 Transportation and Installation ................21 1.1. Transportation ...................... 21 1.2. - Page 19 C21UE001-2008 2.4.10. RS410-800-400-LU ..................62 2.4.11. RS405-400-20P-LU ..................64 2.4.12. RS405-400-40P-LU ..................66 2.4.13. RS405-500-20P-LU ..................68 2.4.14. RS405-500-40P-LU ..................70 2.4.15. RS410-600-20P-LU ..................72 2.4.16. RS410-600-40P-LU ..................74 2.4.17. RS410-700-20P-LU ..................76 2.4.18. RS410-700-40P-LU ..................78 2.4.19. RS410-800-20P-LU ..................80 2.4.20.
-
Page 20: Safety Precautions
C21UE001-2008 0. Safety Precautions 0.1. Emergency Stop If you feel abnormal during the movement of the robot, press the emergency stop button immediately. When the emergency stop button is pressed, the robot will stop at the shortest distance by the action of the brake and the motor brake. Do not press the emergency stop switch when the robot is in normal operation. -
Page 21: Robot Arm Operation Method In An Emergency Stop State
C21UE001-2008 0.2. Robot Arm Operation Method In An Emergency Stop State When pressing the emergency stop button, move the robot arm as described below. When performing the above actions, be sure to confirm that the emergency stop button has been pressed and the status indicator is blinking. Brake release switch Ball spline J1 axis: Push the A-arm by hand. -
Page 22: Transportation And Installation
C21UE001-2008 1. Transportation and Installation 1.1. Transportation If the weight of the robot arm is greater than 30kg, it must be transported by mechanical means instead of manpower. If the weight is not above the mentioned weight, it can be carried by manpower. It is forbidden for the female and child laborers to carry by hand for less than one year after pregnancy or after delivery. - Page 23 C21UE001-2008 When transporting the robot arm, bend it with a bent knee to replace it; do not twist the waist when lifting the robot arm. Avoid maintaining the same posture for a long time. Any static posture is maintained for a period of time. The muscles in this part are likely to cause fatigue.
-
Page 24: Base Mounting Surface
C21UE001-2008 1.2. Base Mounting Surface When installing the robot arm, use the M8 bolt. Mounting bolt specifications are to be in accordance with ISO898-1 performance rating: 10.9 or 12.9. The mounting surface of the base is recommended to have a thickness of 20 mm or more, and is preferably made of steel to reduce vibration during operation. -
Page 25: Installation Method
C21UE001-2008 1.3. Installation Method 1.3.1. Unpacking and Transporting Please set it by authorized personnel, please be sure to comply with the relevant laws and regulations of each country. Do not pull, squash or bend the corrugated hose and adaptors, which can cause damage to the corrugated hose or internal wiring. -
Page 26: Robot Body Installation
C21UE001-2008 1.3.2. Robot Body Installation When installing the robot arm, use the M8 bolt. Mounting bolt specifications are to be in accordance with ISO898-1 performance rating: 10.9 or 12.9. The mounting surface of the base is recommended to have a thickness of 20 mm or more, and is preferably made of steel to reduce vibration during operation. -
Page 27: Power Connection
C21UE001-2008 1.3.3. Power Connection When connecting the robot arm to the controller, please make sure that the serial number of each device matches. Improper connection between the robot arm and the controller will not only cause the robot arm system to burn down, but also may cause serious safety problems. -
Page 28: Grounding
C21UE001-2008 1.4. Grounding This robot arm must be installed by authorized personnel and in accordance with local regulations. After removing the package and removing the robot arm covered with the protective bag, transport the robot arm to the installation position with appropriate handling aids. After the installation and locking is completed, ground the ring terminal (R-type) grounding wire to avoid the risk of electric leakage or electric shock during the operation of the robot arm. -
Page 29: Installation Environment
C21UE001-2008 1.5. Installation Environment 1.5.1. Operation Environment The design of this product is based on the use of indoor environment. If it cannot meet the requirements of the operating environment, it may cause the service life of the product to be shortened or even cause safety problems. Before using the robot arm, make sure that the operating environment meets the relevant requirements to maintain the stability and service life of the robot arm. -
Page 30: Operating Environment Of Controller
C21UE001-2008 is necessary to use it in a place that does not meet the above conditions, please contact our company or dealer. The ambient temperature is only applicable to the robot arm. The surface of the robot arm has general oil resistance. If it is possible to contaminate the special oil, you need to confirm it in advance. -
Page 31: Storage Environment
C21UE001-2008 Avoid dust, oil mist, salt, metal powder or other contaminants. Keep away from water and high humidity. Avoid shock or vibration. Keep away from sources of electromagnetic interference. Placement at a higher altitude will result in reduced performance. The controller is not suitable for use in harsh environments such as coating. If it is necessary to use it in a place that does not meet the above conditions, please contact our company or dealer. -
Page 32: Standard And Optional Equipment
C21UE001-2008 1.6. Standard and Optional Equipment 1.6.1. RS405-LU RS405 Standard and Optional table Item Part No. Qty. Std. Optional Remark Please refer to ● ○ Robot accessory kit RS405Z031-1 the table (RS405) Please refer to ○ End flange RS405Z031-5 the chapter 3.1 Please refer to ○... -
Page 33: Rs410-Lu
C21UE001-2008 1.6.2. RS410-LU RS410 Standard and Optional table Item Part No. Qty. Std. Optional Remark Please refer to the ● ○ Robot accessory kit RS410071-1 table (RS410) Please refer to the ○ End flange RS410071-5 chapter 3.1 Please refer to the ○... -
Page 34: Basic Specification
C21UE001-2008 2. Basic Specification 2.1. Desciption of Model Name SCARA LU series naming principles and models are shown below. RS405 – 500 – 200 – LU LU Series Environment 0 : Standard P: Clean room J3 Stroke 2: 200mm 4: 400mm Maximum reach 400: 400mm 500: 500mm... -
Page 35: Labels
C21UE001-2008 2.2. Labels Labels description Sticker Labels Name Description Position Read manual before Read manual operating the robot. Keep safety distance from robot system, and prevent Collision colliding to operator during operation. Pay more attention that Electric shock the robot may have a risk of electric shock. - Page 36 C21UE001-2008 F(J3) F(J4) F(J1) F(J2) Sticker position description Do not remove the safety label. If there is any loss, please contact our company or dealer.
-
Page 37: Robot Specifications
C21UE001-2008 2.3. Robot Specifications 2.3.1. RS405-LU RS405-400-2 RS405-400-4 RS405-500-2 RS405-500-4 Model Name 00(20P)-LU 00(40P)-LU 00(20P)-LU 00(40P)-LU Degrees of freedom Installation Horizontal platform [Note 1] Rated 2 kg Payload Maximum 5 kg Cycle time 0.42 s 0.40 s [Note 2] J1+J2 ±0.01 mm ±0.02 mm Repeatability... - Page 38 100mm horizontal is not achieved by any path and load, and it cannot be continuously operated. [Note 3.] If you have any special needs, please contact HIWIN. [Note 4.] The power signal cable must have a bend radius of at least 150 mm and is...
-
Page 39: Rs410-Lu
C21UE001-2008 2.3.2. RS410-LU RS410-600-2 RS410-600-4 RS410-700-2 RS410-700-4 Model Name 00(20P)-LU 00(40P)-LU 00(20P)-LU 00(40P)-LU Degrees of freedom Installation Horizontal platform [Note 1] 5 kg Rated Payload 10 kg Maximum 0.52 s 0.52 s Cycle time [Note 2] J1+J2 ±0.02 mm ±0.01 mm Repeatability ±0.01 J1+J2... - Page 40 300mm horizontal is not achieved by any path and load, and it cannot be continuously operated. [Note 3.] If you have any special needs, please contact HIWIN. [Note 4.] The power signal cable must have a bend radius of at least 150 mm and is...
- Page 41 C21UE001-2008 Model Name RS410-800-200(20P)-LU RS410-800-400(40P)-LU Degrees of freedom Installation Horizontal platform [Note 1] 5 kg Rated Payload 10 kg Maximum 0.57 s Cycle time [Note 2] J1+J2 ±0.025 mm ±0.01 mm Repeatability ±0.01 J1+J2 800 mm 525 mm Arm length 275 mm ±130 ±150...
- Page 42 300mm horizontal is not achieved by any path and load, and it cannot be continuously operated. [Note 7.] If you have any special needs, please contact HIWIN. [Note 8.] The power signal cable must have a bend radius of at least 150 mm and is...
-
Page 43: Appearance Size And Range Of Motion
C21UE001-2008 2.4. Appearance size and range of motion RS405-LU Interface Brake release switch Lamp D-SUB connector Φ4 Pneumatic tube connector Φ6 Pneumatic tube connector Φ6 Pneumatic tube connector Φ6 Pneumatic tube connector Φ6 Pneumatic D-SUB connector tube connector Power cable Φ4 Pneumatic tube connector... - Page 44 C21UE001-2008 RS410-LU Interface Φ6 Pneumatic tube connector Brake release switch Lamp D-SUB connector Φ6 Pneumatic D-SUB connector tube connector Φ6 Pneumatic Power cable tube connector Signal cable Φ6 Pneumatic tube connector...
-
Page 45: Rs405-400-200-Lu
C21UE001-2008 2.4.1. RS405-400-200-LU [Note1] [Note1] Cable bending radius of at least 150mm, please reserve space to deploy the cable. - Page 46 C21UE001-2008...
-
Page 47: Rs405-400-400-Lu
C21UE001-2008 2.4.2. RS405-400-400-LU [Note 1] [Note 1] Cable bending radius of at least 150mm, please reserve space to deploy the cable. - Page 48 C21UE001-2008...
-
Page 49: Rs405-500-200-Lu
C21UE001-2008 2.4.3. RS405-500-200-LU [Note 1] [Note 1] Cable bending radius of at least 150mm, please reserve space to deploy the cable. - Page 50 C21UE001-2008...
-
Page 51: Rs405-500-400-Lu
C21UE001-2008 2.4.4. RS405-500-400-LU [Note 1] [Note 1] Cable bending radius of at least 150mm, please reserve space to deploy the cable. - Page 52 C21UE001-2008...
-
Page 53: Rs410-600-200-Lu
C21UE001-2008 2.4.5. RS410-600-200-LU [Note 1] [Note 1] Cable bending radius of at least 150mm, please reserve space to deploy the cable. - Page 54 C21UE001-2008...
-
Page 55: Rs410-600-400-Lu
C21UE001-2008 2.4.6. RS410-600-400-LU [Note 1] [Note 1] Cable bending radius of at least 150mm, please reserve space to deploy the cable. - Page 56 C21UE001-2008...
-
Page 57: Rs410-700-200-Lu
C21UE001-2008 2.4.7. RS410-700-200-LU [Note 1] [Note 1] Cable bending radius of at least 150mm, please reserve space to deploy the cable. - Page 58 C21UE001-2008...
-
Page 59: Rs410-700-400-Lu
C21UE001-2008 2.4.8. RS410-700-400-LU [Note 1] [Note 1] Cable bending radius of at least 150mm, please reserve space to deploy the cable. - Page 60 C21UE001-2008...
-
Page 61: Rs410-800-200-Lu
C21UE001-2008 2.4.9. RS410-800-200-LU [Note 1] [Note 1] Cable bending radius of at least 150mm, please reserve space to deploy the cable. - Page 62 C21UE001-2008...
-
Page 63: Rs410-800-400-Lu
C21UE001-2008 2.4.10. RS410-800-400-LU [Note 1] [Note 1] Cable bending radius of at least 150mm, please reserve space to deploy the cable. - Page 64 C21UE001-2008...
-
Page 65: Rs405-400-20P-Lu
C21UE001-2008 2.4.11. RS405-400-20P-LU [Note1] [Note1] Cable bending radius of at least 150mm, please reserve space to deploy the cable. - Page 66 C21UE001-2008...
-
Page 67: Rs405-400-40P-Lu
C21UE001-2008 2.4.12. RS405-400-40P-LU [Note 1] [Note 1] Cable bending radius of at least 150mm, please reserve space to deploy the cable. - Page 68 C21UE001-2008...
-
Page 69: Rs405-500-20P-Lu
C21UE001-2008 2.4.13. RS405-500-20P-LU [Note 1] [Note 1] Cable bending radius of at least 150mm, please reserve space to deploy the cable. - Page 70 C21UE001-2008...
-
Page 71: Rs405-500-40P-Lu
C21UE001-2008 2.4.14. RS405-500-40P-LU [Note 1] [Note 1] Cable bending radius of at least 150mm, please reserve space to deploy the cable. - Page 72 C21UE001-2008...
-
Page 73: Rs410-600-20P-Lu
C21UE001-2008 2.4.15. RS410-600-20P-LU [Note 1] [Note 1] Cable bending radius of at least 150mm, please reserve space to deploy the cable. - Page 74 C21UE001-2008...
-
Page 75: Rs410-600-40P-Lu
C21UE001-2008 2.4.16. RS410-600-40P-LU [Note 1] [Note 1] Cable bending radius of at least 150mm, please reserve space to deploy the cable. - Page 76 C21UE001-2008...
-
Page 77: Rs410-700-20P-Lu
C21UE001-2008 2.4.17. RS410-700-20P-LU [Note 1] [Note 1] Cable bending radius of at least 150mm, please reserve space to deploy the cable. - Page 78 C21UE001-2008...
-
Page 79: Rs410-700-40P-Lu
C21UE001-2008 2.4.18. RS410-700-40P-LU [Note 1] [Note 1] Cable bending radius of at least 150mm, please reserve space to deploy the cable. - Page 80 C21UE001-2008...
-
Page 81: Rs410-800-20P-Lu
C21UE001-2008 2.4.19. RS410-800-20P-LU [Note 1] [Note 1] Cable bending radius of at least 150mm, please reserve space to deploy the cable. - Page 82 C21UE001-2008...
-
Page 83: Rs410-800-40P-Lu
C21UE001-2008 2.4.20. RS410-800-40P-LU [Note 1] [Note 1] Cable bending radius of at least 150mm, please reserve space to deploy the cable. - Page 84 C21UE001-2008...
-
Page 85: Mechanical Shaft Hardware Limit
C21UE001-2008 2.5. Mechanical shaft hardware limit The mechanical stop of each arm of the robot arm is installed on J1, J2 and J3 to limit the range of motion of each axis to the minimum. Mechanical stop Mechanical stop Mechanical stop... -
Page 86: Device Installation
C21UE001-2008 3. Device Installation 3.1. End effector installation When setting up the end effector, be sure to observe the following. 1. Do not remove or change any mechanical stops on your arm. 2. When installing the end effector on the ball spline, use an end flange at the lower end of the ball spline 30mm. -
Page 87: End Flange
C21UE001-2008 3.1.1. End Flange The end flange(optional) is mounted on the ball spline and can be used to install various end effectors. Installation steps: Step1. Insert the center hole of the end flange with the ball spline. Step2. Align the radial bolt hole with the center of the cutting plane of the ball spline, and install the bolt. -
Page 88: Interface
C21UE001-2008 3.2. Interface 3.2.1. Pneumatic interface The back panel of the arm has three air line connectors, and the three air lines are connected to the top panel of the B-arm through the arm body. Please refer to the following figure. (The maximum working pressure of the air source is 8 kgf/cm RS405-LU Interface Description(outer diameter ×... - Page 89 C21UE001-2008 RS410-LU Interface Description(outer diameter × inner diameter) Collar color A、E Suitable for (∅ 6mm×∅ 4mm) pneumatic pipe B、F Suitable for (∅ 6mm×∅ 4mm) pneumatic pipe Green C、G Suitable for (∅ 6mm×∅ 4mm) pneumatic pipe...
-
Page 90: Signal Interface
C21UE001-2008 3.2.2. Signal Interface The back panel of the arm has a D-Sub connector, and cables pass through the arm body. The B-arm top panel D-Sub connector is shown below. The maximum current per cable is 1A. RS405-LU Interface Description D、H D-Sub 15Pin connector... - Page 91 C21UE001-2008...
- Page 92 C21UE001-2008 RS410-LU Interface Description D、H D-Sub 25Pin connector...
- Page 93 C21UE001-2008...
-
Page 94: Equipment Installation
C21UE001-2008 3.2.3. Equipment installation There are multiple sets of threaded holes under the B-arm and on the side. You can use the bolt holes to install cameras, solenoid valves, etc., please refer to the following figure. RS405-LU Interface... - Page 95 C21UE001-2008 RS410-LU Interface...
-
Page 96: Inertia
C21UE001-2008 3.3. Inertia 3.3.1. Moment of inertia calculation The moment of inertia is the amount indicating the resistance of the object to rotate. When installing the jig/end effector at the end of the ball spline, the moment of inertia of the load device must be considered. Ball spline rotation axis End Effector Workpiece B... - Page 97 C21UE001-2008 The calculation method of the moment of inertia of each object is shown in (a), (b), and (c) below. Please refer to the following calculation method of the moment of inertia of the basic shape to determine the moment of inertia of the object. (a) Moment of inertia of a rectangular object Rotation axis Offset distance...
- Page 98 C21UE001-2008 (c) Moment of inertia of a sphere Rotation axis Center of mass Mass × Offset distance...
-
Page 99: End Effector Extension Load
C21UE001-2008 3.3.2. End effector extension load The end extension load calculation is shown in the figure and will vary depending on the shape of the load object. It is recommended to calculate the inertia actually. Offset distance End extension of the ball spline... -
Page 100: Adjustment
C21UE001-2008 4. Adjustment 4.1. Zero position setting The kit includes a calibration tool as shown below. When calibrating, press the emergency stop button on the robot arm to push the robot arm freely until the calibration tool can be aligned with the calibration hole or the set position. Calibration tool J1-axis calibration sequence is as follows Step1. - Page 101 C21UE001-2008 J2-axis calibration sequence is as follows Step1. Press the emergency stop button and push the B-arm with your hand until the B-arm matches the correction hole of the A-arm. Step2. Insert the calibration hole from bottom to top using the calibration tool. Step3.
- Page 102 C21UE001-2008 J3,J4-axis calibration sequence is as follows Step1. Confirm that the distance between the stop ring and the ball spline is 30mm, as shown below. Step2. After pressing the emergency stop button, hold the brake release switch and push the ball spline with your hand until the stop ring comes into contact with the robot body.
-
Page 103: Maintenance
C21UE001-2008 5. Maintenance This chapter will introduce the daily inspection and periodic inspection items and treatment methods of the robot arm, as well as the basic maintenance items including disassembly, installation of the outer casing for internal maintenance, inspection and replacement of each shaft belt, oil supply and matters needing attention. - Page 104 C21UE001-2008 RS405-LU RS410-LU Installing cover: Step1. Turn off the power of the controller. Step2. Install the arm cover from the top to bottom. Step3. Confirm that the cover does not interfere with any parts and cables. Step4. Lock with the external 8 bolts.
- Page 105 C21UE001-2008 When installing the cover, pay attention to whether the internal wires are excessively bent to avoid poor contact or damage to the internal cables. When installing the cover, pay attention to whether the ball spline will interfere with the cover. After confirming, the fixing bolt can be locked and the cover can be installed.
-
Page 106: Daily Inspection
Drain the drainage system and replace there any air leak, drain clogging or the leaking component. If needed, hose damage? Is the air source normal? please contact HIWIN directly. After turning power ON The robot installation bolts might not be securely tightened to the installation surface. - Page 107 Please contact HIWIN directly. The Zero-position of the robot might be rewritten. Please set the Zero-position. The Zero-position data will be lost if the backup batteries is dead.
- Page 108 C21UE001-2008 The items and time for regular inspection are shown below. Daily checklist Inspection item Remedies Inspection item A (1 month / 320 hours) Is the robot dirty or dusty? Clean and check each part of the robot. Inspection item B (3 months / 960 hours) If it is dusty, turn off the power and Check the ventilation system of the clean the ventilation system of the...
- Page 109 C21UE001-2008 Inspection schedule 1 month Check item A 2 months Check item A 3 months Check item A Check item B 4 months Check item A 5 months Check item A 6 months Check item A Check item B Check item C 7 months Check item A 8 months Check item A 9 months Check item A Check item B...
-
Page 110: Maintenance Item
C21UE001-2008 5.2. Maintenance Item 5.2.1. Battery Replacement The absolute encoder is used for position recording. When the power is interrupted, the backup battery must be used to memorize the current position of the encoder. The robot has been installed with the battery at the time of shipment. Usually, the battery replacement time is about one year, but this varies depending on the condition of the arm used. -
Page 111: Timing Belt Replacement
C21UE001-2008 5.2.2. Timing Belt Replacement The belts on axis 3 and axis 4 of robot arm have been adjusted before the shipment. The robot arm movement will cause the belt wear out and the belt tension will lower than standard value. Therefore, the belt tension needs to be regularly inspected, maintained and replaced. - Page 112 C21UE001-2008 Timing belt(J3) Timing belt(J4M) Timing belt(J4S) RS405-LU Recommended tension table Belt width Belt span tension Belt Spec. (mm) (mm) Timing belt(J3) 100-S3M-396 ±5 100-S2M-172 44.3 Timing belt (J4M) ±5 150-S2M-300 86.3 Timing belt (J4S) ±5 RS410-LU Recommended tension table Belt width Belt span tension...
-
Page 113: Ball Spline Lubricaion
C21UE001-2008 5.2.3. Ball Spline Lubricaion When the spline is exposed to the open environment for a long time, it is easy to be contaminated with environmental dust or insufficient lubrication. It is recommended that the user clean and maintain every 3 months or 100km, and evenly apply grease (G04, 5C.C.) to the surface of the ball spline and the groove to maintain the smooth running Please turn off the power of the controller and remove the power cable to avoid... - Page 114 C21UE001-2008 Reducer Lubrication Grease application Method Figure area Groove Fill the space A with grease. Reducer Remove the grease in area B. After that, fill the space with new grease. Fill the grease in space C. Please check the following table for the grease filling amount.
- Page 115 C21UE001-2008 RS405-LU reducer disassembly J1 reducer disassembly Step1. Turn off the power of the controller. Step2. Remove the M3 bolts from the bolt cover. Step3. Remove the bolt cover on the A-arm. Step4. Remove the A-arm M8 bolts. Step5. Remove the A-arm vertically upwards. M3 Bolt Bolt cover M8 Bolt...
- Page 116 C21UE001-2008 Step6. Remove the reducer flange M5 bolts. Step7. Remove the reducer body vertically upwards. Step8. Remove the M4 bolt from the motor and wave generator. Step9. Remove the wave generator vertically. M5 Bolt Reducer M4 Bolt Wave generator...
- Page 117 C21UE001-2008 J2 reducer disassembly Step1. Turn off the power of the controller. Step2. Remove the M3 bolts from the bolt cover. Step3. Remove the bolt cover on the A-arm. Step4. Remove the A-arm M8 bolts. Step5. Remove the B-arm. M3 Bolt Bolt cover M8 Bolt A-arm...
- Page 118 C21UE001-2008 RS410-LU reducer disassembly J1 reducer disassembly Step1. Turn off the power of the controller. Step2. Remove the M4 bolts from the bolt cover. Step3. Remove the bolt cover on the A-arm. Step4. Remove the A-arm M10 bolts. Step5. Remove the A-arm vertically upwards. M4 Bolt Bolt cover M10 Bolt...
- Page 119 C21UE001-2008 Step6. Remove the reducer flange M5 bolts. Step7. Remove the J1 motor module vertically upwards. M5 Bolt J1 Motor module...
- Page 120 C21UE001-2008 Step8. Remove the M4 bolt from the motor and wave generator Step9. Remove the M6 bolts. Step10. Separate the reducer, wave generator and motor in the axial direction. Reducer M4 Bolt Wave generator M6 Bolt...
- Page 121 C21UE001-2008 J2 reducer disassembly Step1. Turn off the power of the controller. Step2. Remove the M4 bolts from the bolt cover. Step3. Remove the bolt cover on the A-arm. Step4. Remove the A-arm M8 bolts. Step5. Remove the B-arm. M4 Bolt Bolt cover M8 Bolt...
- Page 122 C21UE001-2008 Step6. Remove the reducer flange M8 bolts. Step7. Remove the J2 motor module vertically upwards. M8 Bolt J2 Motor module...
- Page 123 C21UE001-2008 Step8. Remove the M3 bolt from the motor and wave generator Step9. Remove the M6 bolts. Step10. Separate the reducer, wave generator and motor in the axial direction. Reducer M4 Bot Wave generator M6 Bolt When tightening the reducer, tighten the bolts with the torque wrench. The torque setting is as follows: Spec.
-
Page 124: Robot/Controller Requirements Form
□Conveyor tracking module (encoder module、encoder、 Expansion module (optional) cable) □Ethernet Cable(3m) □Emergency stop button switch (5m) □Bellow Other □Ball spline grease(G04) □Reducer grease(G11) (optional) □Gromet □I/O connector wiring set Recommended specification: HIWIN adviser: Fields marked with an * are required. - Page 125 C21UE001-2008...
Need help?
Do you have a question about the SCARA Robot RS405-LU and is the answer not in the manual?
Questions and answers