Table of Contents
Advertisement
Advertisement
Table of Contents

Related Manuals for Medline EVENCARE G3


Summary of Contents for Medline EVENCARE G3
- Page 1 EVENCARE ® BLOOD GLUCOSE MONITORING SYSTEM USER’S GUIDE...
- Page 3 Introduction Thank you for choosing the EVENCARE G3 Blood Glucose Monitoring System to help monitor your patients’ blood glucose levels. The EVENCARE G3 Blood Glucose Monitoring System is designed to be accurate and easy to use. This user manual contains all the information needed to use and maintain the EVENCARE G3 Blood Glucose Monitoring System.
- Page 4 Intended Use The EVENCARE G3 Blood Glucose Monitoring System is intended for the quantitative measurement of glucose in fresh capillary whole blood samples drawn from the fingertips, forearm, or palm. It is indicated to be used for multiple patients in a clinical setting by healthcare professionals, as an aid to monitoring levels in Diabetes Mellitus.
- Page 5 Important Safety Instructions • Adhere to standard precautions when handling or using this device. All parts of the glucose monitoring system should be considered potentially infectious and are capable of transmitting blood-borne pathogens between patients and healthcare professionals. For more information, refer to “Guideline for Isolation Precautions: Preventing Transmission of Infectious Agents in Healthcare Settings 2007”, http://www.cdc.gov/hicpac/2007ip/2007isolationprecautions.html .
-
Page 6: Table Of Contents
Table of Contents 1. About the EVENCARE G3 Blood Glucose Monitoring System Contents of Kit ..............................6 EVENCARE G3 Meter ............................7 Screen Display ..............................9 EVENCARE G3 Test Strip ..........................13 EVENCARE G3 Control Solutions ......................... 14 2. Meter Setup Inserting the Battery ............................15 Setting the Date and Time ..........................17... - Page 7 3. Testing a Patient’s Blood Glucose Preparing the Lancing Device ........................31 Alternate Site Testing (AST) .......................... 32 Running a Blood Glucose Test ........................34 Disposing Used Test Strips and Lancets ....................38 4. Understanding a Patient’s Blood Glucose Test Results Blood Glucose Test Results ...........................39 5.
-
Page 8: About The Evencare G3 Blood Glucose Monitoring System
1. About the EVENCARE G3 Blood Glucose Monitoring System Contents of Kit The EVENCARE G3 Blood Glucose Monitoring System includes the following items: • EVENCARE G3 Meter • User’s Guide • Carrying Case... -
Page 9: Evencare G3 Meter
EVENCARE G3 Meter EVENCARE ® Display Screen Shows blood glucose test results, memory values, averages, and other messages. Enter Button Press and hold to turn the meter on or off. Scroll ( ▼▲ ) Buttons Press to enter control mode when test strip is inserted, during meter setup, or to view stored test results and averages. - Page 10 EVENCARE ® Battery Compartment Holds one 3V Lithium coin cell battery (CR2032). Test Strip Ejector Slide to eject used test strip. Data Port Function is not yet available.
-
Page 11: Screen Display
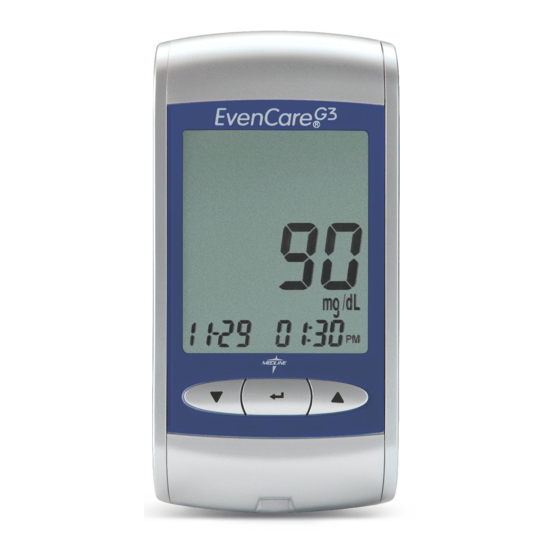
Meter Display Screen BEEPER MAIN DISPLAY AREA CONTROL UNIT MONTH / DAY HOUR / MINUTE TEST STRIP... - Page 12 HAPPY/SAD FACE BATTERY TEMPERATURE BLOOD DROP DAY AVERAGE AM / PM...
- Page 13 MAIN DISPLAY AREA .....Displays test results, stored test results, result averages, and messages. BEEPER ........Indicates the beeper function is set (See Turn the Beeper On/Off). BATTERY ........Appears when the battery is low and needs to be replaced (See Inserting the Battery). MEM ..........Indicates the number in the display area is a stored test result (See Viewing Meter Memory).
- Page 14 BLOOD DROP ......Appears when a test strip is inserted into the meter and the meter is ready for testing. DAY AVERAGE ......Appears when viewing the day-averages (See Viewing Meter Memory). HAPPY/SAD FACE ....Indicates whether or not the meter’s electronics are functioning properly.
-
Page 15: Evencare G3 Test Strip
Apply blood or control solution here. IMPORTANT: • Use only the EVENCARE G3 Blood Glucose Test Strips with the EVENCARE G3 Meter. Other brands of test strips will not work with the meter. • For foil test strips, keep the test strip in the foil wrapping until ready to use. -
Page 16: Evencare G3 Control Solutions
Run the control test to make sure the meter and test strips are working properly together, to practice testing procedure, and when using a new package of EVENCARE G3 Blood Glucose Test Strips. -
Page 17: Meter Setup
2. Meter Setup EVENCARE ® Inserting the Battery Materials needed: EVENCARE ® • EVENCARE G3 Meter EVENCARE • One 3V Lithium coin cell battery (CR2032) ® Step 1. Remove the battery compartment cover. EVENCARE ® EVENCARE ® Step 2. If there is an old battery in the compartment, take it out. - Page 18 IMPORTANT: Dispose of used batteries according to local regulations. NOTE: Stored test results will not be erased when the battery is changed.
-
Page 19: Setting The Date And Time
• EVENCARE G3 Meter NOTE: • If the date and time on the EVENCARE G3 Meter are not set, test results will not be stored in the meter memory. • The meter will automatically ask you to set the date and time after you change the battery. - Page 20 Step 2. Set the year The year will flash. Press the scroll buttons ▼▲ to select the correct year. Press the button to confirm selection and advance to set the month. Step 3. Set the month The month will flash. Press the scroll buttons to select the correct ▼▲...
-
Page 21: Setting The Beeper On/Off
Step 6. Set the hour The hour will flash. Press the scroll buttons ▼▲ to select the correct hour. Press the button to confirm selection and advance to set the minute. Step 7. Set the minutes The minutes will flash. Press the scroll buttons to select the correct minute. - Page 22 Step 2. The meter will run a series of self tests. The icon will appear on the screen when all tests are complete. If the icon or other error messages (Err 2, Err 3, etc.) appear, see the Troubleshooting section. Step 3.
-
Page 23: Setting The Qc Lock Mode
Setting the QC Lock Mode The EVENCARE G3 meter has the option to be put in QC lock mode. When the QC mode is turned on and no control tests have been performed in the past 24 hours, the message “qC”... - Page 24 Step 3. Press the down button four times to reach the QC lock mode. ▼ The screen will show the icon “ctl” button to enter the QC setting mode. Step 4. Press the Step 5. Press the up button to turn the QC lock mode on or off. ▲...
-
Page 25: Control Solution Testing
Control Solution Testing The purpose of the control solution testing is to validate that the EVENCARE G3 Meter is working properly with the test strips. Control solutions are not included in the kit. Please contact your local supplier to order EVENCARE G3 Glucose Control Solutions. - Page 26 • EVENCARE G3 Glucose Control Solutions (Level 1 or Level 3) • A new EVENCARE G3 Blood Glucose Test Strip NOTE: • Use only EVENCARE G3 Glucose Control Solutions with the EVENCARE G3 Blood Glucose Test Strips. Other brands of control solutions will produce inaccurate results.
- Page 27 Step 1. Insert a test strip into the meter with the contact points facing up. Make sure to firmly and completely insert the test strip into the meter. The meter will turn on automatically. IMPORTANT: • Do not use test strips that are expired. Check the expiration date printed on the test strip package.
- Page 28 • Foil-wrapped test strips are good until the expiration date on the packaging. • Make sure you are performing the test in an environment that is between 50˚F–104˚F. • If the meter displays a temperature icon , this means that your meter has been exposed to extreme temperature that is outside the operating temperature range.
- Page 29 Step 3. Wait until the flashing blood drop and arrow icons appear next to the test strip icon on the meter display screen, press the down button ▼ or up button ▲ to enter control solution testing mode. The “ctl” icon will appear next to the test strip icon on the meter display screen, indicating that the meter is in control solution testing mode.
- Page 30 NOTE: • Replace the cap of the control solution immediately after use. • If there is insufficient sample, the strip icon will flash and the message “Err” will be shown. Eject and discard the used test strip. Repeat the control solution test with a new test strip.
- Page 31 If the control test result falls outside of the range provided, do the following: • Do not test the patient’s blood glucose. • Make sure you are using EVENCARE G3 Glucose Control Solution. • Make sure the testing environment is between 50˚F–104˚F.
- Page 32 3. Testing a Patient’s Blood Glucose Materials needed: • EVENCARE G3 Meter • A new EVENCARE G3 Blood Glucose Test Strip • Auto-disabling single use lancing device Lancing Device Use an auto-disabling single use lancing device to take the blood sample. Follow the...
-
Page 33: Testing A Patient's Blood Glucose
IMPORTANT: • Please contact your local supplier to order auto-disabling single use lancing devices. • Users need to adhere to standard precautions when handling or using this device. All parts of the glucose monitoring system should be considered potentially infectious and are capable of transmitting blood-borne pathogens between patients and healthcare professionals. -
Page 34: Alternate Site Testing (Ast)
Important Information on Alternative Site Testing (AST) The EVENCARE G3 Blood Glucose Monitoring System can test for blood glucose in areas other than the fingertip, such as the palm and forearm (alternative site testing, or AST). Alternative site testing can be less painful than fingertip testing. - Page 35 Alternative Site Testing SHOULD NOT be used when: • Patients have hypoglycemic unawareness. • Within 2 hours of a meal, exercise, or medication. • Operating machinery or driving a car. • During times of stress. • Patient is ill. • Patient’s blood glucose is low. •...
-
Page 36: Running A Blood Glucose Test
Running the Test Step 1. Insert a test strip into the meter. IMPORTANT: • A new pair of clean gloves should be worn by the user before testing each patient. Step 2. The meter will run a series of self tests. The icon will appear on the screen when all tests are complete. - Page 37 Step 3. For fingertip testing: Wash the patient’s hand thoroughly, and dry well. Hold the single use lancing device against the side of the patient’s fingertip and lance the finger. Follow the manufacturer’s instructions for how the lancing device should be used. TIPS: •...
- Page 38 For Testing on the Palm and Forearm (AST): Hold the lancing device against the test site (base of palm or forearm). Avoid a test site that has veins, moles, excessive hair, or bone. Press the lancing device firmly against the test site and lance the site. Do not lift up the lancing device.
- Page 39 Step 4. When the blood drop icon appears on the screen, gently bring the test strip to the test site and touch the drop of blood. The drop of blood will be drawn in automatically by the test strip. NOTE: •...
-
Page 40: Disposing Used Test Strips And Lancets
CAUTION: • If you see “HI” or “LO” displayed, the patient’s blood glucose level may be above 600 mg/dL or below 20 mg/dL. Repeat the blood glucose test. If you receive the same result, contact the patient’s physician or healthcare provider. Disposing Used Test Strips and Lancets CAUTION: Used lancets and strips are biohazardous material and can transmit bloodborne diseases. -
Page 41: Understanding A Patient's Blood Glucose Test Results
If the meter displays a result that is “HI” or “LO” or a patient gets a result that is more than 250 mg/dL or less than 50 mg/dL and the patient DOES NOT feel ill: • Test again using a new test strip. • Call the Medline Technical Service Center at 1-866-274-2131. - Page 42 NOTE: • Inaccurate results may occur in severely hypotensive individuals or patients in shock. • Inaccurate low results may occur for individuals experiencing a hyperglycemic- hyperosmolar state, with or without ketosis. • Critically ill patients should not be tested with blood glucose meters. Reference: 2.
-
Page 43: Viewing Meter Memory
® 5. Viewing Meter Memory The EVENCARE G3 Meter automatically stores up to 300 glucose test results together with the date and time. The meter also provides 7, 14, and 30 day averages to help track a patient’s blood glucose trend. The time and date must be set in order to use the memory and day averaging function (See Setting Date and Time). - Page 44 Step 2. The meter will run a series of self tests. The icon will appear on the screen when all tests are complete. If the icon or other error messages (Err 2, Err 3, etc.) appear, see Troubleshooting. Step 3. Press the down button ▼...
- Page 45 Step 6. On the most recent result, continue to press the up button to view the day ▲ averages. The meter will display the 7 day average. Press up again to see the 14-day average, and press up again to see the 30 day average. The number of test results included in the average calculation is shown to the right of icon.
- Page 46 NOTE: • When the meter memory is empty, the display will show “nil”. • When there are no day averages available, the display will show 0 mg/dL. • If the meter memory is full, adding a new test result will cause the oldest one to be deleted.
-
Page 47: Caring For The Meter
• DO NOT try to clean the test strip holder. • DO NOT take the EVENCARE G3 Meter apart. Doing so will void the warranty. If there are technical problems or questions in the use of the meter, contact Medline Technical Service Center at 1-866-274-2131 between 8:00 am and 5:00 pm (Central Time), Monday through Friday. - Page 48 Cleaning and Disinfecting Procedures for the Meter The EVENCARE G3 Meter should be cleaned and disinfected between each patient. The meter is validated to withstand a cleaning and disinfection cycle of ten times per day for an average period of three years. The following products have been approved for cleaning and disinfecting the EVENCARE G3 Meter: •...
- Page 49 Other EPA registered wipes may be used for disinfecting the EVENCARE G3 system, however, these wipes have not been validated and could affect the performance of your meter. If you use an EPA registered wipe not listed above and you notice any of the below signs after cleaning and disinfecting the meter, stop using the device and call Medline technical service at 1-866-274-2131.
- Page 50 Step 5. To disinfect your meter, clean the meter surface with one of the approved disinfecting wipes. Other EPA registered wipes may be used for disinfecting the EVENCARE G3 system, however, these wipes have not been validated and could affect the performance of the meter. Allow the surface of the meter to remain wet...
- Page 51 Wipe all external areas of the meter including both front and back surfaces until visibly wet. Avoid wetting the meter test strip port. Wipe meter dry, or allow to air dry. Step 6. Remove gloves.
- Page 52 Disposal of infectious material: Blood, body fluids and cleaning materials should be disposed of according to federal, state and local regulations for infectious waste disposal. NOTE: • Single-use medical protective gloves should always be worn during disinfection procedures and also by anyone performing blood glucose testing on another person.
- Page 53 • Clouding of the LCD display • Corroding of the plastic housing • Corroding of the buttons • Malfunction of any meter buttons If these signs of deterioration are noted, stop using the meter and call Medline Technical Service at 1-866-274-2131.
- Page 54 Storage and Precautions • The meter and the test strips are designed to be used within a temperature range of 50˚F to 104˚F. • Avoid leaving the meter in extremely hot or cold places, such as near a heat source or in an extremely hot or cold car.
-
Page 55: Troubleshooting
This section details display screen messages and error codes you may encounter when using your EVENCARE G3 Meter and Test Strips. If your meter is still not working after you have followed the troubleshooting instructions, call Medline Technical Service at 1-866-274-2131. - Page 56 What you see What it means What you should do The strip was removed Repeat the test with a new test strip. from the meter while the testing was in progress. The size of the blood Repeat the test with a new test strip. sample was too small.
- Page 57 What you see What it means What you should do Battery is low. Change the battery according to “Inserting (or Changing) the Battery” section of the user manual. Glucose test result is Wash and dry your hands and repeat the higher than 600 mg/dL.
- Page 58 What you see What it means What you should do There are no results stored Check if the date and time are set up in the meter. correctly. See Setting Date and Time. There are no day averages.
-
Page 59: System Specifications
Battery: 1 x 3V CR2032 Lithium coin cell battery Automatic Power-Off: After 3 minutes of non use Operating Temperature: 50˚F – 104˚F Operating Humidity: 22% – 90% For additional information, refer to the EVENCARE G3 Blood Glucose Test Strip insert. -
Page 60: Product Warranty
The EVENCARE G3 Blood Glucose Meter is warranted to be free of defects in workmanship and materials for a period of two (2) years from the date of purchase. Medline’s liability for warranty claims is limited to repair or replacement, and in no event shall Medline be liable for indirect or consequential damages, or for any loss arising from misuse, improper use, abuse, neglect, unauthorized repair or modification. - Page 61 Medline and EVENCARE are registered trademarks of Medline Industries, Inc. Medline Micro-Kill and Medline Micro-Kill+ are trademarks of Medline Industries, Inc. Clorox Healthcare and Dispatch are registered trademarks of The Clorox Company. Manufactured in Taiwan for Medline Industries, Inc., Northfield, IL 60093 USA.
- Page 62 EVENCARE ®...
Need help?
Do you have a question about the EVENCARE G3 and is the answer not in the manual?
Questions and answers
Can you interchange the G2 and G3 controls and test strips or do you need each to have its own controls and strips.
Medline EVENCARE G2 and G3 controls and test strips require separate controls and strips. The G3 system must be used with G3-specific control solutions and test strips; using other brands or versions will produce inaccurate results.
This answer is automatically generated
where is the lot number located on the evencare test strips