Table of Contents
Advertisement
Quick Links
Advertisement
Table of Contents

Related Manuals for Collection C Leonardo LIVING WAVE


Summary of Contents for Collection C Leonardo LIVING WAVE
- Page 1 Aufbauanweisung Assembly instruction WAVE - Schiebetürenschränke - sliding-door cabinet Alle Aufbauanweisungen finden Sie auch unter www.collection-c.de unter Downloads! All assembly instructions are available for download on www.collection-c.de! 1051272-09.01.20...
- Page 2 Bitte aufbewahren. WAVE Keep this information for further reference. Sehr geehrter Kunde, als Möbelproduzent möchten wir Sie darüber informieren, dass eine Befestigung nur so gut ist wie die Verbindung zwischen Befestigungsmaterial (Dübel) und Mauerwerk. Prüfen Sie bei Hängeelementen Ihr Mauerwerk und verwenden Sie nur dafür vorgesehene Dübel aus dem Fachmarkt.
-
Page 3: Table Of Contents
WAVE 2 Personen / 2 person Collection C Inhaltsverzeichnis / Contents: 02-03 Allgemeines / introduction Übersicht Schiebetürenschränke / overview sliding-door cabinet Montage Außenseiten / assembly of sides Montage Mittelseiten / assembly centre partition 07-08 Montage Korpus / assembly of elements Kippsicherung / tilting protection Montage Böden und Kleiderstange / assembly of shelves and hanging rails... -
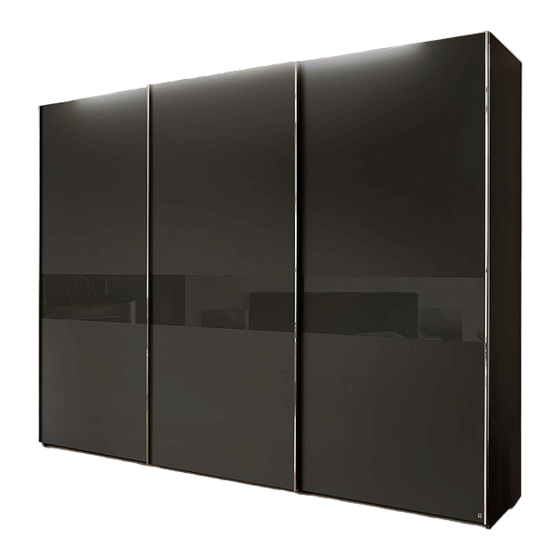
Page 4: Übersicht Schiebetürenschränke / Overview Sliding-Door Cabinet
WAVE Übersicht Schiebtürenschränke / overview sliding-door cabinet 8930/240 8930/300... -
Page 5: Montage Außenseiten / Assembly Of Sides
WAVE 1018465 Montage Außenseiten / assembly of sides rechts / right 1018465 links / left... -
Page 6: Montage Mittelseiten / Assembly Centre Partition
WAVE 1018465 Montage Mittelseiten / assembly centre partition 1018464 180°... - Page 7 WAVE 1018205 1018500 Montage Korpus / assembly of elements Montagebeispiel- Schwebetürenschrank 300 Example - sliding-door cabinet 300 180° Ausrichtung / adjustment 1000449 1018487 1017761 4,0x13 Schrank erst ausrichten, dann 1017664 3,5x17 Schraube G eindrehen. => Schritt 4-5 wiederholen First adjust the wardrobe then screw in screw G.
- Page 8 WAVE 1018205 1018500 180° Ausrichtung / adjustment 1000449 1018487 4,0x13 1017761 Schrank erst ausrichten, dann 1017664 3,5x17 Schraube G eindrehen. First adjust the wardrobe then screw in screw G.
-
Page 9: Kippsicherung / Tilting Protection
WAVE 1001582 6,0x110 1018214 Kippsicherung / tilting protection Montagebeispiel / example 1018225 1017698 4,0x15 Bei geringer Deckenhöhe ist die Wandbefestigung im Kopus unter dem Oberboden zu befestigen. With a low ceiling height the tilting protection must be screwed under the top panel. -
Page 10: Montage Böden Und Kleiderstange / Assembly Of Shelves And Hanging Rails
WAVE 1019273 Montage Böden und Kleiderstangen / assembly of shelves and hanging rails 1000927 3,5x13 Montagebeispiel / example 1002546 1018475 1017722 M6x30 1017664 3,5x17... - Page 11 WAVE 3,5x25 1017667 1020008 Montage Türen und Dämpfer / assembly fittings and dampers...
- Page 12 WAVE 1019134 B240mm 753,5 753,5 2346 B300mm 953,5 953,5 1093 2946...
- Page 13 WAVE 1017762 4x27...
- Page 14 WAVE 1019787 3,5x15 Tür links / left door Tür rechts / right door...
- Page 15 WAVE Tür links / left door Tür rechts / right door...
- Page 16 WAVE 0000000 1017676 4x15 1003075 1003370 1003079 Tür links / left door Tür rechts / right door...
- Page 17 WAVE 1019787 3,5x15 1003076 1003079 1017676 4x15...
- Page 18 WAVE 1003077 Tür links / left door 1003077 Tür rechts / right door...
- Page 19 WAVE 1003078 Tür links / left door Bei geringer Deckenhöhe müssen die Dämpfer SM1 vor dem Einhängen der Türen montiert werden. With a low ceiling heigh the damper SM1 must be assembled before hanging the doors.
-
Page 20: Einbaumittelseite / Build-In Centre Partition
WAVE 1017695 4,5x25 Einbaumittelseite / build-in centre partition Montagebeispiel / example TIPP: Einlegeboden für Abstand einschieben. Insert shelf to hold the distance. - Page 21 WAVE Wäscheauszug / drawer for laundry Montagebeispiel / example 1017684 4,0x55 58mm 58mm Position festlegen / Choose the position...
- Page 22 WAVE Demontage / dismantling Ausrichten / Adjustment mit Glas / with glass ohne Glas / without glass Montage Griff / assembly of handles 1017958 1017958 Schubkasten mit Glas / Schubkasten ohne Glas / drawer with glass drawer without glass 1005046 M4x27 1017716 M4x27...
-
Page 23: Hosenauszug / Trousers Excerpt
WAVE M4x7 1023046 3,5x35 Hosenauszug / trousers excerpt... -
Page 24: Korb Chrom Ausziehbar / Pull-Out Basket
WAVE Korb chrom ausziehbar / pull-out basket 4,0x40 1017682 4,0x16 1017677 mit Tür / with door ohne Tür / without door... -
Page 25: Krawatten- Und Gürtelhalter Ausziehbar / Tie- And Belt Holder Extensible
WAVE Krawatten- und Gürtelhalter ausziehbar / tie- and belt holder extensible 4,0x40 1017682 1017677 4,0x16 mit Tür / with door ohne Tür / without door... -
Page 26: Kleiderstange Ausziehbar / Telescopic Hangingrail
WAVE 1018163 3,0x16 Kleiderstange ausziehbar / telescopic hangingrail Montagebeispiel / example >=20mm... - Page 27 WAVE Kleiderbügelhalter drehbar / coathanger rail for shelf rotarable Montagebeispiel / example 1018163 3,0x16 >=20mm...
-
Page 28: Drehspiegel Ausziehbar / Telescoping Rotating Mirror
WAVE Drehspiegel ausziehbar / telescoping rotating mirror... - Page 29 WAVE...
-
Page 30: Kleiderlift / Clothes Lift
WAVE 1000449 Kleiderlift / clothes lift 3,5x20 1017699 4,0x17 1003016 M4x16 +/- mm 8x k1 Teleskopstange 3-teilig / telescopic bar 1005442 1017710 6,3x13 1003016 M4x16 1005442 4x m1 1017710 6,3x13 rechts / right side Ø5mm - Bohrtiefe 12mm Ø5mm - drilling depth 12mm... - Page 31 WAVE 1017699 4,0x17 links / left side markieren / mark Bohrschablone / hole-drilling template Bohrschablone an Markierung anlegen und Punkte mit einem spitzen Gegenstand ankörnen. Use the hole-drilling template to mark the mounting points. Use a sharp item.
- Page 32 WAVE 1017765 3,5x20 d1 d1 x = Schrankbreite innen - 165mm x = interior width - 165mm Länge einstellen. Adjust the length. Länge fixieren Fixing the length.
- Page 33 WAVE 1000449 Achtung! Anschlagpuffer ab 3kg Belastung einsetzen. Caution! Use the bump stop at 3kg load.
- Page 34 WAVE Sehr geehrter Kunde, Die Montage und das Verlegen der Elektroartikel sind nur von autorisiertem Fachpersonal durchzuführen. Beachten Sie die Beschreibung in der Montageanleitung. Alle elektrischen Installationen sind nach den gültigen Normen bzw. Vorschriften von VDE, CE, MM gefertigt. Die zu verwendende Leuchtmittelstärke ist auf der jeweiligen Lampenfassung angegeben.
-
Page 35: Beleuchtung Übersicht / Lighting
WAVE Beleuchtung / lighting LED-Aufsatzleuchte / LED attachment light 8929/060 8929/230 LED-Leuchte Einlegeboden Bewegungsmelder / Tipp-Sensor / mit Bewegungsmelder / motion sensor (g2) tip sensor (h1) 1003074 1018786 Removable shelf lighting with motion sensor 310/050 310/100 50 / 1014805 100 / 1014804 Trafo / transformer Trafo / transformer Trafo / transformer... - Page 36 WAVE Montage LED-Aufsatzleuchte / assembly of the LED attachment light Montagebeispiel / example 8929/060 1015263 3,0x17 L0000689 Seitenansicht / side view ca. 237mm ca. 265mm...
- Page 37 WAVE 1000395 1002571 1018788 1018778 Beispiel / example Die maximale Angabe der Wattzahl auf den Trafos darf nicht überschritten werden. The maximum number of watts on the transformers must not be exceeded. on / off Vor der Montage der Möbel müssen alle elektrischen Anschlüsse (Fußschalter, Tipp-Sensor, Funksteuerung ) und Trafos verlegt werden. es sollten alle Leuchten angeschlossen und getestet werden.
- Page 38 WAVE 1000395 1002571 1018778 Beispiel / example Die maximale Angabe der Wattzahl auf den Trafos darf nicht überschritten werden. 1018786 The maximum number of watts on the transformers must not be exceeded. 1017674 3,0x17 Der Tipp-Sensor kann an jeder beliebigen Seite vom Korpus montiert werden.
- Page 39 WAVE 1000395 1002948 Beispiel / example Die maximale Angabe der Wattzahl auf den Trafos darf nicht überschritten werden. 1002571 The maximum number of watts on the transformers must not be exceeded. 1002947 1018778 S. 40-41 Vor der Montage der Möbel müssen alle elektrischen Anschlüsse (Fußschalter, Tipp-Sensor, Funksteuerung ) und Trafos verlegt werden. es sollten alle Leuchten angeschlossen und getestet werden.
- Page 40 WAVE CR2032 (3V) 0 °C – +35 °C 137 x 40 x 11,7 147 x 50 x 21,7 868 MHz 833.00.620 +32 °F – +95 °F 002.99.032 ≤ 20 m 833.00.621 833.00.622 100 - 240 V~...
- Page 41 WAVE < 1 sec < 1 sec < 3 sec 100% 100% < 1 sec < 1 sec CH1−4 CH1−4 < 1 sec < 1 sec CR2032...
-
Page 42: Led-Einlegebodenbeleuchtung Mit Bewegungsmelder / Led Lighting With Motion Detector
WAVE B0000368 3,5x25 LED-Einlegebodenbeleuchtung mit Bewegungsmelder / LED lighting for shelves with motion detector Montagebeispiel / example ca.25mm ca.18mm Kabelkanal aufkleben Stick on the cable duct. Kabel in Kabelkanal einlegen und schließen. Insert the cable into the cable duct and close it. öffnen / open ca.25mm... - Page 43 WAVE Montagebeispiel Bewegungsmelder bei lnker Tür 1003074 - bei rechter Tür Bewegungsmelder rechts montieren Example for the left door - At a right door you have to assemble the motion detector to the right 85mm 1022374 100mm 1018772 1018778 Die maximale Angabe der Wattzahl auf den Trafos darf nicht überschritten werden.
-
Page 44: Led-Einlegebodenbeleuchtung Mit Batterie / Led Lighting With Battery
WAVE LED-Einlegebodenbeleuchtung mit Batterie / LED lighting for shelves with battery Montagebeispiel / example ca.80mm Laden / charge: Magnetic Region... - Page 45 You have received high quality new furniture. We would like to congratulate you on this and we would like you to enjoy them for a long time. Collection C furniture are coated with noble, natural real wood veneer. The veneer technology itself is a long-established, traditional craftsmanship in the production of high-quality furniture.
- Page 46 For light dirt, please observe the following cleaning tips: If you need to dust the furniture Collection C more than just dry, then please take only a slightly damp, soft cloth or a damp leather. Wipe the damp surface dry. This is normally sufficient to clean.
-
Page 47: Reklamationsbericht / Complaint Report
Collection C Möbel Vertriebsgesellschaft mbH Brühl 10 f 99423 Weimar Tel.: 0049-3643-4953047 Fax: 0049-3643-4953050 Reklamationsbericht / complaint report Sehr geehrtes Montageteam, für den Fall, dass eine Beanstandung aufgetreten ist, möchten wir Sie bitten dieses Formular auszufüllen und das entsprechende Teil auf der Aufbauanleitung bzw. der Kommissionszeichnung kenntlich zu machen.
Need help?
Do you have a question about the Leonardo LIVING WAVE and is the answer not in the manual?
Questions and answers