Table of Contents
Advertisement
Advertisement
Table of Contents

Related Manuals for Yamaha P-100


Summary of Contents for Yamaha P-100
- Page 1 P-100 OWNER’S MANUAL...
-
Page 2: Fcc Information (U.s.a.)
If these corrective measures do not produce satisfactory results, please contact the local retailer authorized to distribute this type of product. If you can not locate the appropriate retailer, please contact Yamaha Corporation of America, Electronic Service Division, 6600 Orangethorpe Ave, Buena Park, CA 90620 * This applies only to products distributed by YAMAHA CORPORATION OF AMERICA. -
Page 3: Special Message Section
SPECIFICATIONS SUBJECT TO CHANGE: The infor- mation contained in this manual is believed to be correct at the time of printing. However. Yamaha reserves the right to change or modify any of the specifications without notice or obligation to update existing units. -
Page 4: Important Safety And Installation Instructions
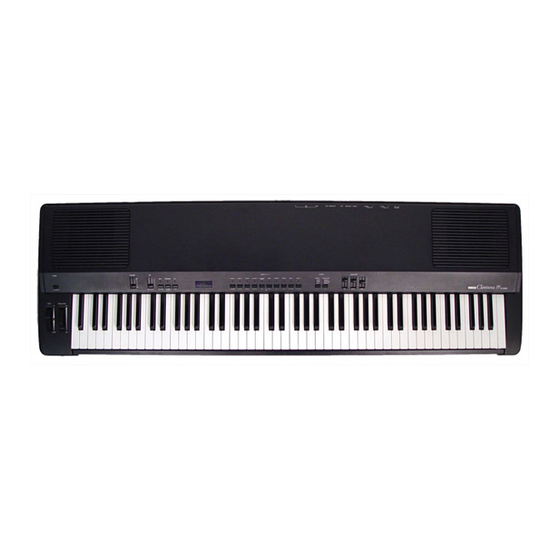
IMPORTANT: The louder the sound, the shorter the time period before damage occurs. 15. Some Yamaha products may have benches and/or acces- sory mounting fixtures that are either supplied as a part of the product or as optional accessories. Some of these items are designed to be dealer assembled or in- stalled. - Page 5 THANK YOU! ... for purchasing the Yamaha Clavinova PF Series P-100. The P-100 is a high-performance electronic piano with ten voices and a host of functions that make it an ideal instrument for professional stage and studio applications, as well as for use at home. Its features include the following:...
-
Page 6: Table Of Contents
SPECIAL OPERATIONS ... 44 Bulk dumps ... 44 Memory initialization ... 45 SYSTEM APPLICATIONS ... 46 Using the P-100 with a tone generator ... 46 Using the P-100 with another MIDI keyboard ... 47 Using the P-100 in an extended MIDI system ... - Page 7 Clavinova PF P-100 Operation Guide...
- Page 8 Clavinova PF P-100 Operation Guide...
- Page 9 PLAYING THE DEMO SONGS PLAYING THE P-100 DUAL MODE SPLIT MODE ADJUSTING THE KEYBOARD MIDI KEYBOARD CONTROL FUNCTIONS MIDI UTILITY MODE SETTINGS SPECIAL OPERATIONS...
-
Page 10: Precautions
The P-100 is a fine musical instrument composed of sensitive mechanisms and delicate digital circuitry. To ensure a long lifetime of reliable service, observe these precautions when installing, moving, or handling the P-100. Location Do not use the P-100 in locations where it will be exposed to direct sunlight, extremes of tempera- ture or humidity, or excessive dust or vibration. -
Page 11: Introducing The
MIDI messages. You will use it to select the MIDI Utility mode functions, and to transmit the P-100’s current settings to another MIDI device as a MIDI bulk dump. It is also used to adjust the P-100’s tuning and select keyboard velocity curve settings. LED display... -
Page 12: Phones Jack
[EQUALIZER] sliders These sliders adjust the level of the sound output by the P-100 in three bands: high, middle, and low. In Dual and Split modes, the changes you make will affect both voices being played. PHONES jack You can connect a stereo headphone set to the P-100 using this jack. -
Page 13: Rear Panel
A single FC4 pedal is included with your P-100. If you wish to purchase additional foot pedals, be sure to use only Yamaha models FC4 or FC5. FOOT CONTROLLER jack This jack allows you to connect a foot controller (Yamaha FC7, available separately) for use as an auxiliary controller. -
Page 14: Setting Up The
SETTING UP THE P-100 To prepare the P-100 for playing, follow the steps below to set it up and connect any peripheral equipment. 1. Plug in the power cord. Plug the P-100’s power cord into an AC outlet. Do not turn on, the [POWER] switch until you have finished making all of the connections below. -
Page 15: Playing The Demo Songs
P-100 is in Utility mode.) To exit Utility mode, simply press the [MIDI] button. Also. you will not be able to play the P-100 or use any of the Utility mode functions while the demo songs are playing. Be sure to press the [-l] button to leave the Demo Play mode when you are done listening to the demo songs. -
Page 16: Playing The P-100
Once you’ve set up the P-100 and adjusted the volume level, you’re ready to start making music. The standard mode for playing the P-100 is known as Single mode. In this mode, as its name implies, the P-100 plays only a single voice. - Page 17 Voice polyphony As the table above shows, the P-100 produces 32 notes of polyphonic sound for seven of its voices. For convenience, we will refer to these voices as 32-note voices. The remaining three voices can produce only 16 simultaneous notes. The first voice, PIANO 1, is a stereo voice, created using stereo sampling techniques.
-
Page 18: Using The Reverb Effect
P-100 will automatically switch back to HALL depth 6 when you next select PIANO 1. When you play two voices in Dual or Split modes, the P-100 will apply the main voice reverb type and depth settings to both voices, ignoring any settings which you may have made for the sub voice. -
Page 19: Using The Modulation Effects
[MODULATION] wheel. The procedure for turning this vibrato effect on and off is described on page 38. The P-100 will remember modulation type and depth settings for each of the ten voices. When you play two voices in Dual or Split modes, the P-100 will apply the main voice modulation settings to both voices. ignoring any settings you have made for the sub voice. -
Page 20: Adjusting The Equalization
Adjusting the equalization The P-100’s equalizer works much like the three-band graphic equalizers found on many portable stereo sets. It allows you to adjust the P-100’s output in three frequency ranges, LOW, MIDDLE and HIGH. Slide the slider for each range up to increase the level of output, or down to decrease output in that range. -
Page 21: Dual Mode
Selecting voices in Dual mode In Dual mode, the P-100 sounds two of its voices in response to every note you play. Playing the P-100 in Dual mode is therefore like playing two keyboards at once. You could use this mode, for example, to play a melody with a piano underscored with the sound of strings. -
Page 22: Adjusting The Voice Balance
Adjusting the voice balance The P-100’s Dual mode is a useful feature. However, you may not always want to give the two voices equal emphasis. When playing a piano voice with strings, for example, you might want the strings to be little more than a murmur in the background, adding a delicate nuance to the piano without overwhelming it. -
Page 23: Detuning The Voices
7 produces maxi- mum detune. When you have selected the desired detune setting, release the [DETUNE] button. The P-100 will display the new setting for about a second, then exit the function automatically. DETUNE SETTING +1.56... -
Page 24: Split Mode
Entering Split mode The P-100’s Split mode, like its Dual mode, lets you play two voices at once. In this mode. however. the two voices are played independently rather than together. You could use this mode, for example. to play the vibes with your right hand and a wood bass with your left. -
Page 25: Selecting Voices In Split Mode
The procedure for changing the main voice is exactly the same as that for selecting a voice in Single mode. You can select a Split mode sub voice while the P-100 is in Single or Dual modes, if you wish. If you do so, the P-100. -
Page 26: Changing The Split Point
Imagine, for example, a song arrangement which calls for you to play the vibes with a piano bass line. The P-100’s Split mode can handle this requirement quite well. After the bridge, however, there is a flashy piano solo with sweeping runs that take you from one end of the keyboard to the other. - Page 27 What about the split point key? The key that you press to select the split point will always be included in the main keyboard area. Thus, if you select F4 as the split point and then set the main keyboard below this point, the main voice will play all notes up to and including F4, and the sub voice will play any notes from F#4 on.
-
Page 28: Adjusting The Keyboard
Electronic pianos have one advantage over their acoustic counterparts: they are much easier to tune. You can fine-tune the P-100’s keyboard upward or downward within a range of about 100 cents. You can set the tuning to a value from –64 to 63. Each step raises or lowers the tuning by about 0.78 cents. -
Page 29: Selecting A Velocity Curve
Although the P-100’s keyboard feels like an acoustic piano keyboard, it works on quite different principles. Since the P-100 is an electronic piano, it must determine how fast a key is being pressed — that is, the velocity of a note — in order to know how hard the note was played. -
Page 30: Using The Transpose Function
Using the transpose function The P-100 has a transpose function which makes transposing between keys easy. To use this function, you may want to first set the transpose amount using the procedure described on the following page. Once you have set the transpose amount to the desired value, you can turn the transpose function on and off as needed using the [TRANSPOSE] button. -
Page 31: Setting The Transpose Amount
Setting the transpose amount The P-100’s default main voice transpose setting is 12. This means the P-100 will transpose the notes you play up an octave after you press the [TRANSPOSE] button to activate the transpose function. When you have set the transpose amount to the desired value, release the [TRANSPOSE] button. The P-100 will display the new value for about a second, then show the number of the currently selected voice. -
Page 32: Transposing In Dual And Split Modes
[TRANSPOSE] and [SPLIT] buttons rather than just the [TRANSPOSE] button. Use the operation below while the P-100 is in Dual mode to change the setting for the Dual mode sub voice, or in Split mode to change the setting for the Split mode sub voice. - Page 33 Why transpose the sub voice? This function may not seem very necessary at first glance. After all, transposing one voice up or down a few semitones while leaving the other untransposed would only complicate playing unnecessarily — unless you want to try sightreading a part written for. say, a saxophone with your right hand and a bass line with your left.
-
Page 34: Midi Keyboard Control Functions
1980s to provide for the communication of data between electronic musical instruments. The MIDI standard allows instruments such as synthesizers, tone generators, and drum machines — not to mention electronic pianos such as the P-100 — to communicate with each other, and to be controlled by sequencers or computers. - Page 35 MIDI terminals: IN, OUT, and THRU. Not all MIDI devices have three MIDI terminals; but most, like the P-100, do. A device with all three termi- nals will receive incoming data through its MIDI IN terminal, and output its own data through the MIDI OUT terminal.
-
Page 36: The P-100'S Midi Configuration
The P-100’s MIDI configuration Now that we have gone over the basic concepts involved, you might be interested to take a look at the way the P-100 uses MIDI to produce music. We mentioned on the previous page that the P-100 consists of a MIDI keyboard connected to a multitimbral tone generator, which is capable of producing two timbres at once. - Page 37 MIDI channel (Tch+l). Since the P-100 thus outputs its messages on two MIDI channels in Split mode, you can use the P-100’s keyboard in this mode to control two of an external tone generator’s timbres.
-
Page 38: Enabling Midi Transmission
The LED above the [MIDI] button remains lit while this function is enabled to remind you that the P-100 is transmitting. Should you wish to turn this function off for some reason, there is an easy way to do so: just press the [MIDI] button. -
Page 39: Using The Midi Transpose Function
This at least ensures that any external tone generators will at least be playing the same notes as the P-100’s internal voices. If you want your external tone generator to play at a different octave, though. -
Page 40: Midi Utility Mode Settings
MIDI Utility mode In addition to its Single, Dual, Split, and Demo Play modes, the P-100 has a MIDI Utility mode which allows you to make a number of settings related to MIDI control functions. Below is a listing of the settings available in this mode:... -
Page 41: Transmit And Receive Channels
Transmit and receive channels This is actually a group of three settings. In addition to the MIDI transmit and receive channels described on page 25, the P-100 lets you specify a separate channel to receive program change messages. 1. Enter MIDI Utility mode. - Page 42 Program change receive channel The P-100 can be set to receive program change messages on a channel other than the normal receive channel. When you select a channel from 1 through 16, or “all”, as the program change receive channel, the P-100 will receive program change messages on the selected channel only.
-
Page 43: Local Control
Local control This setting allows you to disconnect the P-100’s keyboard from its internal tone generator. It is usually turned on so that the P-100 will function normally, producing music in response to the notes you play on the keyboard. When you turn the local control off, the internal tone generator will no longer respond to notes you play. -
Page 44: Midi Merge
When the MIDI merge function is turned on, any MIDI data received at the MIDI IN terminal will be echoed through the MIDI OUT terminal together with data transmitted by the P-100, allowing instruments receiving this data to be controlled by both the P-100 and other devices connected to the P-100’s MIDI IN terminal. -
Page 45: Bulk Protect
The bulk protect function protects the P-100’s internal settings against incoming system exclusive messages. When this function is turned on, as is normally the case, the P-100 will not accept any incoming bulk dump or param- eter change messages. When it is set to bulk (“bul”), the P-100 will accept parameter change messages, but protect against bulk messages. -
Page 46: Pitch Bend Range
Pitch bend range This setting lets you specify how far the pitch of sounds produced by the P-100 will bend when you roll the [PITCH] wheel all the way in either direction. The range you set here applies only to the P-100’s internal voices. External tone generators may interpret pitch bend messages from the P-100 in a different manner, depending on their own internal settings. -
Page 47: Modulation Wheel
P-100’s [MODULATION] wheel to send modulation messages to an external tone generator, which will naturally interpret these messages according to its own internal settings. The modulation wheel setting does not affect the P-100’s PIANO 1 and PIANO 2 voices, as the vibrato effect is turned off at all times for these voices. -
Page 48: Assignable Controllers
0 and 32, which are used for bank select messages). If you purchase an optional foot controller (Yamaha FC7), you can assign a function to it as well. In addition to the full range of functions mentioned above, the foot controller can be assigned as an overall volume control. You can then use it instead of the [VOLUME] slider, leaving your hands free to do other things. -
Page 49: Program Change Transmit Table
Thus, an external tone generator connected to the P-100 will receive messages selecting program 1 when you press the [PIANO l] button, program 2 when you press the [PIANO 2] button, and so on. - Page 50 Whenever you press a [VOICE/UTILITY] button to select a voice (other than the Dual mode sub voice), the P-100 will check the program change transmit table to determine whether a program change number has been assigned to that button. If so, and if MIDI transmission is enabled, it will transmit the program change number in question from the MIDI out terminal.
-
Page 51: Program Change Receive Table
Program change receive table The P-100 is also capable of changing its current voice selection in response to program change messages it receives from external devices. Before it left the Yamaha factory, your P-100 was set so that program change numbers 1 through 10 will select the corresponding voices: program change 1 will select PIANO 1, program change 2 will select PIANO 2, and so on. - Page 52 If so, the main voice will automatically switch to the voice indicated by the program change receive table. (If the P-100 is in Dual mode, this will cause it to shift to Single mode.) If the program change function has been turned off for that number, the message will simply be...
-
Page 53: Special Operations
To prepare the P-100 to accept a bulk dump, first turn the bulk protect function off using the procedure described on page 36. Also, the P-100 must be set to receive on the channel that was set as the transmit channel when the P-100 dumped the data in question. -
Page 54: Memory Initialization
After you’ve been using the P-100 for a while, you may find yourself wishing that you could erase all your settings and start again with a fresh slate. After all, the P-100 lets you make enough settings that changing the majority of them can be a time-consuming process. -
Page 55: System Applications
The P-100 will send program change messages on either of these channels each time you press one of the [VOICE/UTILITY] buttons to select a new main or sub voice. The P-100 is thus able to select up to ten of the slave’s voices or multiple-voice selections (such as the TG77’s multis), depending on your program change transmit table... -
Page 56: Using The P-100 With Another Midi Keyboard
To make full use of the more powerful control capabilities of a MIDI synthesizer like the SY99, you will probably want to connect it to the P-100 with two MIDI cables: one to carry data from the P-100 to the synthesizer, and another to carry it in the other direction. -
Page 57: Using The P-100 In An Extended Midi System
To sum this system up, then, all three instruments, will respond when you play the SY99, and only two will respond when you play the P-100. By turning off some of the timbres in the SY99 and the TG77, you could come up with a... -
Page 58: Using The P-100 With A Midi Data Recorder
With this arrangement, you would use the P-100’s bulk dump procedure to send its settings to the MDF2, which would record this data in MDR mode. You could then transmit the data back to the P-100 at any time, as long as the bulk protect function is turned off. -
Page 59: Error Messages
Whenever a problem occurs, the P-100 will display an error message to alert you to the nature of the trouble. The meanings of the error messages are described below, together with the action you should take in response to each. -
Page 60: Specifications
Keyboard: 88-key (A-1 to C7) Action Effect, velocity sensitive Tone Generator: Tone generation method: AWM Voices: PIANO 1, PIANO 2, E.PIANO 1, E.PIANO 2, CLAVINOVA TONE, Maximum simultaneous notes: 32/16 Built-in DSP Effects: Digital reverb: Modulation: Equalizer: Pitch control range: Tuning: Transposition: Controls:... -
Page 61: Index
FOOT CONTROLLER jack 4 Foot pedals, connection 5, jacks 4 Initialization 45 INDEX Keyboard 3, main and sub areas 15, P-100 configrua- tion 27-28, split point 17, MIDI system applica- tions 46-48, tuning 19, velocity curve 20 LED display 2... - Page 62 40-41, transmit channel setting 32-33 Transpose, main voice 22, MIDI 30, sub voice 23, turning function on and off 21 TRANSPOSE button 2 Tone generator, P-100 configuration 27-28, system applications 46-48 TUNE button 2 Tuning 19 Upper panel 2...
-
Page 63: Midi Data Format
The transmitted note number value can be adjusted within the range from 0 (C-2) to 127 (G8) using the MIDI Tch and Tch+l transpose settings. 2.1.2 CONTROL CHANGE The P-100’s controllers transmit MIDI data as described in the table below. 2.1.3 PITCH BEND Pitch bend messages are transmitted with 7-bit resolution. - Page 64 Under this condition, pro- gram change messages 000 through 009 will select voices 1 through 10 as the main voice. If the P-100 is in Dual mode. the reception of a program change message will cause it to enter Single mode.
- Page 65 2 . Program change transmit table dumps 3 . Program change receive table bulk dumps The P-100 will transmit each of these three bulk dumps. in sequence, when the MIDI. REVERB. and MODULATION buttons arc pressed simultaneously. It can receive any one of the three bulk dump types independently of the others.
- Page 66 <TABLE l-3 > MIDI PARAMETER CHANGE TABLE (PROGRAM CHANGE RECEIVE TABLE) $F0, $43, $1n, $2A, $0F, $00, $00, N2, $00, V2, $F7 Notes: = device number (ie., transmit/receive table) N 2 = parameter number V2 = parameter value Note: The indicated parameter is considered to be off when any value greater than 9 is received for V2.
-
Page 67: Midi Implementation Chart
YAMAHA [ Electronic Piano P-100 Model P-100 Function Basic Default Channel Changed Default Messages Mode Altered Note Number True voice Velocity Note ON Note OFF After Key's Touch Ch's Pitch Bender Control Change 1 - 120 Prog Change True #... - Page 68 For details of products, please contact your nearest Yamaha or the authorized distributor listed below. Pour plus de détails sur les produits, veuillez-vous adresser à Yamaha ou au distributeur le plus proche de vous figurant dans la liste suivante. NORTH AMERICA CANADA Yamaha Canada Music Ltd.
Need help?
Do you have a question about the P-100 and is the answer not in the manual?
Questions and answers