Table of Contents
Advertisement
Advertisement
Table of Contents

Related Manuals for Zanussi Z716WT83BI


Summary of Contents for Zanussi Z716WT83BI
- Page 1 User Manual GETTING STARTED? EASY. Z716WT83BI EN User Manual Washer Dryer...
-
Page 2: Safety Information
VISIT OUR WEBSITE TO: Get usage advice, brochures, trouble shooter, service and repair information: www.zanussi.com/support SAFETY INFORMATION Before the installation and use of the appliance, carefully read the supplied instructions. The manufacturer is not responsible for any injuries or damage that are the result of incorrect installation or usage. - Page 3 This appliance is intended to be used in household and similar • applications such as: staff kitchen areas in shops, offices and other working – environments; by clients in hotels, motels, bed & breakfast and other – residential type environments; areas for communal use in blocks of flats or in launderettes.
- Page 4 If the mains power supply cable is damaged, it must be • replaced by the manufacturer, its Authorised Service Centre or similarly qualified persons to avoid an electrical hazard. Wipe away lint or packaging debris that has accumulated • around the appliance. Items that have been soiled with substances such as vegetable •...
-
Page 5: Safety Instructions
SAFETY INSTRUCTIONS INSTALLATION WATER CONNECTION • Do not cause damage to the water hoses. The installation must comply with • Before connection to new pipes, pipes not used relevant national regulations. for a long time, where repair work has been carried out or new devices fitted (water meters, •... -
Page 6: Product Description
• To replace the internal lighting, contact the sensors, software and firmware including reset Authorised Service Centre. software, door, door hinge and seals, other seals, door locking assembly, plastic peripherals SERVICE such as detergent dispensers. Please note that some of these spare parts are only available to •... -
Page 7: Technical Data
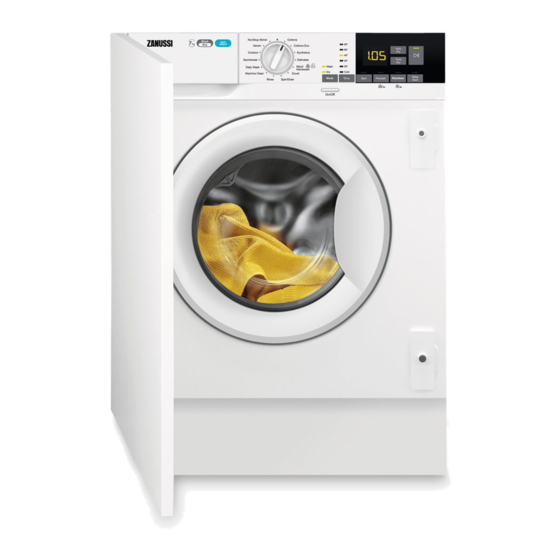
The rating plate reports the model name (A), product number (B), electrical ratings (C) and serial number (D). Mod. xxxxxxxxx Prod.No. 910000000 00 000V ~ 00Hz 0000 W 00000000 TECHNICAL DATA Dimension Width/ Height/ Total depth 59.6 cm /81.9 cm /55.3 cm Electrical connection Voltage 230-240 V... - Page 8 THE APPLIANCE IS EQUIPPED WITH ... UNPACKING WARNING! Use the gloves. WARNING! Remove all the packaging and the transit bolts before installing the appliance. 1. Put two polystyrene packaging elements on the floor under the appliance. WARNING! It is strongly recom- mended that this action is carries out by two persons.
-
Page 9: Installation On Suspended Flooring
4. Return the appliance in vertical position and remove the socket polystyrene protection. 5. Remove the power supply cable and the drain hose from the hose holders. It is possible to see water flowing from the drain hose. This is due to the testing with water of the appli- ance in factory. -
Page 10: Positioning And Levelling
If possible, install the appliance where the floor is more stable. POSITIONING AND LEVELLING 1. Install the appliance on a flat hard floor. WARNING! Make sure that carpets do not stop the air circulation below the ap- pliance. Bring the appliance near the furniture recess before levelling it. - Page 11 The inlet hose 1. Remove the inlet hose from inside the drum. 2. To connect the water inlet hose towards the prop- er direction and with the proper inclination, check the position of the water tap before connecting it to the back of the appliance.
- Page 12 To a stand pipe with vent-hole Directly into a drain pipe at a height of not less than Ø 40 mm 60 cm (23.6”) and not more than 100 cm (39.3”). The end of the drain hose must always be ventilated , i.e.
- Page 13 If hoses run behind the appliance, make 596 mm 553 mm sure that nothing closes the small re- cess indicated with the measures 50 x 50 mm. 819 mm 50 mm 50 mm 140 mm 76 mm The appliance is also equipped with an adhesive sponge pad H that you can find inside the drum.
- Page 14 1. Remove the screws of the top cover on the rear of the appliance and install the anti-tilting device as shown in the drawing. 2. Adjust the anti-tilting device so that the distance from the counter is 10mm. Loosen the nut counter- ~10mm clockwise with a 3mm wrench.
- Page 15 Reversibility of the cupboard door Carry out the cupboard door reversibility before the appliance is built in completely. If the cupboard door has to be opened from left to right, invert the position of the hinge supports M with the magnetic plate N and lower plate O. Make sure that the plate with magnet is on the upper position.
- Page 16 Set the position of the lower hole respecting dimen- sions and distances shown in the drawing (449 16-22 mm mm). Countersink the holes. Ø 35 mm 12,5 - 14 mm 22±1,5 mm 595-598 mm Hinges To mount the hinges it is necessary to drill two holes (dia.
- Page 17 Counter-magnet The appliance is pre set for a magnetic closure. For a correct closure: 1. Position the screw C and the counter-magnet D on the magnetic plate N. Lean the cupboard door against the screw until it leaves a mark. 2.
-
Page 18: Control Panel Description
CONTROL PANEL CONTROL PANEL DESCRIPTION Eco 40-60 Wool/ Handwash Prewash touch button and permanent Extra The permanent options are set by Rinse option holding pressed the relative button for Spin touch button at least 3 seconds. Temp. touch button Programme dial Mode touch button: Display •... - Page 19 DISPLAY Door locked indicator. The digital indicator can show: • Programme duration (e. g. , washing and/or drying phase). • Delay time (e. g. • Cycle end ( • Warning code (e.g. • Error indicator ( Flextime indicator. Extra Rinse indicator. The spin area: Spin speed indicator No Spin indicator.
-
Page 20: Dial And Buttons
DIAL AND BUTTONS INTRODUCTION the selected washing programme. Set this option for very delicate fabrics. The rinses phase The options/functions are not available uses more water for some washing programmes with all washing programmes. Check • Activate the Rinse Hold option. -
Page 21: Child Lock
FLEXTIME CHILD LOCK With this option you can reduce the programme With this option you can prevent children from duration depending on the load size and the degree playing with the control panel. of soiling. To activate/deactivate this option, hold the When you set a washing programme, the display Flextime button pressed until the indicator shows the default duration and... -
Page 22: Programme Chart
PROGRAMMES PROGRAMME CHART Reference Programme Maxi- spin speed Programme description Default temperature Spin speed (Type of load and level of soiling) Temperature range load range 1600 rpm 7 kg 1600 rpm Eco 40-60 (Wash - 400 rpm only mode) 40 °C 60 °C - 30 °C White cotton and fast-coloured cotton. - Page 23 Reference Programme Maxi- spin speed Programme description Default temperature Spin speed (Type of load and level of soiling) Temperature range load range 1600 rpm 7 kg All fabrics, except woollens and delicate fab- (1600 - rics. To spin the laundry and to drain the water in Spin/Drain 400 rpm) the drum.
- Page 24 Reference Programme Maxi- spin speed Programme description Default temperature Spin speed (Type of load and level of soiling) Temperature range load range 1200 rpm 2 kg Do not use fabric softener and make (1200- Outdoor sure that there is no softener residue in 400 rpm) 30 °C the detergent dispenser.
- Page 25 Reference Programme Maxi- spin speed Programme description Default temperature Spin speed (Type of load and level of soiling) Temperature range load range Reset position. The display shows dashes only. 1) According to Commission Regulation EU 2019/2023. This programme at default temperature and spin speed, in washing only mode, with rated capacity 7 kg is able to clean normally soiled cotton laundry declared to be washable at 40 °C or 60 °C, together in the same cycle.
- Page 26 Programme ■ ■ ■ ■ ■ Delicates ■ ■ ■ ■ Wool/Handwash ■ ■ ■ Duvet ■ ■ ■ Spin/Drain ■ ■ ■ ■ ■ Rinse ■ ■ ■ Machine Clean ■ ■ ■ 20min 3kg ■ ■ ■ ■ ■...
-
Page 27: Automatic Drying
Universal pow- Liquid Univer- Liquid for col- Delicates wool- Programme Special oureds lens ▲ ▲ Delicates Wool/Hand- ▲ ▲ wash ▲ ▲ Duvet ▲ ▲ 20min 3kg ▲ ▲ ▲ Sportswear ▲ ▲ Outdoor ▲ ▲ ▲ Denim NonStop ▲ ▲... -
Page 28: Timed Drying
Dryness Level Type of fabric Load Cottons and Linen up to 4 kg (bathrobes, bath towels, etc) Cupboard Dry For items to be stored Synthetics and mixed fab- up to 3 kg rics (jumpers, blouses, underwear, household and bed linen) Delicate fabrics up to 2 kg (acrylics, viscose and delicate... -
Page 29: Acoustic Signals
Spin Load Suggested du- Dryness Level Type of fabric speed (kg) ration (mins) (rpm) Cupboard Dry Cottons and Linen 1600 160 - 180 For items to be (bathrobes, bath towels, etc) 1600 100 - 110 stored 1600 55 - 65 Synthetics and mixed fabrics 1200 135 - 150... -
Page 30: Before First Use
BEFORE FIRST USE 1. Make sure that the electrical power is available 4. Set and start a programme for cotton at the and the water tap is open. highest temperature without any laundry in the 2. Pour 2 litres of water into the detergent drum. -
Page 31: Setting A Programme
CHECK THE POSITION OF THE DETERGENT SETTING A PROGRAMME FLAP 1. Turn the programme dial to select the desired 1. Pull out the detergent dispenser until it stops. washing programme. The indicator of Mode - Wash button illuminates. The indicator of the Start/Pause button flashes. -
Page 32: Interrupting A Programme And Changing The Options
Changing the delay start after the countdown INTERRUPTING A PROGRAMME AND has started CHANGING THE OPTIONS To change the delay start: When the programme is running, you can change only some options: 1. Touch the Start/Pause button to pause the appliance. -
Page 33: Daily Use - Washing & Drying
END OF THE PROGRAMME 1. If necessary, touch the Spin button to decrease the spin speed proposed by the appliance. When the programme has finished, the appliance stops automatically. The acoustic signals operate (if 2. Press the Start/Pause button: the appliance drains the water and spins. -
Page 34: Daily Use - Drying Only
Non-automatic wash&dry programmes In the display the door locked indicator comes In some washing programmes, you can combine Mode - Wash and Mode - Dry for running a The display also shows the remaining programme complete wash&dry programme. time. Proceed as follows: WASHING AND TIMED DRYING 1. -
Page 35: Fluff In The Fabrics
4. Tap on the Mode button twice to perform level indicator goes off and the indicator drying only. The indicator of Mode - Dry button comes on. illuminates and the indicator of Mode - Wash Each time you tap on this button the time value button goes off. -
Page 36: Hints And Tips
HINTS AND TIPS WARNING! Refer to Safety chapters. THE LAUNDRY LOAD • Divide the laundry into: white, coloured, synthetics, delicates and wool. • Follow the washing instructions on the laundry care labels. • Do not wash white and coloured items together. •... - Page 37 • Follow the instructions that you find on Use the correct quantity of water softener. Follow packaging of the detergents or other treatments the instructions that you find on the packaging of without exceeding the indicated maximum level the product. PREPARE THE DRYING CYCLE •...
-
Page 38: Care And Cleaning
GENERAL TIPS 1. Use fabric conditioner in the washing cycle. 2. Use special fabric conditioner for tumble Refer to the «Drying programmes» table to find the dryers. average drying times. When the drying programme is completed remove Experience will help you to dry the laundry better. the laundry promptly. -
Page 39: Cleaning The Drum
the detergent dispenser drawer, once in a while Refer to "Cleaning the drum" carry out the following cleaning procedure: paragraph. 1. Open the drawer. Press the catch downwards as indicated in the picture and pull it out. DOOR SEAL WITH DOUBLE LIP TRAP This appliance is designed with a self cleaning draining system, allowing light fluff fibers that fall off the clothes to be drained out with the water. -
Page 40: Cleaning The Drain Pump
without any clothes in the drum. Regularly check the drain pump filter and make sure that it is clean. Clean the drain pump if: • The appliance does not drain the water. • The drum does not turn. • The appliance makes an unusual noise because of the blockage of the drain pump. - Page 41 180˚ 3. Turn the filter 180 degrees in anti-clockwise direc- tion to open it, without removing. Let the water flow out. 4. When the bowl is full of water, turn the filter back and empty the container. 5. Repeat the steps 3 and 4 until the water stops to flow out.
-
Page 42: Cleaning The Inlet Hose And The Valve Filter
9. Put the filter back into the special guides by turning it clockwise. Make sure that you tighten the filter cor- rectly to prevent leakages. 10. Close the pump cover. When you drain the water with the emergency drain procedure, you must activate the drain system again: 1. -
Page 43: Troubleshooting
EMERGENCY DRAIN 1. Disconnect the mains plug from the mains socket. If the appliance cannot drain the water, carry out 2. Close the water tap. the same procedure, described in 'Cleaning the 3. Put the two ends of the inlet hose in a drain pump' paragraph. - Page 44 • Make sure that the water tap is open. • Make sure that the pressure of the water supply is not too low. For this The appliance does not information, contact your local water authority. fill with water properly. • Make sure that the water tap is not clogged.
- Page 45 Problem Possible solution • Set the spin programme. The spin phase does • Make sure that the drain filter is not clogged. Clean the filter, if neces- not operate or the sary. Refer to "Care and cleaning". washing cycle lasts lon- •...
-
Page 46: Emergency Door Opening
Problem Possible solution The fabrics washed in the previous cycle released fluff of a different col- our: The laundry is full of dif- • The drying phase helps to eliminate some fluff. ferent colours fluff. • Clean the clothes with a fluff remover. In case of an excessive amount of fluff in the drum run the special pro- gramme to clean it (refer to “Fluff in the fabrics"... -
Page 47: Consumption Values
CONSUMPTION VALUES INTRODUCTION This user manual reports two different tables in order to favour a gradual passage from a regulation to the other: • Directive 96/60/EC, valid up to 28th of February 2021, is rela- ted to an energy label reporting the Energy Efficiency classes from A to G for washing and drying cycles. - Page 48 ACCORDING TO COMMISSION REGULATION EU 2019/2023 Washing only Eco 40-60 pro- Litres h:mm °C gramme Full load 0.965 3:20 1551 Half load 0.630 2:30 1551 Quarter load 0.358 2:30 1551 1) Maximum spin speed. Wash and dry cycle Eco 40-60 pro- gramme and Cup- Litres h:mm...
-
Page 49: Environmental Concerns
Programme Litres h:mm °C Cottons 1.60 3:45 1600 90°C Cottons 1.05 3:30 1600 60°C Cottons 0.25 2:50 1600 20°C Synthetics 0.65 2:20 1200 40°C Delicates 0.30 00:50 1200 30°C Wool 0.25 1:05 1200 30°C 1) Reference indicator of the spin speed. 2) Suitable for washing heavily soiled textiles. - Page 52 WWW.ZANUSSI.COM/SHOP...