Table of Contents
Advertisement
Available languages
Available languages
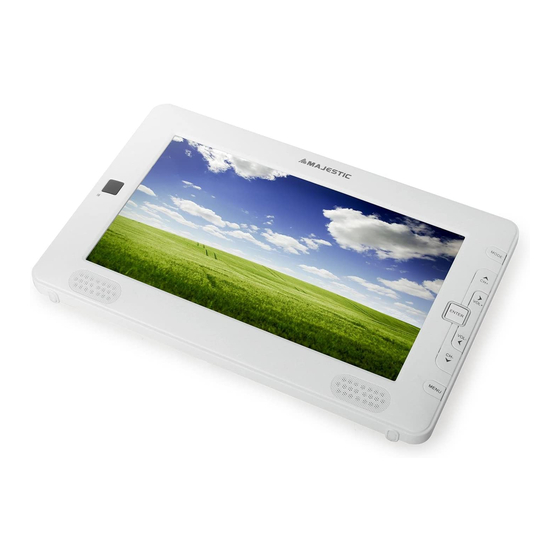
TVD 934N TFT/USB/REC
TELEVISORE PORTATILE SCHERMO 9" TFT LCD E BATTERIA INTERNA RICARICABILE
SINTONIZZATORE DIGITALE TERRESTRE CON INGRESSO USB/Micro SD ETELECOMANDO
La New Majestic SpA dichiara che il prodotto rispondente al D.M. 548 del 28.08.95 ed in particolare a quanto
indicato nell'art. 2 comma 1
Manuale d'istruzioni
Advertisement
Chapters
Table of Contents

Related Manuals for Majestic TVD-934N

Summary of Contents for Majestic TVD-934N
- Page 1 TELEVISORE PORTATILE SCHERMO 9" TFT LCD E BATTERIA INTERNA RICARICABILE SINTONIZZATORE DIGITALE TERRESTRE CON INGRESSO USB/Micro SD ETELECOMANDO La New Majestic SpA dichiara che il prodotto rispondente al D.M. 548 del 28.08.95 ed in particolare a quanto indicato nell'art. 2 comma 1...
- Page 3 Precauzioni Per prevenire la scossa elettrica o il pericolo di incendio, non esporre l’apparecchio all’umidità o alla pioggia. Attenzione: non aprire il prodotto, rivolgersi a personale qualificato autorizzato. Questo simbolo avverte l’utente della presenza di voltaggio pericoloso che potrebbe costituire rischio di scossa elettrica alle persone. Questo simbolo avverte l’utente della presenza di importanti istruzioni per la manutenzione.
- Page 4 Precauzioni Il prodotto funziona con adattatore Leggere attentamente questo manuale AC100-240VA 50/60Hz DC 9V 1A prima di installare e utilizzare l’apparecchio. Controllare regolarmente il collegamento. In caso di rotture o mancanza di isolamento, chiamare un tecnico Posizionare il cavo di alimentazione specializzato.
- Page 5 Precauzioni Non posizionare oggetti pesanti sull’unità. Non far cadere liquidi sul prodotto potrebbe causare incendi o scossa. Non riparare l’apparecchio da soli, l’apertura o la rimozione del coperchio potrebbe esporvi a voltaggio pericoloso o altri pericoli; rivolgersi al personale qualificato. Scollegare l’apparecchio e rivolgersi al Non posizionare l’unità...
- Page 6 Precauzioni TELECOMANDO Puntare il telecomando direttamente al ricevitore sull’apparecchio. Non far cadere in terra il telecomando oppure colpirlo con altri oggetti. Non posizionare il telecomando in un luogo caldo e umido. Non far entrare liquidi all’interno. Non aprire il telecomando. Distanza: circa 7m dal ricevitore.
- Page 7 Caratteristiche Schermo TFT LCD 9” Rapporto immagine 16:9 o 4:3. Altoparlante incorporato, presa cuffia. Tre tipi di alimentazione: adattatore AC 100 – 240V 50/60Hz --- DC 9V 1A adattatore 12V da macchina (presa accendisigari). batteria ricaricabile Li-ion 7,4V – 1600mAh La batteria ricaricabile a piena carica può...
-
Page 8: Table Of Contents
Contenuti Quick Installation Interfaccia operazioni ................2. Collegamenti sistema................Operazioni base 3. Pagina di benvenuto ................4. Modifica canali..................5. Installazione..................6. Impostazioni sistema ................9-13 7. Strumenti ....................13-16 8. Gioco..................... 9. Registrazione..................16-18 10. Funzioni....................18-22 11. Risoluzione dei problemi..............12. -
Page 9: Interfaccia Operazioni
Interfaccia operazioni Interfaccia unità principale Mode (DVB-T / AV IN) CH+: funzione direzione in condizioni di impostazione,cambio canale su in modalità DVBT Tasto volume + Enter: lista canali (DVB-T) / confermare Tasto volume - CH-: funzione direzione in condizioni di impostazione,cambio canale giù... - Page 10 Interfaccia operazioni Interfaccia di collegamento Ingresso MicroSD CARD Tasto ON/OFF (accensione Ingresso DC 9V e spegnimento) Uscita cuffia presa Ingresso USB da 3,5mm Uscita AV Ingresso AV Presa Antenna RF 75 ohms...
- Page 11 Interfaccia operazioni Interfaccia telecomando 1. Tasto Mode (DVB-T/AV IN) 15. Ritorno veloce 2. Tasti numero 16. Avanzamento veloce/tasto verde 3. Menu 17. Tasto mute 4. Canale su 18. Recall 5. Volume giù 19. Uscita da menu 6. OK/PLAY: confermare lista canali 20.
-
Page 12: Collegamenti Sistema
Collegamenti sistema Collegamento ingresso/uscita AV e cuffie Collegamento AV Nota: spegnere tutti i dispositivi prima del collegamento. Come da figura, usare il cavo AV per collegare il televisore portatile alla TV, o altri dispositivi. Accendere il televisore portatile e gli altri dispositivi collegati. Premere il tasto DVBT/AV sull’apparecchio o sul telecomando per entrare in modalità... -
Page 13: Operazioni Base
Operazioni base Pagina di benvenuto 1. premere il tasto su/giù per selezionare le pagine del Quando si accende il prodotto per la prima volta, verrà menu tra Modifica Canale, Installazione, Configurazione visualizzata la pagina di benvenuto come segue: Sistema, Strumenti, Gioco e Registrazione. 2. - Page 14 Operazioni base 5.1.2 Blocca (rosso) 1. muovere la selezione premendo i tasti canale su/giù poi premere il tasto OK per visualizzare un’anteprima 1. premere il tasto rosso per entrare in modalità “blocca”. del canale selezionato nella finestra. 2. premere i tasti su/giù per selezionare il canale da bloccare, premere OK apparirà...
- Page 15 Operazioni base 2. premere i tasti su/giù per muovere il canale selezionato sulla posizione desiderata. Premere OK per confermare lo spostamento. 3. solo in modalità LCN OFF è possibile spostare il canale sul numero desiderato. 5.1.5 Modifica (compil / Edit) (azzurro) 1.
-
Page 16: Installazione
Operazioni base 5.3 Cancella tutto 1. premere il tasto su/giù per selezionare le pagine del menu tra Scansione Automatica, Ricerca Canali, LCN Premere il tasto OK, apparirà un messaggio di (ordinamento automatico dei canali). attenzione che chiede se cancellare tutti i servizi 2. - Page 17 Operazioni base 6.2 Ricerca canali manuale Quando si entra nel menu Ricerca canali, apparirà come segue: 1. ci sono due modalità di scansione: per canale o per frequenza. Se viene effettuata la scansione “per canale”, le opzioni 6.3 LCN (Logical Channel Numbering) “ricerca banda”...
- Page 18 Operazioni base Premere il tasto su/giù per selezionare le pagine del menu 3. audio secondario: se il canale contiene la traccia audio tra Lingua, Sistema TV, Impostazioni ora locale, corrispondente all’audio secondario invece di quello Impostazioni timer, Sicurezza bambini, Impostazioni OSD, principale, il sistema riprodurrà...
- Page 19 Operazioni base 1. regione: selezionare la nazione in cui vi trovate. 2. Uso GMT : scegliere l’impostazione tra per regione/definizione utente/off. 3. GMT Offset: valido solo quando Uso GMT è impostato su definizione utente. Premere i tasti sinistra/destra per commutare la gamma tra - 11:30 e + 12:00 con l’aumento di mezz’ora per volta.
- Page 20 Operazioni base Premere il tasto su/giù per selezionare un timer, poi premere OK per aprire ed impostare il menu timer. Modo orologio: spento, una volta, giornaliero Servizio: impostare su canale per l’inizio di un programma sul canale desiderato Impostare su registrare per programmare una registrazione sul canale desiderato 1.
- Page 21 Operazioni base 4. premere il tasto exit per uscire dal menu impostazioni OSD. 1. premere il tasto giallo per passare da maiuscola a minuscola. 2. premere il tasto rosso per cancellare il carattere sul cursore. 3. premere il tasto blu per salvare le modifiche. 8.
-
Page 22: Strumenti
Operazioni base 1. all code: è possibile effettuare l’aggiornamento del file completo nel flash ROM. Rinominare il file nel formato “all*.bin”, premere il tasto OK per iniziare l’aggiornamento da USB. 2. main code: è possibile effettuare l’aggiornamento di una parte del codice principale. Confermare che il formato del file di aggiornamento sia “mcd*.bin”. - Page 23 Operazioni base Music 1st: solo files musicali Image 1st: solo files immagine INFO: impostazione dello slide show immagini, seguire le indicazioni a video. Tasto blu: per commutare tra le 3 diverse modalità di ripetizione fornite come segue: ripeti cartella Quando sono inseriti due dispositivi e precisamente riproduzione casuale cartella dispositivo USB e Micro SD, quando si entra in modalità...
-
Page 24: Gioco
Operazioni base 8.5 Rimozione sicura dell’USB che richiede la password, 0000 default. 3. premere il tasto su/giù e OK per selezionare le voci Prima di rimuovere il dispositivo USB o Micro SD, posizionarsi nel menu. su rimozione sicura e confermare la rimozione del dispositivo 4. - Page 25 Operazioni base 2. se volete annullare l’operazione, premere ancora il tasto blu per togliere il contrassegno. 3. quando si esce dal menu record manager, tutti i canali contrassegnati verranno cancellati. 10.1.3 Rinomina 1. premere il tasto rosso per rinominare il programma evidenziato, apparirà...
-
Page 26: Registrazione
Operazioni base Nota: timeshifting/registrazione saranno disponibili solo 1. premere il tasto Play/Pause per visualizzare l’OSD del timeshift. quando un dispositivo USB o HDD sono collegati al sistema 2. premere i tasti sinistra/destra per muovere il cursore a e la velocità di lettura/scrittura è sufficientemente alta. destra o sinistra. - Page 27 Operazioni base 3. nella finestra “FAV group X”, muovere la selezione premendo i tasti canale su/giù e premere OK per selezionare i canali preferiti. Premere i tasti pagina su/giù per cambiare pagina. 11.6 Mute 1. premere il tasto MUTE per togliere il suono e lo schermo visualizza la scritta MUTE.
- Page 28 Operazioni base 5. premere il tasto “exit” per uscire dalla finestra corrente. 2. premere il tasto OK per vedere le informazioni dettagliate 6. per uscire dalla funzione Favoriti premere i tasti Vol+ del programma e premere il tasto rosso per cancellare. o –...
- Page 29 Operazioni base 11.11 TEXT 1. premere il tasto TEXT a pieno schermo, è possibile aprire la pagina del televideo sul canale che incorpora le informazioni del televideo. 2. se il canale non ha queste informazioni, sullo schermo verrà visualizzato “no data”. 11.12 Menu Premere il tasto MENU per aprire il menu, uscire dal menu corrente o chiudere la finestra.
- Page 30 Operazioni base 2. premere di nuovo Play/Pausa, l’immagine torna alla riproduzione corrente. 11.18 STOP 1. in modalità time-shift, premere il tasto stop per fermare la riproduzione time-shift e tornare alla posizione precedente. 2. durante la registrazione, premere il tasto stop sarà visualizzata una finestra con il programma in registrazione.
-
Page 31: Risoluzione Dei Problemi
Soluzione Dei Problemi In alcune regioni, il segnale digitale terrestre potrebbe essere debole. Far controllare l’antenna dal vostro antennista di fiducia. Problema Causa possibile Cosa fare NESSUN SEGNALE ANTENNA SCOLLEGATA CONTROLLARE IL ANTENNA DANNEGGIATA COLLEGAMENTO AREA SENZA SEGNALE O CON CONTROLLARE L’ANTENNA SEGNALE SCARSO CONTOLLARE IL SEGNALE... -
Page 32: Specifiche
Specifiche Tecniche TUNER & CANALI CONNETTORE INGRESSO ANTENNA X1 ( TIPO-D, IEC169-2, FEMMINA ) GAMMA DI FREQUENZA 174 MHZ, 230 MHZ (VHF) & 470 MHZ- 862 MHZ (UHF) LARGHEZZA DI BANDA 6/7/8MHz LIVELLO SEGNALE -20 -77 dBm DEMODULATORE COFDM Risoluzione Schermo 800X480 MPEG-2 ISO/IEC13818-1 TRANSPORT STREAM... - Page 33 INFORMAZIONE AGLI UTENTI DI APPARECCHIATURE DOMESTICHE Ai sensi dell’art. 13 del Decreto Legislativo 25 luglio 2005, n. 151 "Attuazione delle Direttive 2011/65/UE, 2002/96/CE e 2003/108/CE, relative alla riduzione dell'uso di sostanze pericolose nelle apparecchiature elettriche ed elettroniche, nonché allo smaltimento dei rifiuti". Il simbolo del cassonetto barrato riportato sull’apparecchiatura o sulla sua confezione indica che il prodotto alla fine della propria vita utile deve essere raccolto separatamente dagli altri rifiuti.
- Page 34 La marcatura “CE” indica che il prodotto è conforme alle Direttive Europee: 2006/95/CE direttiva basso voltaggio 2004/108/CE Direttiva EMC 2011/65/UE Direttiva RoHS Questo prodotto è fornito di adattatore AC/DC conforme alle disposizioni della direttiva Eup 2009/125/CE Regolamento (CE) n° 278/2009...
- Page 35 ENERG IE IA TVD 934N TFT/USB/REC Consumo da spento: 0.17W Risoluzione: 640 x 234 pixels ENERGIA ENEP EIA ENERGIJA ENERGY ENERGIE ENERGI kWh/annum 22.9 inch 2010/1062 2011...
- Page 36 TVD 934N TFT/USB/REC PORTABLE 9" TFT LCD TV WITH BUILT-IN RECHARGEABLE BATTERY DVB-T DECODER WITH USB/Micro SD INPUT USER MANUAL ENGLISH...
- Page 38 Point for attention Precautions To prevent electric shock or fire hazard do not expose the unit to rain or moisture. Warning To avoid electric shock or fire hazard,do not open the cabinet,refer servicing to qualified person only. This symbol is intended to alert the user to the presence of uninsulated “dangerous voltage”within the product’s enclosure that may be of sufficient magnitude to constitute a risk of electric shock to persons.
- Page 39 Point for attention The power requirement of this unit is Please read this safety&operation 100~240VAC,50Hz/60Hz, DC 9V 1A manual before you install and use the unit,and please follow the instruction. Pay attention to warning and do follow them. Check the connection reguarly.If any rupture of failure in insulation,call for Route the power cord so that it is not a maintenance man to replace them.
- Page 40 Point for attention Never place the unit near or over Do not repair the unit yourself,opening or removing the cover may expose you to such objects:for example,radiator, heat register,stove or other heat dangerous voltage or other hazards, refer all servicing to qualified service sources(including amplifier).
- Page 41 Point for attention REMOTE FUNCTIONS Aim the remote directly at the receiver on the unit while operating. Do not drop the remote control on the floor or impact any other object. Do not place the remote in a hot or moist location. Do not let any water or other liquid fall on the remote.
- Page 42 Features Features 9 inch TFT LCD 16:9 or 4:3 aspect ratio Built in speaker;Earphone output. Three kinds of power supply:Power Adapter,Li-Nion polymer chargeable battery and car adapter. Li-Nion polymer chargeable battery.one fully charged battery can last for 2 hours Intelligent charging function. Use Power Adapter,Li-Nion polymer chargeable battery,you can charge while playing.
- Page 43 CONTENTS Quick Installation 1.OPERATION INTERFACE..............2.SYSTEM CONNECTION..............BASIC OPERATIONS 3.WELCOME PAGE ................4.EDIT CHANNEL..................5.INSTALLATION..................6.SYSTEM SETUP .................. 9-13 7.TOOLS ....................13-16 8.GAME....................9.REC....................... 16-18 10.HOTKEY....................18-23 11.TROUBLESHOOTING................ 12.SPECIFICATIONS................25-26...
-
Page 44: Operation Interface
Operation interface Mainbody operation interface Switch DVB-T/AV button Direction function in setup condition, Channel UP in DVBT mode. Volume up button Channel list /OK(Enter) Volume down button Direction function in setup condition/ Change channels "DOWN" in DVBT mode. Switch MENU button... - Page 45 Operation interface Connection interface Micro SD DC INPUT POWER BUTTON Earphone output AV output AV input RF ANT 75ohm...
- Page 46 Operation interface Remote interface 1. Mode 15. Fast backward/Red button 2. Number keys 16. Fast forward/Green button 3. Menu 17. Switch sound/Soundless button 4. Channel up 18. Recall 5. Left/Volume down 19. Exit 6. OK/Play 20. Right/Volume up 7. Page up 21.
-
Page 47: System Connection
System connection AV input/output and earphone connection AV connect Notice:Please turn off all devices before connection. As per the picture, use the A/V cable to connect the portable TV player to a TV or other devices. Turn on the portable TV player and the other unit to which connection has been made. Press the mode button on the portable TV player or on the remote control to enter in A/V mode. -
Page 48: Basic Operations
Basic Operations Welcome Page 1 Press [Up/Down] key to select menu pages among When turn on the power for the first time, the Edit Channel, Installation, System Setup, Tools, Game, welcome page will be shown as below: and REC. 2 Press [OK] or [Right] key to enter the “Edit Channel”. If Menu Lock is “On”, a dialogue inquires the password, “0000”... - Page 49 Basic Operations 5.1.2 Lock 1 Move the highlight by pressing [Channel Up/Channel Down] key then press [OK] key to preview the 1 Press [Red] key to enter the lock mode. current highlighted program in the preview window. 2 Press [Up/Down] key to move the highlight, and press 2 By pressing [Page Up/Page Down] key to execute [OK] key to display a dialogue to ask you to input the Page Up/Page down function.
- Page 50 Basic Operations 2 By pressing [Up/ down] key to move the selected channel to the position that you want to place. Press [OK] key to confirm. 3 The channel can be moved only if LCN is set to OFF. 5.1.5 Edit 1 Press [Blue] key to open “Edit”...
-
Page 51: Installation
Basic Operations 5.3 Delete All 1 Press [Up/Down] key to select menu pages among Auto scan, Channel scan, Aerial adjustment, LCN. Press [OK] key, it will pop up a warning message 2 Press [OK] or [Right] key to enter the “Installation”. If to inquire you whether delete all services or not . -
Page 52: System Setup
Basic Operations 6.2 Channel Scan When entering to “Channel Scan” menu, a channel scan menu will be shown as below: 1 There are two choices of “Scan Mode,” by channel or by frequency. If you scan by channel, “Scan Band” and “Ch No” 6.3 LCN are available to be adjusted. - Page 53 Basic Operations Press [Up/Down] key to select menu pages among 3 Second Audio: If the channel contains the audio Language,TV system,Local time setting, Time setting track corresponding to the “Second Audio” instead of Parental lock, Osd setting,Favorite. the “First Audio”, system will play the second audio language as default.
- Page 54 Basic Operations 1 Region: Select the country which the user is in. 2 GMT Usage: Set to be By Region/User Define/OFF. 3 GMT Offset: Valid only when the setting of “GMT Usage” is “User Define”. By pressing [Left/Right] keys to switch “GMT Offset” values ranging from -11:30 ~ +12:00, with the increment unit by half an hour.
- Page 55 Basic Operations Press [up/down] key to select a timer, then press [OK] “Yes”, then the password will be asked to play the key to open and adjust the timer menu. channels with lock mark. 3 New Password: used for revising password, by keying in the new password in this item.
-
Page 56: Tools
Basic Operations 4 Press [Exit] key to draw back from the “OSD Setting” menu. 1 Press [Yellow] key to switch whether capital or not. 2 Press [Red] key to delete the char on the cursor. 3 Press [Blue] key to save the modification. 8. - Page 57 Basic Operations 1. All Code: the user can only upgrade whole file to the STB flash ROM. Please rename the new file name to be the format as “all*.bin”, Then Press OK key to start upgrade by USB/Micro SD. 2. Main Code: the user can only upgrade part of the main code.
- Page 58 Basic Operations Music 1st: Music file only; Image 1st: Image file only; INFO: Set up slide show of images. Blue Key: To rotate among the 3 repeat modes provided as below: Repeat Folder The entire Random Folder When two devices are inserted, USB and Micro SD, and enter media player mode, Media Player window will appear, Repeat Single to switch between the two devices press EPG button and...
-
Page 59: Game
Basic Operations 8.5 Remove USB/Micro SD safely Lock is “On”, it will display a dialogue for user to key in Before removing USB device or Micro SD, press “Remove password. The default Password is “0000”. USB device safely” first, with a reminding “You can safely 3 Press [Up/Down] key and [OK] key to select menu remove USB/Micro SD now!”. - Page 60 Basic Operations highlight program. 2 If you want to cancel the delete operation, press [Blue] key again to cancel the delete mark. 3 When exit the “Record Manager” menu, all the delete mark channel will be deleted directly. 10.1.3 Rename 1 Press [Red] key to rename the highlight program.
-
Page 61: Hotkey
Basic Operations Notes: Time Shifting/recording will only be available right. Press [OK] key to play the point where the slide is. when USB/ HDD is connected to system and read/ 3 You also can press [Pause] /[fast back]/[slow /back] write speed is high enough to do that. can realize these function. - Page 62 Basic Operations and press [OK] key to select favorite channels. Pressing [Page Up/Page Down] keys can implement the “Page up/Page down” function 11.6 Mute 1 Press [MUTE] key to mute the sound and the screen will show up mute OSD. 2 Press [MUTE] key again to restore sound.
- Page 63 Basic Operations 5 Press [Exit] key to exit the current window. 2 Press [OK] key in each item can see more detail Frequently Asked Question information and press [Red] key to cancel 6 to exit favorite function press Vol+/- to set on All channel and press ok.
- Page 64 Basic Operations 1 Press [TEXT] key in full screen, you can open teletext page on the channel which has teletext information. 2 If the channel has no teletext information, it will show “No Data” on the screen. 11.12 Menu 1 Press [SETUP] key can open the menu, exit the current menu to last menu or close the window.
- Page 65 Basic Operations 2 Press [PAUSE] key again, the screen’s picture will skip over to the current playing picture, and the sound of the channel will correspond playing. 3 In playing mode, press [Pause] key, the picture will be paused, but the sound of the channel will still continues.
- Page 66 Basic Operations 11.21 PVR Press [PVR] key under Full Screen playback for 1st, it will show the rec bar, then you can select the file by pressing [up] or [down] key, press OK to display at full screen.
-
Page 67: Troubleshooting
3327... -
Page 68: Specifications
MPEG-1 MPEG-2 MP@ML VIDEO PROFILE MPEG-4 AVC/H.264 HP@L3 AND LEVEL MAX. 15Mbit/s@MPEG2 MP@ML MAX. 12.5Mbit/s@H26.4/AVC MP3/JPEG/BMP/MPEG4 (Vers. 4/5/6) - Page 69 AC/DC adaptor AC 100 - 240V 50/60Hz DC 9V – 1A Consumption <9W input/output AV in/out Micro SD USB2.0 Earphones output 5mW (3.5mm jack) Dimensions 25.4 (L) x 2.2 (P) x 16.2 (H) cm Lithium built-in rechargeable battery 7,4V 1600mA...
- Page 70 “CE” marking states that the product is compliant to European Directives: 2004/108/EC EMC Directive 2011/65/EU RoHS Directive This product is supplied of AC/DC adaptor which comply with the rules of Eup Directive 2009/125/EC Regulation (EC) n° 278/2009...
Need help?
Do you have a question about the TVD-934N and is the answer not in the manual?
Questions and answers