Table of Contents
Advertisement
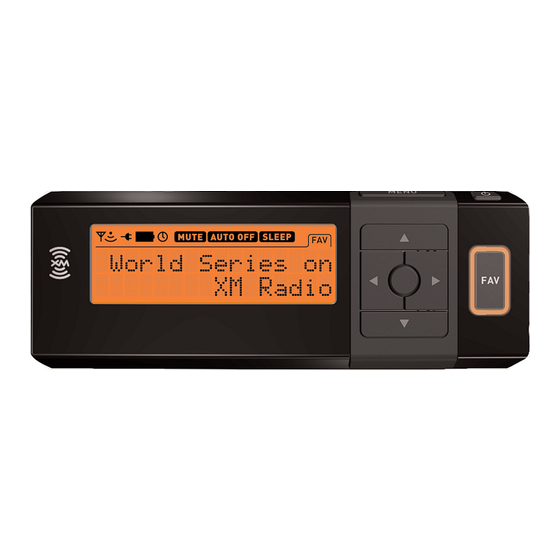
XM Satellite R R adio R R eceiver
I I n n s s t t r r u u c c t t i i o o n n M M a a n n u u a a l l
Model R R 101
Important: This manual contains important safety and operating information. Please read, understand,
and follow the instructions in this manual. Failure to do so could result in personal injury, death, and/or
damage to your Sportscaster, accessories, and/or to your vehicle or property.
Advertisement
Table of Contents

Related Manuals for XM Satellite Radio R101


Summary of Contents for XM Satellite Radio R101
-
Page 1: Channels 0 And
XM Satellite R R adio R R eceiver I I n n s s t t r r u u c c t t i i o o n n M M a a n n u u a a l l Model R R 101 Important: This manual contains important safety and operating information. - Page 2 It is the responsibility of the user to use the cable and antenna wire with the ferrite beads. The user is cautioned that changes or modifications not expressly approved by XM Satellite Radio, Inc. can void the user's authority to operate this device.
-
Page 3: Table Of Contents
Table of Contents A Brief History About Advanced Global Technology About XM Satellite Radio Let’s Get Started First, some important reminders Controls Display Remote Control Activating Your Sportscaster Installation Mounting in the Car Mounting in the Home Using the Portable Battery Kit... -
Page 4: A Brief History
About XM Satellite Radio XM Satellite Radio is the nation's leading provider of satellite radio with more than 6 million subscribers. XM offers more than 160 digital radio channels: 100% commercial- free music channels, ranging from hip hop to opera, rock to bluegrass, big band to reggae;... -
Page 5: Let's Get Started
Let's Get Started First, some important reminders: We know you're eager to turn on your new Sportscaster and listen to XM, but please take a moment to read through this instruction manual. Warning: This manual contains important safety and operating information. Please read, understand, and follow the instructions in this manual. -
Page 6: Controls
Controls 1. M M e e n n u u - access advanced features and personalized settings 2. P P o o w w e e r r - turns the Sportscaster on or off 3. F F a a v v ( ( F F a a v v o o r r i i t t e e s s ) ) - store up to 30 of your favorite channels 4. -
Page 7: Remote Control
Remote Control 1. M M e e n n u u - access advanced features and personalized settings 2. P P o o w w e e r r - turns the Sportscaster on or off 3. F F a a v v ( ( F F a a v v o o r r i i t t e e s s ) ) - store up to 30 of your favorite channels 4. -
Page 8: Activating Your Sportscaster
Note: Carefully check your XM Radio ID. The l l etters I I , O O , S S , a a nd F F a a re n n ot u u sed. Activate your XM Satellite Radio service by contacting XM at http://activate.xmradio.com or by calling 1.800.XM.RADIO (1.800.967.2346). -
Page 9: Installation
Installation Mounting in the Car If using the AMPs mounting holes to fasten the Sportscaster car mount to your console, Bolt or screw the Sportscaster car mount in place and proceed to step 2. AMPs is the standard hole spacing used in most mobile phone mounts. -
Page 10: Mounting In The Home
Installation Mounting in the Home 1. Push the Sportscaster into the home mount until it locks into place. (Figure 1). 2. Connect the AC Power and antenna to the appropriate jacks. (Figure 2). 3. Connect the audio cable to the appropriate jack. (Figure 3). 4. -
Page 11: Using The Portable Battery Kit
Installation Using the Portable Battery Kit 1. Attaching the battery to your Sportscaster is simple. First, install battery by lining up the battery with the slots in the back of your Sportscaster. Next, slide the battery into place until it is locked. (Figure 1). For a complete charge, the battery must be charged for approximately 3 hours. -
Page 12: Listening To Xm
Listening to XM Tuning Categories and Channels C C a a t t e e g g o o r r i i e e s s The XM channels are arranged by categories. Pressing the select button enters first channel in that category. -
Page 13: Storing Favorites
S S t t o o r r i i n n g g F F a a v v o o r r i i t t e e s s If you would like to store a favorite channel, tune to the desired channel and press the FAV button for 2 seconds. -
Page 14: Deleting Favorites
D D e e l l e e t t i i n n g g F F a a v v o o r r i i t t e e s s To delete a Favorite channel, tune to that channel while in FAV mode. Press and hold the FAV button down for 2 seconds. -
Page 15: Audio Level
Note: The FM Transmitter’s default setting is OFF. 1. Press the Menu button to enter the Setup Menu. 2. Press the Up and Down Arrow buttons to navigate to FM Transmitter. 3. Press the Select or Right Arrow button to enter the FM Transmitter sub menu. 4. -
Page 16: Tuning Options
Tuning Options The Tuning Options are used to set the method that channels are tuned. There are two tuning options available. M M a a n n u u a a l l T T u u n n e e Manual Tune mode allows the user to choose channels by viewing the programming and tuning the desired channel only after pressing the Select button. -
Page 17: Display Options
1. Press the Menu button to enter the Setup Menu. 2. Press the Up or Down Arrow button to navigate to Tuning Options. 3. Press the Select or Right Arrow button to enter the Tuning Options sub menu. 4. Press the Up or Down Arrow button to navigate to Auto Tune. 5. -
Page 18: Brightness
B B r r i i g g h h t t n n e e s s s s This option is used to adjust the Sportscasters display brightness. There are 10 levels of adjustment available. 1. Press the Menu button to enter the Setup Menu. 2. -
Page 19: Cycle Display
Note: The default setting is Cycle Display Off. 1. Press the Menu button to enter the Setup Menu. 2. Press the Up or Down Arrow buttons to navigate to Display Options. 3. Press the Select or Right Arrow button to enter the Display Options sub menu. 4. -
Page 20: Backlight Timeout
B B a a c c k k L L i i g g h h t t T T i i m m e e o o u u t t This option powers the Sportscaster’s backlight Off after a preset time has elapsed. This feature is only active when using the Portable Battery Kit to power your Sportscaster. -
Page 21: Clock Features
Clock Features This menu option will allow access to all of the time based features available with the Sportscaster. A A l l a a r r m m This option powers the Sportscaster on at a preset time. The Alarm feature will only operate if the Sportscaster is currently powered off and able to receive XM Satellite Radio signal. -
Page 22: Sleep
To set the Alarm Time first repeat steps 1-5. 6. Press the Up or Down Arrow buttons to navigate to Time. 7. Press the Select or Right Arrow button to enter the Alarm Time sub menu. 8. Press the Up or Down Arrow button to select the first hour digit. 9. -
Page 23: Auto Shutdown
A A u u t t o o S S h h u u t t d d o o w w n n This option powers off the Sportscaster after a 1-hour period of no user activity. After 59-minutes of inactivity, an Auto Shutdown notice appears. If the Select button is pressed, Auto Shutdown is cancelled. -
Page 24: Format
F F o o r r m m a a t t This option selects either a 12-hour or 24-hour (military) time display format. 1. Press the Menu button to enter the Setup Menu. 2. Press the Up or Down Arrow buttons to navigate to Clock features. 3. -
Page 25: Time Zone
T T i i m m e e Z Z o o n n e e This option allows you to select the appropriate time zone for your area. 1. Press the Menu button to enter the Setup Menu. 2. Press the Up or Down Arrow buttons to navigate to Clock features. 3. -
Page 26: Daylight Savings
D D a a y y l l i i g g h h t t S S a a v v i i n n g g s s This option will enable the clock to automatically adjust when your time zone observes daylight savings time. -
Page 27: Defaults
Defaults This option is used to return the Sportscaster to the original "factory" settings. Restoring defaults resets all settings to the factory defaults. 1. Press the Menu button to enter the Setup Menu. 2. Press the Up or Down Arrow buttons to navigate to Defaults. 3. -
Page 28: Antenna Aiming
Antenna Aiming This option presents feedback indicating the strength of satellite and terrestrial signals. Use this screen to place your antenna in the optimal position to receive the XM broadcast. 1. Press the Menu button to enter the Setup Menu. 2. -
Page 29: Other Things You Should Know
Troubleshooting Your Sportscaster should provide you with trouble-free performance without needing any servicing. If it does not appear to be working properly, first try to remedy the prob- lem by following these steps: 1. Attach all connections firmly and securely. 2. -
Page 30: Warranty
Warranty Information O O n n e e -Y Y e e a a r r L L i i m m i i t t e e d d W W a a r r r r a a n n t t y y This limited warranty sets forth all A A d d v v a a n n c c e e d d G G l l o o b b a a l l T T e e c c h h n n o o l l o o g g y y responsibilities regarding your product. -
Page 31: What To Do For Warranty Service
W W h h a a t t t t o o D D o o f f o o r r W W a a r r r r a a n n t t y y S S e e r r v v i i c c e e During the first thirty (30) days, a defective product is eligible for over-the-counter exchange at the retailer from whom it was purchased. - Page 32 . . a a d d v v a a n n c c e e d d g g t t . . c c o o m m AGT, Sportscaster name and related logos are trademarks of Advanced Global Technology, LLC. XM name and related logos are registered trademarks of XM Satellite Radio Inc. Printed on Recycled Paper ©2006 Advanced Global Technology, LLC. All rights reserved.
Need help?
Do you have a question about the R101 and is the answer not in the manual?
Questions and answers