Table of Contents
Advertisement
Advertisement
Table of Contents

Related Manuals for Instant VORTEX PLUS 10


Summary of Contents for Instant VORTEX PLUS 10
-
Page 1: Important Safeguards
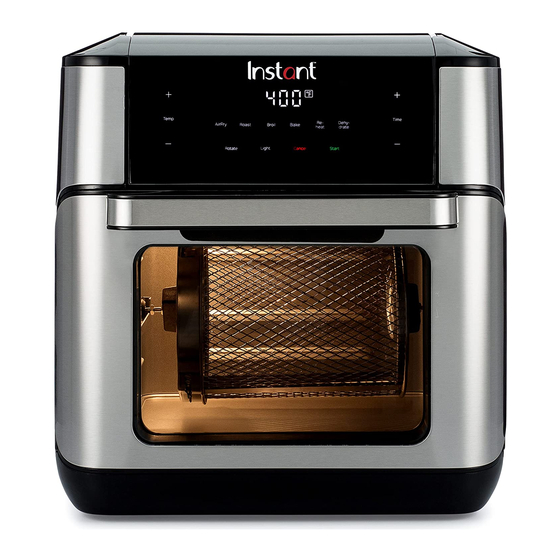
VORTEX PLUS ™ 10 QUART AIR FRYER OVEN User manual Important safeguards Product, parts and accessories Get started Control panel Cooking Rotisserie cooking Care, cleaning and storage Troubleshooting Warranty Contact Download the Instant Pot app with 1000+ recipes at instantappliances.com/app. - Page 2 IMPORTANT SAFEGUARDS (Yes, we have to) At Instant Brands your safety always comes first. The Instant Vortex Plus ™ ™ ™ family was designed with your safety in mind, and we mean business. Visit instantappliances.com to learn about this appliance’s safety mechanisms.
- Page 3 IMPORTANT SAFEGUARDS 10 DO NOT use any accessories or attachments not authorized by Instant Brands Inc. The use of attachments not recommended by the manufacturer, may cause a risk of injury, fire or electric shock. 11 For household countertop use only. DO NOT use outdoors. Not for commercial use.
- Page 4 IMPORTANT SAFEGUARDS 23 While cooking, the internal temperature of the appliance reaches several hundred degrees. To avoid personal injury, NEVER place unprotected hands inside the appliance until it has cooled to room temperature. 24 When cooking, DO NOT place the appliance against a wall or against other appliances.
-
Page 5: Special Cord Set Instructions
120 V ~ 60 Hz 10 Quart 16.94 lb / 7.7 kg Vortex Plus 10 cm: 33.6D x 33.6W x 36.5H Find your model name and serial number Find both of these on the rating label on the back of the air fryer oven, near the power cord. -
Page 6: Table Of Contents
Table of contents IMPORTANT SAFEGUARDS ..................1 Special cord set instructions ...................5 Product specifications .....................5 Find your model name and serial number ............5 Product, parts and accessories .................. 7 Get started ........................8 Initial set up .......................8 Initial test run ......................9 Control panel ...................... -
Page 7: Product, Parts And Accessories
Product, parts and accessories Before using your awesome new air fryer oven, make sure that everything is present and accounted for. Air fryer oven Air vents (rear) Control panel Heating element (interior) Oven door Cooking chamber (interior) Power cord (rear) Accessories Cooking tray (x2) Drip pan... -
Page 8: Get Started
Get started Initial set up "No one is born a great cook; one learns by doing." – Julia Child 01 Pull that Vortex Plus out of the box! 02 Remove all the packaging material from in and around the oven, and make sure to remove all the accessories from inside the oven chamber. -
Page 9: Initial Test Run
Get started Initial test run Do you have to do the test run? No — but getting to know the ins and outs of your Vortex Plus prepares you for success in the kitchen! Take a few minutes to get to know how this baby works. Stage 1: Setting up for cooking Stage 2: "Cooking"... -
Page 10: Control Panel
Control panel Alternates to show the cooking time, the set temperature, Time/temperature display reminder messages and error messages. Use the + / – Temp keys if you want to adjust the cooking temperature. + / − Temp Touch and hold the key to scroll quickly. Use the + / –... -
Page 11: Settings
Settings To do this Do this! Touch any key or open and close the oven Wake the air fryer. door. The display shows OFF to let you know that it's in standby mode and ready for action. In standby mode, touch and hold both – keys (beneath Time and Temp) for 5 seconds. -
Page 12: Status Messages
Status messages The Vortex Plus is in standby mode. A smart program is in the Preheat stage. Not applicable to Reheat and Dehydrate. This message appears to let you know that the air fryer oven has reached the perfect cooking temperature and food can be added (if it hasn’t been already). -
Page 13: Cooking
Cooking in the Vortex Plus is quick and easy — food goes in, crispy deliciousness comes out! Check out the cooking timetables for guidance, or visit our recipe site for fun, easy-to- follow instructions. You can also download the free Instant Pot app to search recipes, save favorites and more. - Page 14 Cooking Stage 1: Setting up for cooking Stage 2: Cooking 01 Follow steps 01 and 02 in the Initial 01 When the display shows Add Food, test run: Stage 1 to set up the air fryer open the oven door and carefully oven.
-
Page 15: Cooking Tips
• Air frying can cause oil and fat to drip, so always use the drip pan. To prevent excess smoke, watch the oil levels and carefully remove and drain the drip pan as needed. Check out the cooking timetables, download the Instant Pot app, or, visit our recipe site for fun, easy-to-follow recipes. -
Page 16: Dehydrate And Reheat
Cooking Dehydrate and Reheat Smart Default Temperature Default time Time range Notes program temperature range Perfect for homemade fruit 7 hours 1 to 72 hours 35 to 79°C Dehydrate 49°C / 120°F leather, jerky, dried (07:00) (01:00 to 72:00) 95 to 175°F vegetables and more. -
Page 17: Rotisserie Cooking
Rotisserie cooking The Instant Vortex Plus is equipped with EvenCrisp Technology for simple rotisserie-style ™ cooking with delicious results. Always insert rotisserie accessories and food items into the cooking chamber before preheating the air fryer oven. Read the instructions below and watch this short video to make sure the rotisserie accessories are being installed correctly. - Page 18 Rotisserie cooking The rotisserie spit and forks are perfect for roasting whole chicken, tenderloin and much more. 01 Unscrew the 2 setting screws. 03 Push your food item onto the spit. 02 Remove the forks from the spit. 04 Slide the forks onto both ends of the spit, making sure the prongs are inserted into the food item securely on both sides.
- Page 19 Rotisserie cooking Stage 1: Setting up the rotisserie accessories Follow the steps in Rotisserie cooking: Rotisserie accessories to prepare your food. 01 Open the oven door and slide the rotisserie basket or rotisserie spit onto the guides in the cooking chamber. 02 Move the red rotisserie catch lever to the right and hold it in position.
- Page 20 Rotisserie cooking 03 Align the left side of the accessory with 04 Release the rotisserie catch lever. the hole in the rotisserie catch, and set the right end of the accessory in the notch on the right. Notch 05 Rotate the accessory in place to make that it’s being held securely.
-
Page 21: Removing The Accessories
Rotisserie cooking Removing the accessories The rotisserie basket and rotisserie spit are installed and removed the same way, but backwards! 01 Open the oven door. 03 Move the rotisserie catch lever to the right and hold it in position to release 02 Position the hooks on the rotisserie lift the accessory. -
Page 22: Care, Cleaning And Storage
Care, cleaning and storage Clean your Instant Vortex Plus and accessories after each use. Always unplug the air fryer oven and let it cool to room temperature before cleaning. Never use harsh chemical detergents, scouring pads, or powders on any of the parts or components. -
Page 23: The Oven Door
Care, cleaning and storage The oven door The oven door is installed and removed the same way, but backwards! Remove the oven door Reinstall the oven door 01 Place one hand on top of the air fryer 01 Hold the oven door at a 45º angle oven to hold it firmly in place. -
Page 24: Troubleshooting
Troubleshooting Register your Instant Vortex Plus today! If your problem persists or if you have questions, get in touch with a Customer Care Advisor through our chat widget at instantappliances.com/#chat, by email at support@instantappliances.com or by phone at 1-800-828-7280. Problem... -
Page 25: Warranty
Instant Brands representative. Limitation and Exclusions The liability of Instant Brands, if any, for any allegedly defective appliance or part shall in no circumstances exceed the purchase price of a comparable replacement appliance. This Limited Warranty does not cover:... - Page 26 If we are unable to resolve the problem, you may be asked to send your appliance to the Service Department for quality inspection. Instant Brands is not responsible for shipping costs related to warranty service, save and except for shipping costs associated with the return of your appliance from Canada or within the 48 contiguous states and the District of Columbia of the United States of America, as provided herein.
- Page 27 Instant Brands Inc. 11—300 Earl Grey Dr., Suite 383 Ottawa, Ontario K2T 1C1 Canada Register your product today instantappliances.com/support/register Contact us 1-800-828-7280 support@instantappliances.com instantappliances.com/#chat instantappliances.com store.instantappliances.com Copyright 2020 Instant Brands ™ © 686-0101-52...
Need help?
Do you have a question about the VORTEX PLUS 10 and is the answer not in the manual?
Questions and answers
How to bake frozen biscuits
To bake frozen biscuits in the Instant Vortex Plus 10, follow these steps:
1. Preheat: Preheat the air fryer by selecting the "Bake" Smart Program and setting the desired temperature (default is 365°F / 185°C). Wait for the "Add Food" message to appear.
2. Arrange: Place the frozen biscuits in an oven-safe baking dish, leaving approximately 1 inch (2.5 cm) of space around all sides to allow heat circulation.
3. Bake: Insert the baking dish into the cooking chamber and bake as per the recommended time and temperature on the biscuit packaging. Adjust as needed based on the air fryer’s settings. No need to turn the biscuits during cooking.
4. Check: Monitor the biscuits to ensure they are evenly baked.
This answer is automatically generated
Can you use cake mix to bake a cake in the air fryer? I want to make a ginger bread cake from a boxed cake mix. Do I need special instructions ?l
Yes, you can use a boxed cake mix to bake a gingerbread cake in the Instant Vortex Plus 10 air fryer. Follow the basic baking instructions:
1. Prepare the cake mix according to the package instructions.
2. Select the "Bake" Smart Program on the air fryer.
3. Set the temperature to 365°F (185°C) or adjust as needed within the range of 180°F (82°C) to 400°F (205°C).
4. Set the cooking time (default is 30 minutes, with a range of 1 minute to 1 hour).
5. Leave approximately 1 inch (2.5 cm) of space around the baking dish for even heat circulation.
6. There is no need to turn the food during baking.
Check for doneness with a toothpick before removing. Adjust time if necessary.
This answer is automatically generated
How to chance from C to F ?
the light in my Vortex Plus stopped working. Any fixes?