Table of Contents
Advertisement
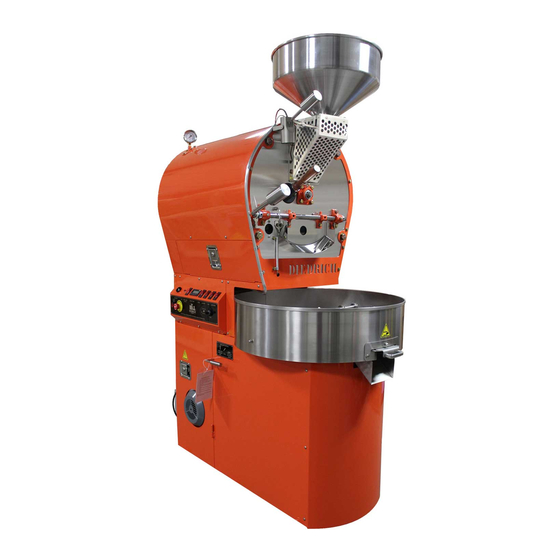
IR Series
IR-1, IR-2.5, IR-5, and IR-12
Cleaning, Maintenance & Troubleshooting Guide
2017
Diedrich Roasters LLC, 30620 HWY 200 Ponderay, ID 83852
Telephone: (208) 263-1276
Toll Free: (877) 263-1276
Fax: (208) 265-4584
Technical Support: support@diedrichroasters.com
PROPRIETARY RIGHTS NOTICE: All rights reserved. No part of this material may be reproduced or transmitted in any form or by means,
electronic, mechanical or otherwise, including photocopy and recording or in connection with any information storage or retrieval system, without
the written permission of Diedrich Roasters, LLC.
Advertisement
Table of Contents

Related Manuals for Diedrich Roasters IR Series


Summary of Contents for Diedrich Roasters IR Series
- Page 1 IR Series IR-1, IR-2.5, IR-5, and IR-12 Cleaning, Maintenance & Troubleshooting Guide 2017 Diedrich Roasters LLC, 30620 HWY 200 Ponderay, ID 83852 Telephone: (208) 263-1276 Toll Free: (877) 263-1276 Fax: (208) 265-4584 Technical Support: support@diedrichroasters.com PROPRIETARY RIGHTS NOTICE: All rights reserved. No part of this material may be reproduced or transmitted in any form or by means, electronic, mechanical or otherwise, including photocopy and recording or in connection with any information storage or retrieval system, without the written permission of Diedrich Roasters, LLC.
- Page 2 PRIOR TO operating the roaster. Failure to have these inspections performed may void the warranty and will relieve Diedrich Roasters of any liability associated with the installation and use of your machine.
-
Page 3: Table Of Contents
Table of Contents CLEANING ................................2 Suggested Hand Tools ..........................2 Lubricants Required / Where Used: ......................2 CLEANING POINTS ............................2 Cyclone Chaff & Chaff Collection Compartment ..................3 Blower Fan ..............................5 Impeller Compartment (IR-5 & IR-12 ONLY) ..................6 Vacuum Sensor Tube ..........................9 Air Flapper ..............................10 Cooling Bin .............................. - Page 4 Safety Information Before attempting to operate your unit, read the instructions in this manual thoroughly. Throughout this manual, you will find notations enclosed in bordered boxes similar to the ones below. CAUTION CAUTION CAUTION boxes contain information about actions or conditions that may cause or result in a malfunction of your system.
-
Page 5: Cleaning
Diedrich Roasters Maintenance, Cleaning & Troubleshooting Guide SAFEGUARDS ALWAYS disconnect roaster at electrical source (at the circuit breaker or safety shut-off switch) before servicing. Proper installation, cleaning and safe operation of the coffee roaster and ancillary equipment is the owner and operator’s responsibility. -
Page 6: Cyclone Chaff & Chaff Collection Compartment
These areas fill up quickly and require frequent emptying. Residue will accumulate on the metal surfaces within the compartment. Use a wire brush or scraping tool to scrape off any residue, down to bare metal. Diedrich Roasters recommends cleaning these areas after 4-hours of roasting. - Page 7 Diedrich Roasters Maintenance, Cleaning & Troubleshooting Guide IR-1 & IR-2.5 IR-5 & IR-12 Page 4 of 31...
-
Page 8: Blower Fan
Diedrich Roasters Maintenance, Cleaning & Troubleshooting Guide Blower Fan 2.2.1 IR-1 & IR-2.5 ONLY IR-1 & IR-2.5 Blower Fan 2.2.2 Unscrew the two Phillips head screws that secure the duct to the blower housing 2.2.3 NOTE: There may be a line of caulk used to secure the top and bottom parts of the blower housing. -
Page 9: Impeller Compartment (Ir-5 & Ir-12 Only)
Diedrich Roasters Maintenance, Cleaning & Troubleshooting Guide CAUTION Do not spray any kind of liquid directly onto the fan. 2.2.6 Being careful to not bend the impeller blades, clean the fan with a wet rag. 2.2.7 Reassemble the blower cover in the reverse order making sure to reapply caulk if necessary. - Page 10 Diedrich Roasters Maintenance, Cleaning & Troubleshooting Guide 2.3.1 Unscrew the two wingnuts securing the impeller cover 2.3.2 Remove the cover from the impeller compartment. Page 7 of 31...
- Page 11 Diedrich Roasters Maintenance, Cleaning & Troubleshooting Guide 2.3.3 Clean out the set screw holes. NOTE: Prior to removing the impeller, measure the gap between the impeller and the housing to ensure the position on the shaft doesn’t change when you reinstall it.
-
Page 12: Vacuum Sensor Tube
Diedrich Roasters Maintenance, Cleaning & Troubleshooting Guide 2.3.5 Grab the impeller firmly with both hands and pull it towards you. (NOTE: It may be necessary to pry the impeller loose using a flathead screwdriver or pry bar depending on the state of cleanliness.) 2.3.6... -
Page 13: Air Flapper
Diedrich Roasters Maintenance, Cleaning & Troubleshooting Guide Vacuum Sensor Tube IR-5/12 Vacuum Sensor Location 2.4.1 Locate the aluminum tube in the impeller compartment. 2.4.2 NOTE: Do not use a vacuum cleaner to clean the tube. If any debris or residue is evident, clean the inside of the tube using a thin tool or wire to pull the residue through the tube. -
Page 14: Cooling Bin
Diedrich Roasters Maintenance, Cleaning & Troubleshooting Guide The air flapper is located in the blower compartment to the top left. As you change your air position from cooling bin to 50/50 to through the roasting drum, this flapper rotates to direct the air through a different section of the roaster. - Page 15 Diedrich Roasters Maintenance, Cleaning & Troubleshooting Guide 2.6.1 IR-1 and IR-2.5 For cooling efficiency and to minimize a fire hazard, the area below the screen must be cleaned. For roasters without agitators: 2.6.1.1 Lift the cooling bin from the roaster frame by simply lifting the cooling bin up and sliding it away from the roaster.
- Page 16 Diedrich Roasters Maintenance, Cleaning & Troubleshooting Guide 2.6.1.5 Tilt the front edge of the cooling bin up. 2.6.1.6 Slide the cooling bin to the right. Page 13 of 31...
- Page 17 Diedrich Roasters Maintenance, Cleaning & Troubleshooting Guide 2.6.1.7 Guide the cooling bin up and over the agitator motor shaft. 2.6.1.8 Use a wire brush or screen cleaning tool to dislodge debris from the screen. 2.6.1.9 Thoroughly clean both sides of the screen (at a minimum of every six months.).
- Page 18 Diedrich Roasters Maintenance, Cleaning & Troubleshooting Guide 2.6.2 IR-5 and IR-12 Cooling Bin Place both hands under the agitator horizontal shaft and lift up. (NOTE: The agitator arm assembly is held in place by its own weight. There is not a set screw or bolt securing it to the gearbox shaft.) Place one hand on each side of the...
- Page 19 Diedrich Roasters Maintenance, Cleaning & Troubleshooting Guide Reassembly Apply Anti-Seize to the shaft before putting the agitator back in place. 2.6.3 Apply a lubricant such as food grade grease or anti-seize to the gearbox shaft Align the channel on the...
- Page 20 Diedrich Roasters Maintenance, Cleaning & Troubleshooting Guide Example of a Clean IR-5 & IR-12 Cooling Bin Screen Page 17 of 31...
-
Page 21: Infrared Burner Compartment
Diedrich Roasters Maintenance, Cleaning & Troubleshooting Guide Infrared Burner Compartment DANGER Make sure the chaff inside the burner compartment is cool to the touch and contains no hot embers before vacuuming. Vacuuming hot embers may start a fire or cause personal injury. -
Page 22: Burner & Drum Tray Access Doors
Diedrich Roasters Maintenance, Cleaning & Troubleshooting Guide IR-5 & IR-12 Burner Compartment Use caution not to move the ignitor sensor while vacuuming the burner compartment. Burner & Drum Tray Access Doors The burner and drum access doors provide access to clean or service burners, pilot igniter electrodes and drum chaff tray. -
Page 23: Rear Ducting
Diedrich Roasters Maintenance, Cleaning & Troubleshooting Guide Rear Ducting The rear duct is the 3” pipe located at the back of the roaster that connects the air box area at the top of the roaster with the cooling bin and the cyclone (if applicable) on the side of the roaster. The vacuum that is created from the spinning impeller pulls air from the drum and cooling bin, through the air box, and into the cyclone. - Page 24 Diedrich Roasters Maintenance, Cleaning & Troubleshooting Guide IR-5 & 12 Page 21 of 31...
-
Page 25: Air Box (Ir-1 And Ir-2.5 Only)
Diedrich Roasters Maintenance, Cleaning & Troubleshooting Guide 2.10 Air Box (IR-1 and IR-2.5 ONLY) IR-1 IR-2.5 IR-1 Page 22 of 31... -
Page 26: Exhaust Ducting
Diedrich Roasters Maintenance, Cleaning & Troubleshooting Guide 2.11 Exhaust Ducting The exhaust ducting is an integrated part of the roasting system. Dirty exhaust ducting will also effect the performance of your roaster and your cupping results. Additionally, dirty exhaust ducting creates the possibility of a ducting fire which could cause collateral damage to your building. -
Page 27: Maintenance Procedures
Diedrich Roasters Maintenance, Cleaning & Troubleshooting Guide MAINTENANCE PROCEDURES Diedrich roasters are specifically designed to require minimal maintenance. Following the cleaning schedule (example located at the end of this manual) will help to achieve your performance expectations. Suggested Hand Tools •... - Page 28 Diedrich Roasters Maintenance, Cleaning & Troubleshooting Guide 3.3.4 Loosen the bolts of the chain tensioner and slide the idler gear arm left to increase, or right to decrease the chain tension. 3.3.5 Use a wrench to tighten the bolts to prevent a loose engagement of the chain and motor sprocket.
-
Page 29: Lubricate Drum Bearing(S)
Diedrich Roasters Maintenance, Cleaning & Troubleshooting Guide Lubricate Drum Bearing(s) (IR-2.5, and applicable IR-5, and IR-12) Failure to lubricate the bearings may cause their premature failure. ATTENTION Use only high temperature food grade grease. NOTE: The grease will flow more easily if the roaster is at roasting temperature. -
Page 30: Lubricate Drum Drive Chain (For Roasters With Chain Drive Motors Only)
Diedrich Roasters Maintenance, Cleaning & Troubleshooting Guide Lubricate Drum Drive Chain (For roasters with chain drive motors ONLY) WARNING Keep Fingers, Hair, and Loose Clothing Clear of Moving Parts. Oil the chain every six months with SAE20 non-detergent oil or sewing machine oil. For access, remove the rear cover panel. -
Page 31: Air Flow Control Lever (Manual Roasters Only)
Diedrich Roasters Maintenance, Cleaning & Troubleshooting Guide Tighten the set screws on the agitator shaft couplings. Air Flow Control Lever (Manual roasters only) 3.7.1 (IR-5 & IR-12 ONLY) Open the impeller motor compartment door located below the control panel. NOTE: Immediately to the right is the air flow position mechanism that is connected to air flow control handle on the outside of the roaster. -
Page 32: Troubleshooting And Faq's
Diedrich Roasters Maintenance, Cleaning & Troubleshooting Guide TROUBLESHOOTING AND FAQ’s Airflow Our Technical Support Department receives numerous calls every year regarding under-performing coffee roasters and/or oxidizers. The problem is usually identified as an airflow issue. Airflow issues are a result of inadequate cleaning and maintenance. - Page 33 If so, how do I do it? The IR Series roasters do not come with an electrical cord due to the fact that there are so many different codes and regulations that come in to play when you install the roaster. Diedrich Roasters LLC, recommends that you use a licensed electrician to perform this part of the installation to make sure that you are in compliance with all applicable codes and regulations.
- Page 34 Diedrich Roasters Maintenance, Cleaning & Troubleshooting Guide Q9 - How do I clean the drum of my roaster? The drum in your roaster is similar to a cast iron skillet in so much that you don’t clean it because the oils from the coffee are needed in order to prevent the beans from scorching.
- Page 35 Diedrich Roaster IR Series Cleaning & Maintenance Schedule ✓when Daily Date Initials complete Vacuum all chaff from the cyclone chaff collection compartment. Vacuum any chaff and/or bean debris from the infrared burner compartment. Inspect perforated cooling bin screen for clogging. Clean as necessary with a screen roller, wire brush or by utilizing a pointed object to clean out the perforated holes.
Need help?
Do you have a question about the IR Series and is the answer not in the manual?
Questions and answers