Advertisement
Quick Links
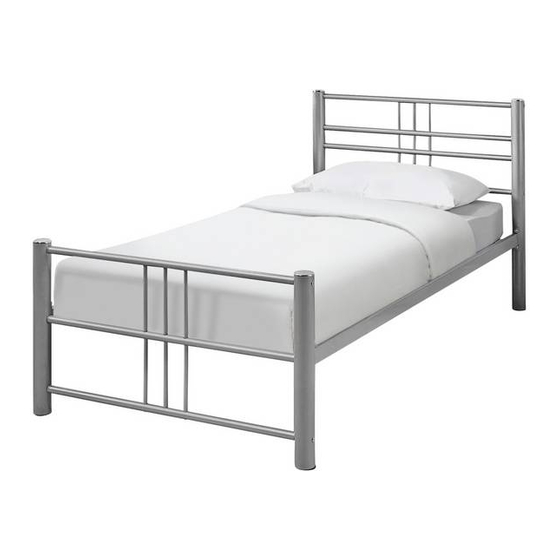
Atlas 3ft Bed
Assembly Instructions
664/9458
- Please keep for future reference
Dimensions
Width - 100cm
Depth - 204cm
Height - 89cm
Important
– Please read these instructions fully before starting assembly
If you need help or have damaged or missing parts, call the Customer Helpline: 0845 6400800
Issue 1 - 09/04/10
Advertisement

Summary of Contents for Argos Home Atlas 3ft Bed 664/9458
- Page 1 Atlas 3ft Bed Assembly Instructions 664/9458 - Please keep for future reference Dimensions Width - 100cm Depth - 204cm Height - 89cm Important – Please read these instructions fully before starting assembly If you need help or have damaged or missing parts, call the Customer Helpline: 0845 6400800 Issue 1 - 09/04/10...
- Page 2 Safety and Care Advice Important – Please read these instructions fully before starting assembly • We do not • Check you have all the • As you unpack and prepare recommend the components and tools listed on for assembly, clear an area for use of power pages 2 and 3.
- Page 3 Components - Panels If you have damaged or missing components, call the Customer Helpline: 0845 6400800 Please check you have all the panels listed below Left footboard post Left headboard post Right headboard post (dia6.0 x 90cm) (dia6.0 x 55cm) (dia6.0 x 90cm) Right footboard Headboard upright x 3...
- Page 4 Components - Fittings Please check you have all the fittings listed below Note: The quantities below are the correct amount to complete the assembly. In some cases more fittings may be supplied than are required. 42mm Bolt x 24 30mm Bolt x 8 80mm Bolt x 8 Small plain washer x 48 Spring washer x 8...
- Page 5 Assembly Instructions Step 1 Assemble headboard Assemble end horizontal bar middle horizontal bars to left headboard post and right headboard post using bolts shown in the figure. Note: The chrome cap on both posts should be at the top. Do not fully tighten bolts.
- Page 6 Assembly Instructions Step 2 Assemble footboard Assemble end horizontal bar middle horizontal bar to left footboard post and right footboard post using bolts shown in the figure. Note: The chrome cap on both posts should be at the top. Do not fully tighten bolts.
- Page 7 Assembly Instructions Step 3 Assemble side rails Three people are needed here. Assemble side rails to headboard frame and footboard frame using bolts , spring washers and large plain washers Note:Do not fully tighten bolts. Step 4 Assemble slats Assemble slats to the unit using bolts , small...
- Page 12 Atlas 3ft Guestbed Trundle Assembly Instructions 649/7545 - Please keep for future reference 633/3496 Dimensions Width - 93cm Depth - 191cm Height - 34cm Important – Please read these instructions fully before starting assembly If you need help or have damaged or missing parts, call the Customer Helpline: 0845 6400800 Issue 1 - 21/04/10...
- Page 13 Safety and Care Advice Important – Please read these instructions fully before starting assembly • Check you have all the • As you unpack and prepare • We do not components and tools listed on for assembly, clear an area for recommend the pages 2 and 3.
- Page 14 Components - Panels If you have damaged or missing components, call the Customer Helpline: 0845 6400800 Please check you have all the panels listed below End x 2 Leg x 2 Side rail (93 x 21cm) (93.5 x 33.1cm) (160 x 9cm) Side rail Slat x 10 (160x9cm)
- Page 15 Components - Fittings Please check you have all the fittings listed below Note: The quantities below are the correct amount to complete the assembly. In some cases more fittings may be supplied than are required. 17mm Bolt x 8 37mm Bolt x 4 48mm Bolt x 20 Plain washer x 44 Cap nut x 20...
- Page 16 Assembly Instructions Step 1 Assemble ends Assemble ends side rails using bolts Step 2 Assemble legs Two people are needed here. Assemble legs to side rails using bolts , plain washers and nuts Note: Do not tighten bolts.
- Page 17 Assembly Instructions Step 3 Assemble slats Assemble slats to the unit using bolts , plain washers and cap nuts Note: Re-tighten all the bolts. Caution: Ensure the locking pins are inserted into the holes when in use. Failure to do so could cause a hazard.


Need help?
Do you have a question about the Atlas 3ft Bed 664/9458 and is the answer not in the manual?
Questions and answers