Advertisement
Advertisement
Table of Contents

Related Manuals for Holybro Micro OSD V2


Summary of Contents for Holybro Micro OSD V2
- Page 1 Micro OSD V2 Full Manual & Installation Guide v1.0 Page | 1 Micro OSD V2...
-
Page 2: Table Of Contents
Specifications Warranty and Return Policy Pinout Diagram ………………………………………………….. 4 Simple Plug and Play Installation ………………………… 5 Advanced Installation ………………………….……………… 6 Connecting an FTDI Adapter Adjusting and changing the displayed OSD elements Troubleshooting Guide……………………….……………..… 9 Page | 2 Micro OSD V2... -
Page 3: Specifications
FPV flight. This manual is split into two parts; the first is the most basic ‘plug and play’ setup. The HolyBro Micro OSD v2 is supplied ready to go so you don’t need to upload any software or files onto it. -
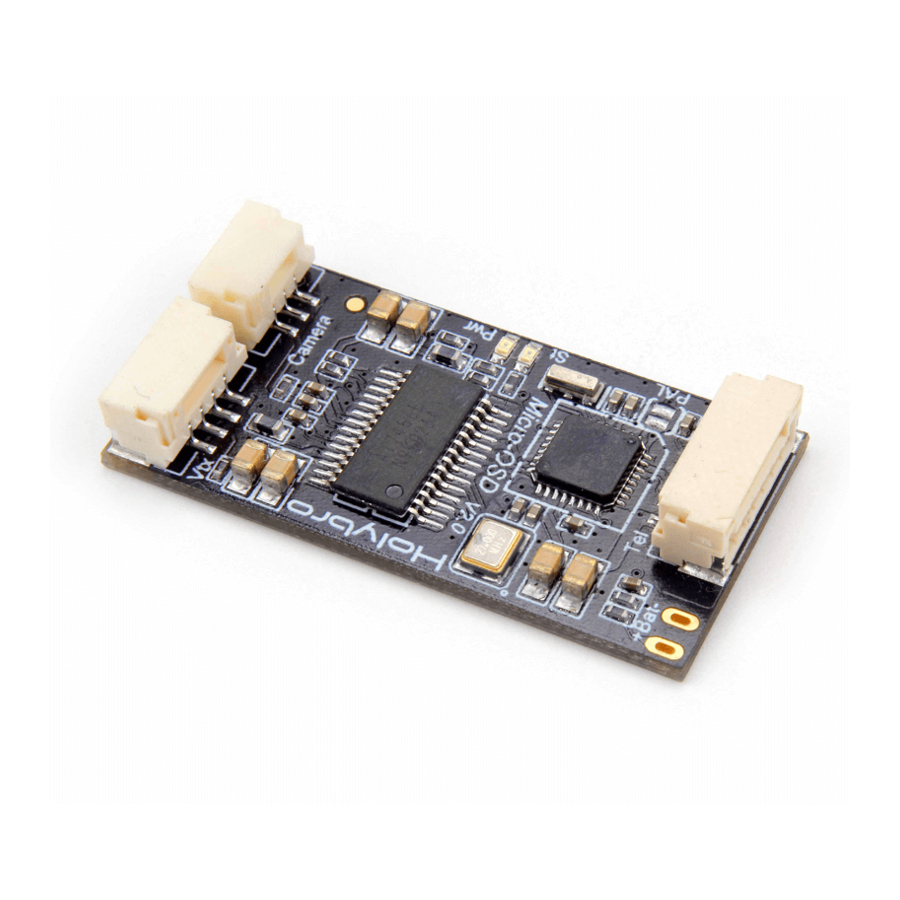
Page 4: Pinout Diagram
Pinout Diagram Page | 4 Micro OSD V2... -
Page 5: Simple Plug And Play Installation
The HolyBro Micro OSD v2 comes installed with the software installed and all of the pieces you need so setup is very easy. All of the cables you will need to connect to the HolyBro Micro OSD v2 are included too. -
Page 6: Advanced Installation
SERIALx_BAUD (where x is the number of the telemetry port you’ve connected the Micro OSD v2 to on your PixHawk) is set to 57 and the SERIALX_PROTOCOL is set to 1. You can also change the layout of your HolyBro Micro OSD v2 and what elements of the OSD are displayed. - Page 7 Plug the FTDI adapter using a USB cable into your computer and wait for any device drivers to install, they should install automatically. You should see the amber coloured LED on the HolyBro Micro OSD V2 flickering to show that it is communicating. Open the folder with the configurator in and run the file called OSD_Config.exe on your computer.
- Page 8 PRO TIP: Make sure that you have the right video standard setup in the ‘Video Mode’ menu to fit with your camera and goggle/screen settings (PAL or NTSC) and always check in the goggles that the placement of the OSD elements works for your screen before disconnecting. Page | 8 Micro OSD V2...
-
Page 9: Troubleshooting Guide
No power: o The HolyBro Micro OSD V2 is powered from the 5v supplied via the TELEM Port cable, not from the battery connection so check that you have a 5v supply via the TELEM cable. The camera and VTX unit are powered from the battery connection.
Need help?
Do you have a question about the Micro OSD V2 and is the answer not in the manual?
Questions and answers